


Erin’s Recipe Rundown

Texture: Crisp, golden-brown crust with a soft, airy center.
Taste: Savory and light with hints of olive oil.
Ease: With only 5 ingredients, this is such an easy gluten-free bread recipe— Just plan ahead for the rise and chill times!
Top Tips: Baking this bread in a Dutch oven is key for the perfect crust!
Recommended GF Flour: This recipe was specifically designed with Caputo Fioreglut Gluten-Free Flour. Unfortunately, no other flour can be substituted with the same results.
Would I make these again? Yes! Sometimes a piece of crusty bread is just what you need to make the world feel right and this gluten-free artisan bread doesn’t disappoint!
xoxo erin

This gluten-free artisan bread uses the right kind of flour and a Dutch oven to create a beautifully crusted, bakery-quality loaf with the perfect soft and chewy texture inside.
Easy to make and perfect for any meal or occasion, no one will ever guess that it’s gluten-free!
Featured Comment
From Kelly: “Are you kidding!!! Where has this been my whole miserable gf life. I will now be making every recipe on your website. This bread was delicious!”
Table of Contents
- Erin’s Recipe Rundown
- Ingredients You’ll Need
- How to Make Gluten-Free Artisan Bread
- Make-Ahead/Storage/Freezing Instructions
- Can I make this gluten-free artisan bread dairy-free? What about nut-free?
- Can I use a different gluten-free flour other than the Caputo Fioreglut?
- Can I make this bread without a Dutch oven?
- What can I serve with this gluten-free artisan bread?
- Gluten-Free Bread Equipment Links
- More Gluten-Free Bread Recipes
- Gluten-Free Artisan Bread (5 Ingredients!) Recipe
Ingredients You’ll Need
Here are a few notes on some of the key ingredients to make this gluten-free artisan bread. See the recipe card below for exact measurements.

- Gluten-free flour: This bread was specifically designed with Caputo Fioreglut gluten-free flour for the BEST crumb! It contains gluten-free wheat starch so keep in mind that it’s gluten-free, but not wheat-free.
- Instant yeast: The yeast, along with the sugar and warm water, give this bread the perfect rise. I like to use instant yeast since it doesn’t require proofing first.
- Olive oil: The rich olive oil is just as much for texture as it is for taste. It adds softness to the middle while helping to create that the crackly, crisp crust that makes artisan bread so irresistible!
How to Make Gluten-Free Artisan Bread
Here’s an overview of how to make this recipe. You can jump to the recipe for the full instructions!

- In the bowl of a stand mixer: Add in all of the dry ingredients and mix with a paddle attachment until combined.
- With the mixer on low: Slowly add the warm water and olive oil. Increase the speed to medium-high and continue to mix (about 5 minutes). The goal is dough that resembles thick cookie dough! Use an oiled spatula to scrape down the bottom and sides, then mix again until the dough is well-combined.

- Using gluten-free flour: Flour a 7-inch banneton with gluten-free flour. No banneton? No problem! You can oil a small mixing bowl instead. Set that aside and then lightly flour a flat surface where you can work the dough. Press the dough into a 2-inch thick circle. Pull the sides upwards, then towards the middle to form a loaf. Flip it over so it’s seam side down, then rotate it in place to seal the seam. Place the loaf in the banneton, seam side up.
- Rise and refrigerate: Cover the bowl with oiled plastic wrap. Let the loaf rise in a warm place (45-60 minutes). Once the dough has risen, chill it in the fridge before baking (30 minutes). This helps the loaf hold its shape!

- Using a Dutch oven: Place the Dutch oven (I like this 5-quart Lodge Dutch Oven) with the lid ON in the middle or lower rack of the oven. Preheat the oven to 475°F and let the Dutch oven preheat (at least 30 minutes). Gently turn the loaf out onto a piece of parchment paper. Use a bread lame (or sharp knife!) to score the top of the bread. Carefully remove the Dutch oven from the oven and use the parchment paper to gently place the scored loaf into the Dutch oven. Add 5-6 ice cubes around the edges, then quickly pop the lid back on to trap the steam inside.
- Bake: First bake the bread covered (30 minutes), then lower the oven temperature to 450°F (bake another 30 minutes). Remove the lid and let it bake uncovered until the crust is golden brown and the loaf sounds hollow when tapped (another 15-20 minutes). You can also check its temperature to judge when it’s done (the center should be 205°F). Remove the loaf from the oven and turn it out onto a wire rack to cool (at least 3 hours). Slice and enjoy!
Make-Ahead/Storage/Freezing Instructions
To Make-Ahead: The dough can be prepared up to 1 day in advance. Follow the recipe through step 7, but instead of refrigerating it for 30 minutes, allow it to remain in the fridge up to 24 hours.
To Store: Let the bread cool completely, then store it in an airtight container at room temperature for up to 3 days.
To Freeze: After the bread has cooled, wrap it in plastic wrap or foil, then place it in a freezer bag or airtight container. Freeze for up to 3 months. Thaw at room temperature for a few hours before serving.
Can I make this gluten-free artisan bread dairy-free? What about nut-free?
This bread is naturally dairy-free and nut-free! No need to make any adjustments to enjoy this recipe.
Can I use a different gluten-free flour other than the Caputo Fioreglut?
This recipe was specifically designed with the Caputo Fioreglut so it will only turn out correctly with this flour. I don’t recommend using other gluten-free flour blends!
Can I make this bread without a Dutch oven?
This gluten-free artisan bread gets its crispy, crackly crust from baking it in a preheated Dutch oven, using the ice cubes to make steam. Using other styles of pans will impact the crust and overall structure of the bread.
What can I serve with this gluten-free artisan bread?
This bread is delicious on its own, with butter and other spreads, or as a side dish for your favorite meals! It goes with comforting soups, like this Gluten-Free Minestrone Soup, and flavor-packed salads, like this Arugula Pear Goat Cheese Salad. And of course, it’s a delicious addition to Italian dishes too! Here are a few of my favorites: Gluten-Free Lasagna, Gluten-Free Meatballs, and Dairy-Free Baked Ziti.

Gluten-Free Bread Equipment Links
- I use this 5 quart Lodge Dutch Oven
- I recommend this 7-inch round banneton
- This recipe was developed with Caputo Fioreglut Flour
More Gluten-Free Bread Recipes
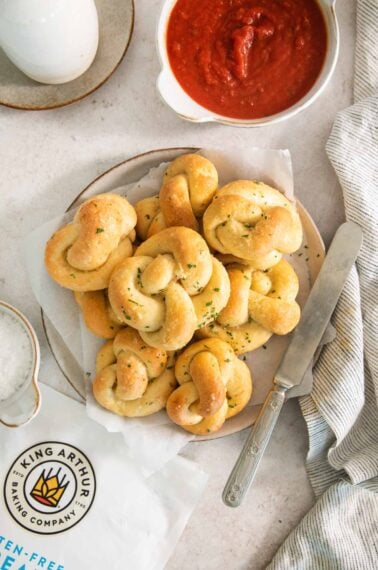
- Gluten-Free Focaccia (with Caputo Fioreglut)
- Gluten-Free Cheese Breadsticks (with Caputo Fioreglut)
- Gluten-Free Cinnamon Breadsticks (with Caputo Fioreglut)
- Gluten-Free Dinner Rolls
- Gluten-Free Sandwich Bread
- Gluten-Free Crescent Rolls

Gluten-Free Artisan Bread (5 Ingredients!)
Ingredients
- 4⅓ cups (650g) Caputo Fioreglut Flour
- 1 tablespoon kosher salt
- 1 tablespoon granulated sugar
- 2¼ teaspoons instant yeast
- 2 cups + 2 tablespoons (510ml) water, warm
- 3 tablespoons olive oil
Instructions
Make the Dough
- In the bowl of a stand mixer fitted with the paddle attachment, add the Caputo Fioreglut flour, salt, sugar and instant yeast. Mix to combine.
- With the mixer running on low, slowly add the water and olive oil. Increase the speed to medium-high and mix for 5 minutes. The dough will resemble thick cookie dough, this is normal.
- Using an oiled rubber spatula, scrape down the bottom and sides of the bowl and mix again until well-combined.
Shape/Rise
- Flour a 7-inch banneton with gluten-free flour. (You can also use a small oiled mixing bowl.)
- Scoop the dough out onto a lightly floured surface. Press the dough into a 2-inch thick circle. Pull the sides upwards, then towards the center of the circle to form a loaf. Flip the loaf seam side down onto the floured surface and rotate in place to seal the seams.
- Place the loaf into the banneton seam side facing upward. Cover with oiled plastic wrap and let rise in a warm place for 45-60 minutes.
- Once the dough has risen, place it in the refrigerator for 30 minutes before baking. (This helps the bread hold its shape.)
Bake
- Place a Dutch oven with the lid on in the middle/lower rack of the oven. Preheat the oven to 475°F. Allow the Dutch oven to preheat for at least 30 minutes.
- Gently turn out the loaf onto a piece of parchment paper. Using a bread lame or sharp knife, score the top of the loaf.
- Carefully remove the hot Dutch oven from the oven. Using the parchment paper, carefully place the scored loaf in the Dutch oven, add 5-6 ice cubes around the edges and quickly replace the lid to trap the steam.
- Bake the bread covered for 30 minutes, then reduce the oven temperature to 450°F and continue baking for another 30 minutes.
- Remove the lid and bake uncovered for another 15-20 minutes, or until the crust is golden brown and the loaf sounds hollow when tapped. (For a more accurate test of doneness, the bread is done when an instant-read thermometer inserted in the center reads above 205°F.)
- Remove the bread from the oven and turn out onto a wire rack. Let the bread cool for at least 3 hours before slicing. This is important so the crust develops properly. Slice and enjoy!


Made this today and it came out perfectly as instructed. Chewy crunchy crust and spongy soft bread. Delicious and easy to make with the stand mixer and Dutch oven. Bravo!
That’s great to hear, Alisa! We’re so glad you loved the artisan bread. Thank you for sharing your positive feedback with us!
I just made this- did everything you spelled out. It is a bit burnt on the bottom. Is that because I sprayed a bit of oil under the parchment or was oven too hot?
Hi Brenda, we’re sorry you had this experience! Yes, it sounds like your oven may be running a bit hot which could have caused the Dutch oven to get too hot and burn the bottom of the loaf. We’d also recommend checking the rack placement in the oven. If the Dutch oven was too close to the bottom, it could have contributed to the burning too. We hope your next loaf turns out amazing!
Is it imperative to use the Caputo Fioreglut Flour. I have Cup4Cup on hand. My daughter has recently gone gluten free, so I am baking for her in search of the perfect bread – which she misses so much.
Hi Cindy, yes this recipe was designed with that specific kind of bread flour. 1:1 gf blends, like Cup4Cup, won’t produce the same results unfortunately. We’re sorry 🙁
Hi,
I made this bread and the crust comes out so hard. Any recommendations? Do I need to turn my oven temp down?
Thank you!
Hi Lauren, thank you for your question! A few ideas: home ovens can often be inaccurate so yes you could definitely try bumping the temperature down a little, make sure the dough resembles thick cookie dough (not thicker), and steam is crucial for the crust so you could try adding a few more ice cubes at that step. We hope these ideas help and your next loaf turns out even better!
Made this today and it is phenomenal. Burnt the bottom a bit, but that’s my fault. The texture is light and perfect and satisfies all the artisan crusty bread cravings!!
Yay! We’re so happy to hear you loved the recipe, Rachelle! Thank you for sharing your positive review with us. Happy baking!
Hello! The recommended Dutch oven size appears to be 5 quarts. I’m wondering how much flexibility there is on the size of the pot, as I have a much bigger one, and an oval 3.5 qt. Thanks for your help.
Hi Lynn, thank you for your question! Using larger or smaller Dutch ovens will require adjusting the baking times to get the proper bake. A larger one will cause more spreading and a thinner loaf. A smaller oval one will encourage a better shape, but the dough will be in a more compact space, making it taller/thicker. If you decide to give either a try, you’ll need to keep a close eye on the bread while it bakes to adjust the baking times as needed. We’d definitely recommend using a thermometer to make sure the center reaches 205°F. We’d love to hear how it goes!
Can’t have olive oil, is there a substitute oil, what about avocado oil?
Hi Angela, yes you can use avocado oil as a substitute. We hope you enjoy the recipe!
Absolutely delicious! This bread is so darn good! It’s what I’ve been missing! The texture is just perfect! I had a slice slathered in kerrygold butter. What a treat!
Yay! This make us so happy, Lindsay! Thank you for sharing such positive feedback with us!
I just tried the recipe and the bottom of bread was a little dark. I baked 475 for 30 minutes, 450 for 30 minutes and then lid off for 17 minutes. I used parchment paper and the ice cubes. Any suggestions?
Hi Kris, thank you for your question! To keep the bottom from browning a little too much, you could try baking the next loaf a little higher in the oven to see if that change in position helps the heat distribution. Since home ovens can easily become inaccurate temperature-wise, it could also help to use an oven thermometer to check the temperature throughout the bake. That will help you decide if you need to adjust the temperature and/or baking times during the different phases. We hope this helps!
Made this on the weekend and when I turned the loaf onto the parchment paper it it spread like crazy, was looking perfect before this. Tasted good but disappointed the way it spread.
Delicious bread! Although it tastes good, my loaf lost a ton of height while it cooled. Any idea what would have caused that?
Hi Nichole, we’re so glad you loved the flavor! The main reasons bread loses height as it cools are overproofing and underbaking. We recommend using an instant-read thermometer to check that the bread’s center reaches at least 205°F. If the temperature was reached but the bread still sunk as it cooled, you might want to try shortening the rising time next time. We hope these tips help!
This was my first time making GF bread. I’ve been GF for about 14 years. I was so impressed with the recipe and my bread came out fantastic!
Yay! We’re so happy to hear how much you loved the recipe, Maureen! Thank you for taking the time to share your feedback with us.
Can I still make this if I don’t have a stand mixer?
Hi Lesley, you can definitely mix it by hand! Just keep in mind that you may need to knead the dough longer. We just recommend the stand mixer for ease and consistency. We hope you love the recipe!
This bread turned out amazing! However, the next day it became very hard. Any tips on how to store it so it doesn’t become hard?
Hi Anzo, we’re so glad you enjoyed the recipe! We recommend letting the bread cool completely, then storing it in an airtight container at room temperature for up to 3 days. Happy baking!
Amazing! The recipe was easy and delicious! My Daugter came home from school and was so excited she said mom it squishes and tastes like real bread! Thank you for this great recipe. Caputo’s flours is the way to go for bread!
Aww, we’re so glad both you and your daughter loved the artisan bread so much! We appreciate you taking the time to share such kind feedback with us, Jenn. Happy baking!
Quick question about the ice cubes. Are they placed between the dutch oven and the parchment? Or right on the dough itself (around the edges)? Thank you! I have this flour in the cupboard and want to try it!
Hi Lisa, good question! The ice cubes are placed along the edges of the dough itself, right before the lid gets placed back on for baking. We hope you love the recipe!
Thank you!
I’ve made this multiple times since receiving your cookbook. I love how easy and delicious it is! It’s so wonderful to have tasty bread again. It was something I really missed after going gf. Thank you!!
Can the artisan bread recipe be made using a bread maker machine?
Hi Kelly, thank you for your question! We haven’t tested this recipe with a bread machine ourselves. This bread needs to be baked in a Dutch oven in order to achieve the right bake and ideal crusty exterior. We hope you enjoy the recipe!