

Erin’s Recipe Rundown

I used to missed the good old days of popping holiday slice and bake cookies in the oven for a simple sweet treat. That’s why I set out to make my own gluten-free version!
I love how this recipe is completely customizable for any holiday. I’m partial to Christmas cookies, but it works just as well for Halloween, Thanksgiving, or any festive theme. So fun!
Why You’ll Love It: While the dough needs plenty of time to freeze and chill, the actual hands-on work is pretty simple. These soft, buttery cookies are perfect for making with kids, gifting, taking to parties, or just treating yourself.
Top Tips: The freezing and chilling times really are crucial! Cold dough = clean slices and picture-perfect holiday cookies.
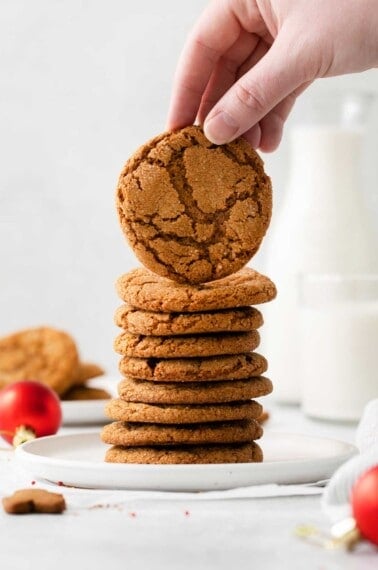
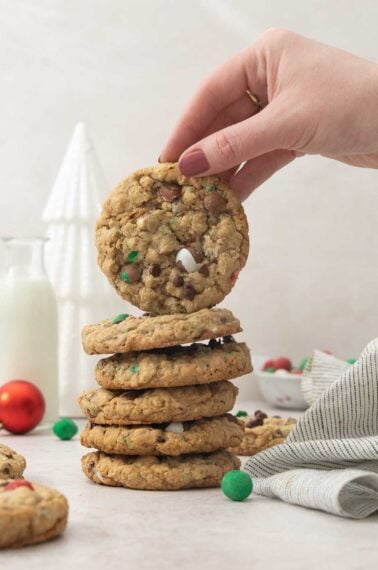
For more holiday cookies, try these gluten-free Christmas cookies, gluten-free spritz cookies, gluten-free gingerbread cookies, or gluten-free thumbprint cookies.
xoxo erin
Ingredients You’ll Need
Here are a few notes on some of the key ingredients to make these gluten-free slice and bake cookies. Jump to the recipe card below for the exact measurements.
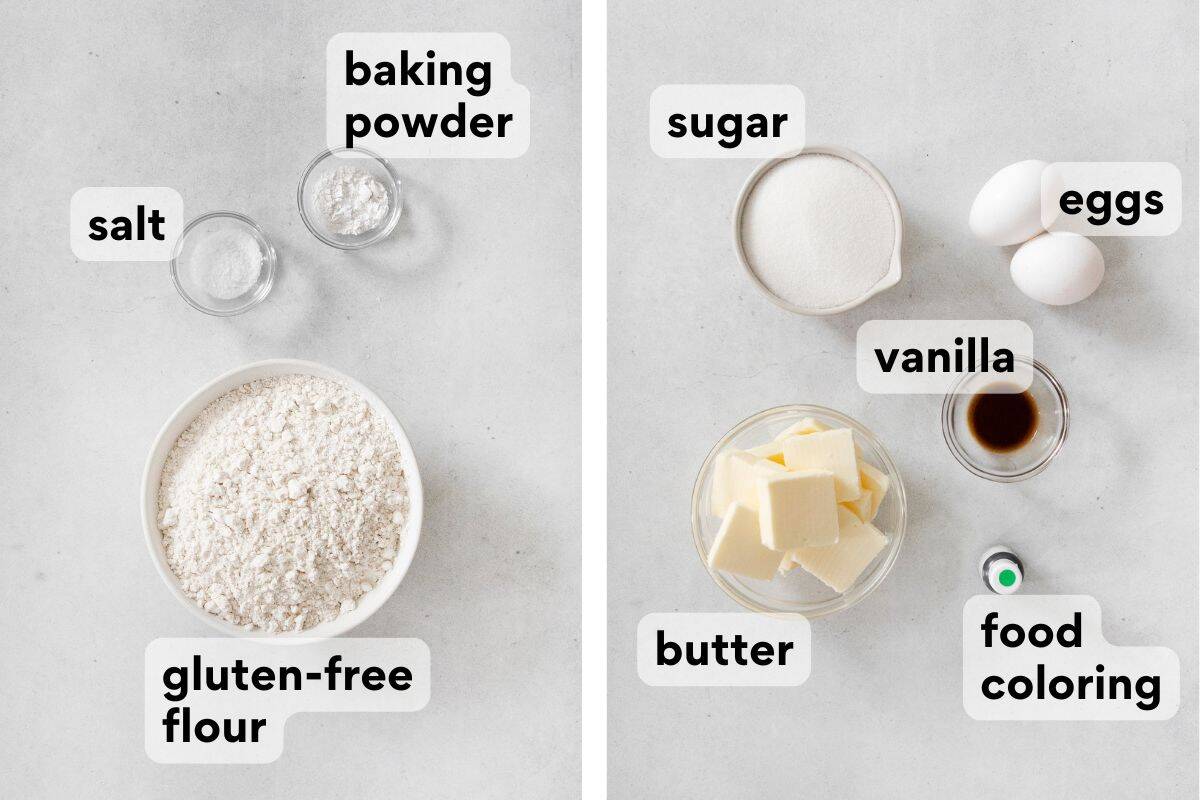
- Gluten-free flour: I recommend using a high-quality gluten-free measure-for-measure flour that contains xanthan gum for the perfect structure and chew!
- Butter: This recipe has a LOT of butter! I like to use salted. It adds rich flavor and soft, tender texture for deliciously buttery cookies.
- Eggs: The eggs play multiple parts. They bind the dough, add richness, and ensure a soft texture. Without them the whole structure is thrown off!
How to Make Gluten-Free Slice and Bake Cookies
Here’s an overview of how to make this recipe. You can jump to the recipe for the full instructions!
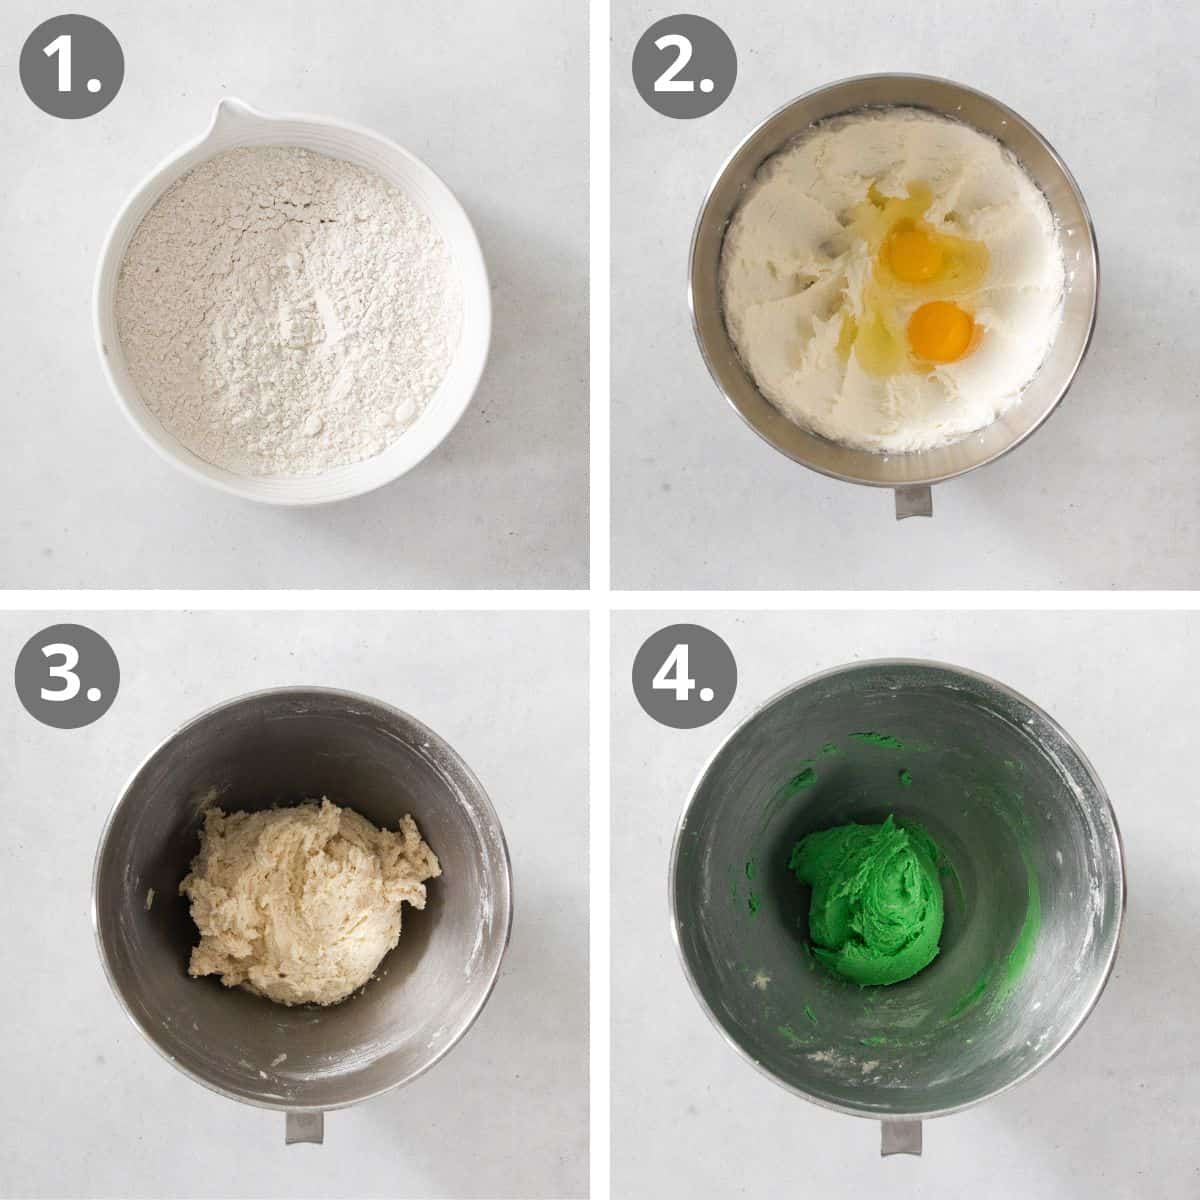
Make the dough: A stand mixer makes the job easier, but a hand mixer works too! Start with the dry ingredients in one bowl, then cream the butter and sugar in the bowl of the stand mixer. Add in eggs and vanilla, then slowly add in the dry mixture.
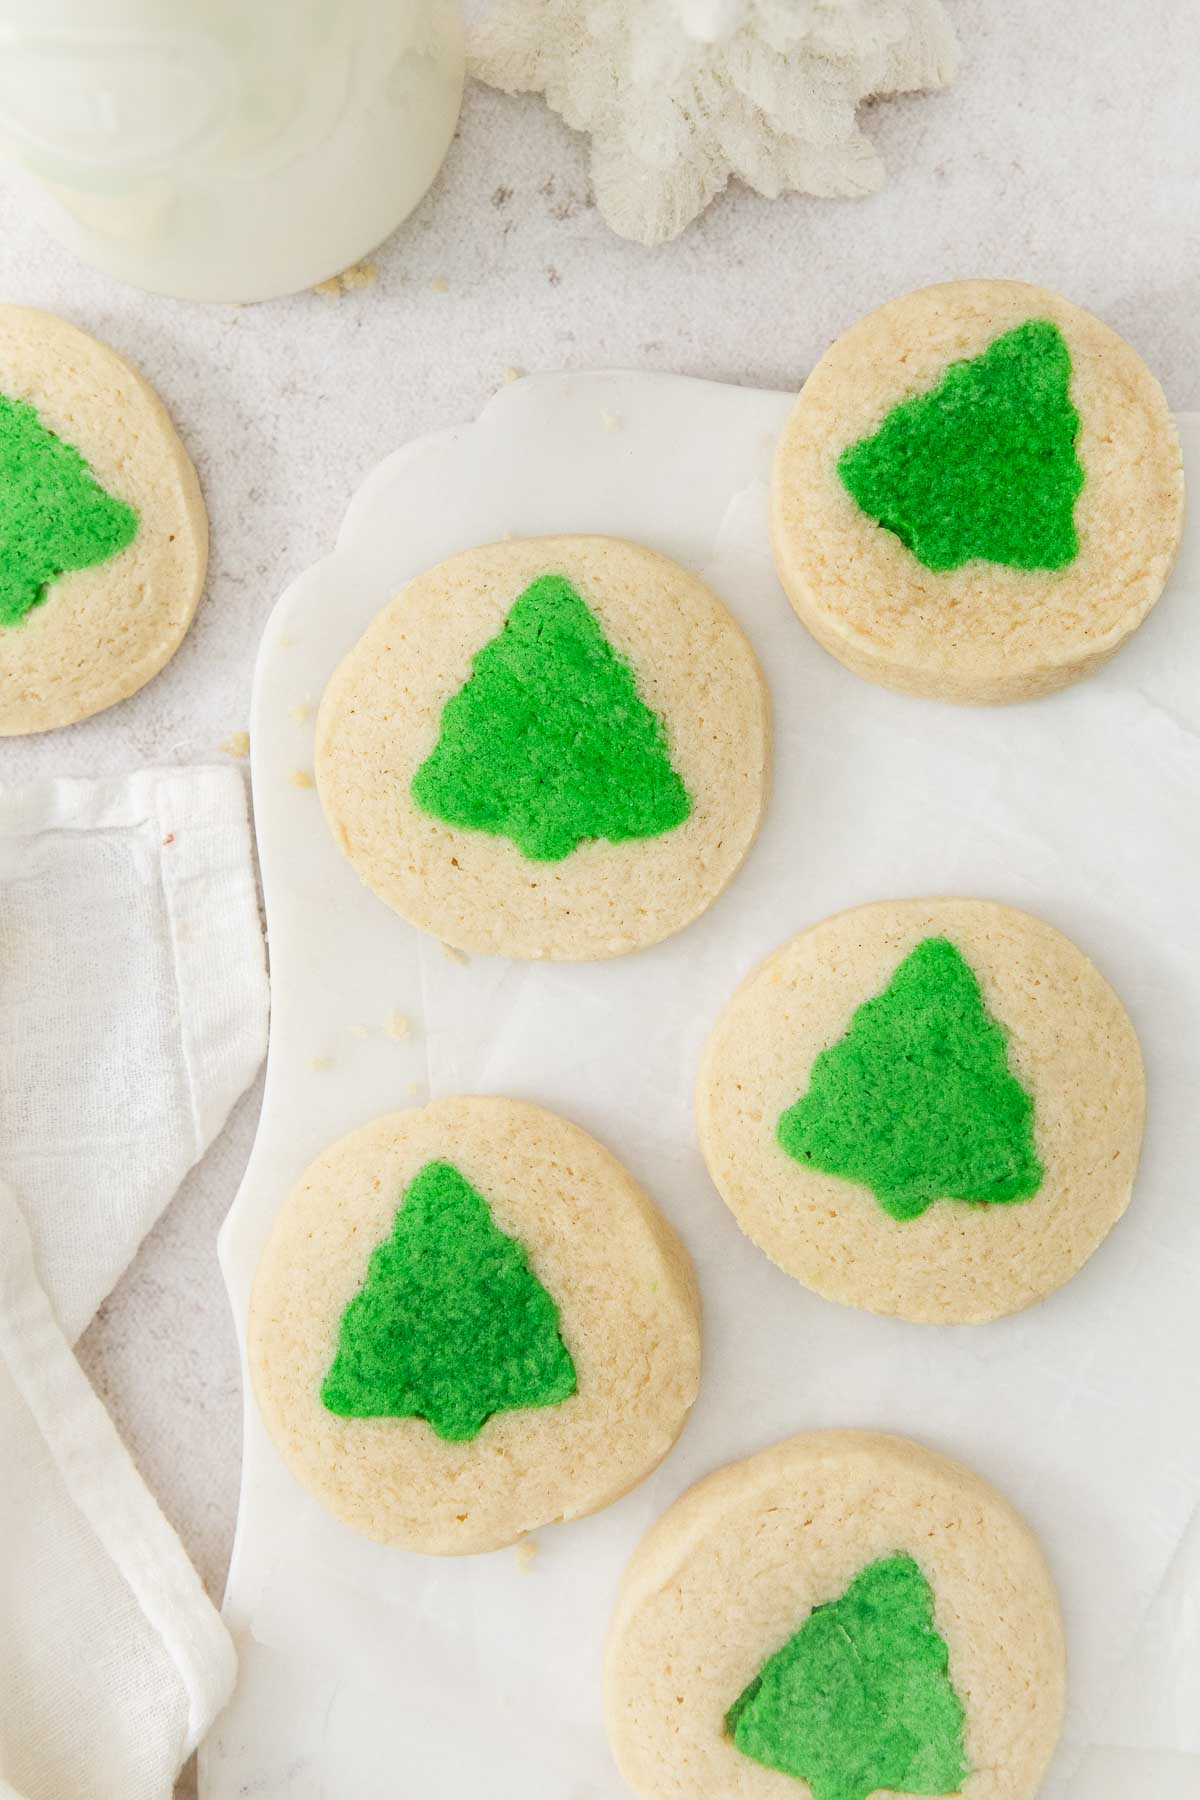
Separate into two portions: Reserve 2/3 of the dough for the outer part of the cookies by covering that bowl and setting it aside. Add the food coloring to the remaining dough. Christmas trees are fun, but you can use different colors and shapes for different holidays!
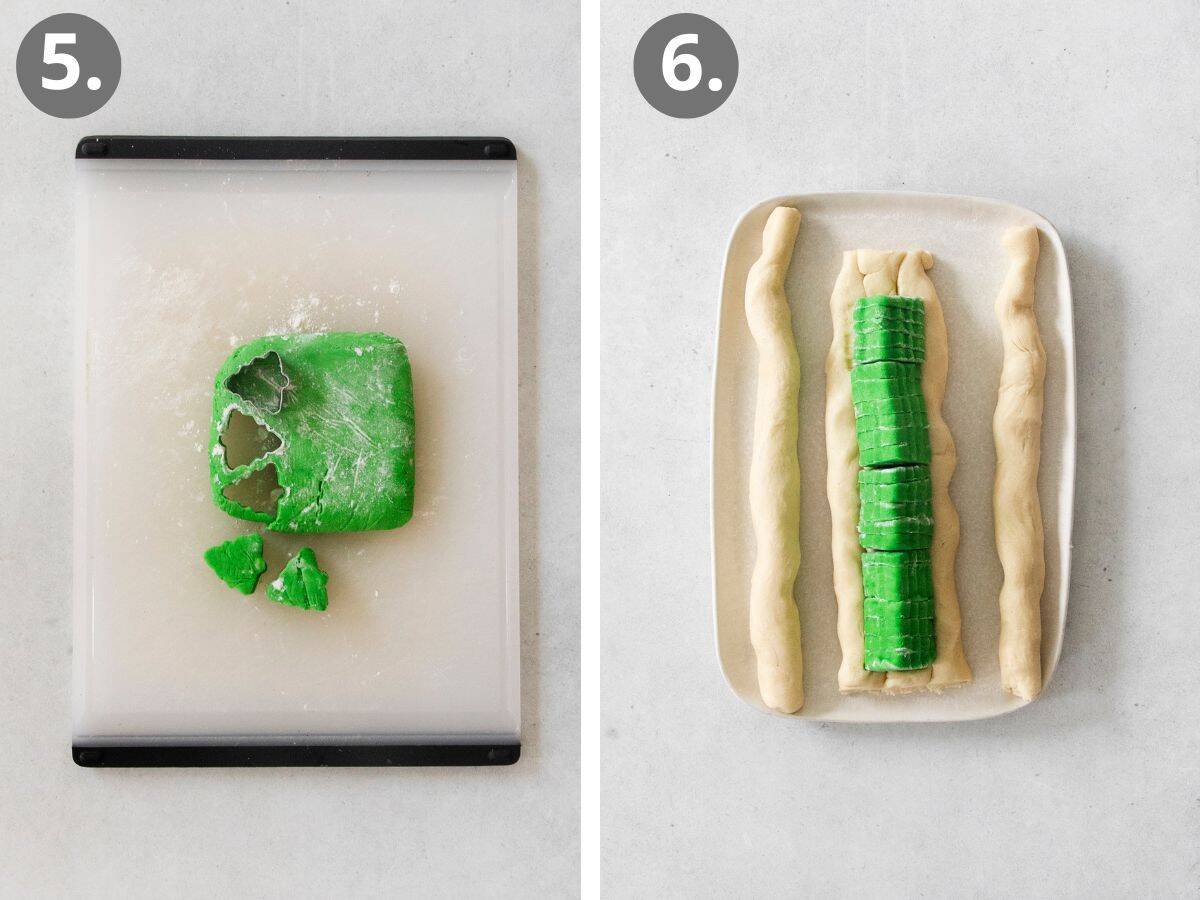
Prepare the shapes: First roll out the colored dough into a disc and freeze. This helps them hold their shape when cut. Then, use a small cookie cutter to cut out the shapes.
Connect the cut-outs: A little water helps them stick together, a lot causes problems! Lightly dip your finger in water and dab it on the flour side of a cut-out shape, then press another one, flour-side-up, on top. Repeat until you have a 10″ log. Cover and freeze.
Shape the log: Divide the plain dough into 6 portions and roll into 10″ logs to match the cut-out log. Place them all around the cut-out log.
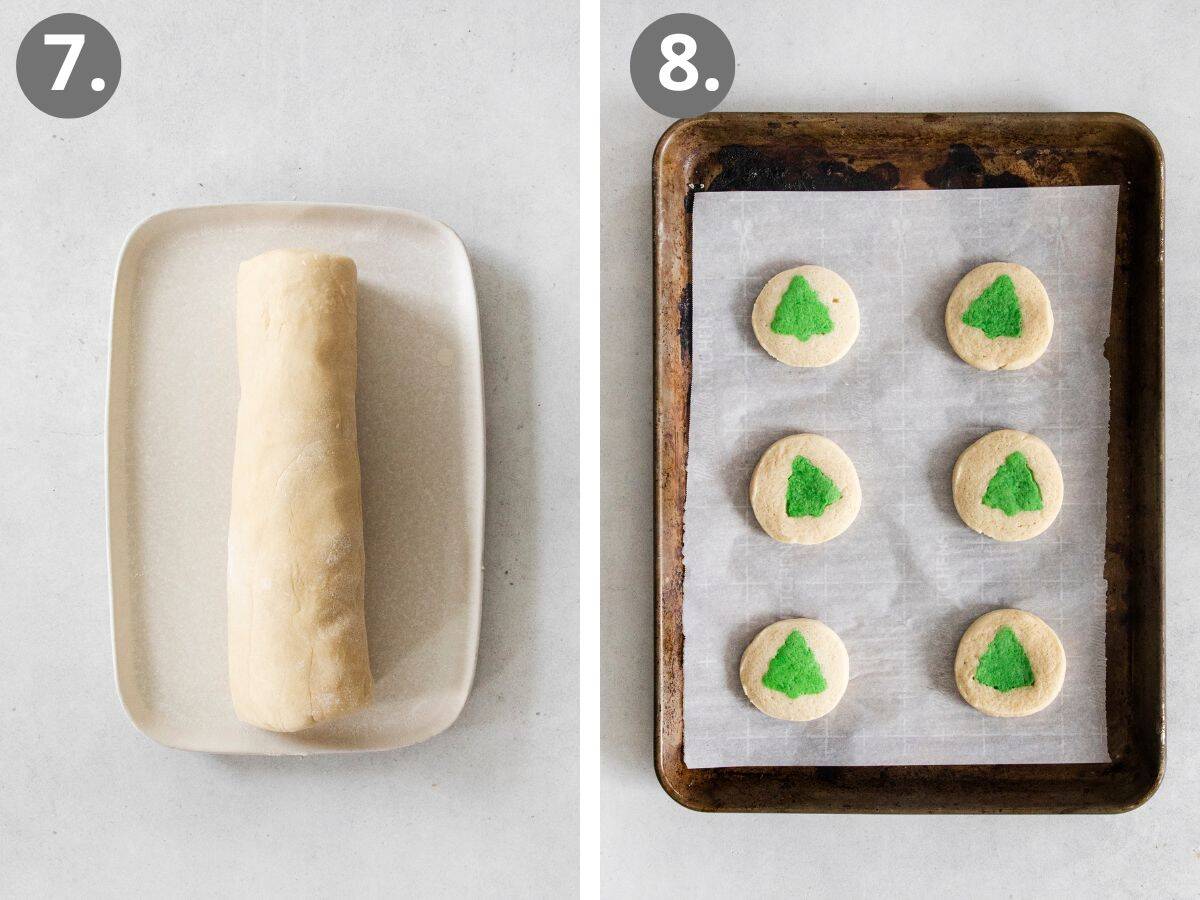
Roll and freeze: Evenly press the 6 plain logs into the frozen cut-out log. No surprise gaps! To smooth, roll the log on a lightly floured surface. Wrap tightly and chill in the fridge. I know it’s a lot of chilling and freezing, but these steps are key for slice and bake cookies!
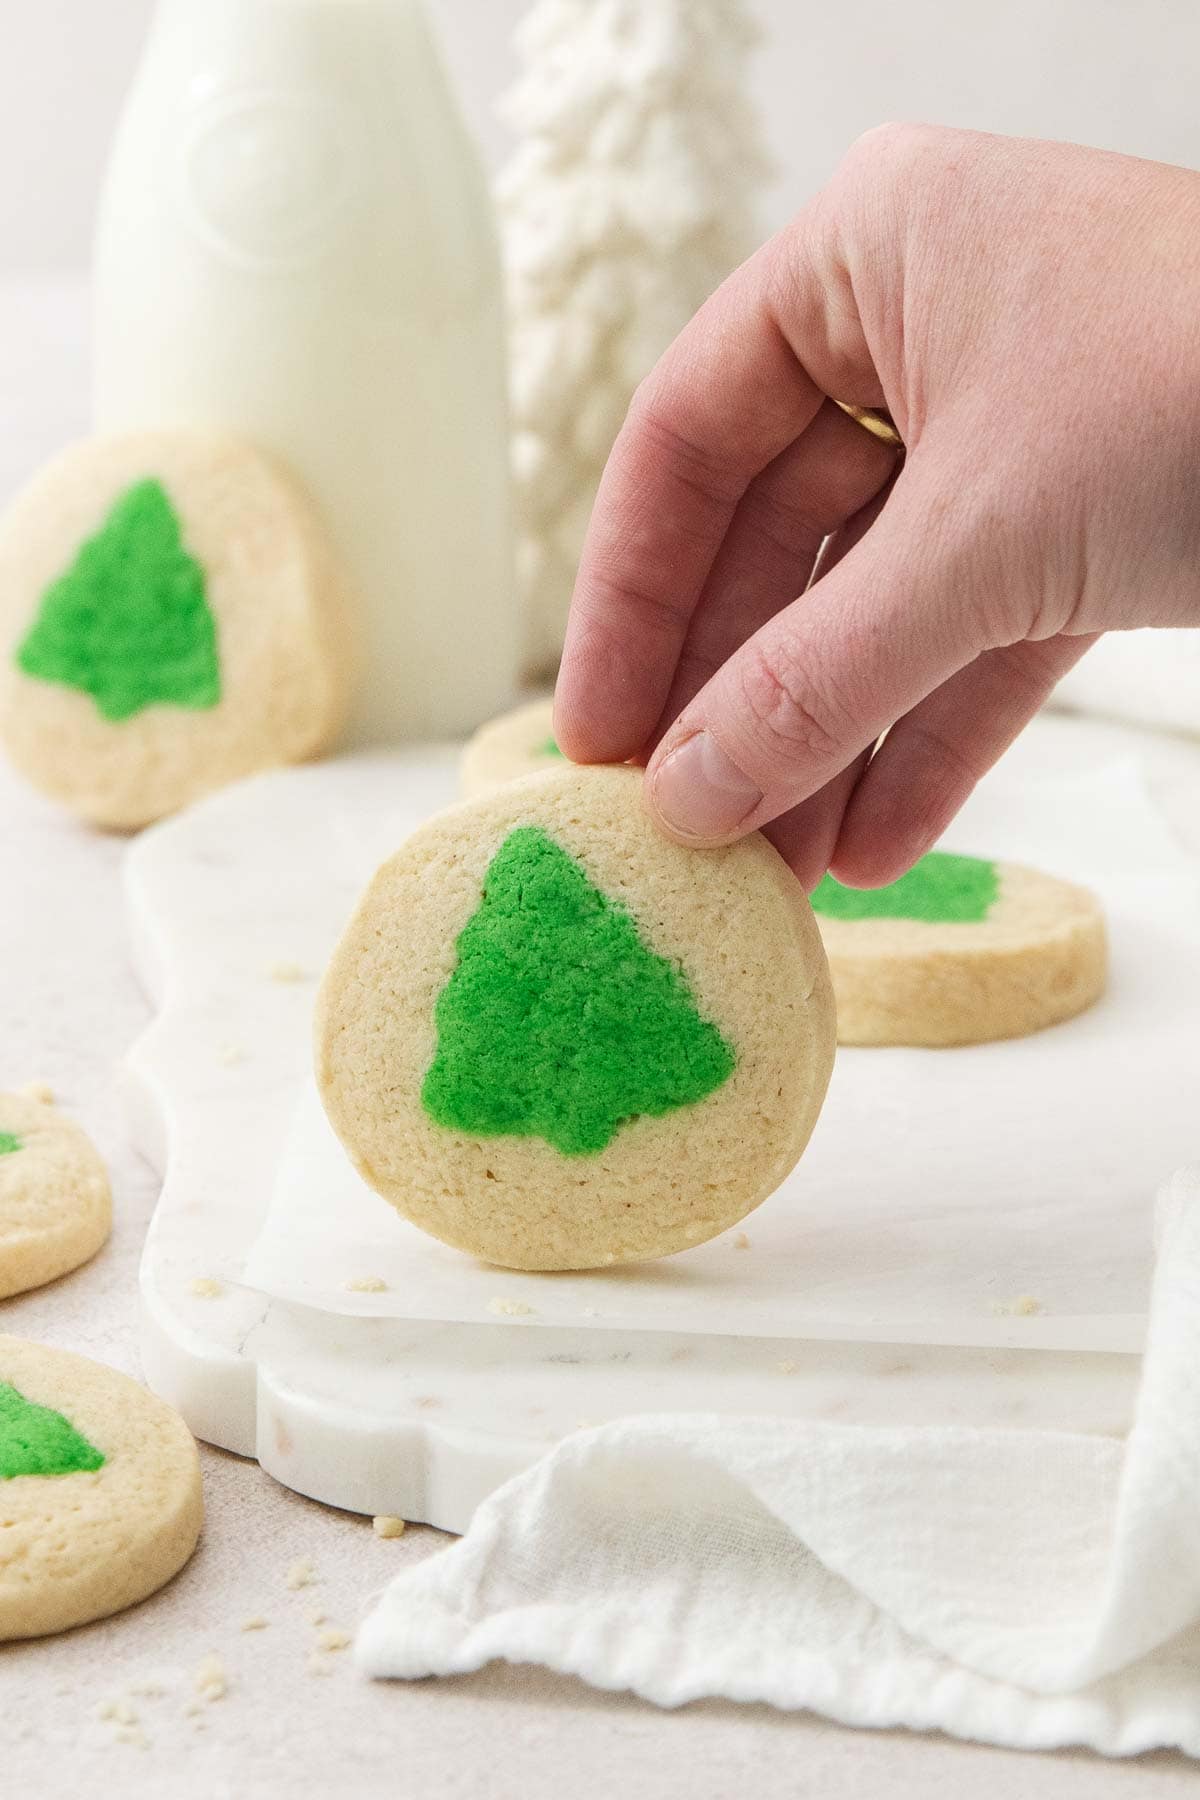
Slice and bake: Cut the chilled dough into 1/4″ rounds. Leave space between them on the baking sheet so they have a little wiggle room. Bake until the edges are set and the centers are still soft. Cookies firm up more as they cool!
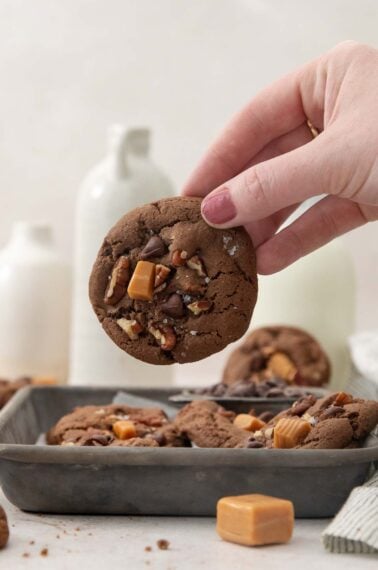
More Gluten-Free Christmas Cookies

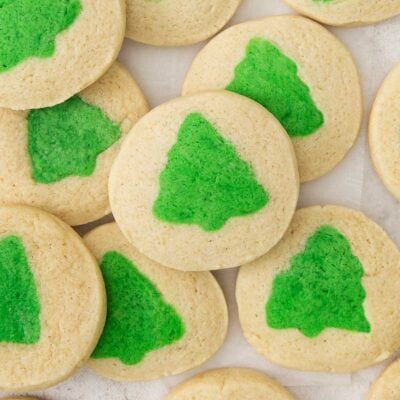
Gluten-Free Slice and Bake Cookies
Ingredients
Dry Ingredients
- 2¼ cups (337g) gluten-free measure-for-measure flour
- 1 teaspoon baking powder
- ¾ teaspoon kosher salt
Other
- ¾ cup (170g) butter, at room temperature
- 1 cup (200g) granulated sugar
- 2 large eggs
- 2 teaspoons vanilla extract
- food coloring
Instructions
- In a medium bowl, whisk together the gluten-free flour, baking powder and salt.
- In the bowl of a stand mixer fitted with a paddle attachment, or using a hand mixer, cream together the butter and sugar on medium-high speed until light and fluffy, about 2-3 minutes.
- Add the eggs and vanilla and mix until well-combined. Scrape down the sides and bottom of the bowl.
- With the mixer running on low, slowly add the dry ingredients to the wet ingredients and mix until well-combined. Scrape down the sides and bottom of the bowl, then mix again until fully incorporated.
- Scoop ⅔ of the cookie dough (about 530g) into a bowl. Cover and let sit at room temperature while you prepare the cut-outs.
- Add 2-3 drops of food coloring to the remaining dough in the mixing bowl. Mix to evenly combine.
- On a lightly floured piece of parchment paper, press the colored dough into a ½-inch disc. Freeze the disc for 30 minutes. (This helps the cut-outs hold their shape.)
- Remove the disc from the freezer and use a small cookie cutter (about 1½ inches across) to cut out the shapes. Lightly dip your finger in water and dab it onto the floured side of a cut-out, then press another cut-out, flour-side-up, on top. This helps them stick together—just be careful not to use too much water! Repeat with the remaining cut-outs, stacking them to form a log about 10 inches long.
- Cover the log and freeze for at least 2 hours until completely solid. (If you’re freezing the log longer than 2 hours, refrigerate the remaining plain dough. Let the plain dough sit at room temperature for at least 30 minutes before using.)
- Divide the remaining plain dough into six pieces and roll each one into a 9- to 10-inch cylinder, about the same length as the cut-out log.
- Remove the cut-out log from the freezer and arrange the plain dough logs evenly around it, making sure to press them in well to avoid any gaps. Roll the dough-covered log on a lightly floured surface until smooth.
- Wrap the log tightly in plastic wrap or parchment paper and refrigerate for at least 30 minutes, or up to 3 days.
- Preheat the oven to 350°F. Line large baking sheets with parchment paper or silicone baking mats.
- Slice the dough into ¼-inch rounds and place on the prepared baking sheets, about 2 inches apart.
- Bake for 10-12 minutes, until the edges are set but the centers are still soft.
- Remove from the oven and cool on the baking sheets for 5 minutes. Transfer to a wire rack to cool completely.


My son who was recently diagnosed as gluten free last year we have just started making our own at home creations and he absolutely loved them so much so I had to make more in a day thank you so much
Hi Meaghan, that’s heartwarming to hear! Thanks so much for leaving a review, so glad you enjoyed them!
In order to get the dough shapable so had to use almost 5 cups of flour. I’m looking to improve this and seeing if you had any recommendations for this issue. Thanks!
Hi Kyle, sorry these didn’t turn out as expected! The dough may need a longer chill time—I’d try overnight. You could also use a more firm butter—cold, but slightly softened. Hope this helps!
My kid is allergic to eggs. Is it possible to use Bob’s Red Mill egg replacer in this recipe?
Hi Ying, we haven’t tried an egg replacement for this recipe. We’d love to hear how it turns out if you try it!
If I only have unsalted butter, could I add extra salt? Is there an amount you’d recommend to essentially make it salted butter?
Hi Sarah, good question! Yes, we recommend adding 1/4 to 1/2 teaspoon of butter for every stick you use. Since this recipe uses 3/4 cup, I would add about 1/2 teaspoon. If you love salted desserts I would add a bit more.