Meaningful Eats
Gluten-Free Dutch Apple Pie
8 servings
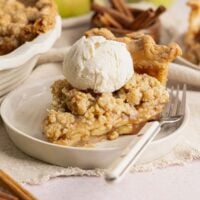
If you’re looking for a show-stopping gluten-free Dutch apple pie that’s worth your time to make, you’re in the right place!My top tips are to cook the apple filling and parbake the crust for a gluten-free pie with tender and jammy apples and a crisp bottom crust. I like to add finely chopped walnuts to the crumb topping for amazing flavor!
Ingredients
Sour Cream Pie Crust
- ½ cup (113g) butter
- 1 cup + 2 tablespoons (169g) gluten-free measure-for-measure flour
- 1 teaspoon granulated sugar
- ½ teaspoon kosher salt
- 1 tablespoon sour cream
- 1½ teaspoons distilled white vinegar
- 3 –4 tablespoons ice water
Apple Filling
- 5 medium-large Granny Smith apples (about 750g after slicing)
- 1 tablespoon fresh lemon juice
- ½ cup (106g) light brown sugar, packed
- 2 tablespoons gluten-free measure-for-measure flour
- 1 teaspoon ground cinnamon
- ⅛ teaspoon ground nutmeg
- Pinch of kosher salt
Crumb Topping
- ½ cup 106g light brown sugar, packed
- ¼ cup 50g granulated sugar
- ¼ teaspoon ground cinnamon
- ½ teaspoon kosher salt
- ½ cup 113g butter, melted
- 1 cup 150g gluten-free measure-for-measure flour
- ¼ cup 25g walnuts
Instructions
- For the sour cream pie crust: Cut the butter into small cubes and place in the freezer while you prepare the rest of the ingredients.
- Add the gluten-free flour, sugar and salt to the bowl of a food processor. Pulse until evenly combined.
- Place a small bowl on top of a kitchen scale and tare the weight. Add the sour cream and vinegar, then add ice water until the mixture reaches 75g. Whisk until smooth and set aside.
- Scatter in the cold butter and pulse until the butter pieces are the size of large peas, about 10 pulses. Add the sour cream mixture and pulse until the dough begins to clump, about 10 more pulses.
- Transfer the dough to a bowl and use your hands to knead it together. If the dough feels too dry, add another tablespoon or so of ice water — but don't be tempted to add too much liquid! You may need to gather and firmly press it a few times until it comes together. The dough should be moist enough to hold together when pressed, but not sticky.
- Turn out the dough onto a lightly floured surface. Gather it together with your hands, pressing any loose bits into the dough to form a cohesive ball.
- Gently shape it into a 1-inch-thick disc. Wrap the disc tightly in plastic wrap and refrigerate for 1 hour or up to 2 days.
- If the dough has been refrigerated longer than 1 hour, let it sit at room temperature for 15 minutes before rolling.
- Place the dough on a lightly floured pastry mat or a silicone baking mat. Roll the pie crust into a circle 12 inches in diameter. You may need to press it together if it starts to split or break at the edges. This is normal — gluten-free pie crust requires a bit of patience to roll out.
- Use the pastry mat to flip the dough onto a 9-inch pie plate. Gently ease the dough into the plate. Trim any excess dough with scissors and shape the edges as desired.
- Wrap the shaped crust loosely in plastic wrap and place in the freezer for 15 minutes or up to 1 hour, until chilled and firm. Remove the plastic wrap and prick holes all over the bottom and sides of the crust with a fork.
- Place a pizza steel in the oven. (A pizza steel helps ensure a crispy bottom crust.) Preheat the oven to 375°F.
- Line the frozen crust with parchment paper and fill with pie weights. (I use 2 full containers) Bake on the pizza steel until the edges are starting to brown and appear set, about 16–18 minutes.
- Remove the crust from the oven and carefully lift the parchment paper and weights out of the pie. Return the crust to the pizza steel and bake until the bottom just starts to brown, about 8–10 minutes longer.
- For the apple filling: Peel, core and slice the apples into ⅛-inch-thick slices. Place in a wide saucepan. Toss with the lemon juice.
- Add the brown sugar, gluten-free flour, cinnamon, nutmeg and salt and stir until evenly coated.
- Place the saucepan over medium heat and cook the apples for about 5 minutes, just until slightly tender and the sugar has melted. Spoon the apple mixture into the par-baked crust.
- For the crumb topping: In a medium bowl, whisk together the brown sugar, granulated sugar, ground cinnamon and salt. Add the melted butter and stir to combine.
- Add the gluten-free flour and walnuts and use a fork to mix until large crumbs form. Sprinkle the topping evenly over the apples.
- Place the assembled pie on a large baking sheet. Bake at 375°F on the pizza steel for 35–40 minutes, until the crumb topping is golden brown and the filling is visibly bubbling around the edges. If the crust edges begin browning too quickly, loosely cover with foil or a pie shield.
- Transfer to a wire rack and cool for 1–2 hours before slicing so the filling can set.
Notes
Gluten-Free: This pie uses my gluten-free sour cream crust, plus a little gluten-free flour in the filling. I prefer to use King Arthur for best results!
Dairy-Free: Unfortunately, the pie crust and crumb topping cannot be made dairy-free. Sour cream and butter play a big role in this recipe!
To Make-Ahead: Once you shape the dough into a disc, it can be refrigerated for 2 days. I like to make the rest of the pie fresh.
To Store: Cover the leftover pie or store slices in an airtight container and keep at room temperature for up to 2 days. You can also refrigerate it for up to 5 days.
To Freeze: I don't typically freeze this pie since the apples can soften and the texture of the crust may change slightly. There's nothing like freshly baked pie!
Nutrition
Calories: 527kcal | Carbohydrates: 73g | Protein: 4g | Fat: 27g | Saturated Fat: 15g | Polyunsaturated Fat: 3g | Monounsaturated Fat: 7g | Trans Fat: 1g | Cholesterol: 62mg | Sodium: 483mg | Potassium: 187mg | Fiber: 6g | Sugar: 47g | Vitamin A: 782IU | Vitamin C: 6mg | Calcium: 66mg | Iron: 2mg