
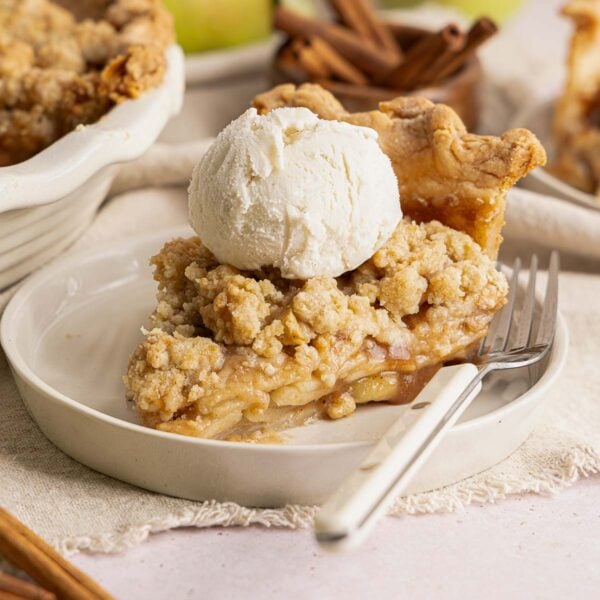
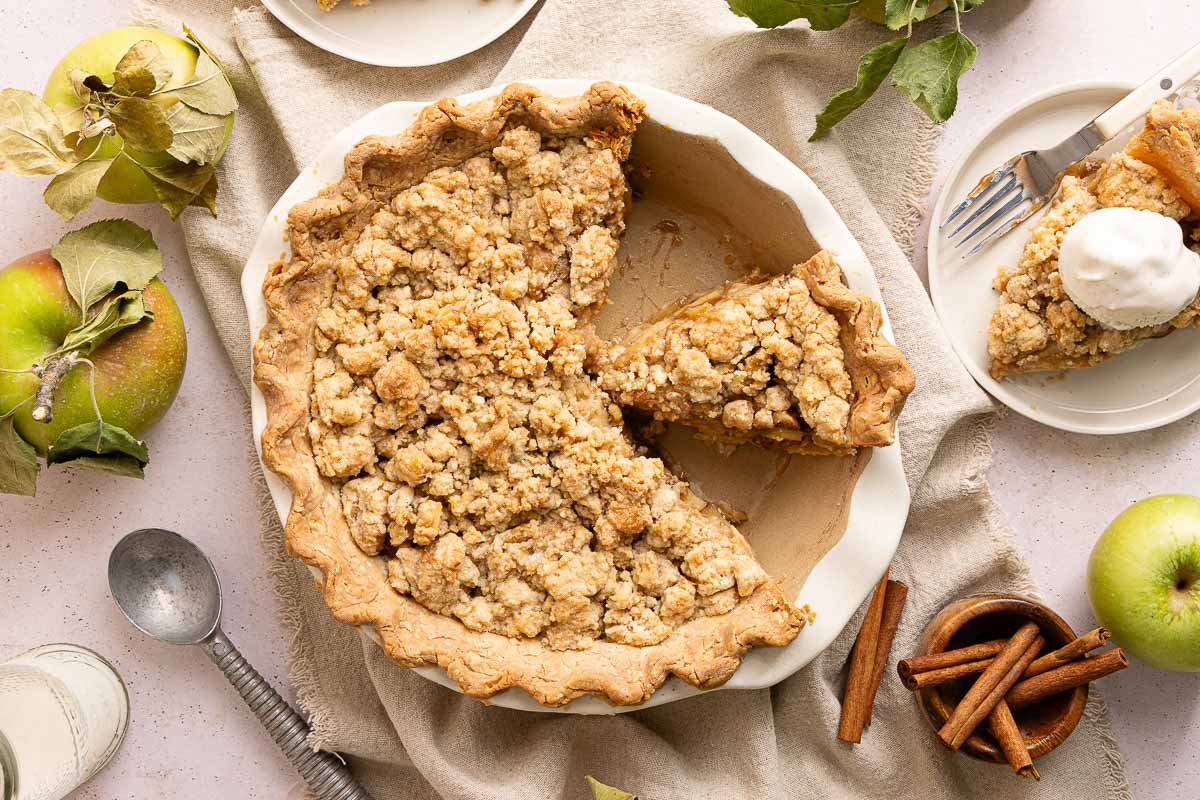
Why Making This Gluten-Free Dutch Apple Pie is Worth Your Time
For a few years now I’ve wanted to have a gluten-free Dutch apple pie recipe on my website but for some reason it always felt like a daunting recipe to develop!
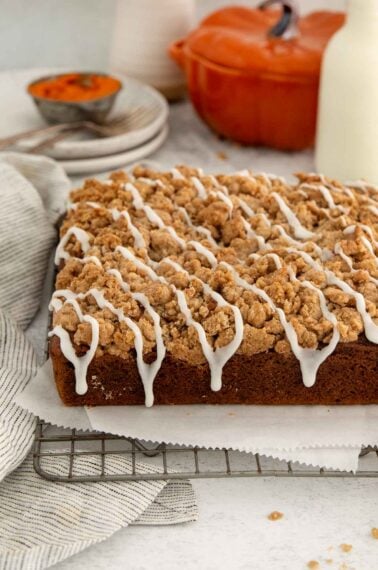
My neighbor who lives across the street helps me with recipe testing. As a starting point for this recipe, I told her to take the sour cream pie crust from my gluten-free pumpkin pie and combine it with the crumb topping from my favorite gluten-free pumpkin crumb cake.
Then all we had left to figure out was the apple filling (read on for all our full recipe testing journey!). All I can say is I’m so happy with the way this recipe turned out.
The resulting pie is:
- Buttery, flaky and crisp. My favorite gluten-free sour cream pie crust bakes up golden and flaky with a crisp bottom that holds up beautifully to the filling.
- Filled with tender, thick apples. I’ve worked to create a filling that’s thick and juicy, with apple slices that keep their shape while baking up tender and soft.
- Topped with the best crumb topping. I love the crunch that this buttery brown sugar topping with cinnamon and walnuts adds to the pie. As much as I love a classic fruit pie, the crumb topping makes this recipe something special!
- Made for sharing. I’ve found that everyone loves this gluten-free Dutch apple pie, whether they need gluten-free or not. I love when one recipe satisfies everyone’s sweet tooth.
What You Need
Here are a few notes on some of the key ingredients to make this gluten-free Dutch apple pie. Jump to the recipe card below for the exact measurements.
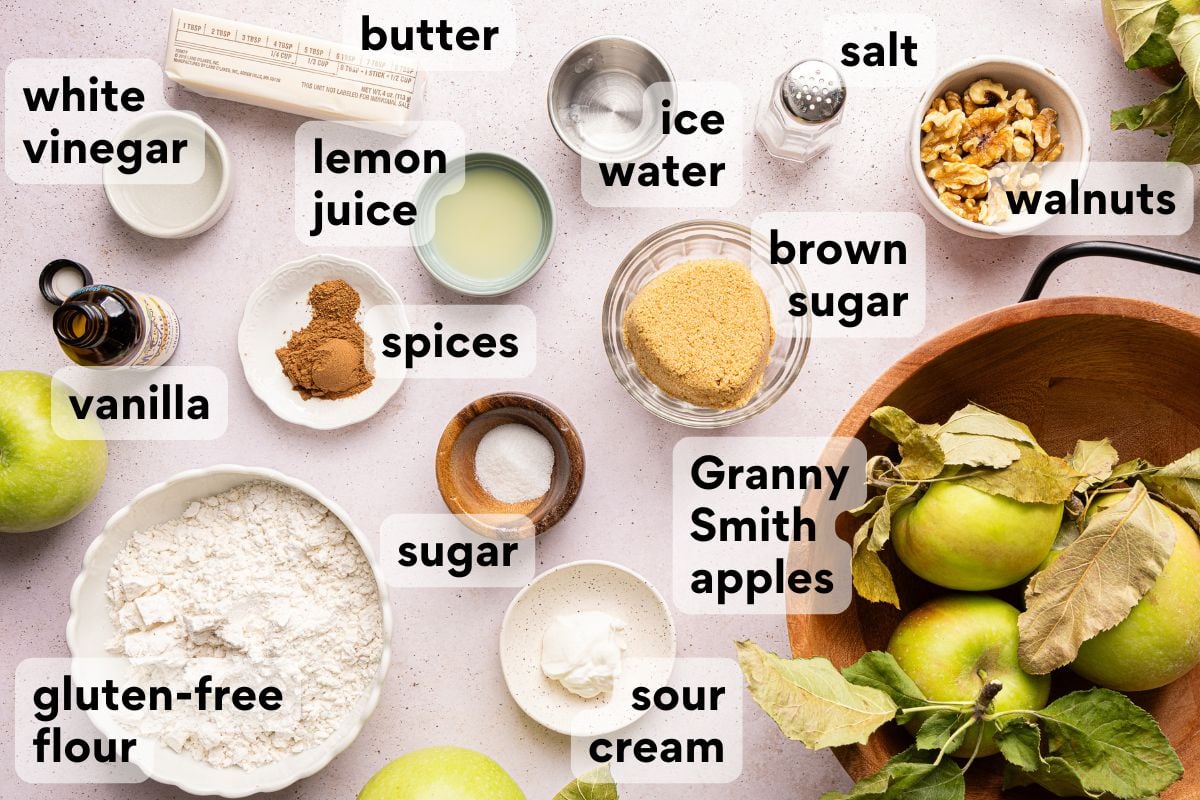
- Walnuts: On our final attempt I also added ¼ cup of chopped walnuts to the crumb topping. It’s such a delicious flavor addition and I really like the extra crunch!
- Apples: I like to use 5 large Granny Smith apples for this pie. They have the perfect tart flavor and firm texture. I like cutting the apples in ⅛-inch slices rather than ¼ -inch slices. That way they end up soft and supple in the final pie.
- Gluten-free flour. I recommend using a gluten-free measure-for-measure flour blend that contains xanthan gum so that the pie crust has the right structure. Other gluten-free flour types will hydrate differently and change the texture of the crust.
- Sour cream. This is my secret to incredible gluten-free pie crust! It adds richness and moisture, plus it helps the gluten-free dough hold together well.
How to Make Gluten-Free Dutch Apple Pie
Here’s an overview of how to make this recipe. You can jump to the recipe for the full instructions!
Make the Gluten-Free Pie Crust
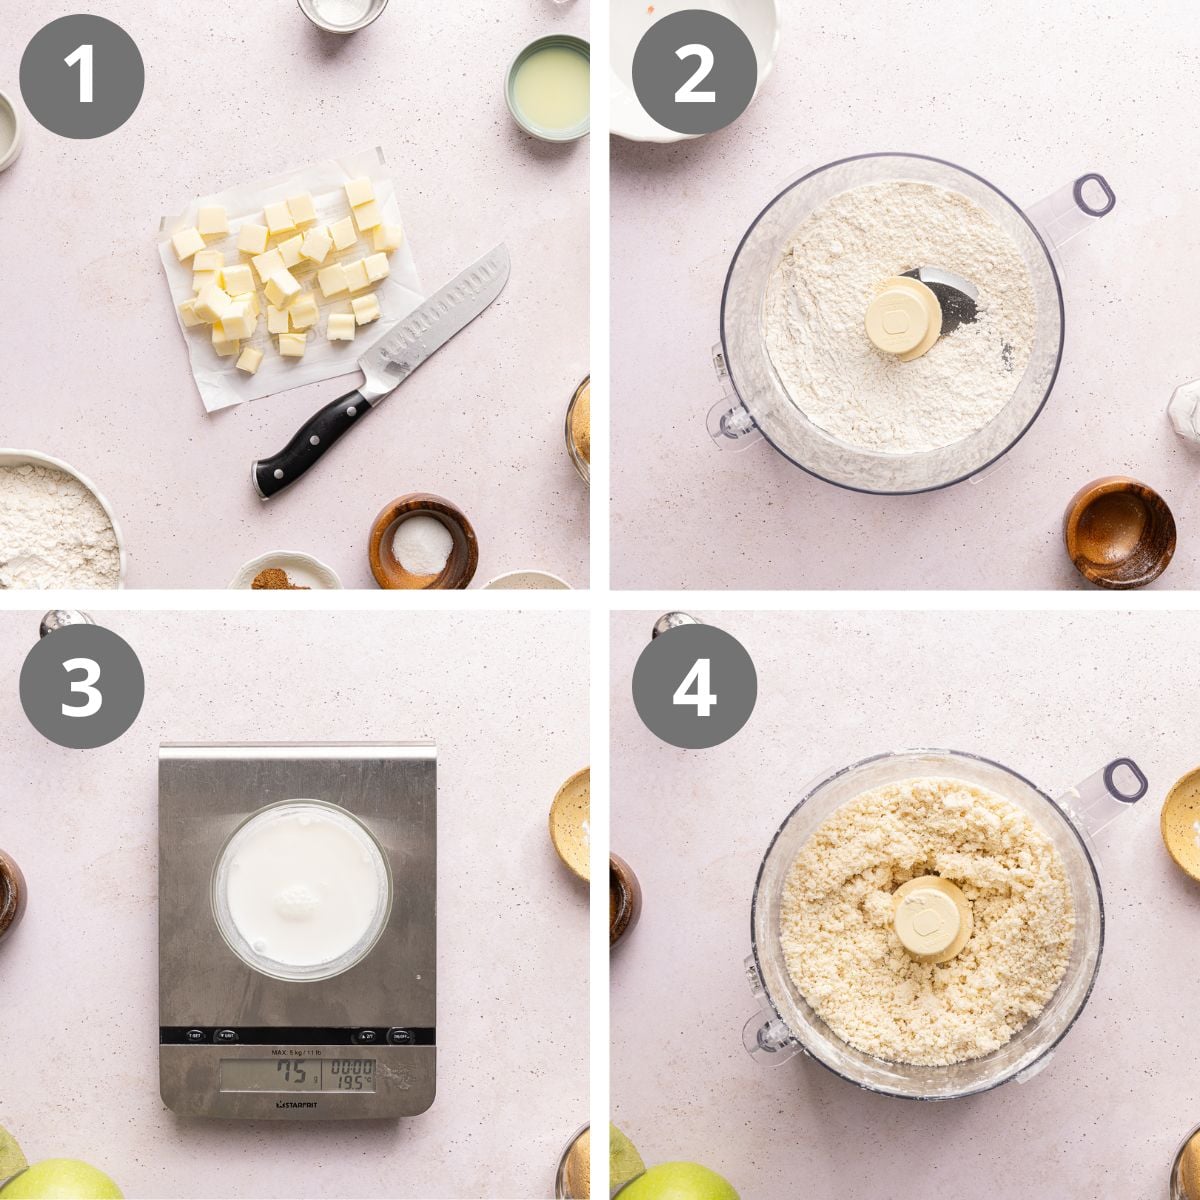
Freeze the butter. The cold butter is so important for creating a flaky crust! I cut it into small cubes and pop it in the freezer while I work on the rest of the crust.
Start the dough. I love using a food processor to make this job easier. I start by pulsing just the gluten-free flour, sugar and salt until combined.
Weigh the liquids. I’ve found that weighing the sour cream, vinegar, and ice water together gives me the most consistent results. That way, I avoid adding too much liquid which can make the crust sticky and hard to work with. Just make sure you zero out the scale after you place the bowl on it and before you start adding the ingredients!
Combine ingredients. I find it takes about 10 pulses to work the butter into the dry ingredients enough to create large pea-sized clumps. From there, I add the sour cream mixture and give it another 10 pulses or so until the dough begins to clump.
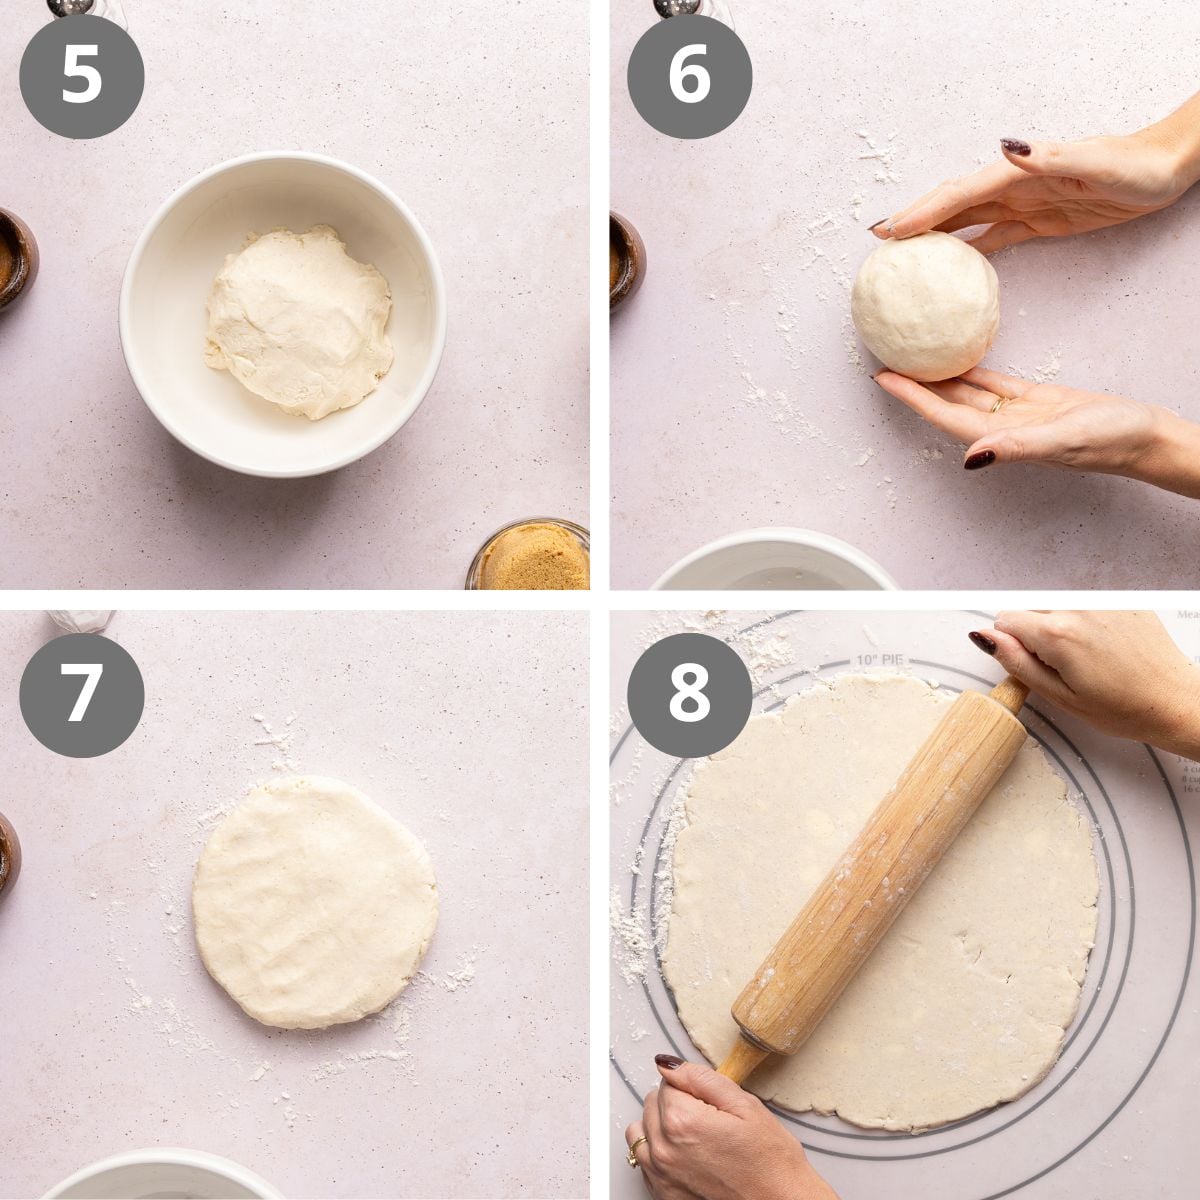
Knead the dough. After I’ve gotten it started with the food processor, I move the dough to a bowl to work it together by hand. If it feels too dry, I’ll add just a little more ice water, but I’ve learned to be cautious. It’s so easy to add too much liquid!
Shape the dough. I gather the dough together into a ball on a lightly floured surface. If any loose bits fall off, I just press them back into the dough. From there, I gently shape it into a 1-inch-thick disc, wrap it tightly in plastic wrap, and refrigerate it for at least 1 hour (or up to 2 days). Chilling helps firm up the butter and makes the dough easier to roll out.
Roll out the dough. I like to lightly flour a pastry mat or silicone baking mat for this step. The dough needs to be rolled out into a 12-inch circle. It’s totally normal for gluten-free dough to split or break a little so I’ve learned to be patient and just press it back together when needed.
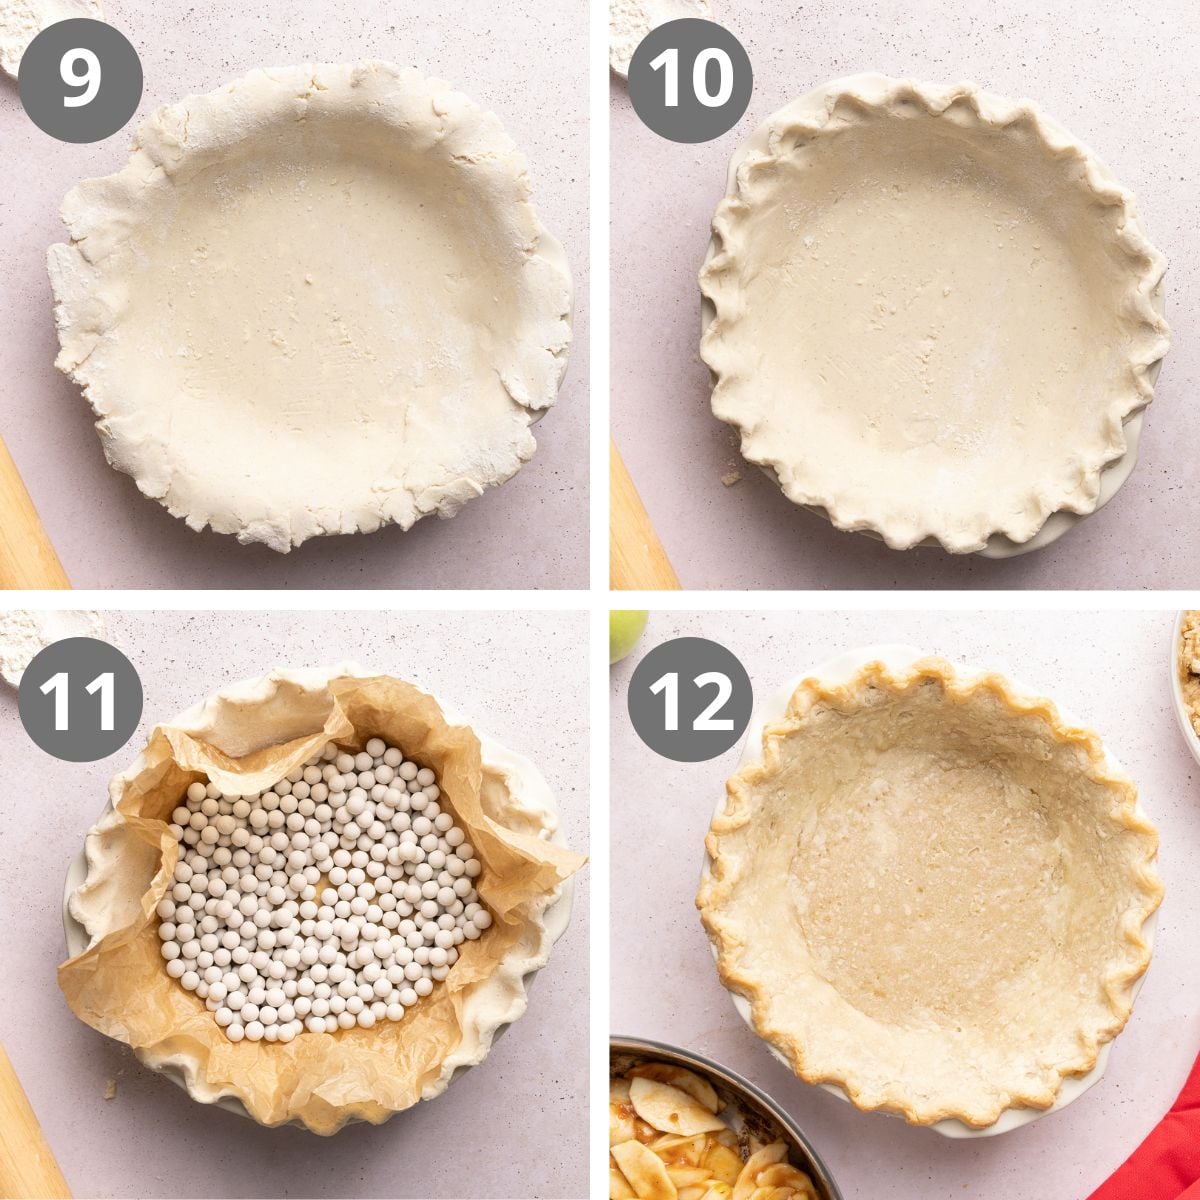
Place in the pie plate. Using the pastry mat makes it easier to flip the dough into the pie plate! You want to gently ease it into place, then trim any excess around the edges. I like to shape the edges too for a cleaner look!
Freeze the shaped dough. I wrap it loosely with plastic wrap, then freeze the dough for anywhere from 15 minutes to 1 hour so it becomes chilled and firm. Then I remove the wrap and prick holes in the bottoms and sides with a fork. This lets steam escape while the crust bakes to help prevent it from bubbling up.
Parbake the crust. While pizza steel preheats, I line the unbaked crust with parchment paper and fill it with the pie weights. I first bake this crust on the pizza steel just until the edges start to brown and look set, then I remove the pie weights and parchment before baking it a little more. I just want to parbake it until the bottom starts to brown.
Erin’s Tips
For the crust, I follow my usual method for par-baking gluten-free pie crust. I always use 2 full containers of pie weights and follow the steps carefully so the sides of the crust don’t collapse in on themselves.
I like to bake my gluten-free pies on a pizza steel so the bottom crust gets nice and crisp.
Make the Cooked Apple Filling
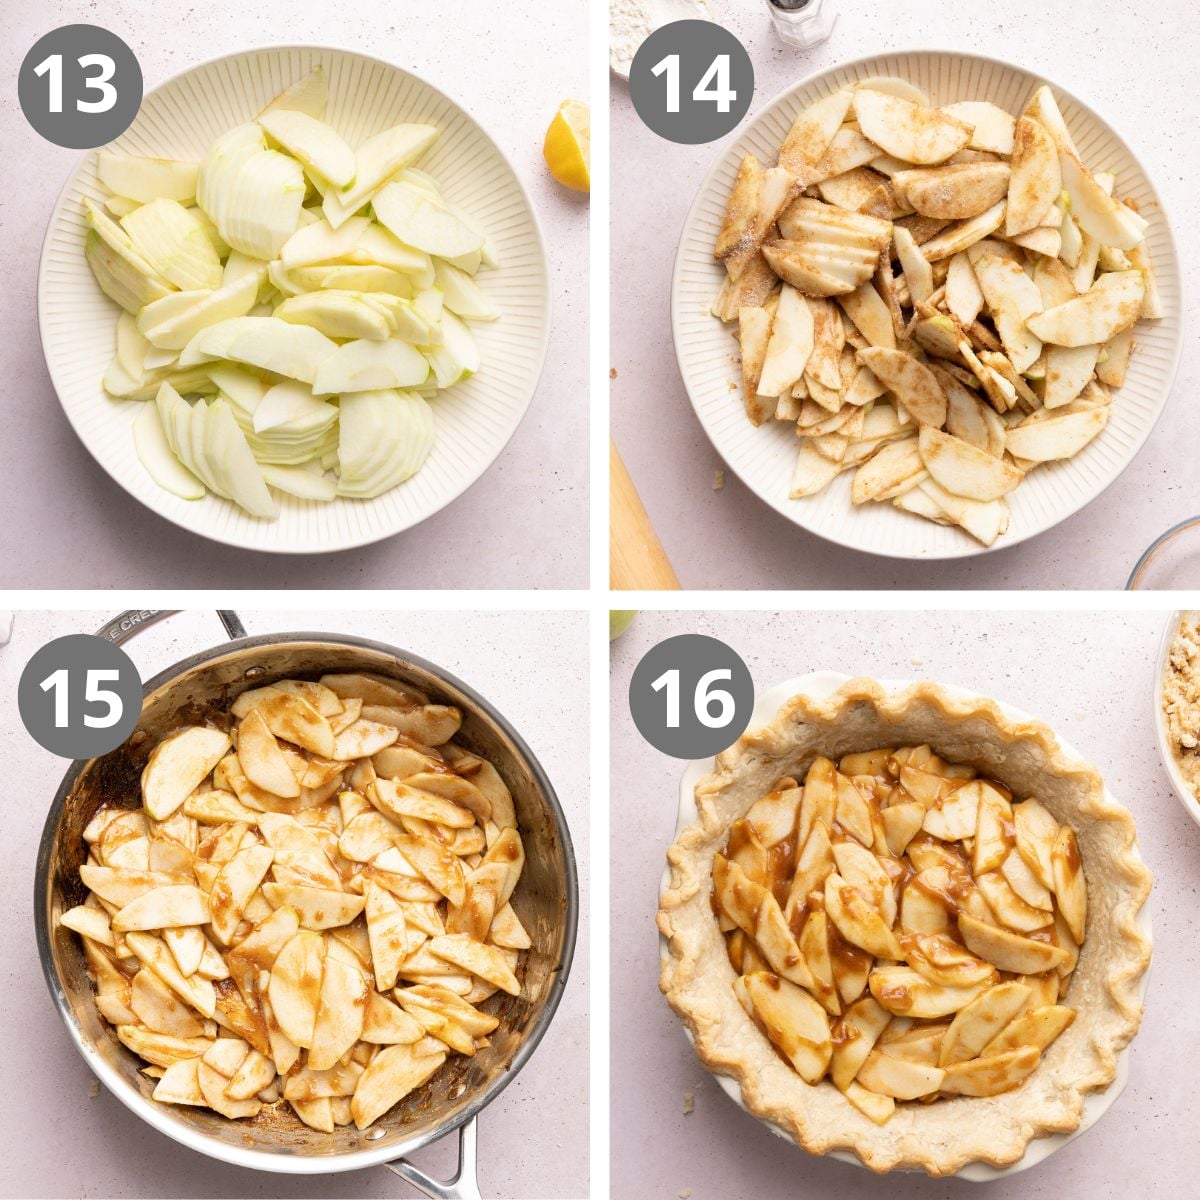
Prepare the apples. I peel, core, and slice the Granny Smith apples into 1/8-inch slices so they’re thin enough to cook evenly until soft and tender. Then I just toss them with lemon juice and stir in the remaining filling ingredients.
Cook in a saucepan. Cooking the apple filling is the only way I’ve found to get the texture and consistency I want in this kind of filling. Plus it protects the crust from absorbing too much moisture which can make it soggy! It only takes about 5 minutes for the apples to become slightly tender which is all we need before adding it to the pie.
Make the Crumb Topping
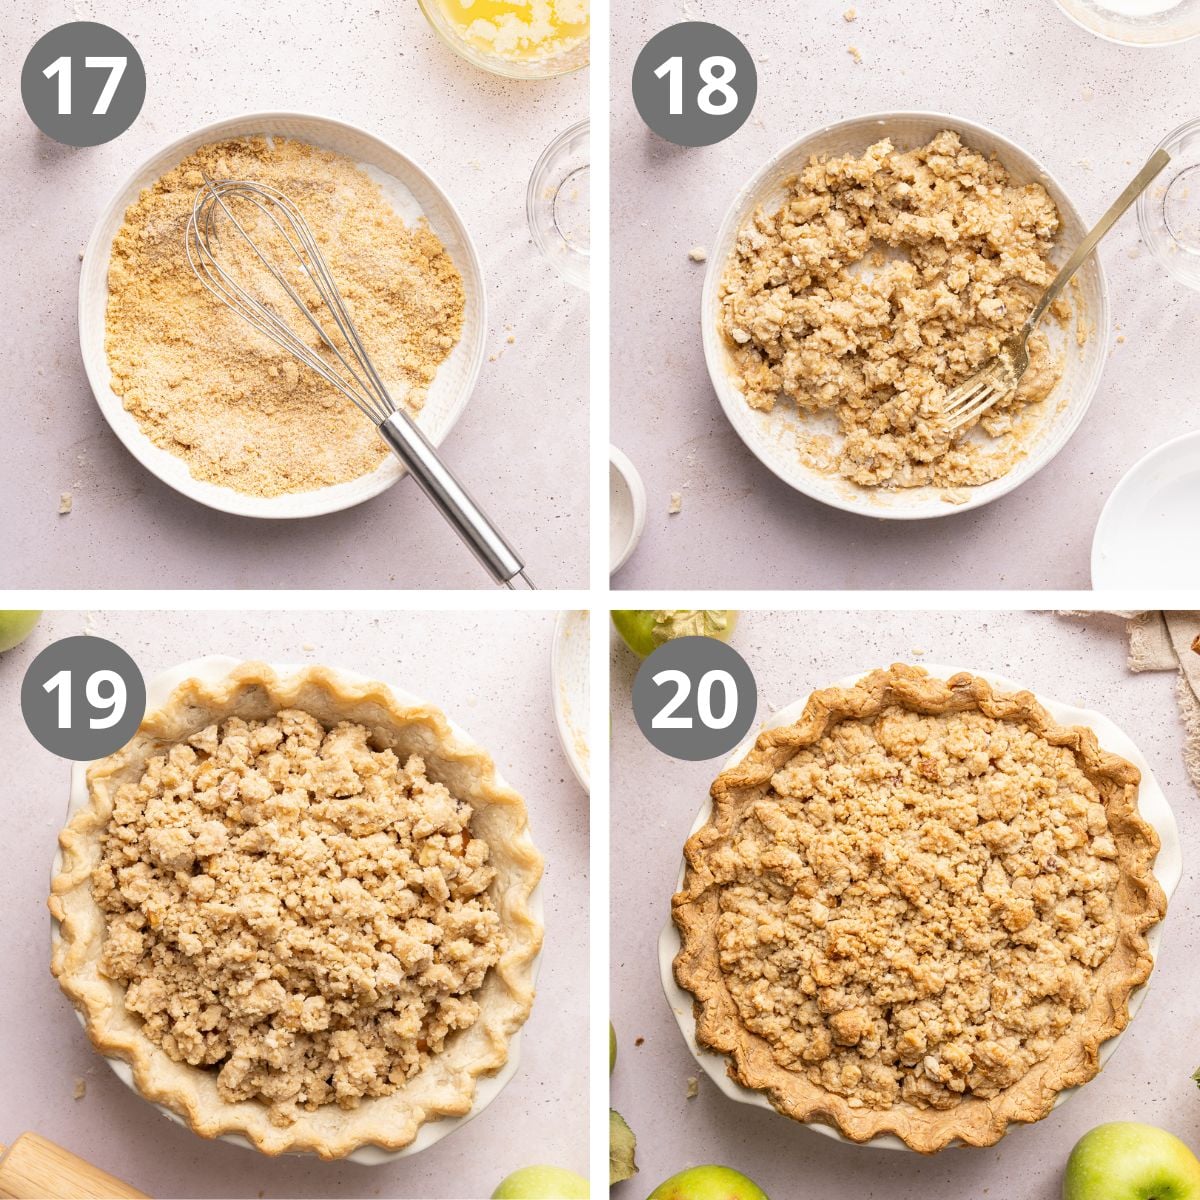
Make the crumb topping. I start by whisking the brown sugar, granulated sugar, cinnamon and salt together to get the blend evenly combined. After that, the melted butter gets stirred in, followed by the gluten-free flour and walnuts. I find a fork works best to mix everything together. I look for large crumbs to form to know when to stop.
Top and bake. There should be plenty of crumb topping to cove the pie crust to crust! I place the pie on a large baking sheet to catch any juices that bubble over, then place that on the pizza steel to make sure the bottom bakes up crisp. When the pie is done, the topping will look golden brown and the filling should be visibly bubbly around the edges.
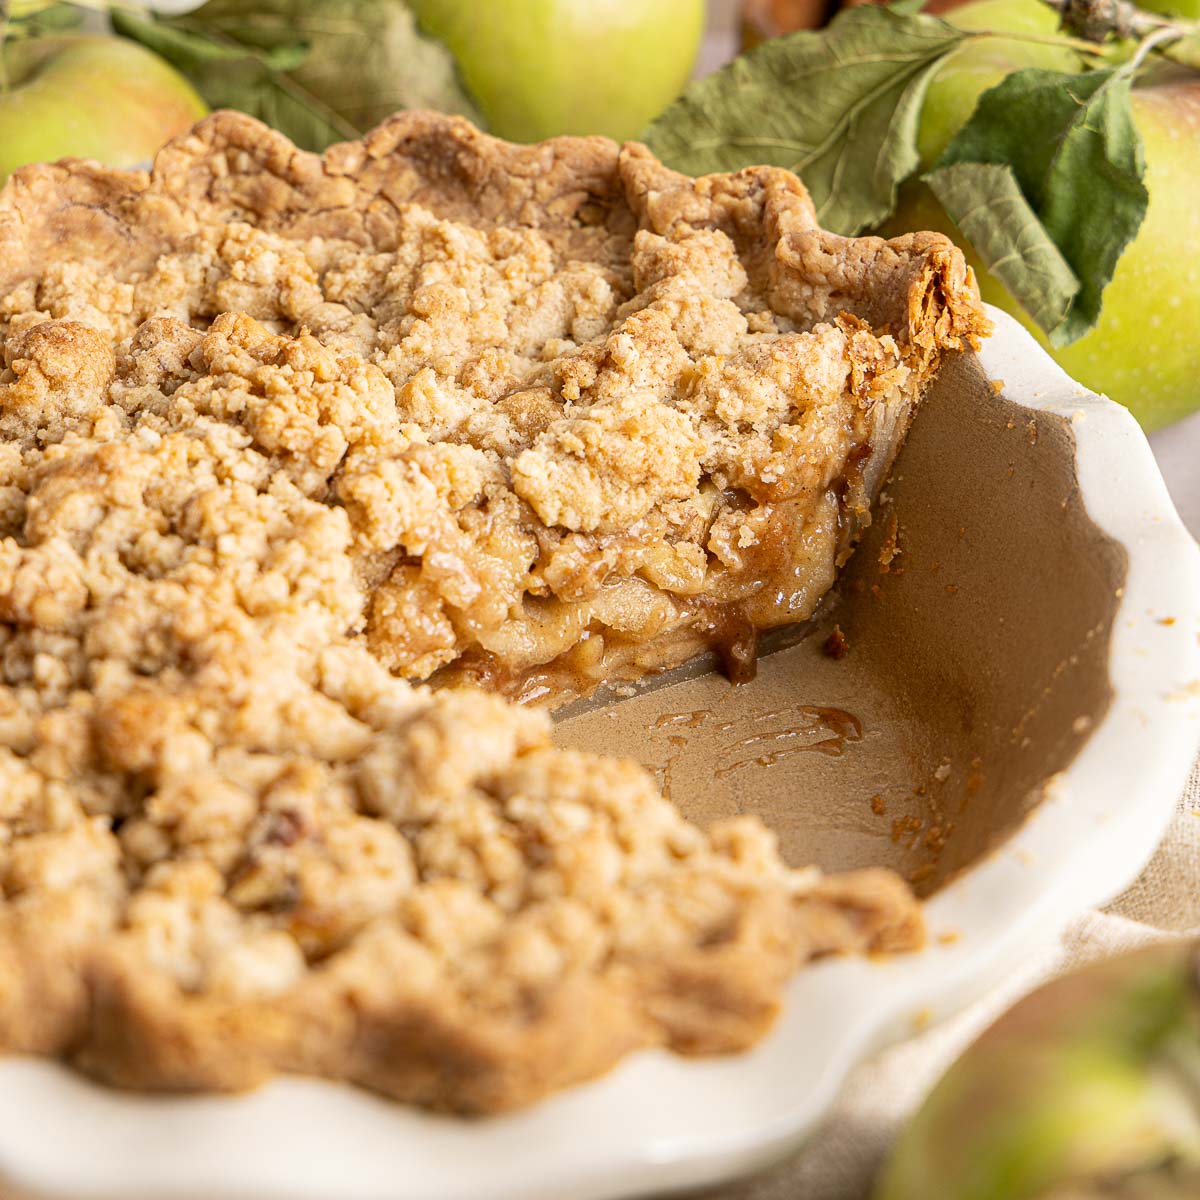
My Recipe Testing Journey
For our first attempt, we tried cooking the apple filling ahead of time, similar to what I do in my classic gluten-free apple pie. Gluten-free pies can get soggy when there’s too much moisture in the filling so we thought this might be the best approach. It turned out good – but I wasn’t settled on if this was the final recipe. I really value keeping my recipes simple and easy-to-make so I wanted to see if we could remove the cooking step and still have good results.
Next, we tried a filling where we didn’t cook the apples ahead of time and instead let the apple sit, then just drained off some of the liquid. While this method was easy, we were missing that yummy, jammy texture of the cooked apples.
We also tried another version where we added sour cream to the apple filling and didn’t cook the apples ahead of time, but the apples were a little too crisp and the flavor just wasn’t quite what we were going for in a Dutch apple pie.
Finally, we went back to cooking the apple filling ahead of time. After all my testing, I really think cooking the apples is worth the extra step for a soft, jammy filling and a perfectly crisp bottom crust!
More Gluten-Free Apple Recipes
Gluten-Free Dutch Apple Pie
Ingredients
Sour Cream Pie Crust
- ½ cup (113g) butter
- 1 cup + 2 tablespoons (169g) gluten-free measure-for-measure flour
- 1 teaspoon granulated sugar
- ½ teaspoon kosher salt
- 1 tablespoon sour cream
- 1½ teaspoons distilled white vinegar
- 3 –4 tablespoons ice water
Apple Filling
- 5 medium-large Granny Smith apples (about 750g after slicing)
- 1 tablespoon fresh lemon juice
- ½ cup (106g) light brown sugar, packed
- 2 tablespoons gluten-free measure-for-measure flour
- 1 teaspoon ground cinnamon
- ⅛ teaspoon ground nutmeg
- Pinch of kosher salt
Crumb Topping
- ½ cup 106g light brown sugar, packed
- ¼ cup 50g granulated sugar
- ¼ teaspoon ground cinnamon
- ½ teaspoon kosher salt
- ½ cup 113g butter, melted
- 1 cup 150g gluten-free measure-for-measure flour
- ¼ cup 25g walnuts
Instructions
- For the sour cream pie crust: Cut the butter into small cubes and place in the freezer while you prepare the rest of the ingredients.
- Add the gluten-free flour, sugar and salt to the bowl of a food processor. Pulse until evenly combined.
- Place a small bowl on top of a kitchen scale and tare the weight. Add the sour cream and vinegar, then add ice water until the mixture reaches 75g. Whisk until smooth and set aside.
- Scatter in the cold butter and pulse until the butter pieces are the size of large peas, about 10 pulses. Add the sour cream mixture and pulse until the dough begins to clump, about 10 more pulses.
- Transfer the dough to a bowl and use your hands to knead it together. If the dough feels too dry, add another tablespoon or so of ice water — but don’t be tempted to add too much liquid! You may need to gather and firmly press it a few times until it comes together. The dough should be moist enough to hold together when pressed, but not sticky.
- Turn out the dough onto a lightly floured surface. Gather it together with your hands, pressing any loose bits into the dough to form a cohesive ball.
- Gently shape it into a 1-inch-thick disc. Wrap the disc tightly in plastic wrap and refrigerate for 1 hour or up to 2 days.
- If the dough has been refrigerated longer than 1 hour, let it sit at room temperature for 15 minutes before rolling.
- Place the dough on a lightly floured pastry mat or a silicone baking mat. Roll the pie crust into a circle 12 inches in diameter. You may need to press it together if it starts to split or break at the edges. This is normal — gluten-free pie crust requires a bit of patience to roll out.
- Use the pastry mat to flip the dough onto a 9-inch pie plate. Gently ease the dough into the plate. Trim any excess dough with scissors and shape the edges as desired.
- Wrap the shaped crust loosely in plastic wrap and place in the freezer for 15 minutes or up to 1 hour, until chilled and firm. Remove the plastic wrap and prick holes all over the bottom and sides of the crust with a fork.
- Place a pizza steel in the oven. (A pizza steel helps ensure a crispy bottom crust.) Preheat the oven to 375°F.
- Line the frozen crust with parchment paper and fill with pie weights. (I use 2 full containers) Bake on the pizza steel until the edges are starting to brown and appear set, about 16–18 minutes.
- Remove the crust from the oven and carefully lift the parchment paper and weights out of the pie. Return the crust to the pizza steel and bake until the bottom just starts to brown, about 8–10 minutes longer.
- For the apple filling: Peel, core and slice the apples into ⅛-inch-thick slices. Place in a wide saucepan. Toss with the lemon juice.
- Add the brown sugar, gluten-free flour, cinnamon, nutmeg and salt and stir until evenly coated.
- Place the saucepan over medium heat and cook the apples for about 5 minutes, just until slightly tender and the sugar has melted. Spoon the apple mixture into the par-baked crust.
- For the crumb topping: In a medium bowl, whisk together the brown sugar, granulated sugar, ground cinnamon and salt. Add the melted butter and stir to combine.
- Add the gluten-free flour and walnuts and use a fork to mix until large crumbs form. Sprinkle the topping evenly over the apples.
- Place the assembled pie on a large baking sheet. Bake at 375°F on the pizza steel for 35–40 minutes, until the crumb topping is golden brown and the filling is visibly bubbling around the edges. If the crust edges begin browning too quickly, loosely cover with foil or a pie shield.
- Transfer to a wire rack and cool for 1–2 hours before slicing so the filling can set.