
This gluten-free quiche Lorraine recipe includes a tried-and-true gluten-free crust recipe. Cream, bacon, onion, and Swiss cheese make the most amazing classic filling.
Serve this with some gluten-free coffee cake for any special occasion! You also might like this gluten-free breakfast casserole.
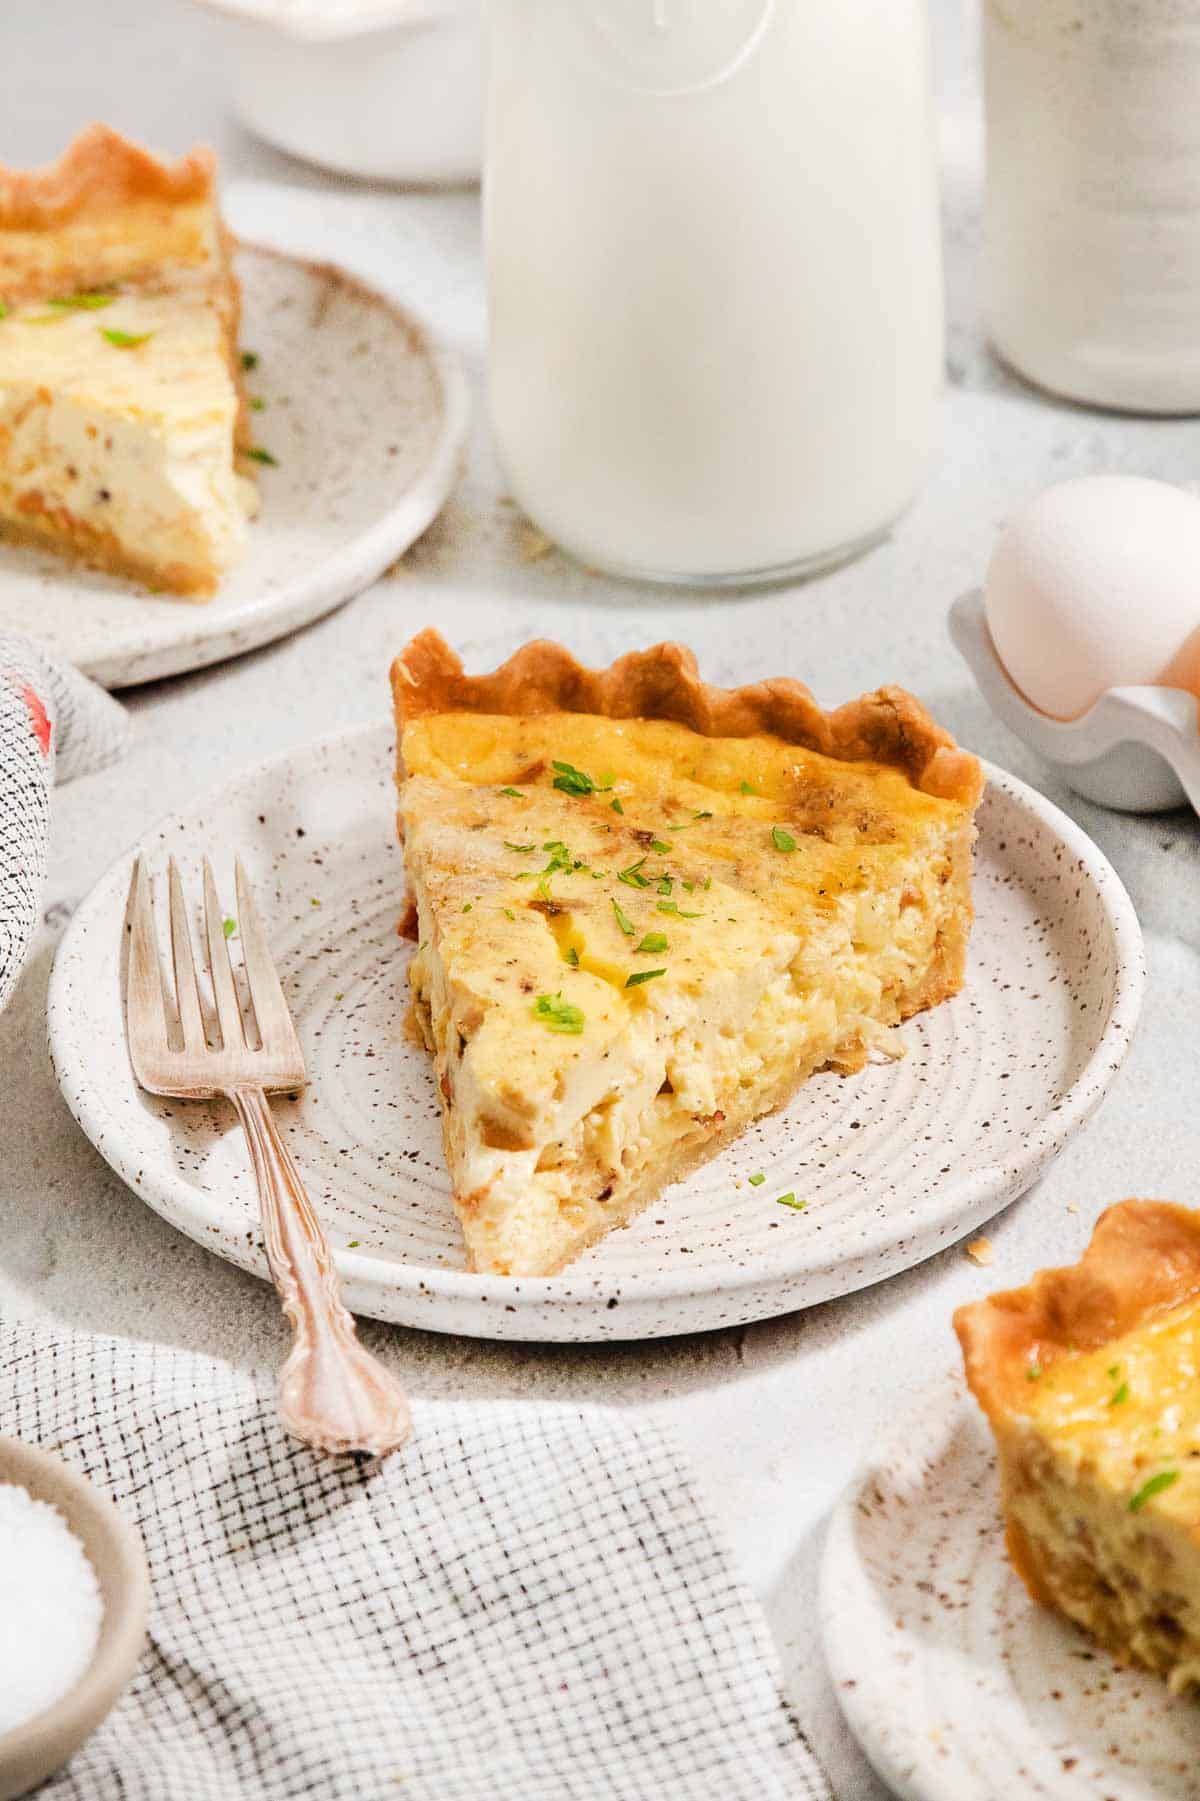
This gluten-free quiche Lorraine recipe is based on an old recipe from my mom’s red and white checkered “Joy of Cooking” cookbook. She used to make this every year for Christmas morning, and now I’ve carried on the tradition with my family!
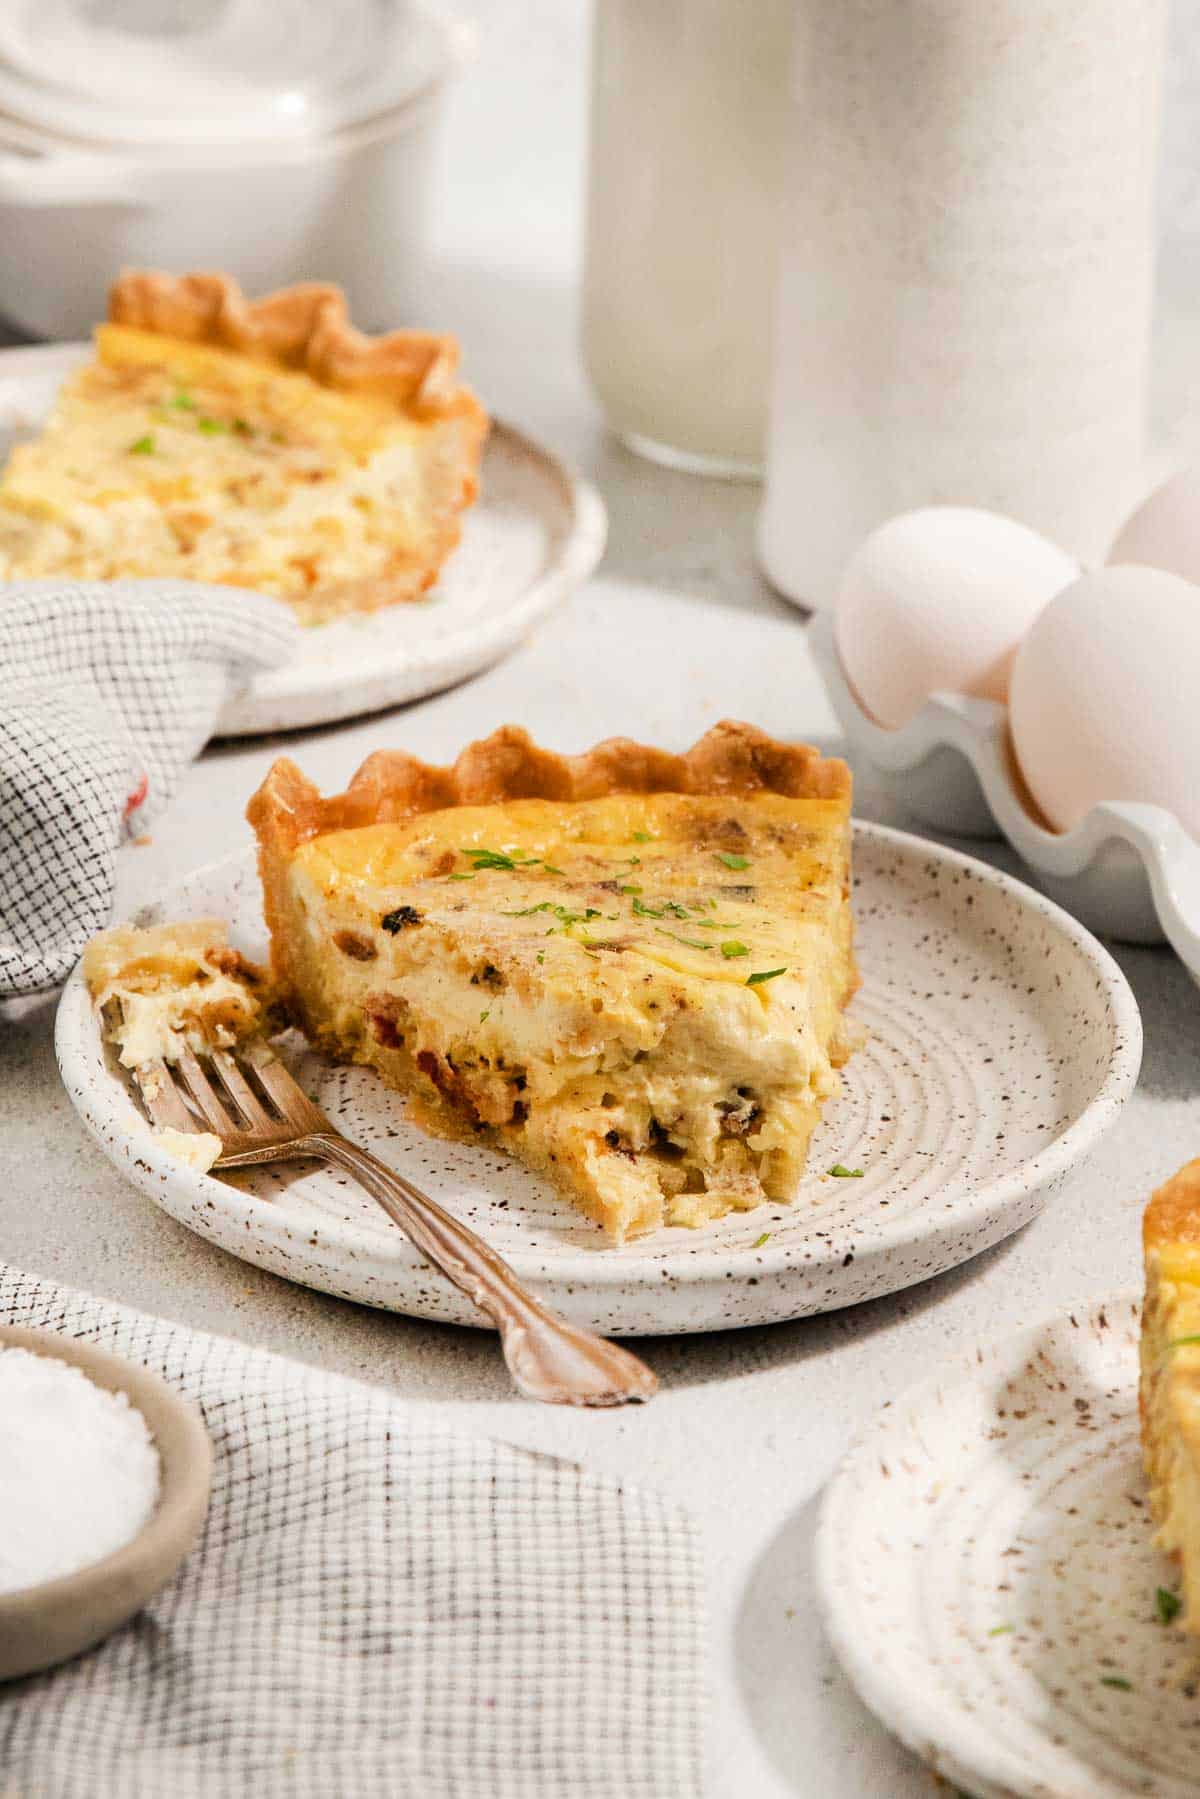
Everyone LOVES the combination of flaky pie crust and creamy filling made with a combination of Swiss cheese, bacon, and caramelized onions. I know you will too!
Why I love this recipe
- Tender, flaky crust: My TRIED-AND-TRUE flaky gluten-free pie crust has been perfected over several years and pairs perfectly with the creamy quiche Lorraine filling.
- Perfect holiday breakfast: I love making this gluten-free quiche Lorraine for Christmas morning, Easter, girls trips, and everything in between!
- Easy to make ahead: This gluten-free quiche Lorraine holds up well for up to three days and can easily be reheat. It’s a great make-ahead option for the busy holiday season or other special occasions!
Gluten-Free Quiche Crust
Ingredients You’ll Need
Here are a few notes on the key ingredients to make this gluten-free quiche Lorraine crust.
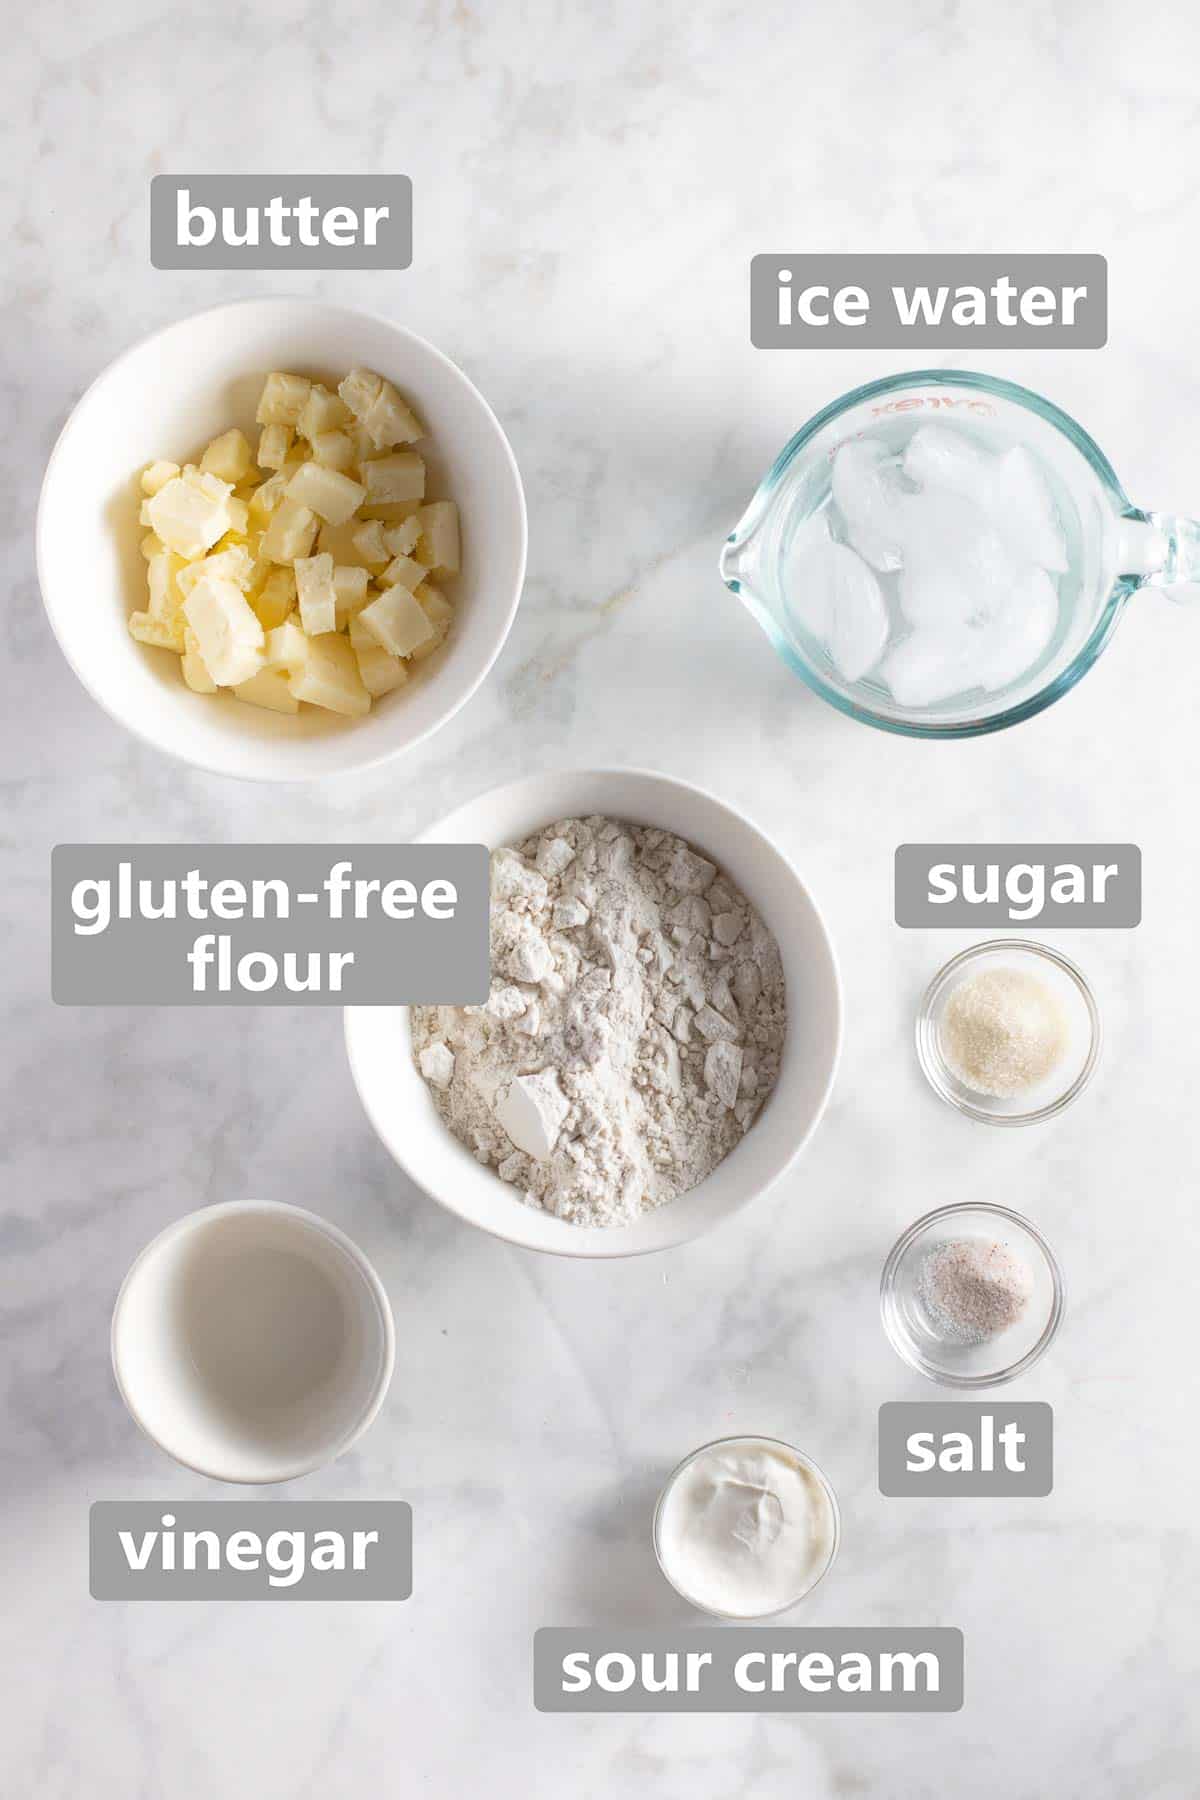
- Gluten-Free Flour: I like to use a high-quality 1:1 gluten-free baking flour that contains xanthan gum. This is my favorite brand.
- Vinegar: I prefer white vinegar or rice vinegar.
- Sour Cream: Gives the dough a little stability and helps it brown.
NOTE: It’s very important to use the listed ingredients and follow the directions when making this pie crust. I’ve tested it many times to get it just right.
How to Make the Crust
Chill butter. Cut the butter until small ¼-inch pieces and freeze for 10-15 minutes.
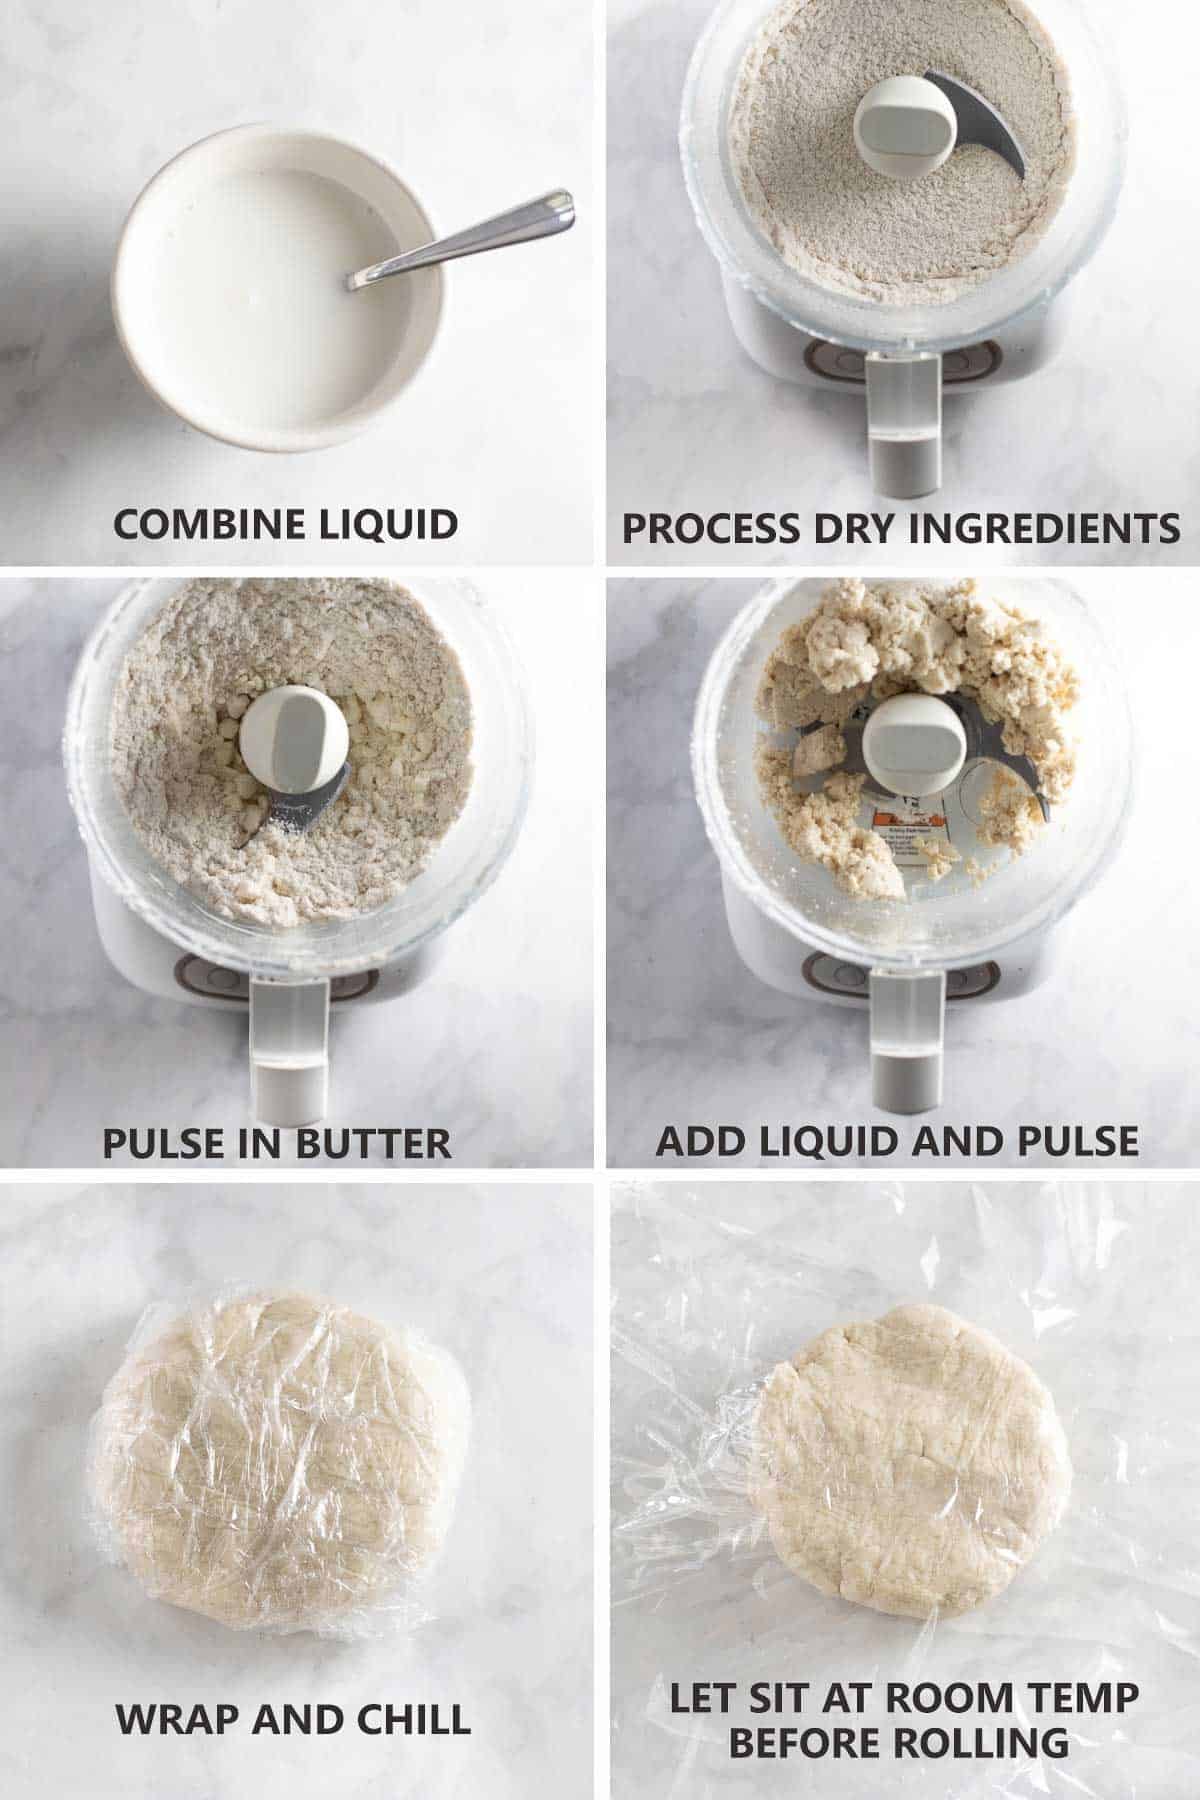
Combine liquid. Combine the ice water, sour cream, and vinegar in a small bowl. Whisk until smooth and set aside.
Process dry ingredients. Process the flour, sugar, and salt in the bowl of a food processor until combined. Scatter the butter over top and pulse until the butter is in small pieces (about the size of large peas), about 10 pulses.
Add liquid and pulse. Add the sour cream mixture and pulse until the mixture begins to clump around the blade, about 10 pulses.
Wrap and chill dough. Turn the dough out onto a piece of plastic wrap. Gather into a a flat disc and wrap tightly in the plastic wrap. Refrigerate for 1 hour or up to 2 days.
Let sit at room temperature. Let the dough sit at room temperature for 15 minutes before rolling.
Tips for Gluten-Free Pie Dough Success
- I really like making this pie crust in the food processor because it’s quick and reliable. You could also cut in the butter by hand using a fork or pastry cutter.
- It’s important to let the pie dough sit in the fridge for at least 1 hour (up to overnight) before rolling it out. This allows the dough to hydrate form a cohesive ball.
- After the chilling time, the pie dough also has to sit at room temperature for 15 minutes before you roll it out.
- Gluten-free pie dough is more delicate than regular pie dough. It helps to roll the dough in-between plastic wrap so you can easily transfer it to the pie plate.
Shape the Crust
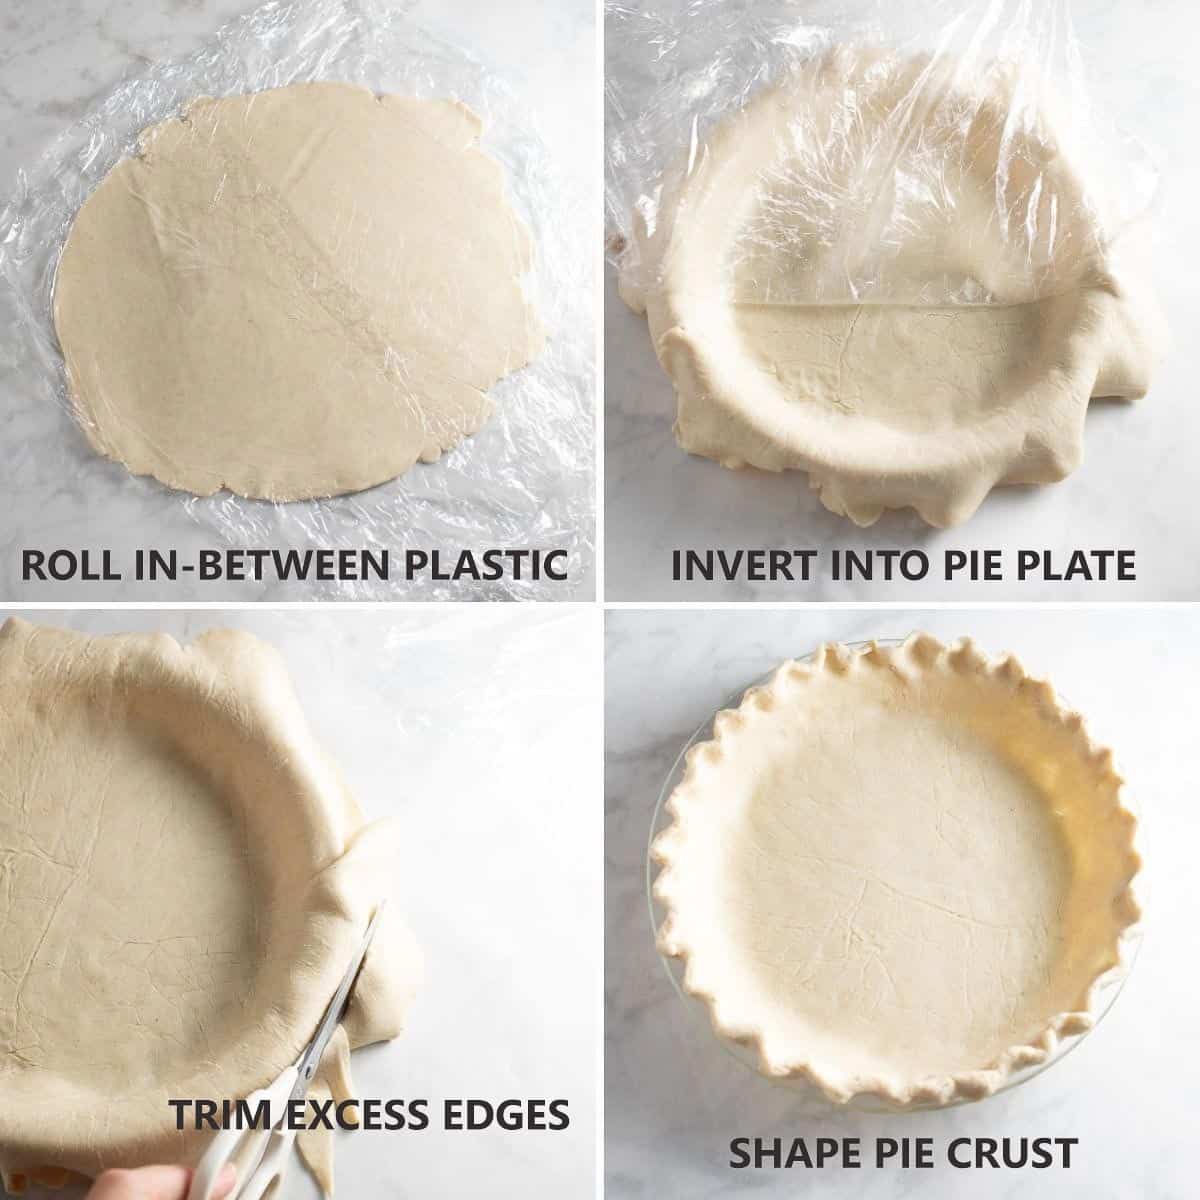
Roll pie crust. Roll the pie crust between 2 large pieces of plastic wrap.
Invert into pie plate. After rolling, remove the top piece of plastic wrap and flip into a 9-inch pie pan. Gently ease the dough into the edges of the pan before removing the 2nd piece of plastic wrap. Trim any excess edges with scissors and shape the edges as desired.
Trim excess edges. Gently trim the crust edges and shape as usual.
Chill crust. Wrap the shaped pie crust loosely in plastic and place in the freezer for 15 minutes or up to 1 hour until chilled and firm.
Gluten-Free Quiche Lorraine Filling
Ingredients You’ll Need
Once the gluten-free quiche crust is shaped in the pan, it needs to chill for another 15 minutes to 1 hour. This is the perfect time to make the filling.
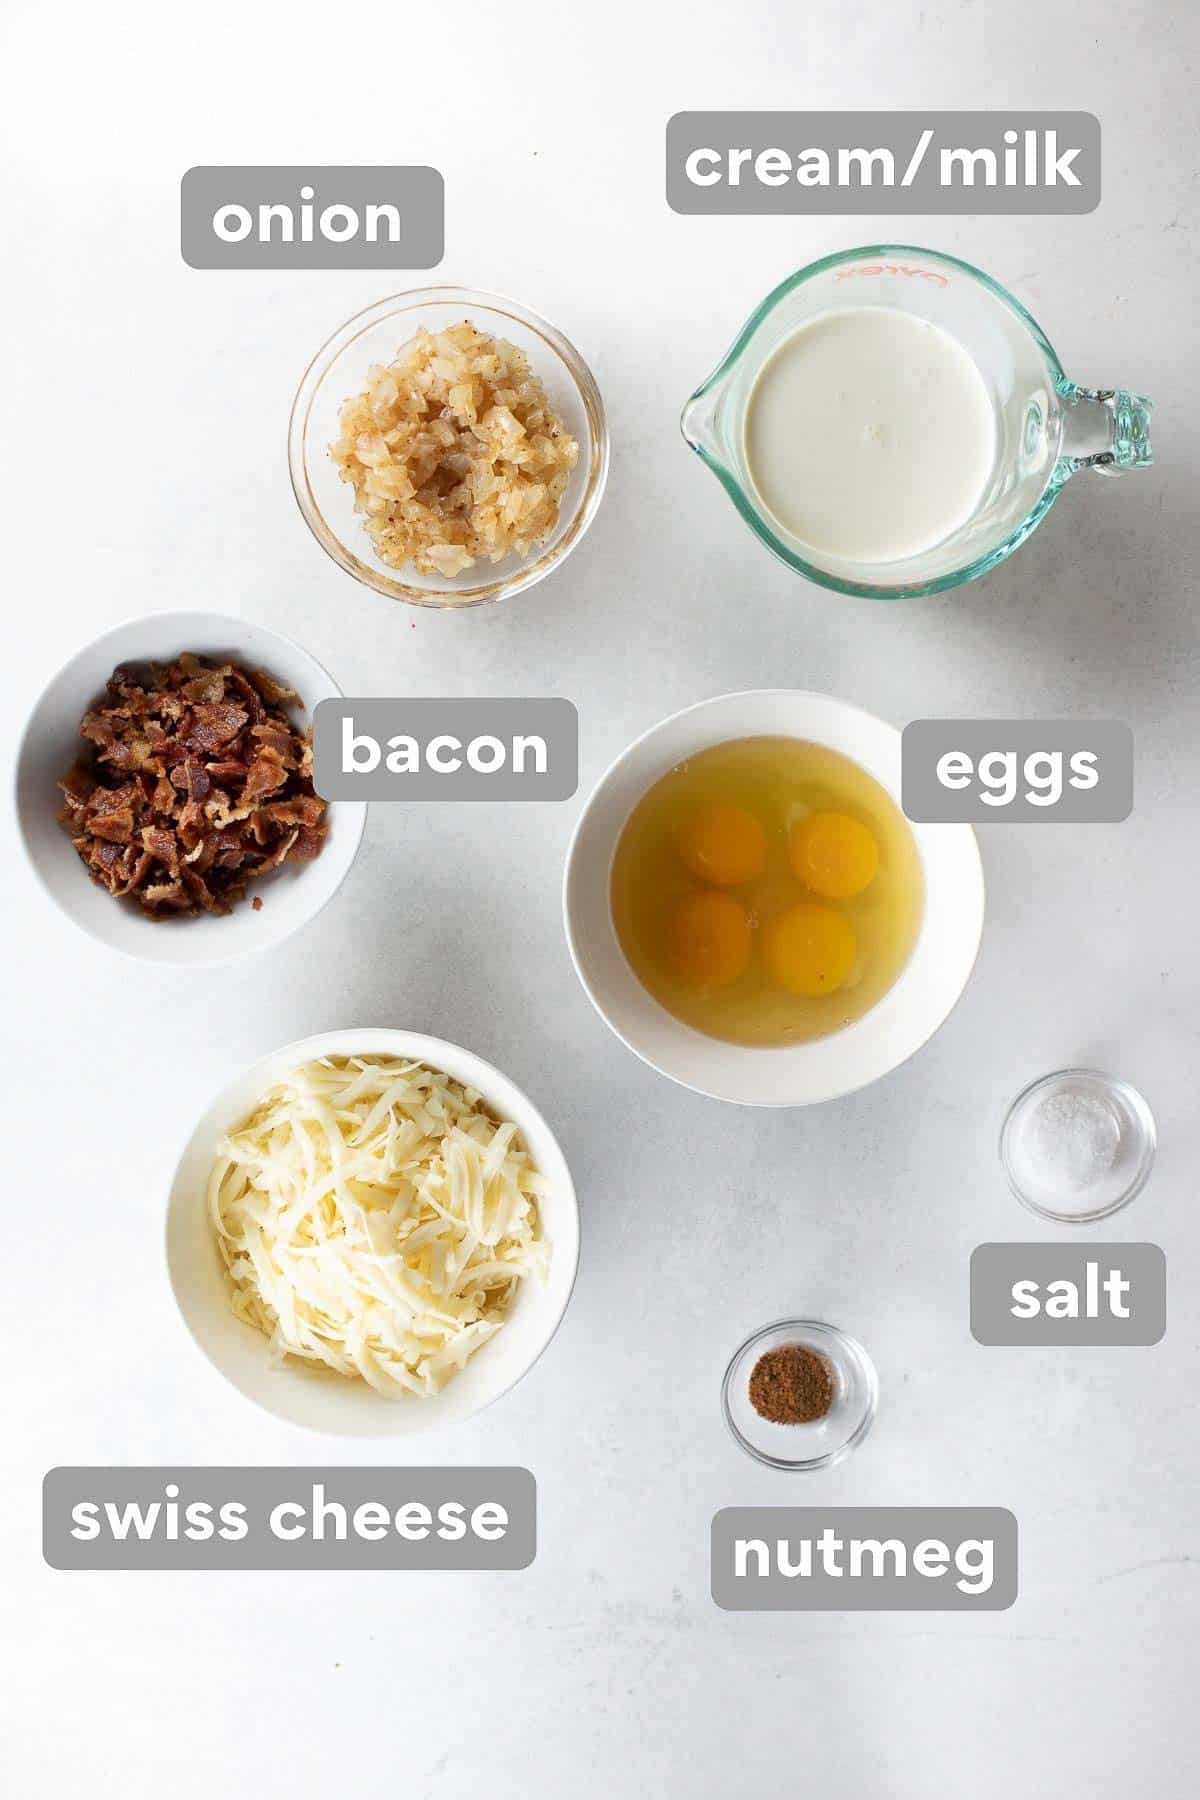
- Heavy cream: It’s important to use heavy whipping cream for this gluten-free quiche recipe, not half and half or whole milk.
- Swiss cheese: When it comes to quiche, I think the classic combination of bacon, onion and Swiss in quiche Lorraine can’t be beaten. However, if you prefer a different type cheese, you could also try Cheddar cheese or Gruyere cheese.
How to Make the Filling
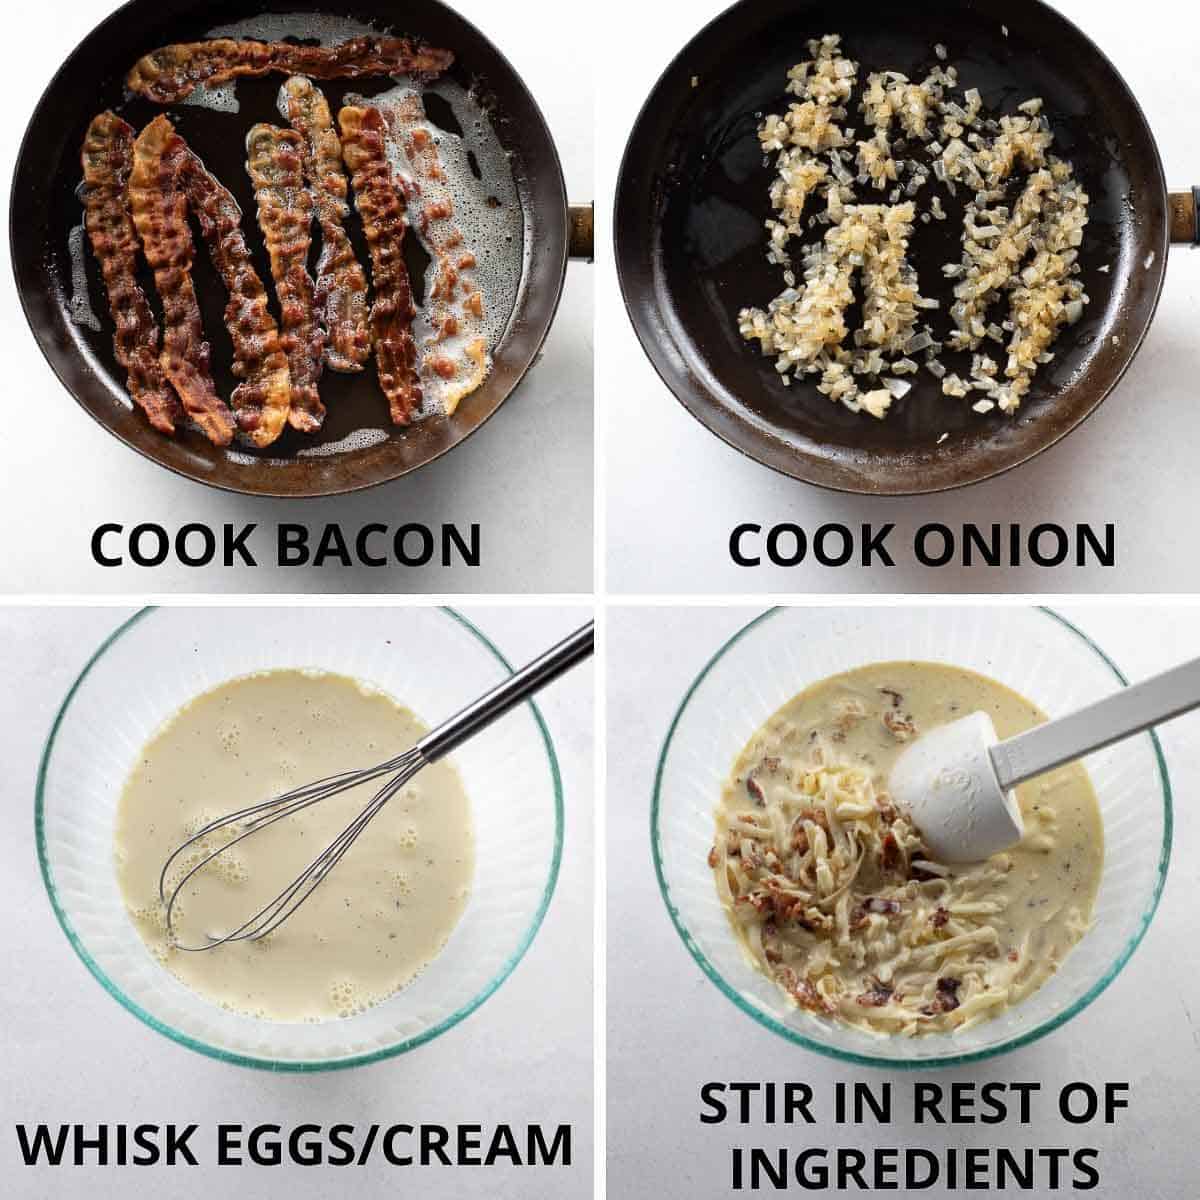
Cook bacon. Cook the bacon over medium-low heat until crisp. Place on a plate lined with a paper towel to cool then crumble.
Cook onion. In the pan you used to cook the bacon, pour off all but 2 tablespoons of the bacon grease. Add the onion and cook over medium-high heat until softened, about 6-8 minutes. Let the onion cool.
Whisk eggs and cream. In a medium or large bowl, whisk together the large eggs, cream, milk, flour, salt, and nutmeg until smooth. Stir egg mixture in the Swiss cheese, bacon, and onion.
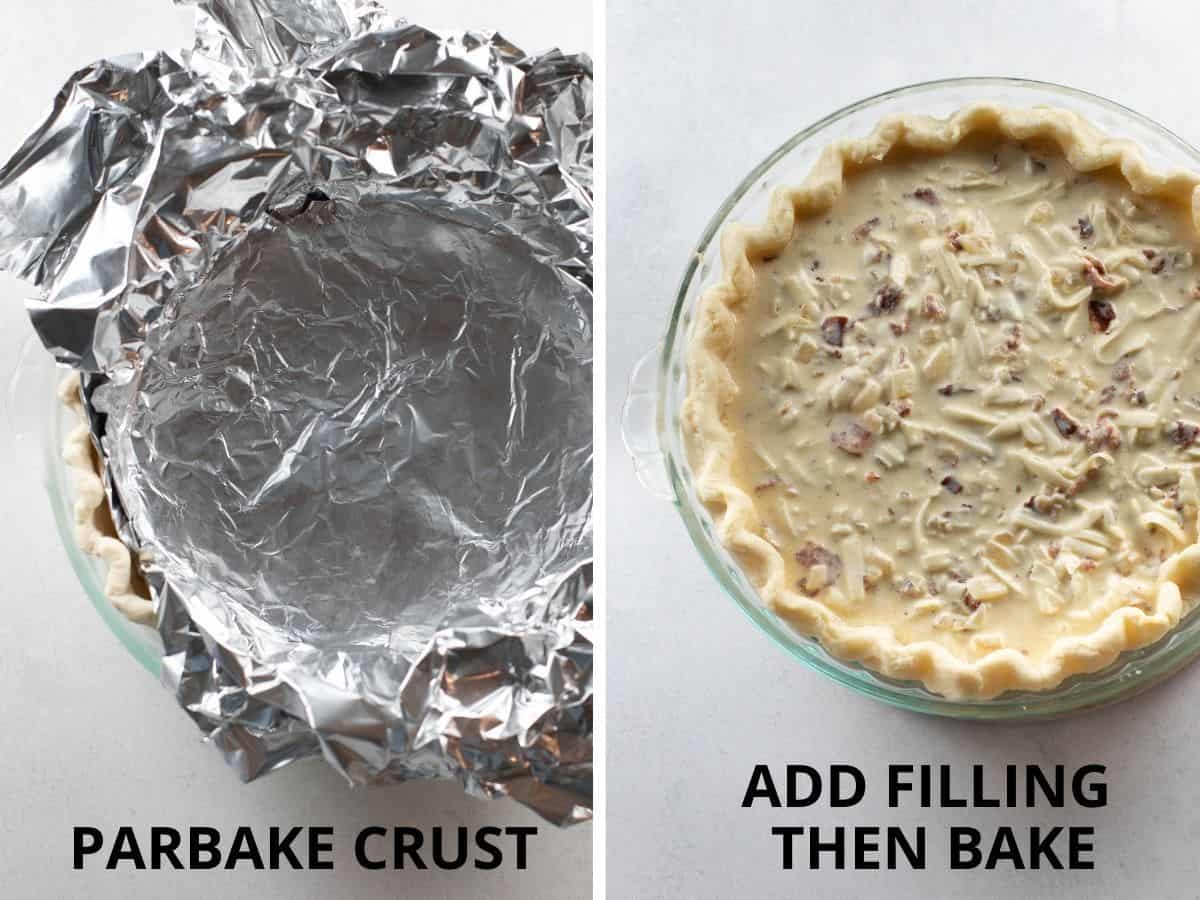
Parbake crust. To help the pie crust keep its shape, press 2 layers of foil into the crust to line it. Bake the crust for 10-12 minutes, until nearly done. This will ensure the quiche crust is crispy on the bottom.
Bake quiche. Reduce the oven temperature to 325F. Pour the filling into the hot crust and bake for 45-50 minutes, until the center is set and golden brown. (I test the middle with a knife or toothpick and make sure it comes out clean.)

Storage/Make-Ahead Instructions
To make ahead: This gluten-free quiche Lorraine is a great make-ahead option. You can store it in the refrigerator for up to 3 days. You can reheat individual slices in the microwave or wrap the entire quiche in foil and warm in the oven at 325F for 10-15 minutes (or until warmed through) before serving.
To store: Store leftover quiche in the fridge for up to 3 days. Reheat in the microwave or wrap the slices in foil and warm in the oven at 325F for 10-15 minutes (or until warmed through) before serving.
Recipe Tips
- Feel free to make ahead: This gluten-free quiche Lorraine can be fully prepared and baked ahead of time. Just reheat it in the oven before serving and you’re ready to go!
- Blind bake the crust: To help the pie crust keep its shape and stay crispy, blind bake the crust before adding the filling. Bake the crust for 10-12 minutes, until nearly done.
- Use high-quality gluten-free flour: For the best flaky gluten-free crust, I like to use a high-quality 1:1 gluten-free baking flour that contains xanthan gum. This is my favorite brand.
- For crustless quiche Lorraine: If you want to make this classic quiche Lorraine recipe lower carb, you could make the filling and bake it in a pie pan without the crust.
More Gluten-Free Brunch/Breakfast Recipes:
- Gluten-Free Blueberry Muffins: These soft and tender blueberry muffins are made from whole milk yogurt (dairy-free option too!) and fresh, juicy blueberries.
- Gluten-Free Waffles: This gluten-free waffle recipe makes the best light and crispy homemade waffles. Made with easy-to-find ingredients, it’s sure to become your go-to weekend breakfast!
- Sweet Potato Crust Quiche: Eggs, goat cheese, and leeks come together for a creamy, savory quiche in a sweet potato crust! It’s naturally gluten-free and sure to please a crowd—a winning combination that’s perfect for your next holiday brunch.
- Gluten-Free Dutch Baby: This gluten-free Dutch baby (also known as a German pancake) is an easy breakfast favorite! With a light custard base, fluffy sides and edges, and a rich buttery flavor, you’d never guess this is gluten-free!
- Gluten-Free Cranberry Bread: This sweet gluten-free cranberry orange bread is dotted with fresh, tart cranberries and topped with a zesty orange citrus glaze! It’s the perfect treat for the holiday season.
- Gluten-Free Breakfast Casserole: This sausage hashbrown breakfast casserole is a total crowd-pleaser! It’s full of flavorful sausage and veggies and is one of my favorite recipes for a holiday breakfast.

Gluten-Free Quiche Lorraine
Ingredients
For the Crust:
- 8 tablespoons butter (1 stick)
- 3 tablespoons ice water
- 1 1/2 tablespoons sour cream
- 1 1/2 teaspoons white vinegar or rice vinegar
- 1 cup + 2 tablespoons gluten-free 1:1 baking flour (185 grams)
- 1 teaspoon sugar
- 1/2 teaspoons salt
For the Filling:
- 8 slices bacon
- 1 medium onion finely diced
- 4 eggs
- 1 cup heavy whipping cream
- 1 cup milk
- 1 tablespoon gluten-free 1:1 baking flour
- 1/2 teaspoons salt
- dash nutmeg
- 1 1/2 cups freshly shredded Swiss cheese (6 oz)
Instructions
Make the Crust:
- Cut the butter until small ¼-inch pieces and freeze for 10-15 minutes.
- Combine the ice water, sour cream, and vinegar in a small bowl. Whisk until smooth and set aside.
- Process the flour, sugar and salt in the bowl of a food processor until combined. Scatter the butter over top and pulse until the butter is the size of large peas, about 10 pulses.
- Add the sour cream mixture and pulse until the mixture begins to clump around the blade, about 10 pulses.
- Turn the dough out onto a piece of plastic wrap. Gather into a a flat disc and wrap tightly in the plastic wrap. Refrigerate for 1 hour or up to 2 days.
- Let the dough sit at room temperature for 15 minutes before rolling. Roll the pie crust between 2 large pieces of plastic wrap.
- After rolling, remove the top piece of plastic wrap and flip into a 9-inch pie plate. Gently ease the dough into the edges of the pan before removing the 2nd piece of plastic wrap. Trim any excess edges with scissors and shape the edges as desired.
- Wrap the shaped pie crust loosely in plastic and place in the freezer for 15 minutes or up to 1 hour until chilled and firm.
Make the Filling:
- Cook the bacon over medium-low heat until crisp. Place on a paper-towel lined plate to cool then crumble.
- In the pan you used to cook the bacon, pour off all but 2 tablespoons of the bacon grease. Add the onion and cook over medium-high heat until softened, about 6-8 minutes. Let the onion cool.
- In a medium bowl, whisk together the eggs, cream, milk, flour, salt and nutmeg until smooth. Stir in the Swiss cheese, bacon and onion.
- Preheat the oven to 450F. To help the pie crust keep its shape, press 2 layers of foil into the crust to line it. Bake the crust for 10-12 minutes, until nearly done. This will ensure the quiche crust is crispy on the bottom.
- Reduce the oven temperature to 325F. Pour the filling into the hot crust and bake for 45-50 minutes, until the center is set. (I test the middle with a knife or toothpick and make sure it comes out clean.)
- Let cool at least 20 minutes before serving. This quiche can also be cooled and served at room temperature. Store in the refrigerator and reheat slices individually for up to 3 days. Enjoy!


Very tasty quiche and finally a great gluten free pie crust that’s actually flaky. Wonderful dish to prepare ahead of time and slices reheats well in oven or toaster oven. Definitely my favorite go to breakfast dish.
Excellent quiche! I added some sliced fresh mushrooms, asparagus and grape tomatoes to get more veggies in. Used a larger 10” pie dish to accommodate the extra ingredients and rolled out the crust thinner to fit the larger pie plate. Absolutely delicious!
Those sounds like delicious additions! Great to know the crust worked in a 10″ pie dish. I’ll have to try that myself sometime!
Love many of your recipes and have subscribed to your email list and have not received your gluten free dinners cookbook. Could you please look into that . Would love to have your cookbook.
I love the filling in this quiche and the crust is actually really easy to make too! Perfect for a fancy brunch without having to put forth too much effort.