
Erin’s Recipe Rundown

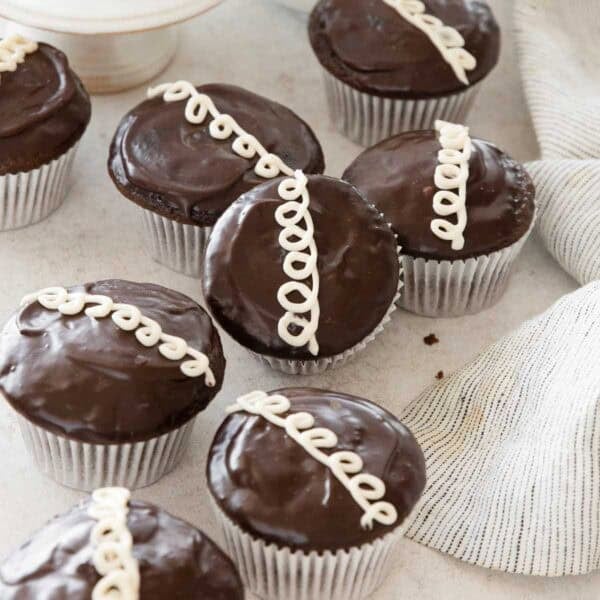
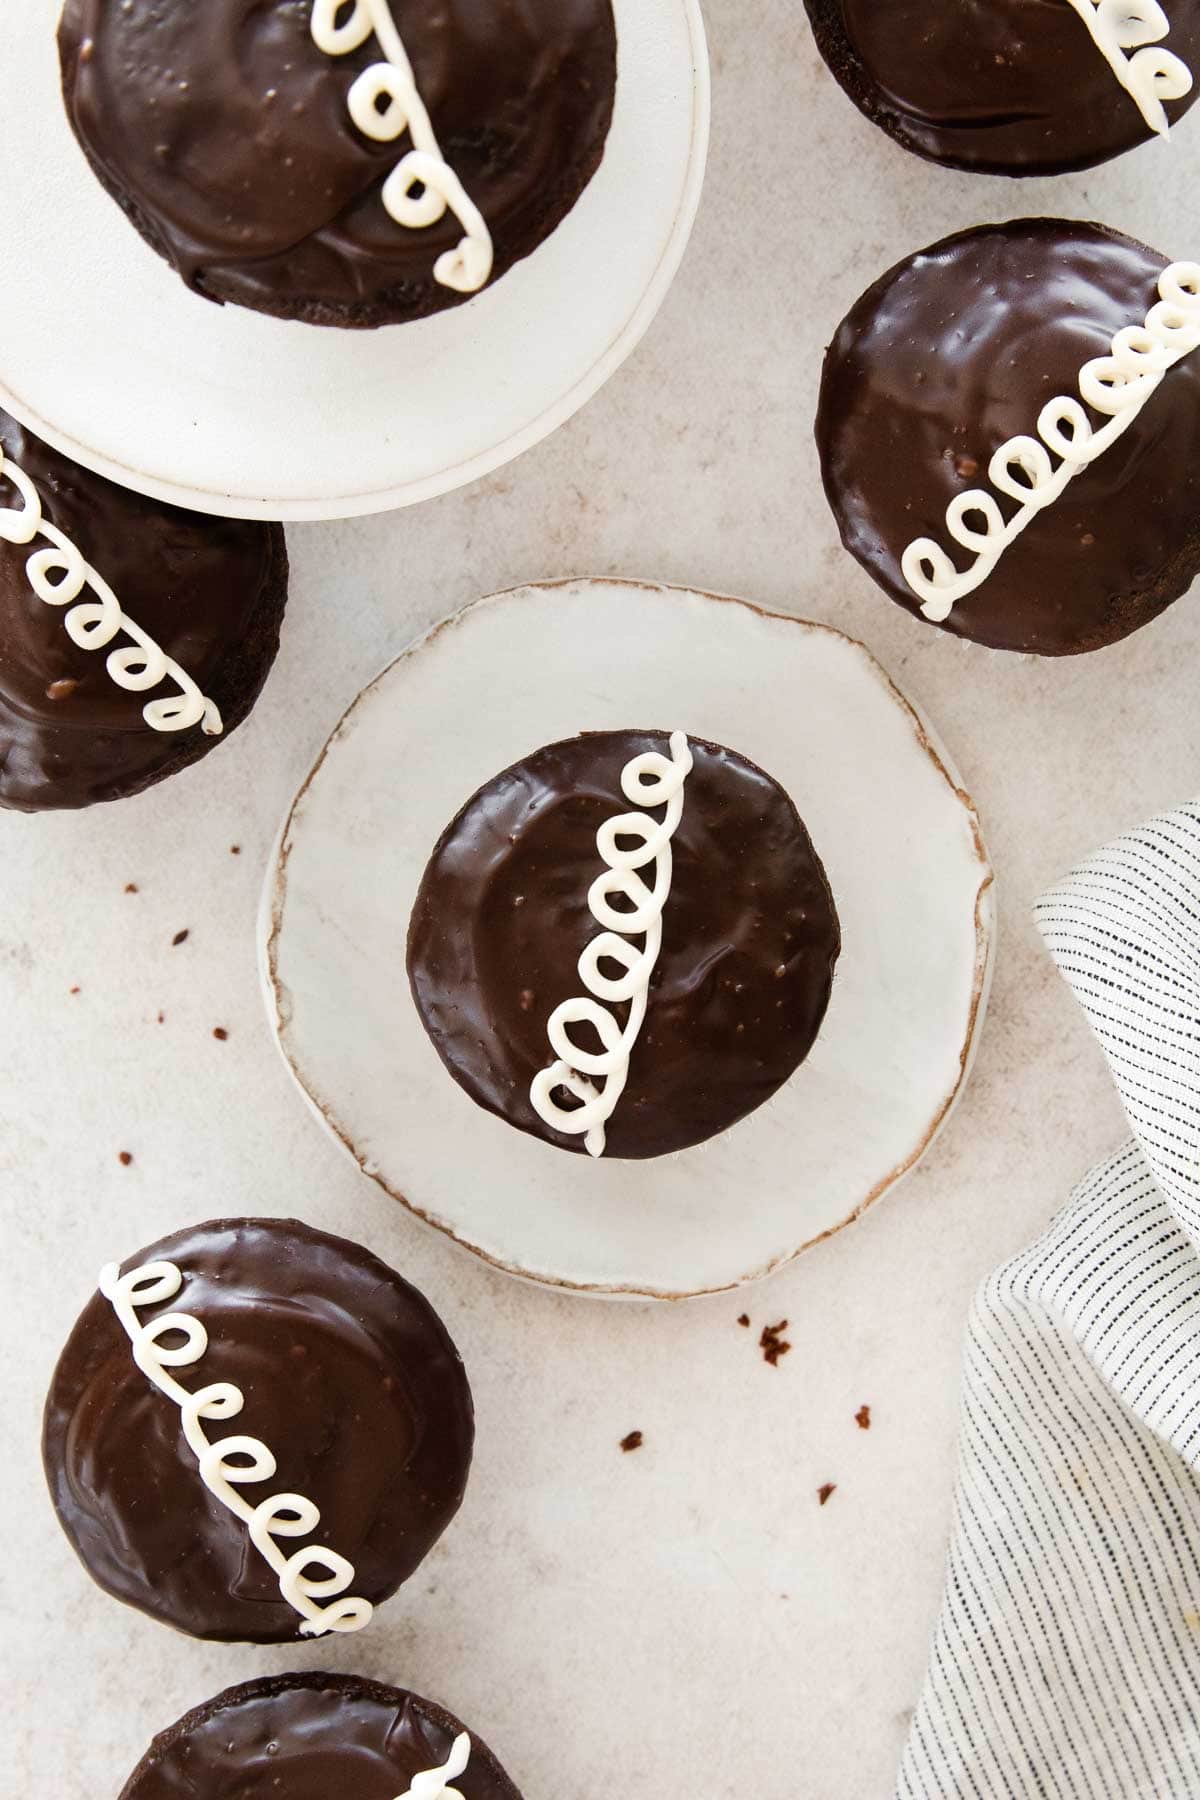
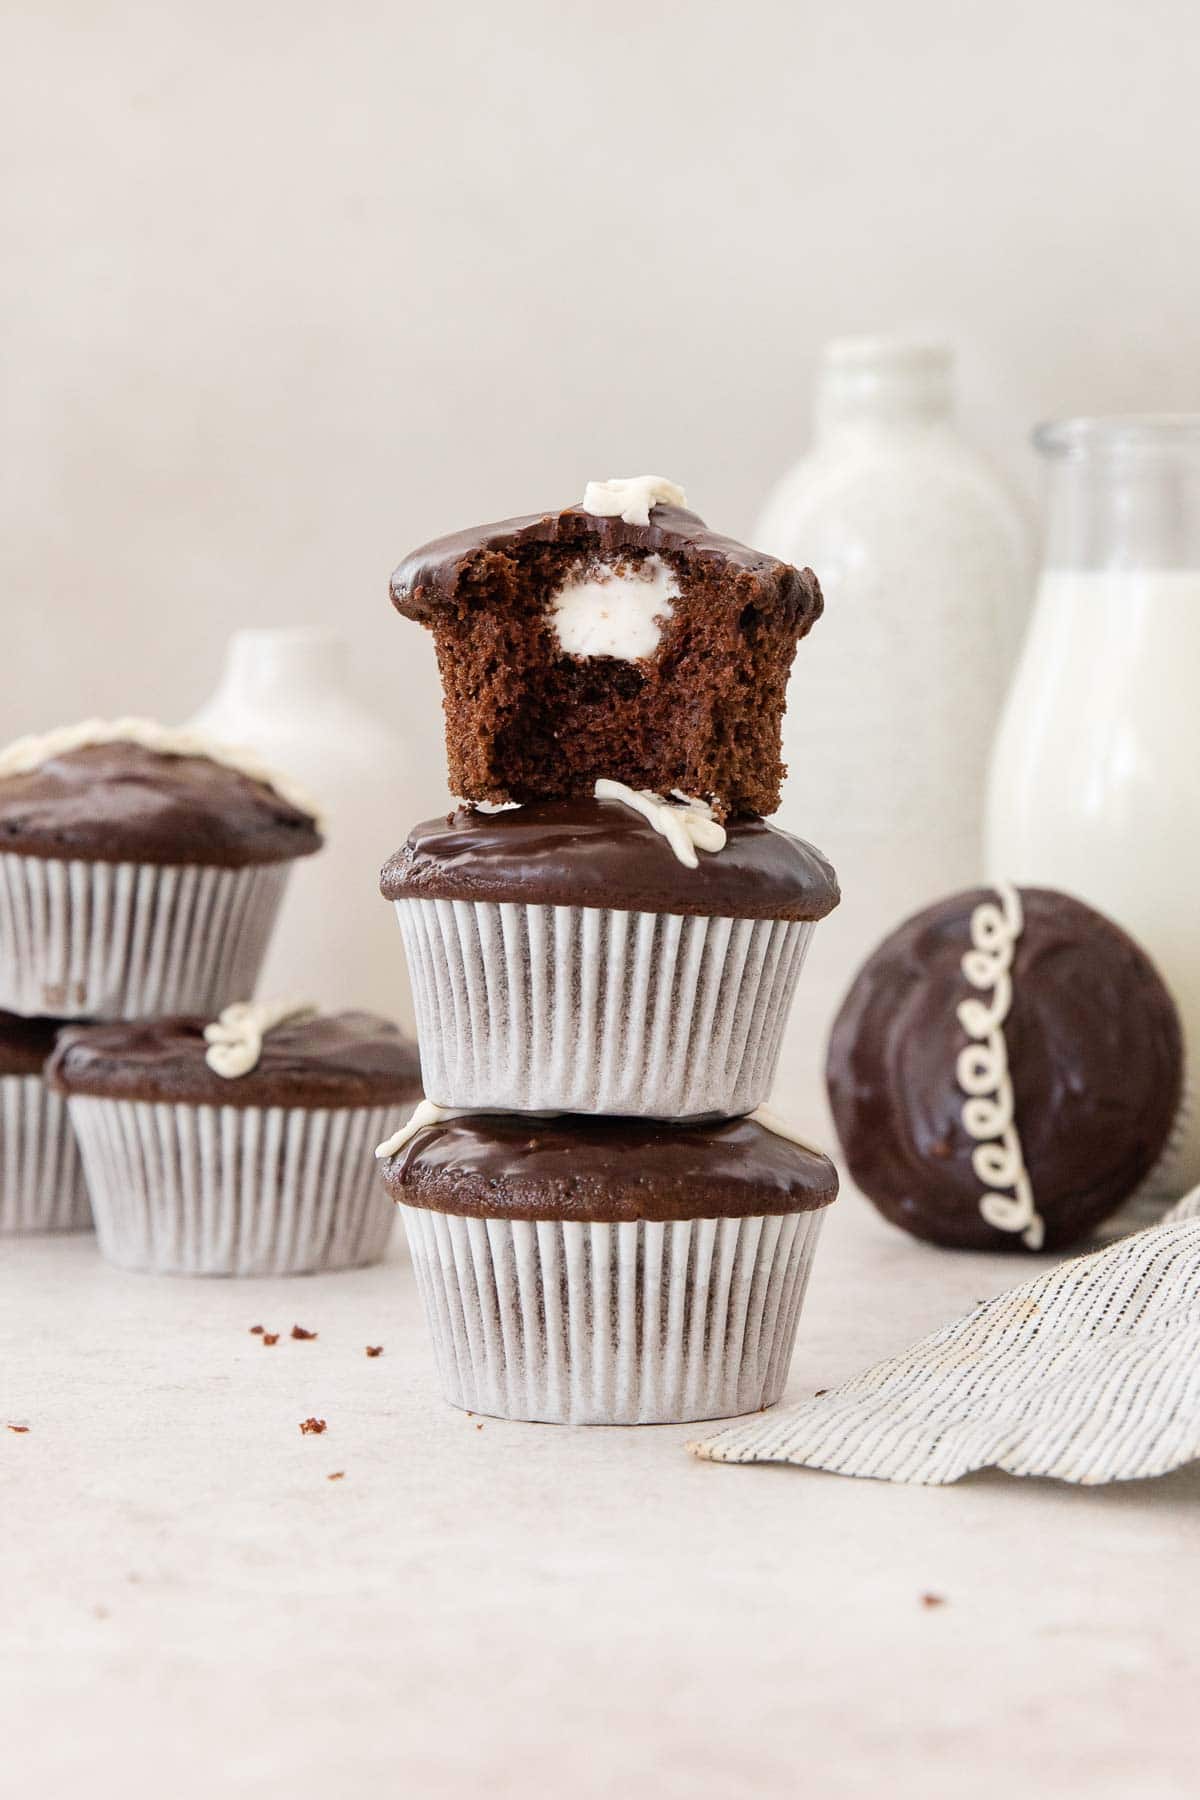
These gluten-free Hostess cupcakes are everything I remember about childhood, but better! Soft chocolate cake, creamy marshmallow filling, glossy ganache, and a classic vanilla swirl make for an iconic flavor combo. Plus, they’re surprisingly simple to make at home.
Why You’ll Love Them: These nostalgic cupcakes are seriously moist with a fluffy marshmallow center, rich chocolate ganache, and signature vanilla swirl. They’re impressive but relatively easy, with a dairy-free option.
Top Tips: Let the cupcakes cool completely before filling and glazing, or everything will melt. Use chopped chocolate bars (not chips) for the smoothest ganache.
For more gluten-free copycat recipes, try gluten-free oatmeal cream pies, gluten-free iced oatmeal cookies, gluten-free Oreo Crumbl cookies, and gluten-free Starbucks-style cake pops.
xoxo erin
Ingredients You’ll Need
Here are a few notes on some of the key ingredients to make gluten-free Hostess cupcakes. Jump to the recipe card below for the exact measurements.
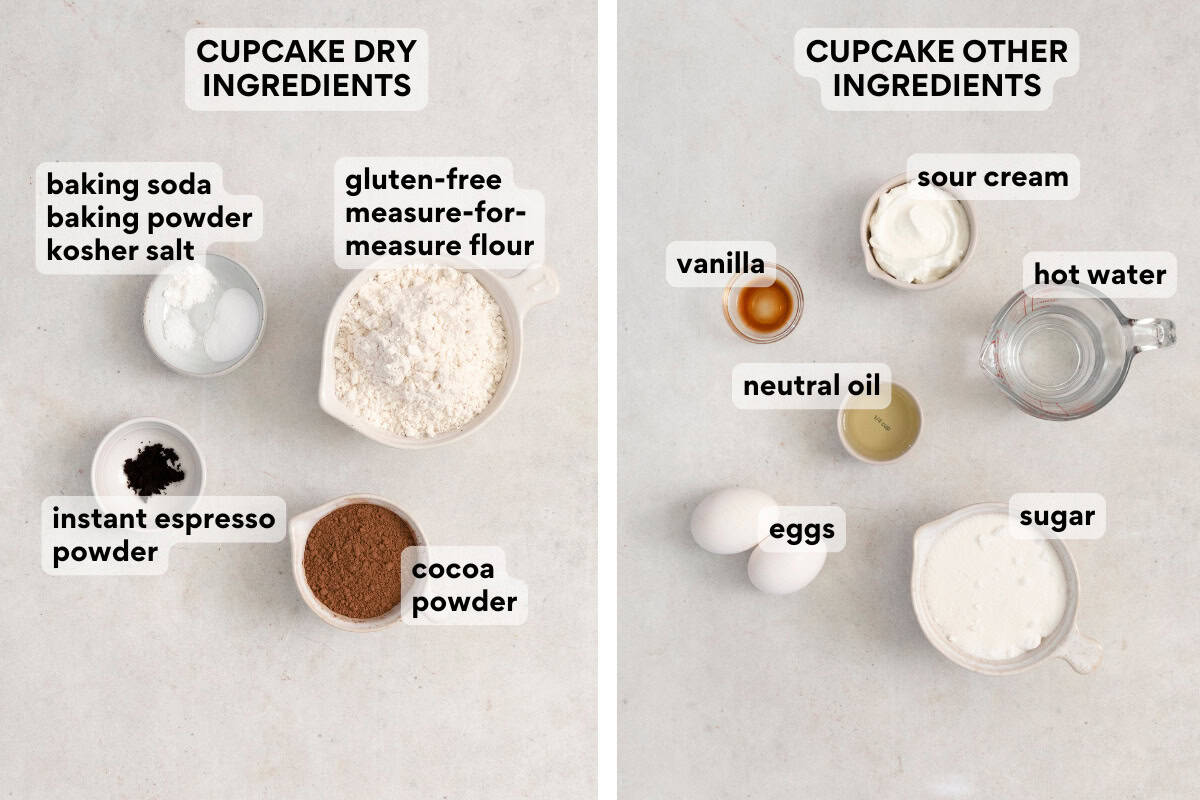
Gluten-free measure-for-measure flour: For best results, use a high-quality gluten-free flour blend that contains xanthan gum. King Arthur Flour Gluten-Free Measure-For-Measure Flour is my favorite gluten-free flour. I’ve also had good results with Bob’s Red Mill Gluten-Free 1:1 Baking Flour.
Instant espresso powder: This is optional, but really helps deepen the chocolate flavor without making the cupcakes taste like coffee.
Cocoa powder: Use a natural cocoa powder (like Hershey’s) for best results. Don’t use Dutch-processed—natural cocoa works better with baking soda and will affect how the cupcakes rise.
Sour cream: This is key for super moist cupcakes with a tender, soft crumb. Don’t skip! Full-fat works best.
Hot water: This “blooms” the cocoa powder, bringing out a richer, deeper chocolate flavor.
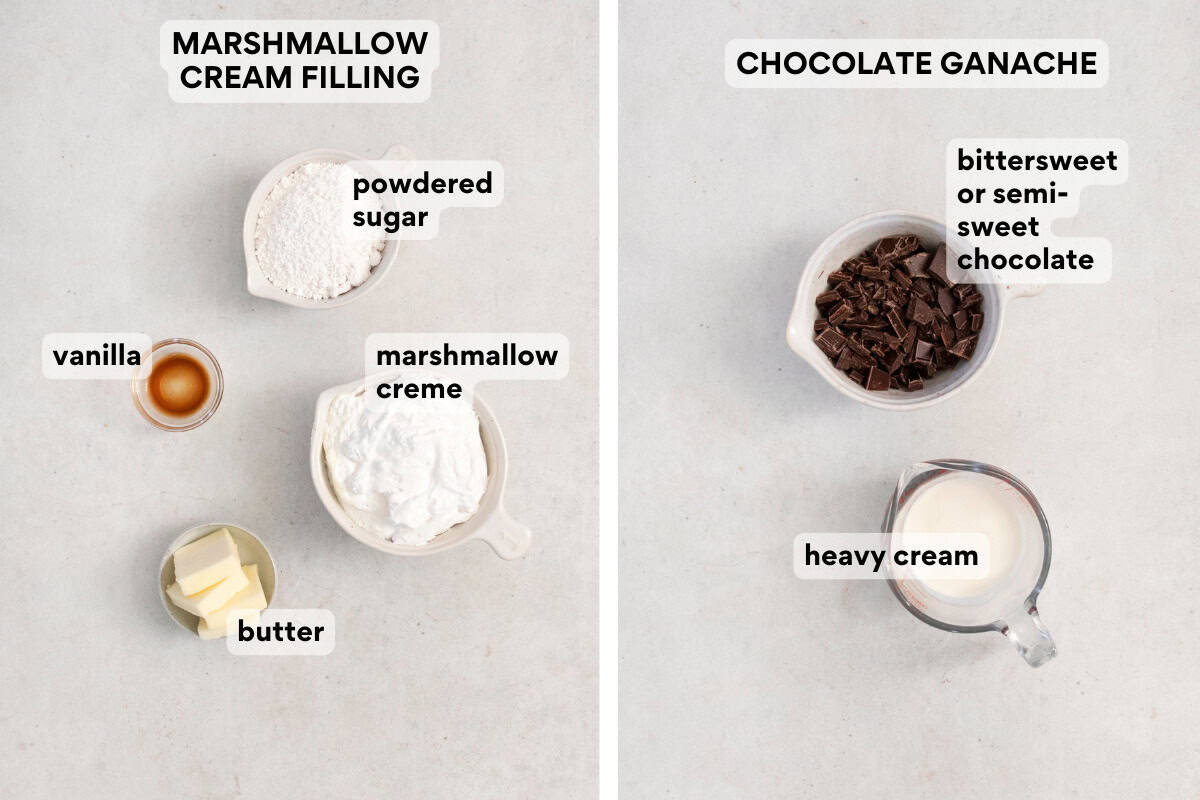
Marshmallow creme: You can use Marshmallow Fluff or any other marshmallow creme you can find. If it’s too sticky, lightly butter your spatula and the opening of your piping bag to make filling easier.
Chocolate: Use bittersweet or semi-sweet chocolate bars rather than chocolate chips. They melt smoother and give you a glossy finish! I prefer bittersweet, but semi-sweet works great too.
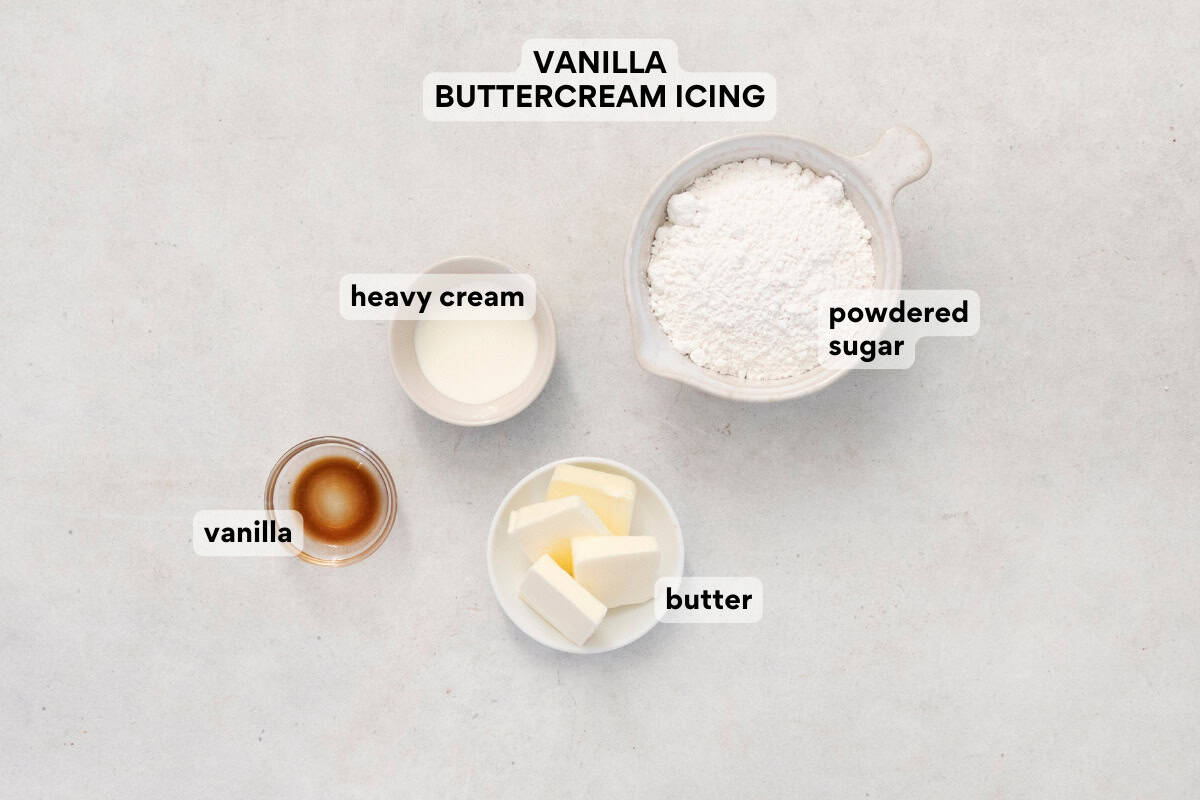
Butter: I always use salted butter when baking—it gives the icing more depth of flavor!
Heavy cream: Just a tablespoon makes for a smoother, more pipeable icing. Whole milk will also work, but heavy cream gives a better consistency for clean icing swirls.
How to Make Gluten-Free Hostess Cupcakes
Here’s an overview of how to make this recipe. You can jump to the recipe for the full instructions!
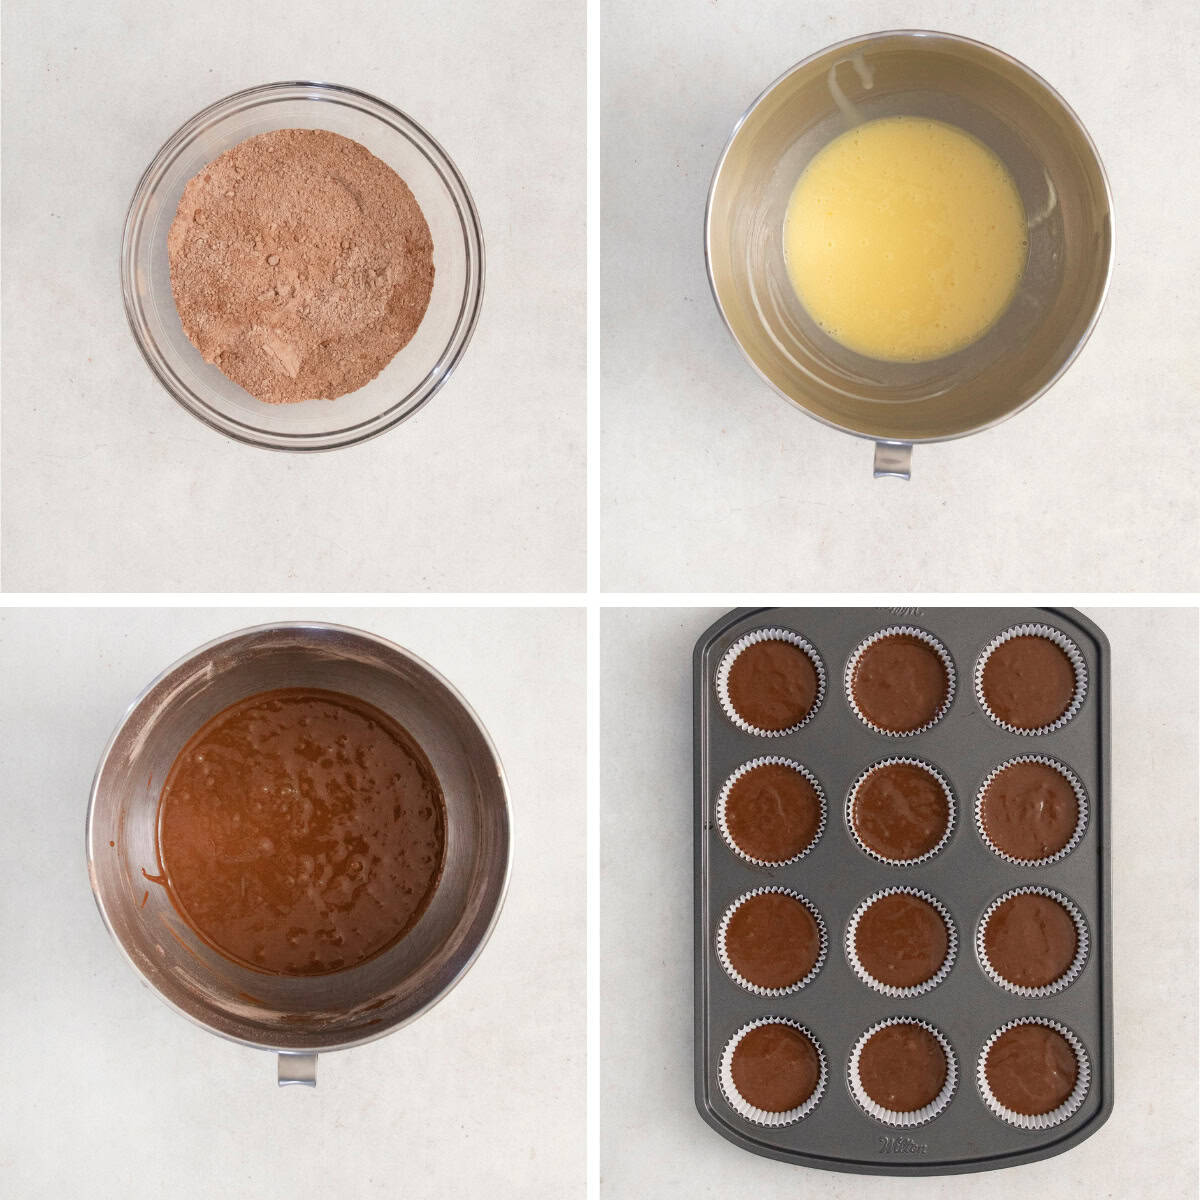
Mix the dry ingredients: Whisk together the dry ingredients and espresso powder (if using) until evenly combined. Make sure there aren’t any lumps!
Beat the wet ingredients: In another bowl, combine wet ingredients and beat until smooth and well blended.
Combine wet and dry: Slowly add the dry ingredients in three phases, mixing just until incorporated after each one. The batter will be thick.
Add the hot water: Gently pour in the hot water while mixing on low. Beat for a few minutes. The batter will thin out and become silky smooth.
Bake the cupcakes: Divide the batter into lined muffin cups, filling each about ⅔ full. Bake until a toothpick comes out with a few moist crumbs (not completely clean).
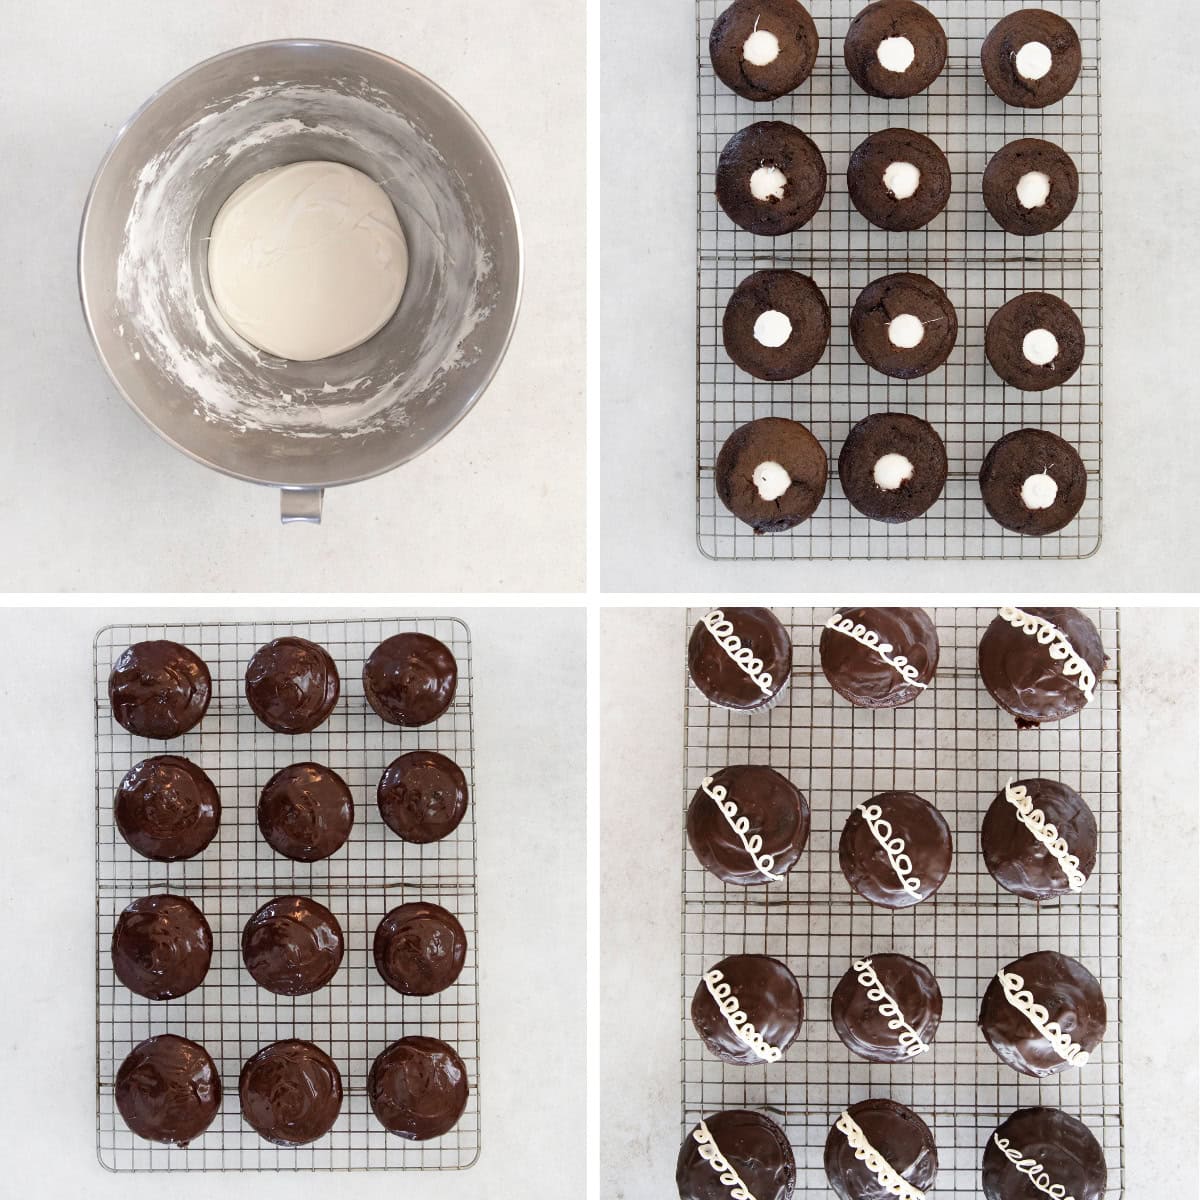
Make the marshmallow filling: Beat filling ingredients together until light and fluffy. Transfer to a piping bag. (A Ziplock bag with the corner snipped off works too!)
Core and fill the cupcakes: Remove the center of each cooled cupcake, stopping about ½ inch from the bottom. Don’t toss them out! Fill each cupcake with about a tablespoon of marshmallow cream, then press the cake center back on top to seal it.
Make the ganache: Microwave the heavy cream until barely simmering, then pour it over a bowl of chopped chocolate. Let it sit for a minute, then stir until smooth and glossy. If there are still chunks, microwave in short bursts, stirring between each. Be very careful here—if it burns, it will turn dull and crumbly.
Glaze the cupcakes: Spoon the ganache over the top of each cupcake, letting it drip down the sides slightly. Let the chocolate set until firm.
Pipe the vanilla swirl: Beat together buttercream ingredients until thick and pipeable. Transfer to a piping bag fitted with a small round tip (I use Wilton #3). Pipe a line of small loops across each glazed cupcake.
MORE GLUTEn-FREE CHOCOLATE DESSERTS


Gluten-Free Hostess Cupcakes (Copycat Recipe)
Ingredients
Chocolate Cupcakes
Dry Ingredients
- 1 cup (150g) gluten-free measure-for-measure flour
- ⅓ cup (27g) unsweetened cocoa powder
- 1 teaspoon baking soda
- ½ teaspoon baking powder
- ½ teaspoon instant espresso powder optional
- ¼ teaspoon kosher salt
Other
- 1 cup (200g) granulated sugar
- ¼ cup (60ml) neutral oil
- 2 large eggs at room temperature
- ½ cup (120g) sour cream
- 1 teaspoon vanilla extract
- ½ cup (120ml) hot water
Marshmallow Cream Filling
- 4 tablespoons (56g) butter at room temperature
- ½ cup (60g) powdered sugar
- 7 oz (198g) marshmallow creme
- ½ teaspoon vanilla extract
Chocolate Ganache
- 4 ounces (113g) bittersweet or semi-sweet chocolate finely chopped
- ½ cup (120ml) heavy cream
Vanilla Buttercream Icing
- 2 tablespoons butter at room temperature
- 1 cup (120g) powdered sugar
- 1 tablespoon heavy cream
Instructions
- Preheat the oven to 350°F. Line a standard muffin pan with paper liners.
- For the cupcakes: In a medium bowl, whisk together the gluten-free flour, cocoa powder, baking soda, baking powder, espresso powder (if using), and salt.
- In the bowl of a stand mixer, or using a hand mixer, mix the sugar, oil, eggs, sour cream, and vanilla on medium-high until well combined.
- With the mixer on low, add the dry ingredients in three additions, mixing after each addition.
- Slowly pour in the hot water. Mix on medium speed for 2 to 3 minutes, scraping down the bowl halfway through, until smooth.
- Divide batter evenly into the liners, about ⅔ full. Bake for 18 to 20 minutes, until a toothpick comes out mostly clean with a few moist crumbs.
- Cool in the pan for 5 minutes, then transfer to a wire rack to cool completely.
- For the marshmallow cream: In the bowl of a stand mixer fitted with a whisk attachment, or using a hand mixer, mix together the butter, powdered sugar, marshmallow creme, and vanilla. Beat until light and fluffy, about 1 minute.
- Transfer to a piping bag, or a zip-top bag with the corner snipped.
- Once the cupcakes are fully cool, use a cupcake corer, or a small paring knife to remove the center of each cupcake, stopping about ½ inch from the bottom. Save the centers.
- Pipe the marshmallow cream into each cupcake until the filling sits just below the top edge, about 1 tablespoon of marshmallow cream.
- Return the cupcake center over the top of the filling to cover it.
- For the chocolate ganache: Place the chocolate in a small bowl. In a separate, small microwave-safe bowl, microwave the heavy cream until simmering, about 1 minute. Pour the hot heavy cream over the chocolate and let sit for 1 minute. Mix until smooth. If the chocolate still isn’t melted, microwave the ganache for 20-second increments at 50% power, stirring after each increment until completely melted and smooth.
- Spoon the ganache over each cupcake.
- For the vanilla buttercream icing: In a medium bowl using a hand mixer, beat together the butter, powdered sugar and heavy cream until thick and pipeable.
- Transfer the buttercream to a piping bag fitted with a small round tip (Wilton #3 is perfect).
- Pipe the classic swirl across the top of each cupcake. Enjoy!
Notes
To Store: Keep in an airtight container in the refrigerator for up to 4 days. Let sit at room temperature for 20 to 30 minutes before serving for the softest texture.
To Freeze: Freeze baked, unfilled cupcakes (before coring) in an airtight container for up to 3 months. Thaw at room temperature, then core, fill, and glaze.


