
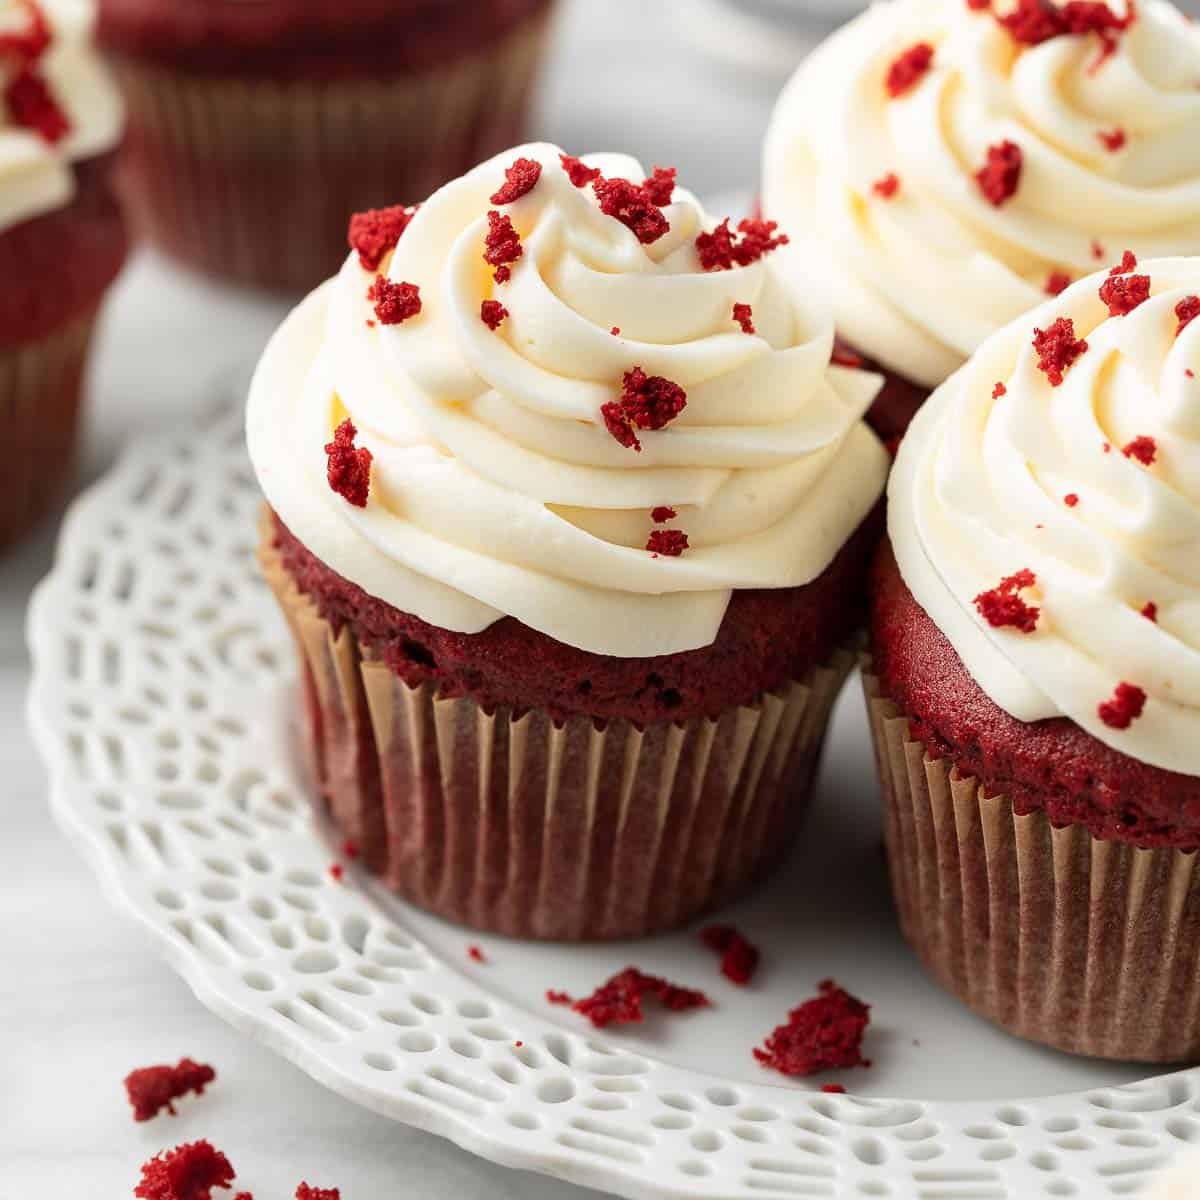
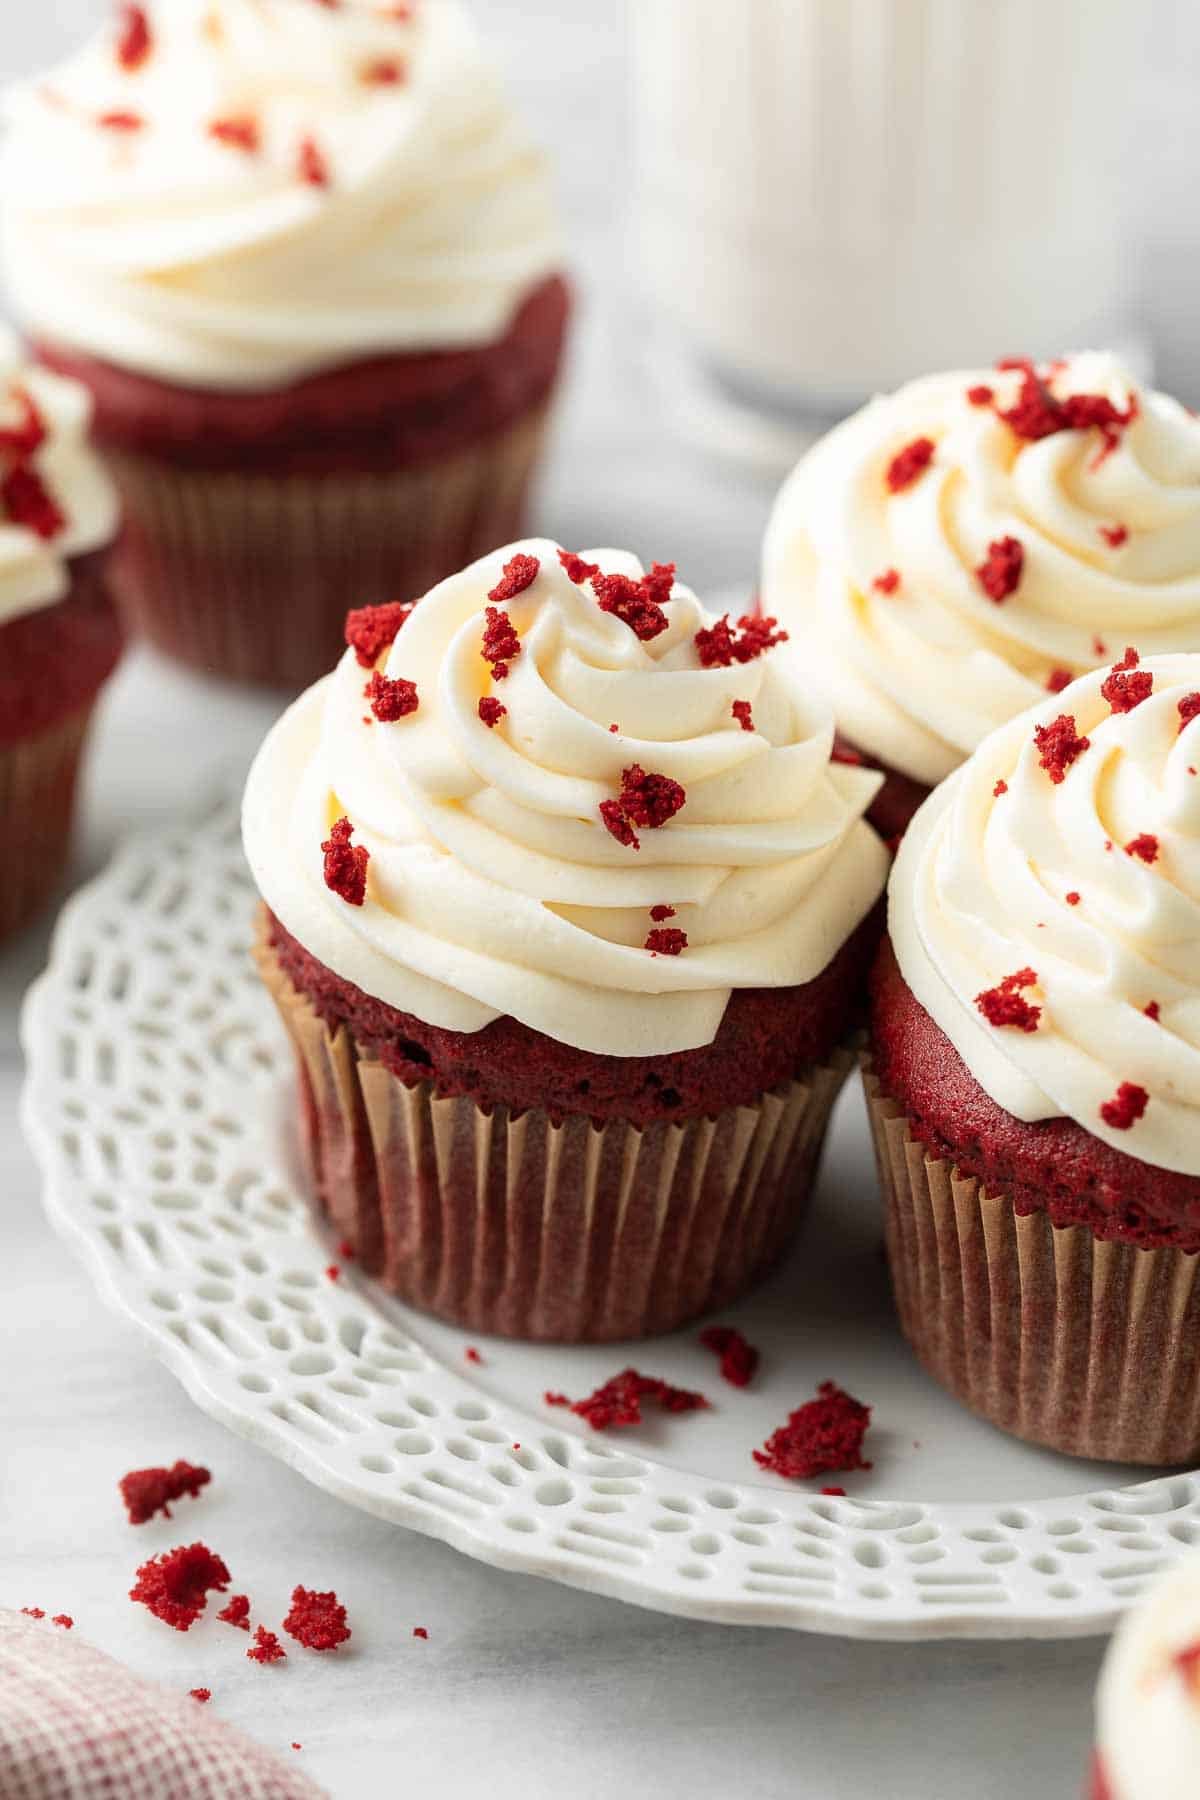
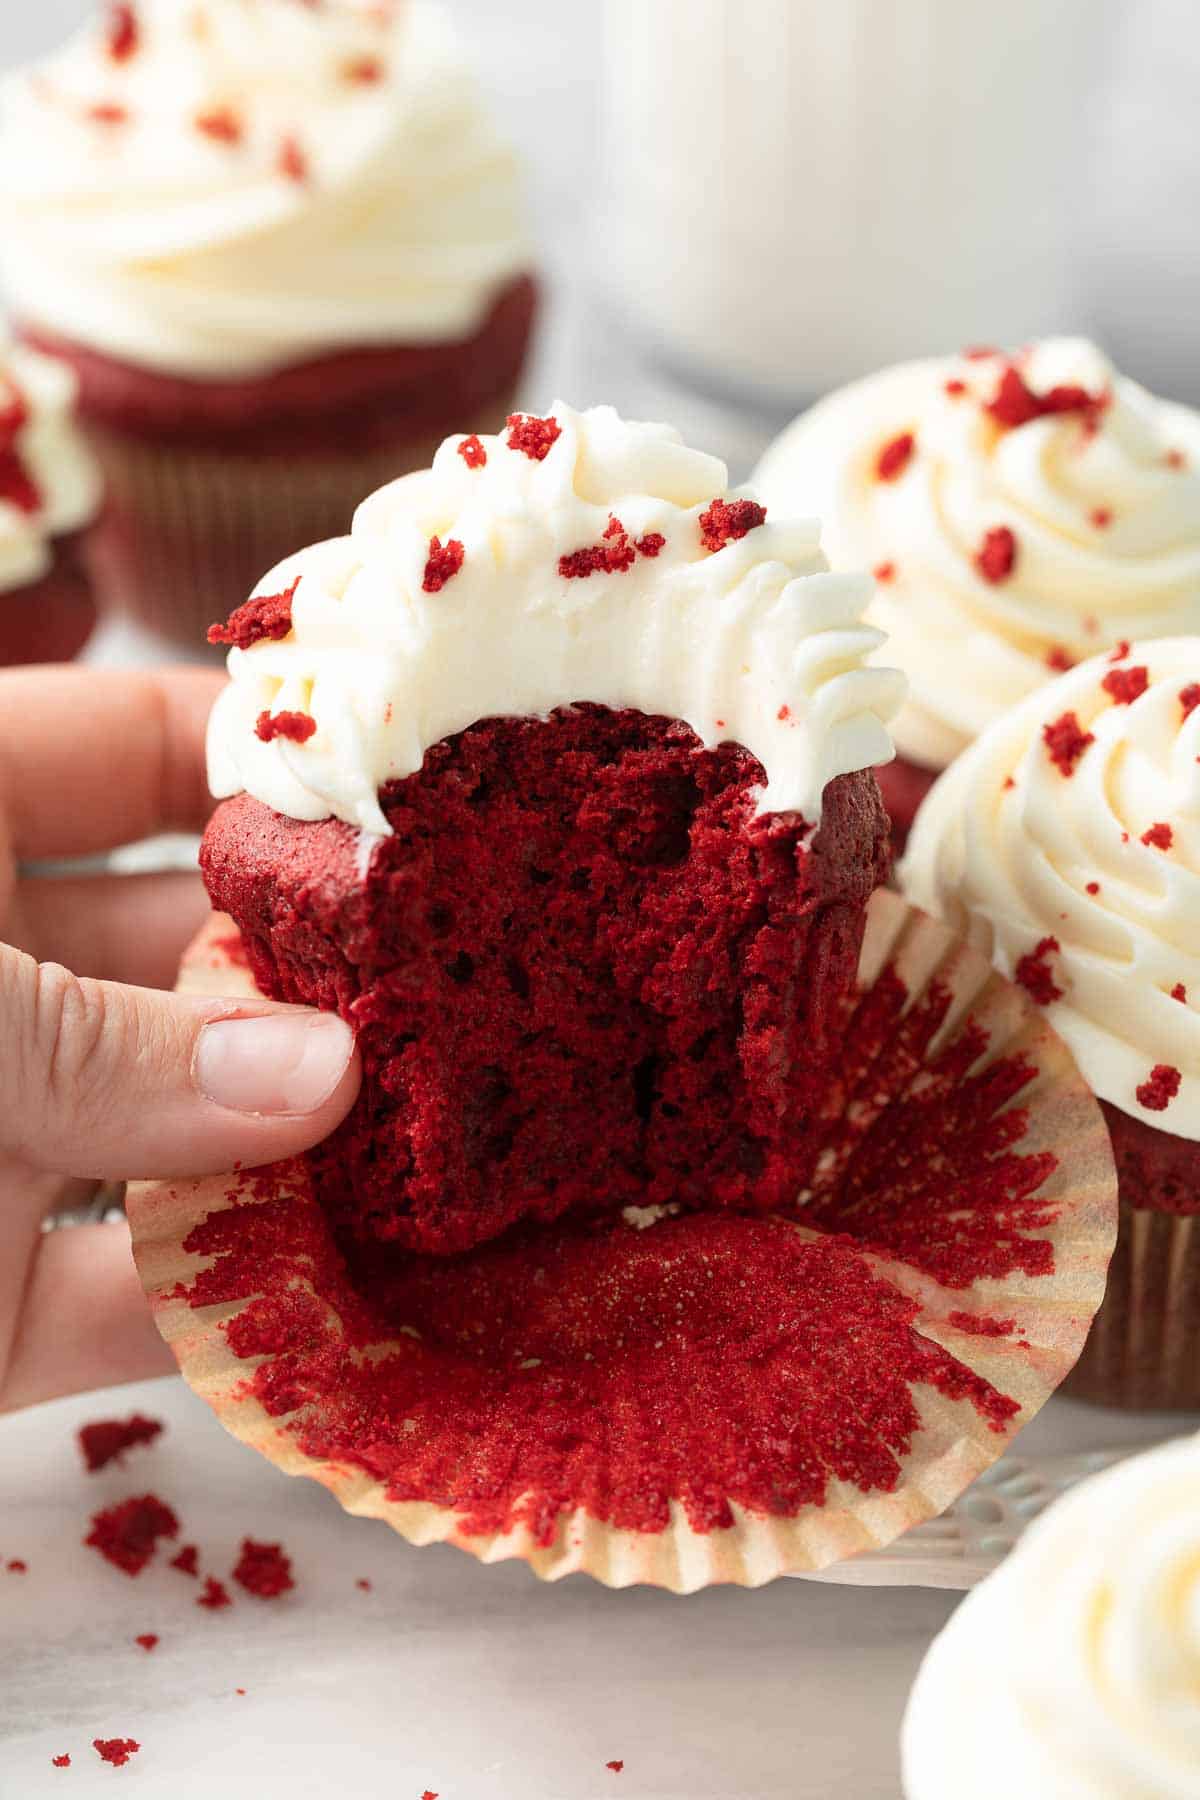
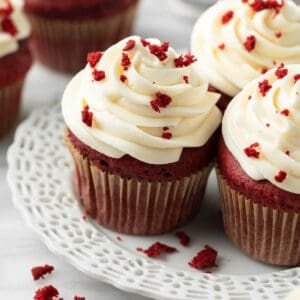
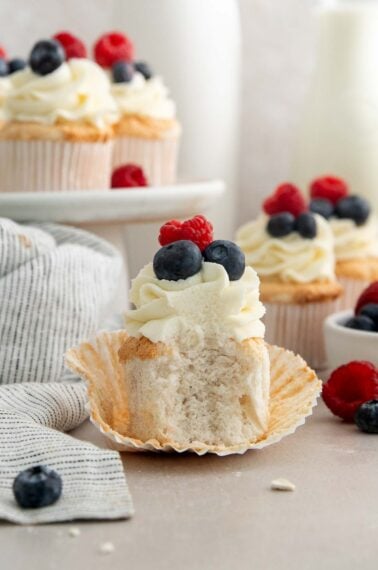
Inspired by my gluten-free red velvet cake, these gluten-free red velvet cupcakes use a unique combination of sour cream + oil for light, FLUFFY, and completely fool-proof cupcakes! The whipped batter also ensures they turn out perfectly every single time.
Want to know my secret to AMAZING gluten-free cupcakes? Here it is: skip the butter and use a combination of sour cream and oil instead!
Whipping the batter also makes a light and fluffy cupcake. You’ll never want to make them any other way!
There are many occasions to use this gluten-free red velvet cupcake recipe, but it is especially great for Valentine’s Day and birthday parties!
Why I Love this Recipe
- Rich and moist – Instead of using butter, these cupcakes call for sour cream and oil. This produces an unrivaled texture that is light and tender!
- Light and airy – Whipping the batter ensures extra light, fluffy cupcakes that taste like your favorite bakery.
- Great for Valentine’s Day – These cupcakes and my warm gluten-free chocolate lava cake are my favorite desserts for Valentine’s Day. I love making them for birthdays, too!
Ingredients You’ll Need
Here are a few notes on the key ingredients to make these gluten-free red velvet cupcakes.

- Gluten-Free 1:1 Baking Flour: These gluten-free red velvet cupcakes turn out best when you use a high-quality 1:1 gluten-free flour blend. Look for a gluten free all purpose flour blend that contains xanthan gum so the cake has the structure it needs. This is my favorite brand for cupcakes.
- Sour Cream/Oil: Adds richness and tenderness to the cake without weighing down the crumb. You can use vegetable oil or coconut oil.
- Lemon Juice: Lemon juice helps to tenderize the crumb. It’s the secret ingredient in my gluten-free German chocolate cake too!
- Cocoa Powder: It’s best to use natural cocoa powder like Guittard or Ghiradelli for red velvet cake. The lighter brown color results in a more vibrant red cake, and the higher acidity reacts with the baking soda to create a more tender crumb.
- Red Food Coloring: If you want a rich red cake, you’ll want to use red dye for food coloring, rather than natural or liquid food coloring.
Recipe Tip
Best kind of red food dye? I use Americolor “red red” or “super red”) If you leave it out the cake will be a pale brown in color. You can also 1 oz liquid red food coloring, but I prefer gel linked above.
How to Make Gluten-Free Red Velvet Cupcakes
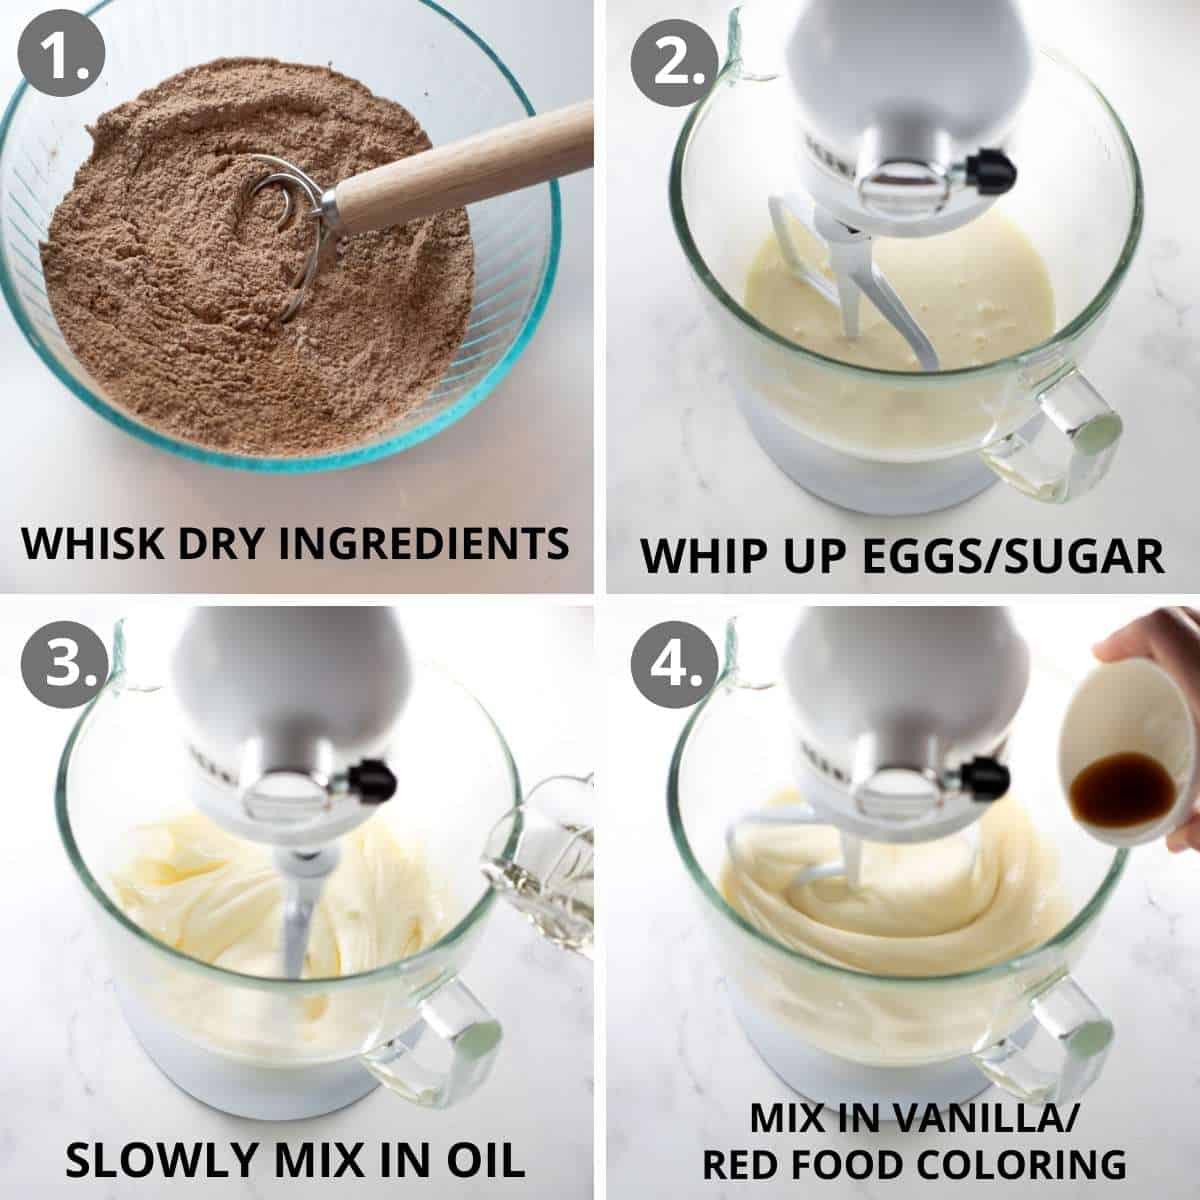
Combine dry ingredients. In a large bowl, whisk together the dry ingredients.
Combine wet ingredients. In a separate large mixing bowl or the bowl of a stand mixer using the paddle attachment, add the eggs and granulated sugar. Whip on medium-high speed for 3 minutes, until light and fluffy. With the mixer running on low, slowly drizzle in the oil. Mix in the red food coloring, vanilla, and lemon juice.

Mix wet and dry ingredients. With the mixer on low, add ⅓ of the dry ingredients. Mix until incorporated. Add the sour cream and mix to combine. Add another ⅓ of the dry ingredients and continue to mix. Add ½ of the milk followed by the last ⅓ of the dry ingredients. Add the remaining milk and stir until totally combined.
Recipe Tip
You want to add the dry ingredients alternatively with wet ingredients so the flour absorbs into the batter.
Bake cupcakes. Pour the cupcake batter into the muffin tin and bake. Once the cupcakes are baked, remove them from the muffin pans and cool on a wire rack before topping with frosting.
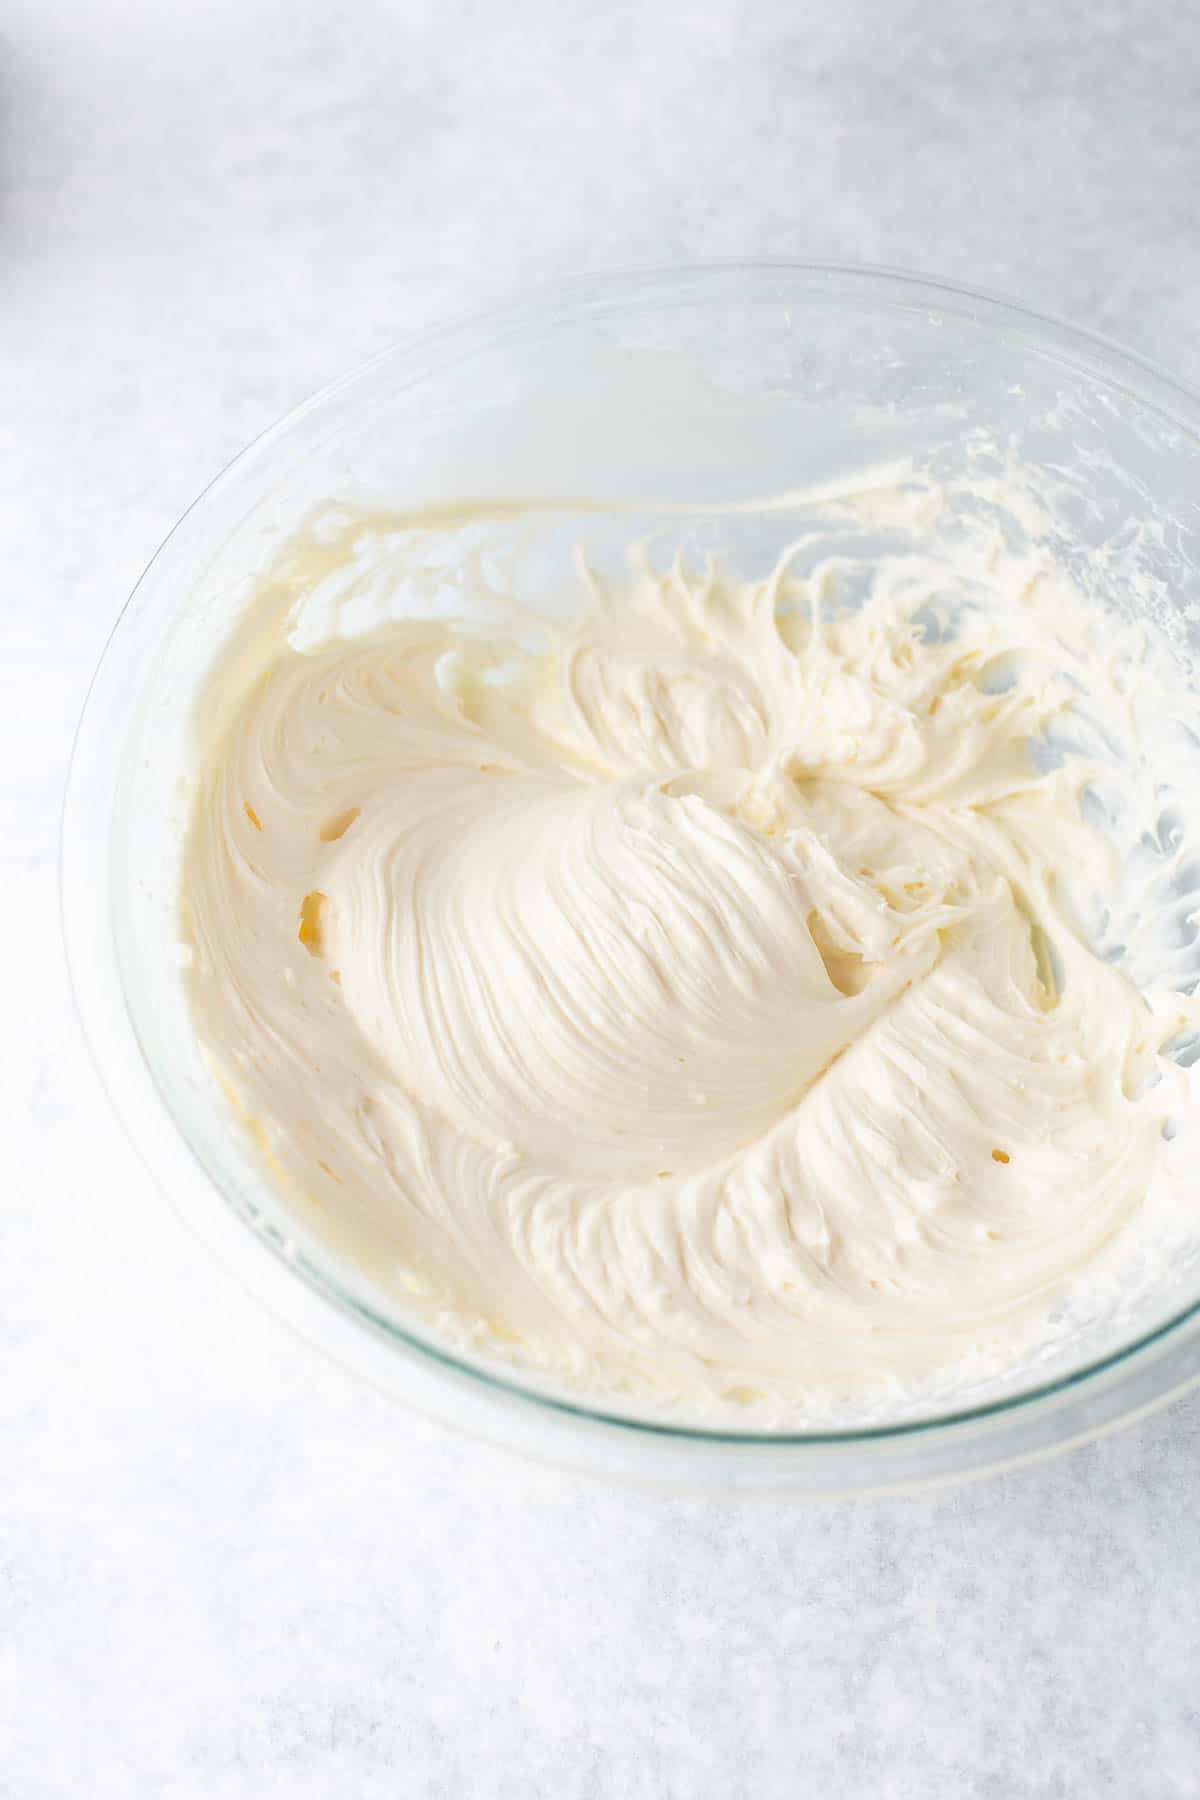
Make the frosting. In a medium bowl, beat together the butter and cream cheese until combined. Add the powdered sugar, salt, and vanilla. Beat on low then switch to high for about three minutes or until light and creamy. Scrape down the sides and bottom of the bowl then mix for another 30 seconds or so. Spoon the frosting into a piping bag and top each cupcake as desired!
Storage/Freezing Instructions
To Store: Cupcakes with cream cheese frosting should always be refrigerated. Store them in an airtight container in the fridge. Remove them from the fridge a few hours before serving to have them at room temperature, if desired.
To Freeze: Cupcakes should be individually wrapped and placed in an airtight container. They should not having frosting on them. Cupcakes can be kept in the freezer up to three months.
Recipe Tips
- For moist, fluffy cupcakes: I love the taste of butter, but these cupcakes taste best when using sour cream/oil instead of butter. Butterfat causes gluten-free flour to clump up and make a denser crumb, while oil creates a light, tender crumb! Whipping the batter also helps create an airy, fluffy taste.
- For easy removal from liner: To prevent the cupcakes from getting stuck, grease the cupcake liners. No more cupcakes falling apart when removing the cupcake liner!
- For a tender crumb: A touch of lemon juice will tenderize the crumb for a moist gluten-free red velvet cupcake.
More Gluten-Free Cupcake Recipes
Gluten-Free Red Velvet Cupcakes
Video
Ingredients
DRY INGREDIENTS:
- 1 ¼ cups gluten-free 1:1 baking flour 190 grams (I use King Arthur Gluten-Free Measure-for-Measure Flour)
- 3 tablespoons cocoa powder 20 grams
- 1 1/2 teaspoons baking powder
- 1/2 teaspoon salt
OTHER INGREDIENTS:
- 1 cup sugar 200 grams
- 2 eggs
- 1/4 cup vegetable oil 50 grams
- 1 tablespoon red food coloring
- 1 1/2 teaspoons vanilla extract
- 1/2 teaspoon lemon juice
- 1/4 cup sour cream 60 grams (regular or light)
- 1/2 cup milk 125 grams (I use 2%)
FOR THE CREAM CHEESE FROSTING:
- ½ cup (1 stick) butter softened 113g
- 8 oz cream cheese softened brick-style, not spreadable (226g)
- 1 teaspoons vanilla extract
- Pinch of salt
- 3 cups powdered sugar 390g
Instructions
MAKE THE CUPCAKES:
- Preheat the oven to 350F. Line 12-count muffin pan with cupcake liners. Lightly grease the liners with cooking spray.
- In a medium bowl, whisk together the gluten-free flour, cocoa powder, baking powder and salt.
- In the bowl of a stand mixer, add the eggs and sugar. Whip on medium-high speed for 3 minutes, until light and fluffy. With the mixer running on low, slowly drizzle in the oil. (You want to do this slowly so you don’t loose the air that you’ve mixed in.) Mix in the red food coloring, vanilla and lemon juice.
- With the mixer on low, add ⅓ of the dry ingredients. Mix until incorporated. Add the sour cream and mix to combine. Add another ⅓ of the dry ingredients and continue to mix. Add ½ of the milk followed by the last ⅓ of the dry ingredients. Add the remaining milk and stir until totally combined. (You want to add the dry ingredients alternately with liquid ingredients so the flour absorbs into the batter.)
- Pour the batter into each cup to fill ¾ of the way up. Bake for 22-25 minutes, until a toothpick inserted into the center of each cupcake comes out clean.
- Let the cupcakes cool for 5 minutes. Then transfer them to a wire rack to cool completely before frosting.
MAKE THE CREAM CHEESE FROSTING:
- Using a hand or stand mixer, beat together the butter and cream cheese until combined. Add the powdered sugar, salt, and vanilla.
- Beat on low then switch to high for about three minutes or until light and creamy. Scrape down the sides and bottom of the bowl then mix for another 30 seconds or so.
- Transfer buttercream to a piping bag fitted with a star tip and pipe large dollops on top of each cupcake.
Notes
- Cocoa powder: It’s best to use natural cocoa powder like Guittard or Ghiradelli for red velvet cake. The lighter brown color results in a more vibrant red cake, and the higher acidity reacts with the baking soda to create a more tender crumb.
- Red Food Coloring: If you want an intensely red cake, you’ll want to use red gel food coloring, rather than natural or liquid food coloring. I use Americolor “red red” or “super red”) You can also 1 oz liquid red food coloring, but I prefer gel linked above.


Hi, I am wondering do you have to grease the cupcake liners? Paper liners are flimsy and I dont want to ruin the shape
Hi Karen! Yes, we typically grease the cupcake liners. We hope you love the recipe!
On the Ghirdadelli packaging, it says “may contain wheat.” Have you ever had an issue?
Hi Anne! Good question! We haven’t had any issues with Ghirardelli, but it’s totally up to the individual’s needs and concerns. Guittard cocoa powder is labeled free from gluten, peanuts, and tree nuts so it is a safe option you may prefer to use. We hope you love the red velvet cupcakes!
This recipe may have changed my life! These cupcakes are wonderful!
Thank you!
Aww, thank you for such amazing feedback, Gail! We’re so pleased you loved the cupcakes. Happy baking!
My first time making these and also first time piping. I didn’t add as much milk it seemed a little runny, but delish.
We’re so glad to hear you enjoyed the cupcake recipe, Lynne! Thank you for sharing with us!
In your ingredient notes it says that the cocoa powder reacts to the baking soda but the recipe doesn’t call for baking soda. Is the baking soda within one of the other ingredients?
Hi Jay, good question! Sorry, it should say baking powder. Thank you for calling that out!