
Erin’s Recipe Rundown

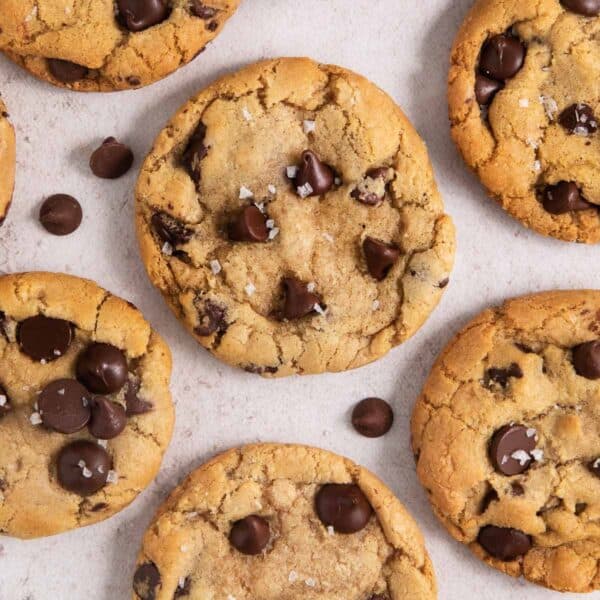
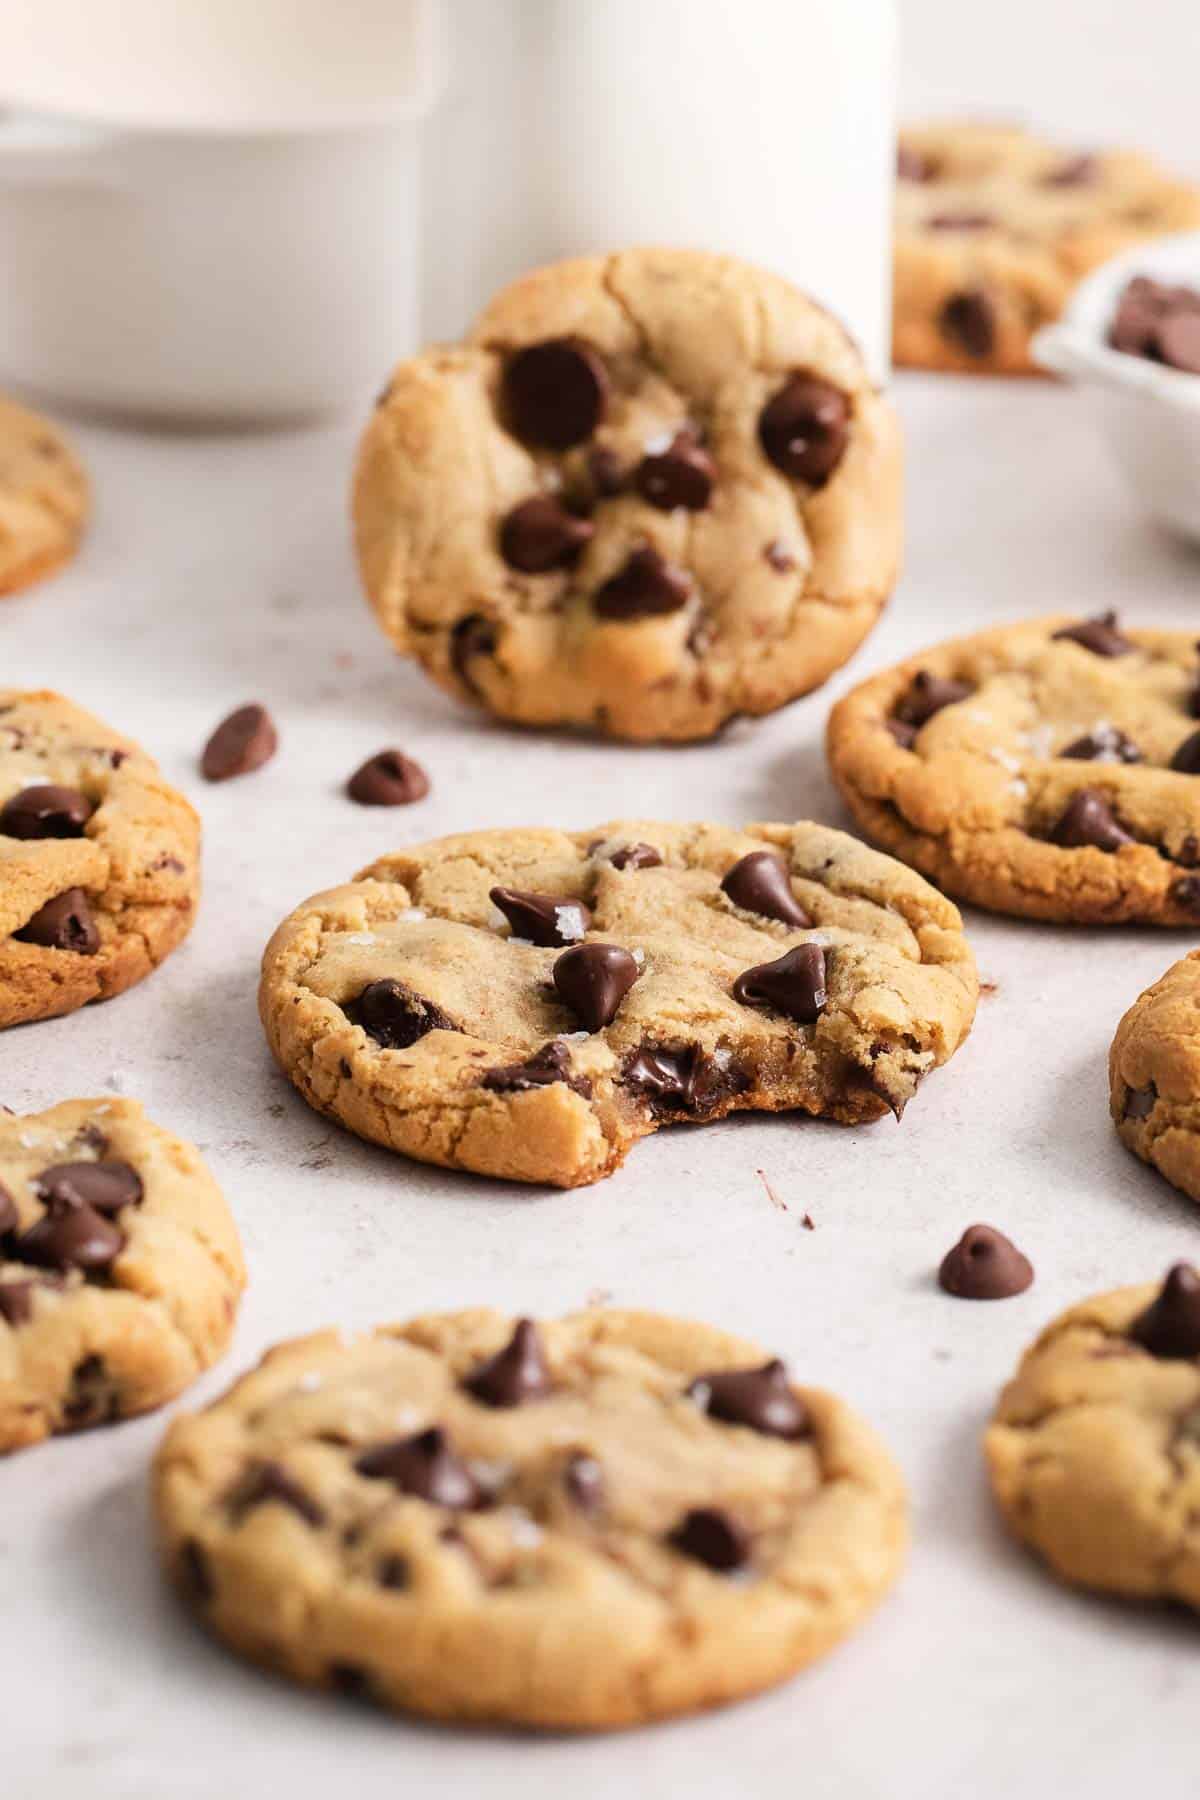
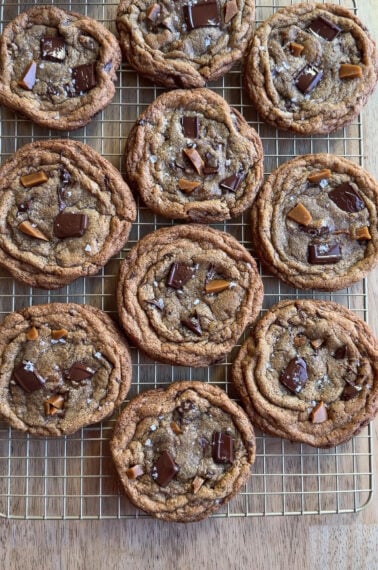
Texture: Chewy, with crisp golden edges and gooey centers.
Taste: Nutty notes from the brown butter and richness from the almond flour. Sprinkle them with flaky salt after baking!
Ease: SO easy to make! No mixer required.
Recommended GF Flour: Works great with many gluten-free flour blends. Use a high-quality flour that contains xanthan gum. I like King Arthur Flour and Bob’s Red Mill.
Would I make these again? Absolutely! Of all the recipes on my website, this is my very favorite! We make these cookies at least once a month. I especially love freezing the cookie dough balls so we can have freshly baked cookies in minutes.
xoxo erin
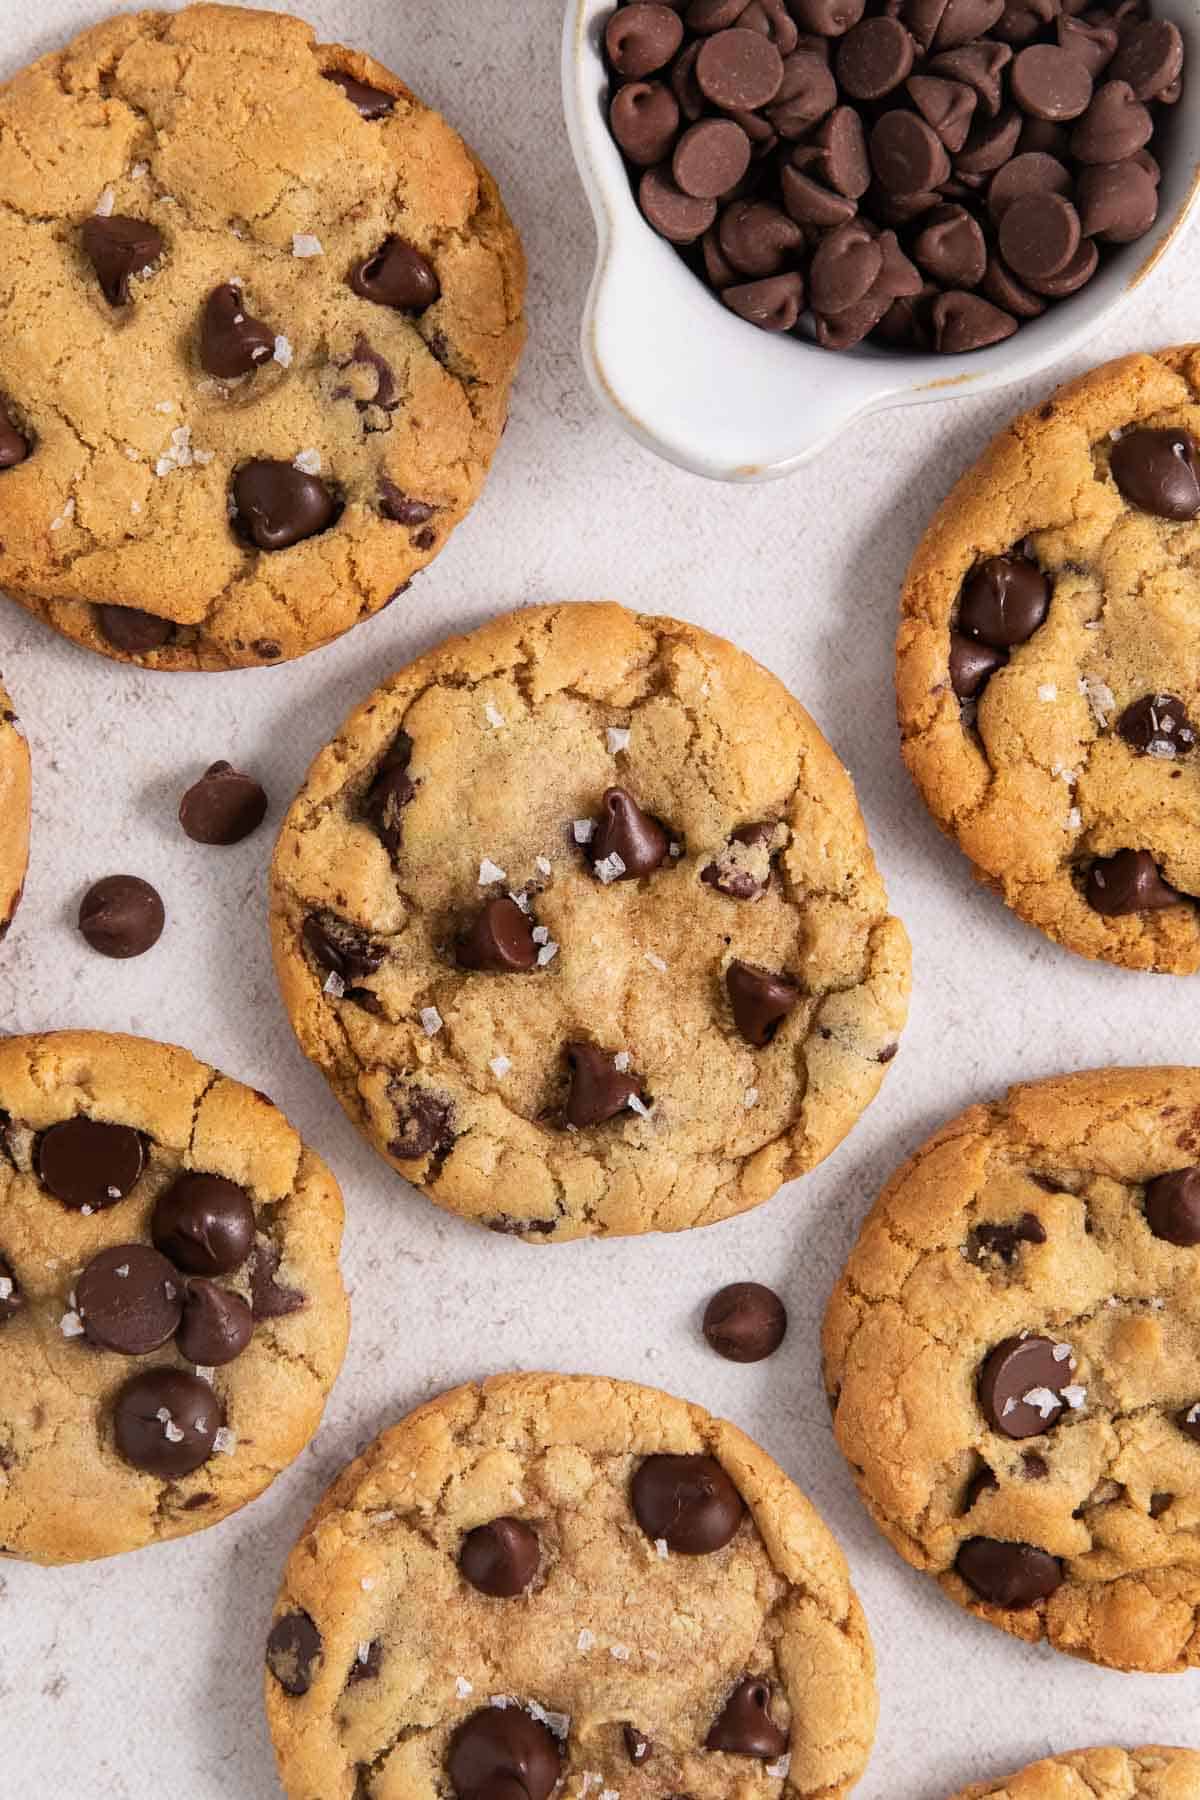
If you’ve been searching for the BEST gluten-free chocolate chip cookie recipe – look no further! I’ve been eating 100% gluten-free for over 10 years now and THIS is the chocolate chip cookie recipe of my dreams
Featured Comment
From Christine: “100 STARS!! Browning the butter is genius. My Mother made the best chocolate chip cookies (with regular flour)….I would put these up against her and no one would know they were gluten free. Thank you.”
Table of Contents
- Erin’s Recipe Rundown
- Ingredients You’ll Need
- How to Make Gluten-Free Chocolate Chip Cookies
- Why do I have to let the dough rest for 30 minutes?
- Why do you add almond flour? Can I make these cookies nut-free?
- Can I use all almond flour?
- Dough Consistency?
- Can I make these cookies dairy-free?
- Storage/Freezer Instructions
- More Favorite Gluten-Free Cookie Recipes
- Top Tips for Gluten-Free Chocolate Chip Cookies
- Gluten-Free Chocolate Chip Cookies (5-Star Recipe!) Recipe
Ingredients You’ll Need
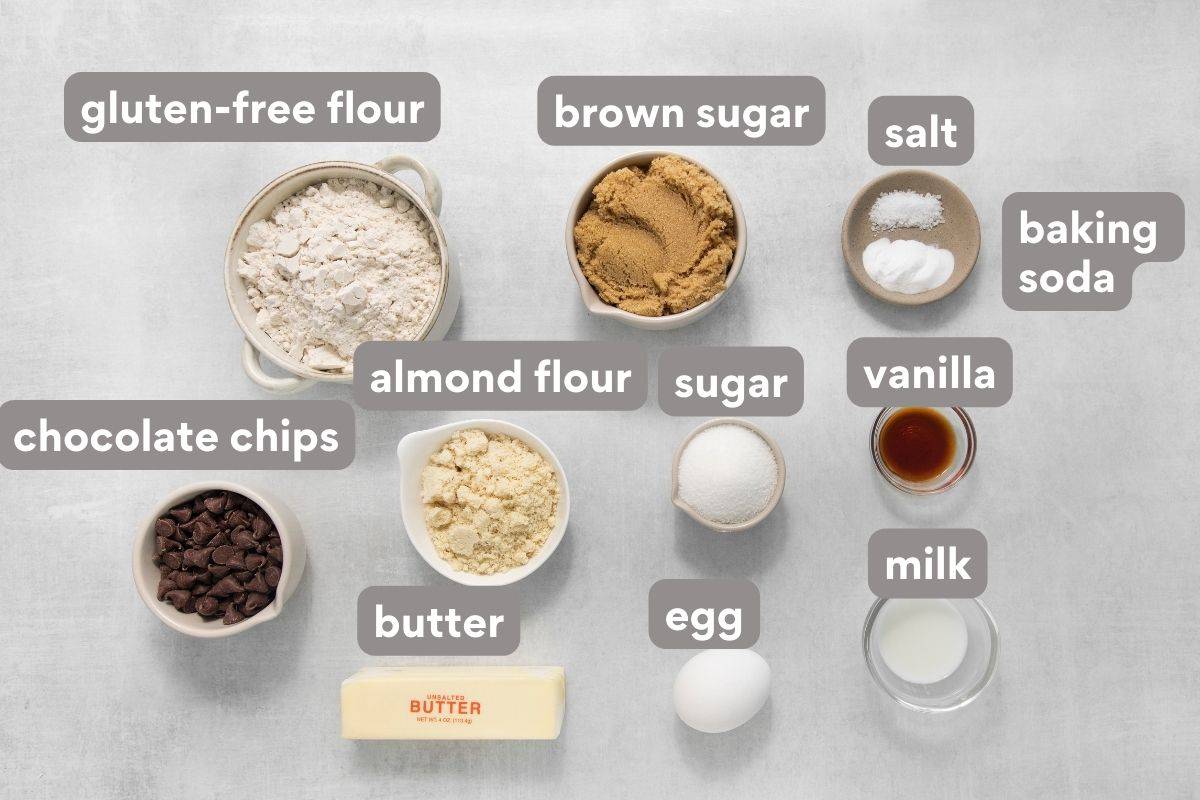
- Gluten-Free Flour: For best results, use a high quality gluten-free flour blend that contains xanthan gum. King Arthur Flour Gluten-Free Measure-For-Measure Flour is my favorite gluten-free flour. I’ve also had good results with Bob’s Red Mill Gluten-Free 1:1 Baking Flour.
- Almond Flour: I like to add a little almond flour along with the gluten-free flour. It gives the cookies richness and helps them to bake up golden brown. It’s my secret ingredient in many gluten-free baked goods like my gluten-free banana bread and gluten-free muffins! If you’re allergic to nuts you can leave out the almond flour and substitute more gluten-free flour.
- Butter: Sometimes gluten-free baked goods can lack flavor. Brown butter gives these cookies a delectable nutty, toasty almost caramelized flavor that you can’t get from anything else.
- Milk: I add 1 tablespoon of milk to replace the moisture lost by browning the butter. Any kind of milk will work.
- Chocolate Chips: Chocolate chips are usually naturally gluten-free! My favorite brand is Guittard. You can also use chopped chocolate bars – any kind you like! I’ve used the bag from Costco, Nestle and Enjoy Life all with great results.
How to Make Gluten-Free Chocolate Chip Cookies
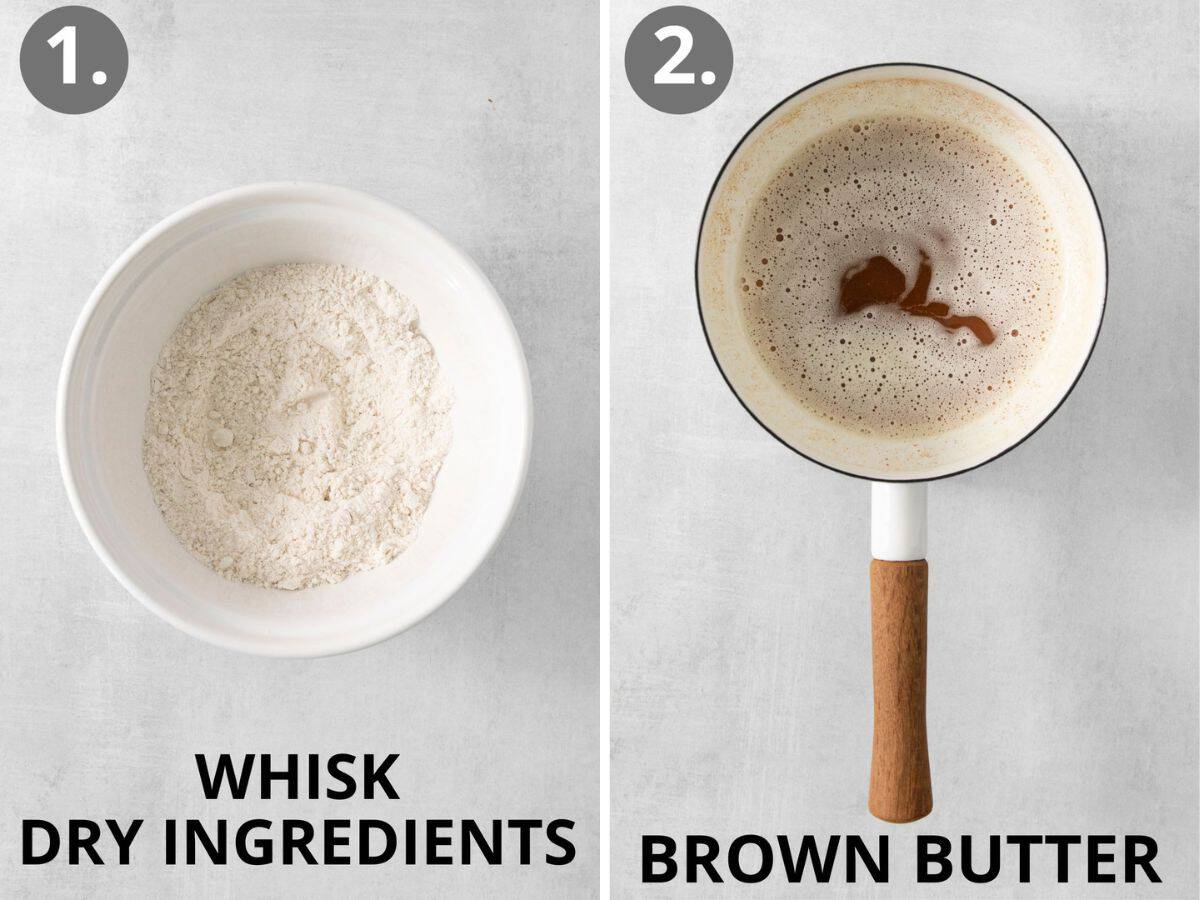
To make these cookies, start by whisking together the dry ingredients. They you’ll brown the butter.
TO BROWN THE BUTTER:
- Melt the butter in a medium skillet over medium-low heat, stirring occasionally.
- Once the butter is melted and begins to foam, stir continuously to prevent the milk solids from sticking to the skillet. The butter will change from yellow to golden brown quickly and will have a nutty aroma. Remove from the heat and immediately pour into a medium bowl.
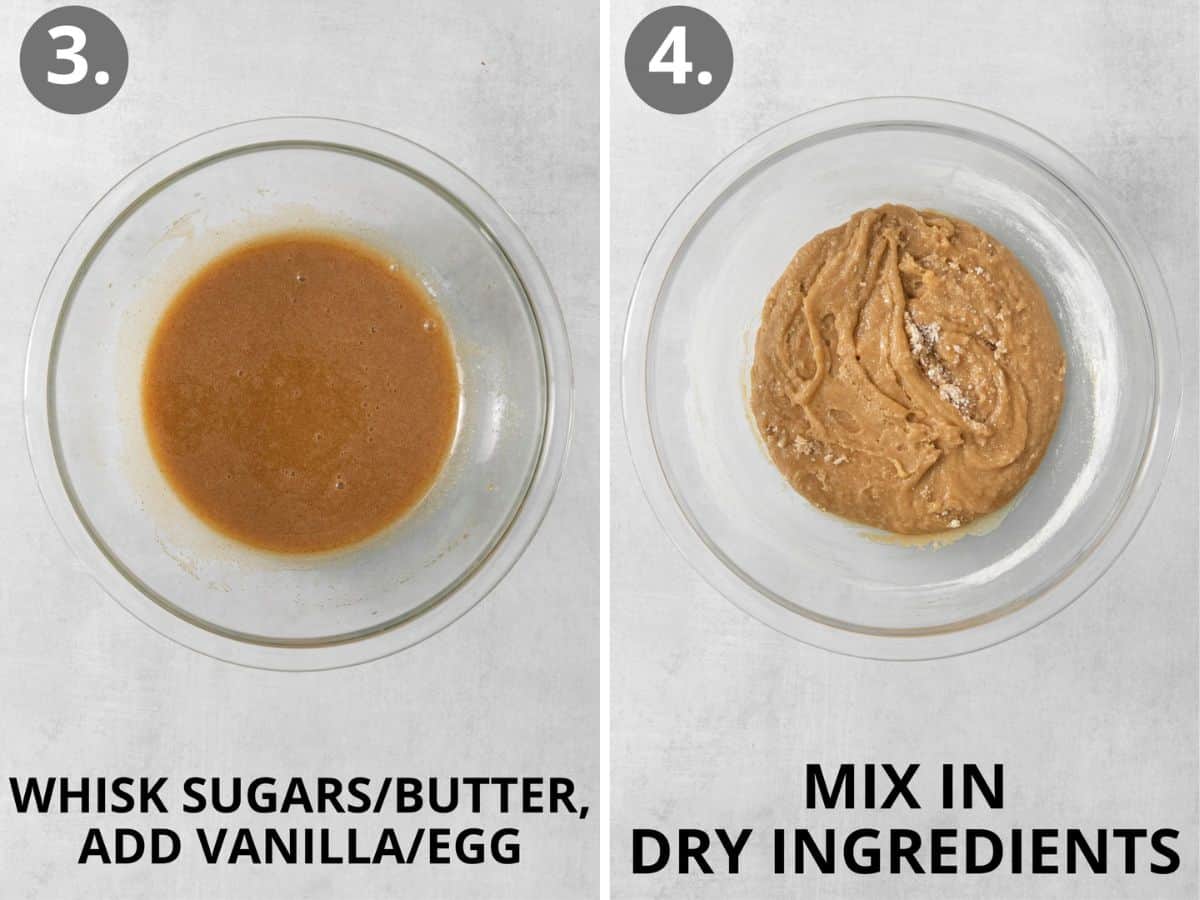
Whisk the brown butter together with the sugar, followed by the eggs and vanilla. Then stir in the dry ingredients and the chocolate chips.
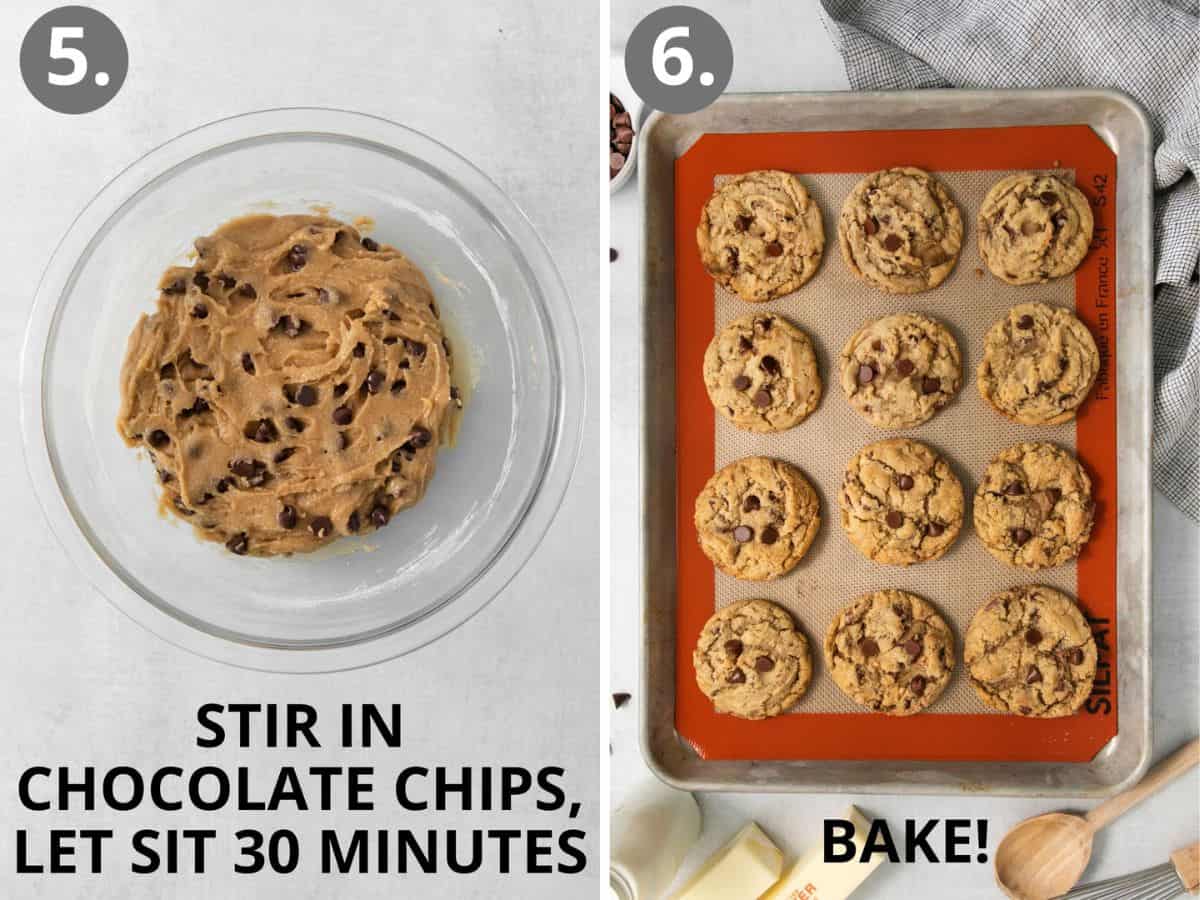
Let the dough rest for 30 minutes before baking, or even better – chill it overnight to let the flavors develop.
Why do I have to let the dough rest for 30 minutes?
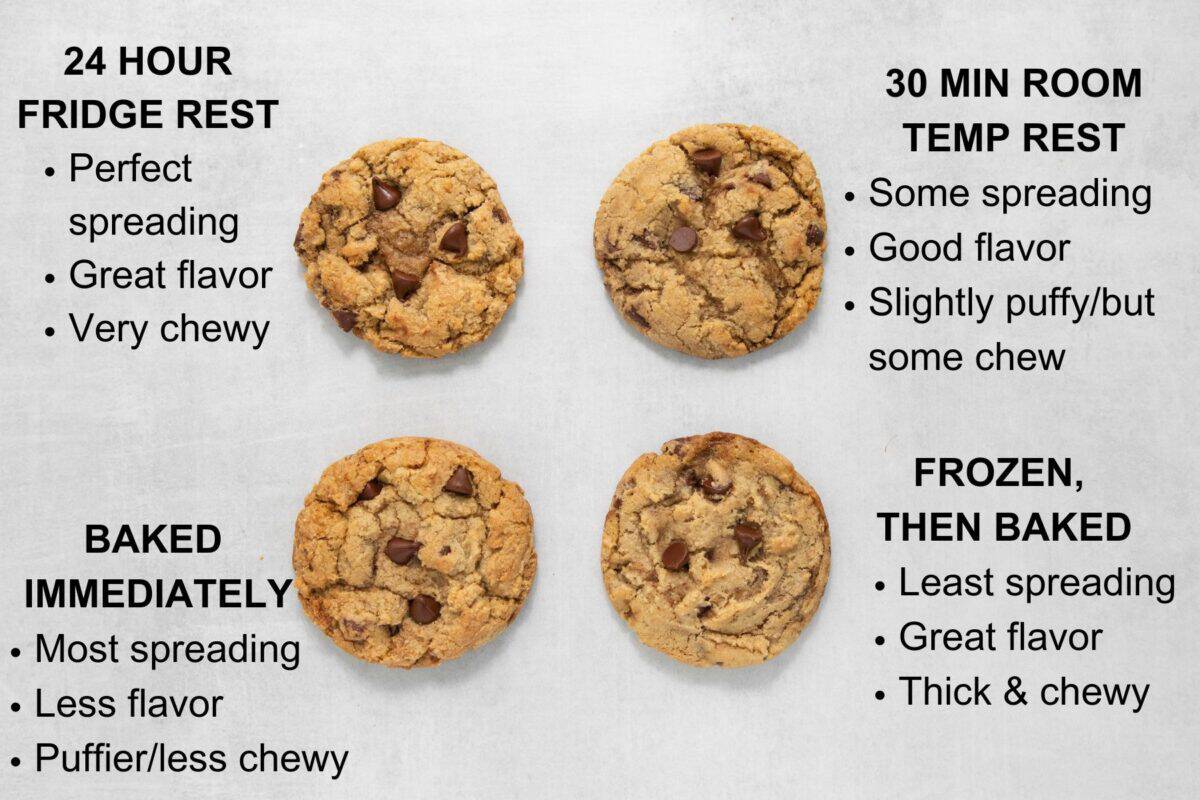
After you mix the dough together it’s important to give it at least a 30-minute rest. This gives the gluten-free flour time to hydrate and the flavors a chance to develop. It also helps guarantee non-gritty cookies.
If you have more time, I recommend refrigerating the dough for an even better flavor. The dough will keep in the refrigerator for up to 5 days. The longer the dough sits the better the flavor will be!
Luckily just a room temperature 30-minute rest will do and no overnight-in-the-fridge chill is needed. So you can still have chocolate chip cookies shortly after a craving strikes!
Why do you add almond flour? Can I make these cookies nut-free?
I like using a little almond flour because it gives the cookie dough moisture and richness. It helps the cookies bake up nice and golden color. To make these cookies nut-free substitute the 1/4 cup almond flour with an additional 1/4 cup gluten-free baking flour.
Can I use all almond flour?
No. I don’t recommend using all almond flour in this recipe. Almond flour has very different properties than gluten-free 1:1 baking flour. Check out this recipe for a great almond flour chocolate chip cookie!
Dough Consistency?
If your cookie dough looks too thin, add a few tablespoons of extra flour. The brand of flour and how you measure it can affect the dough’s consistency. (See the video/process shots for the ideal thickness!)
Can I make these cookies dairy-free?
Yes! To make these gluten-free chocolate chip cookies dairy-free you can use melted vegan butter in place of the brown butter. No need to brown the vegan butter (it won’t work!). You can also replace the milk with almond milk.
Storage/Freezer Instructions
- To Store: Store these cookies in an airtight container at room temperature for up to 5 days.
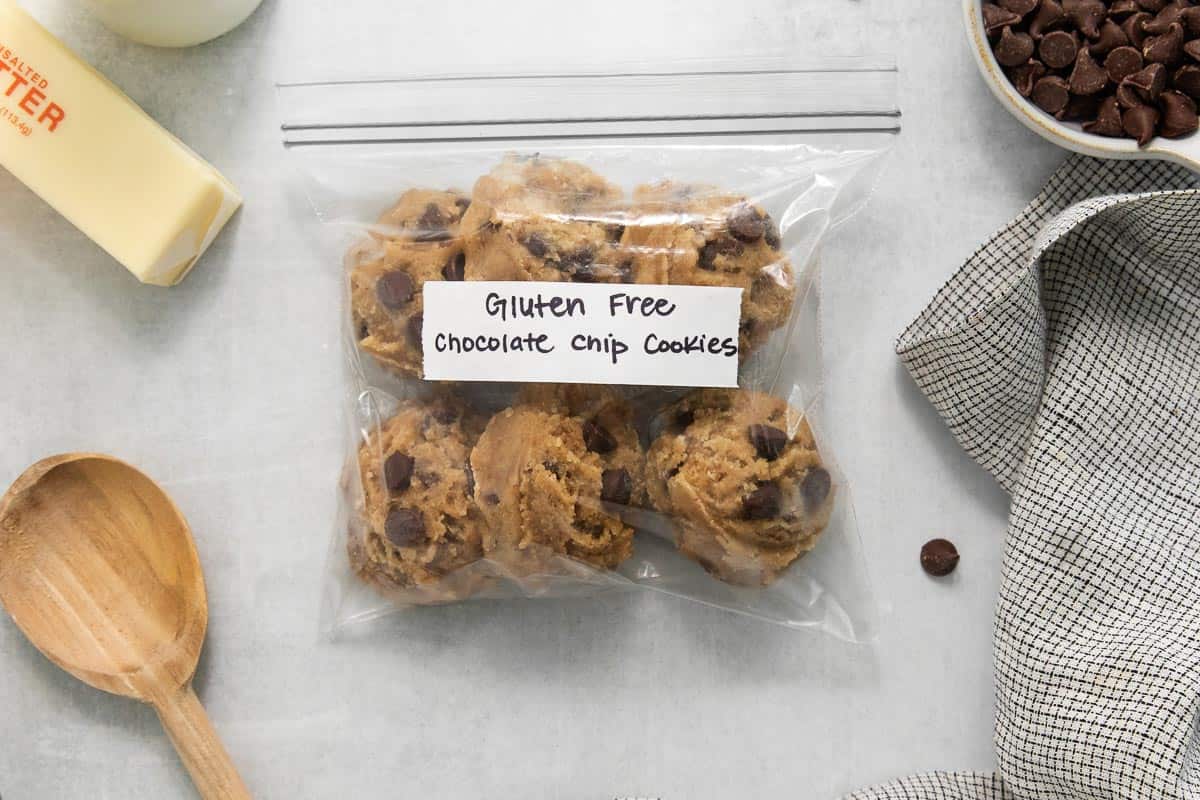
- To Freeze: Scoop the dough into balls and place them on a small baking sheet or plate lined with parchment paper. Pop the sheet into the freezer until the dough balls are solid, which usually takes about 1-2 hours. Then, transfer the frozen dough balls into a freezer bag or air-tight container, making sure to squeeze out any extra air. Label the bag with the date.
- To Bake From Frozen: When you’re craving cookies, simply take out as many dough balls as you need, place them on a baking sheet and bake according to the recipe instructions. You may need to add a few minutes onto the bake time. It’s a simple way to enjoy warm, fresh-baked cookies anytime!
More Favorite Gluten-Free Cookie Recipes
- Gluten-Free Brown Butter Snickerdoodles
- The One True Gluten-Free Sugar Cookie Recipe
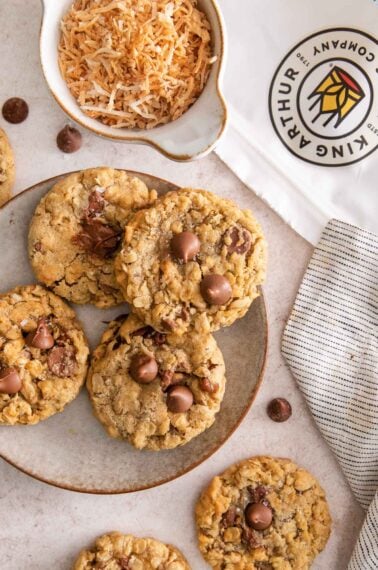
- Gluten-Free Oatmeal Chocolate Chip Cookies
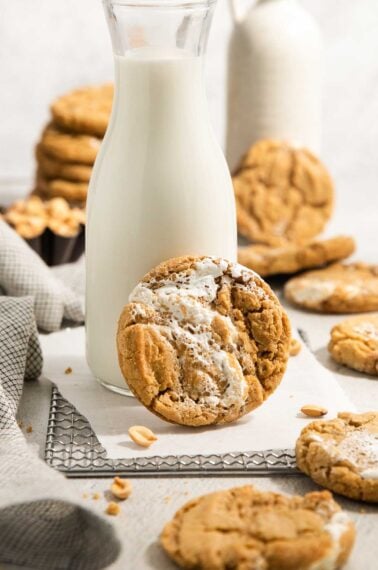
- Gluten-Free Peanut Butter Cookies
- Gluten-Free Christmas Cookies
Top Tips for Gluten-Free Chocolate Chip Cookies
- Brown butter: Gives these cookies a delectable nutty flavor
- A tablespoon of milk: Prevents grittiness and helps the cookies get golden
- 1/4 cup almond flour: For a golden brown color and yummy flavor (can use more gluten-free flour instead if you have a nut allergy)
- 30 minute rest: Gives the flour time to hydrate and prevents grittiness
- A sprinkle of sea salt: Optional, but delicious for gourmet bakery-style cookies!

Gluten-Free Chocolate Chip Cookies (5-Star Recipe!)
Video
Ingredients
Dry Ingredients:
- 1 1/3 cups (200g) gluten-free measure-for-measure flour
- 1/4 cup (25g) almond flour
- 1 teaspoon baking soda
- 1/2 teaspoon kosher salt
Other Ingredients:
- 1/2 cup (113g) butter
- 1 tablespoon milk of choice
- 3/4 cup (160g) brown sugar
- 1/4 cup (50g) granulated sugar
- 1 large egg
- 2 teaspoons vanilla extract
- 1 cup (170g) chocolate chips
- sea salt for sprinkling optional
Instructions
- In a medium bowl, whisk together the gluten-free flour, almond flour, baking soda and salt. Set aside.
- Melt the butter in a medium skillet over medium-low heat, stirring occasionally.
- Once the butter is melted and begins to foam, stir continuously to prevent the milk solids from sticking to the skillet. The butter will change from yellow to golden brown quickly and will have a nutty aroma. Remove from the heat and immediately pour into a medium bowl.
- Add the milk, brown sugar and granulated sugar to the brown butter. Whisk to combine.
- Whisk in the egg and vanilla until smooth and creamy.
- Using a rubber spatula, mix in the dry ingredients until well-combined. Stir in the chocolate chips.
- Cover the bowl and let the dough sit at room temperature for 30 minutes, or refrigerate for up to 5 days.
- Preheat the oven to 350°F. Line large baking sheets with parchment paper or silicone baking mats.
- Scoop the cookie dough into round balls, about 2 tablespoons per ball. Place on the prepared baking sheet, about 2 inches apart.
- Bake for 10-12 minutes or until the edges are golden brown and the center is set.
- Remove from the oven and cool on the baking sheet for 5 minutes. Sprinkle with flaky salt, if desired. Transfer to a wire rack to cool completely.


Hello! May I double and or triple the recipe to yield more cookies?
Thank you!
Definitely, Gina! Just make sure you bake them in batches so they aren’t overcrowded when baking. We hope you enjoy the recipe!
I let my dough sit in the fridge for 4 days before cooking. I did not let it sit out for a half hour beforehand and also subbed a bit of the sugar for monk fruit and maple syrup. These factors might have led to challenging results. My dough did not spread much at all and was puffy and undercooked in the center while darkening on the bottom. A little disappointing but seems to be partially user error.
We’re sorry you had this experience, Alexander. Yes, too cold dough will have trouble spreading due to the fat being too solid. This can cause the bottoms to darken too. After chilling, it’s best to let the dough sit out at room temperature for 5-10 minutes, just until it becomes easy to work with. We haven’t tried monk fruit or maple syrup in these cookies, but since the recipe relies on browned butter, this sub could impact taste/texture. We hope these ideas help and your next bake turns out delicious!
Hello can you freeze thees after baking? They are for a wedding and I want to prep ahead of time to cut down on doing so much last minute. Thank you
Hi Terrie, the baked cookies can also be frozen for up to 3 months. For best results, we would recommend making the dough in advance and freezing the dough balls, then baking from frozen closer to the event. We hope the wedding goes well and everyone enjoys the cookies!
These cookies are delicious! My daughter just recently started eating gluten free. Her eyes lit up when she took a bite. She said she couldn’t tell the difference between these and my usual cookies. I didn’t tell my son they are gluten free and he didn’t even notice. I chilled for around 45 minutes and the spread was minimal. We like puffy, chewy cookies. One of my traditional cookie secrets is adding instant vanilla pudding mix and an extra egg yolk. After a quick label check along with a Google search I verified that jello instant vanilla pudding mix is gluten free. I added only half the package since this recipe is smaller than my traditional one. We are so happy with the end result. This was the first gf cookie recipe I tried and I have no reason to look any further. These are delicious, thank you!
We’re so happy to hear the cookies were a hit with the whole family! Thank you for taking the time to share your experience and tips with us, Shannon. Happy baking!
Finally I found a good gluten free chocolate chip cookie recipe! The first time I made these, I used the King Arthur 1 to 1 flour. They were decent but I could taste the flour some, even after letting the dough rest for 30 minutes. I’ve always had this issue with this flour blend, which has made gluten free baking so disappointing for me. I decided to try a new flour blend – Namaste gluten free flour, which doesn’t have a distinct flavor and I let the dough rest for 45 minutes and the cookies turned out perfect! They did spread a little more than the King Arthur batch I made, but I don’t mind that. They almost remind me of the Nestle Tollhouse cookies I used to love before I went gluten free, which I’ve been trying to replicate for many years now!
Hi Rebecca, thank you for your feedback and tips! We’re so glad you enjoyed the cookie recipe!
Holy cow! These worked exactly as advertised and I love them! 30 min was just long enough to clean up my kitchen from dinner and they had the perfect amount of spread. Thank you!
Yay! We’re so glad to hear it! Thanks for taking the time to share your feedback with us, AJ.
These were my first attempt at gluten free chocolate chip cookies, because this recipe had so many good reviews. Let me tell you, I was not disappointed! They are so delicious! Give them a try.
Thank you for the kind review, Abby! We’re so glad you enjoyed the cookies!
I made the cookies first time ever yesterday. The texture turn out nice but they taste too sweet. What brand of brown sugar you used?
Hi Harpal, any brand of brown sugar should work. If too sweet, you could try reducing the sugar just a little, though we’ve never tried that ourselves. Other readers have had success cutting down the sugar so you may find some tips here in the comments. We’re glad you enjoyed the texture!
Best chocolate chip cookies EVER! I can’t go back to regular softened butter after this. They did spread a lot, but I just used a large mouth jar lid to reshape them when then came out of the oven, so they were puffy and perfectly round. I used a chopped bar of Lindt milk chocolate for half the chocolate chips. So yummy!!!
We’re so glad you enjoyed the recipe, Ami! Thank you for taking the time to comment and share your feedback with us!
I noticed that a few people mentioned the cookies spread too much, mine on the other hand did not spread at all. Still amazing, but more like a raised cookie. I refrigerated over night and let sit for 10 minutes before baking. Any thoughts?
We’re glad you enjoyed the cookies even though they didn’t spread, Lisa! A variety of factors can cause this. For example, too much flour (add a little more liquid to the dough), the cookie sheet’s material type (darker spreads less), too cold oven (make sure it is preheated before putting cookies in and use an oven thermometer to check accuracy), too cold butter (let the dough sit out longer after removing from fridge), etc. We hope these ideas helps!
Has anyone tried to cut down on the sugar content in this recipe and if so by how much and how did they turn out?
Hi Kelly, we go for the full sugar in this as we think it provides the best results for taste and texture, but other readers might be able to share their own experiences with reducing sugar. If you decide to give it a try, we’d love to hear how it goes!
I cut the sugar back 1/3 on all recipes I have tried from this site (including this one) and so far it has always worked out just fine.
Thank you for sharing your experience with reducing the sugar, Stephanie!
Delicious gluten-free cookies in the first attempt! It’s truly a 5-Stars recipe! Thanks for all tips!!
Thank you for the 5 stars, Rith! It makes us so happy to hear you loved the recipe. Thank you for taking time to share your feedback with us!
The best chocolate chips cookies I’ve ever had – including non GF!!
Thank you, Bodhi! We’re so glad you loved the cookies and we appreciate your thoughtful feedback!
Can an egg substitute be used for the egg in the recipe? My grandson is allergic to eggs as well as wheat and nuts. It makes baking for him quite a challenge.
How long do I need to leave out before baking (if putting dough in fridge over night?) Mine spread quite a bit and didn’t rise at all. I also live in Colorado and brown sugar tends to harden but I put in the microwave with a wet towel before mixing it with everything. Is this okay?! Also does cane sugar work or is it too thick? Thanks so much! The dough tasted amazing so can’t wait to try again and hope they turn out better.
Hi Laura, thank you for your questions! You’ll want to leave the dough out just long enough so you can work with it to scoop it into balls, usually 5-10 minutes. Using the towel method to soften the brown sugar should be fine as long as it doesn’t melt and you use it right away before it hardens again. Changing the brown sugar to cane sugar will impact texture. Sometimes cookies spread due to a variety of factors like: the cookie sheet’s color/material type (dark = overbakes, shiny metal = spreads a lot), warm cookie sheets, inaccurate flour measurement (too little causes spreading), etc. We hope when you give it a try again, you get the perfect bake! We’re glad you enjoyed the dough’s flavor!
This recipe looks great and I’m excited to try it! However, I do have a question about the quantity of flour specified. The recipe calls for 1 and 1/3 cups of GF flour, but also says that is 225g of GF flour. Is that correct? The flour you recommend is 31g per quarter cup so 1 and 1/3 cups is just over 165 grams. Can you let me know which measurement is correct?
Hi Steve, this is a very common question that comes up! We find that 1 cup of King Arthur’s Measure for Measure Flour weighs much closer to 160 grams. A cup measurement is subjective – and we think the manufacturer doesn’t realize gluten-free flour is denser than traditional wheat flour. Erin likes to make her recipes so they will turn out for both people using cup measurements and grams measurements. This measurement is her way of being consistent through all her recipes, even if it’s not the same as King Arthur’s measurement guide, so it is best to follow either the cup or weight measurement as listed in the recipe to get the best results. We hope this helps!
I am having this same question as Steve. I’ve made the cookies 3 times using both the cup measurements and weight measurements and the latter results in a dryer dough that doesn’t spread at all during cooking. I think this is likely why some are getting puffed up cookies that don’t spread. Can you clarify on the flour weight for this recipe, specifically in regards to the GF KA flour suggested in the recipe?
Hi Stephanie, thank you for your question! We double-checked our notes and we had made a typo! The weight measurement for the flour should be 200 g. We have updated the recipe. We appreciate your feedback and hope the recipe is a perfect bake for you next time!
Help! This was my first attempt at making gluten free cookies. I followed the directions exactly and I refrigerated the dough for about three hours before baking. While they tasted great, the dough spread out completely, so much so that it looked like sheet pan cookies. They were very flat. Nothing like the pictures. Should the butter cool for any length of time before you start mixing in the other ingredients? Any tips are appreciated!
Hi Maureen, that’s a bummer the cookies spread so much, but we’re glad you enjoyed the flavor! The browned butter doesn’t need to cool before mixing in the other ingredients and you definitely chilled the dough for plenty of time. Sometimes cookies spread due to other factors like: the cookie sheet’s color/material type (dark = overbakes, shiny metal = spreads a lot), warm cookie sheets, inaccurate flour measurement (too little causes spreading), etc. We hope these ideas help for next time!
I subbed oat flour for almond flour because it’s all I had and they still turned out soft and chewy. This recipe really is perfection!
We appreciate you taking the time to share your feedback, Angela! We’re happy to hear you liked the cookies. Glad the oat flour worked as a good sub for almond flour too!