


Erin’s Recipe Rundown

Texture: Chewy, crisp on the bottom and light. This crust has a great chew to it which is often hard to come by with gluten-free pizza!
Taste: Flavorful and golden thanks to olive oil a little almond flour.
Ease: So easy to make! You can have pizza on your table in less than 90 minutes. Great beginners recipe.
Top Tips: I like to parbake the pizza crust without toppings, then slide it onto a pizza steel to finish baking with the toppings. This ensures a crispy bottom crust!
Recommended GF Flour: Works great with many gluten-free flour blends. Use a high-quality flour that contains xanthan gum. I like King Arthur Flour and Bob’s Red Mill.
Would I make these again? Absolutely! This is our go-to homemade gluten-free pizza crust.
xoxo erin

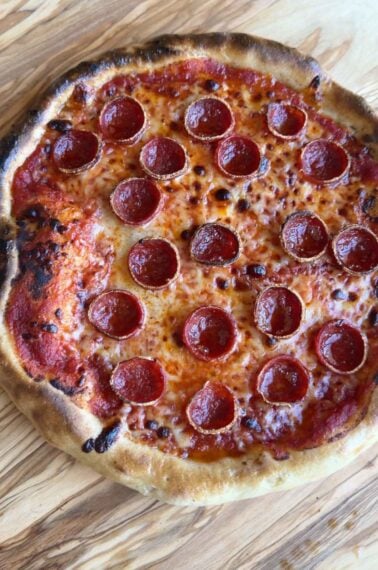
I’ve tried a lot of gluten-free pizza crust recipes over the years and this is my favorite. It’s easy to make and makes a crust that is both crispy and chewy.
So many gluten-free pizza crusts are thin crusts that turn out crunchy like a cracker. If you’re wanting a gluten-free crust with a good chew, this is it!
This pizza crust has the perfect amount of chew and bakes up crispy on the bottom. Plus it’s easy-to-make with gluten-free measure-for-measure flour!
Featured Comment
From Diane: My 7 year old granddaughter has coeliac disease and l have tried numerous gf pizza base recipes for her with no luck. She absolutely loves this one, we double the recipe every time so she always has one in the freezer. Her little brothers also love it. Thank you for a wonderful recipe!
Table of Contents
Ingredients You’ll Need

Here are a few notes on some of the key ingredients to make this gluten-free pizza crust. See the recipe card below for the measurements.
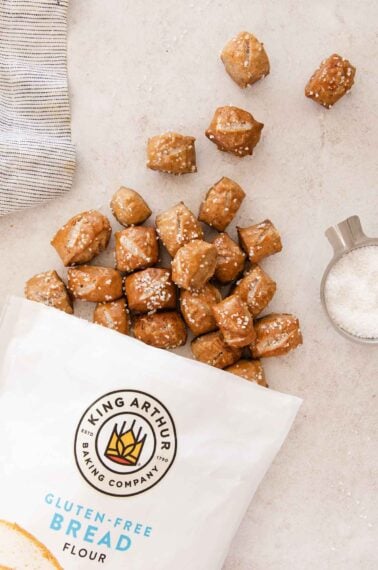
- Gluten-Free 1:1 Baking Flour: I like to use a high quality gluten-free measure-for-measure flour blend like King Arthur Flour in my baked goods. This blend has a mixture of brown rice flour, white rice flour, potato starch and tapioca starch. This recipe works well with most types of gluten-free all purpose flour!
- Almond Flour: Adding a little almond flour is one of my favorite tricks in gluten-free baking (I include it in these gluten-free chocolate chip cookies!) . The extra protein/fat in the almond flour this pizza crust gives it great flavor and helps it brown up nice and golden. To make this gluten-free pizza crust nut-free, you can simple replace the almond flour with more gluten-free flour.
- Psyllium Husk Powder: Don’t skip this ingredient! It had elastic properties that give the crust a springy, bready consistency. I’ve tried many brands of psyllium husk powder over the years and highly recommend this one.
- Baking Powder: This is an unusual ingredient in pizza crust but it lightens up the dough.
- Instant Yeast: Saf yeast is my favorite. Gluten-free doughs don’t need an extra rise, so instant yeast works great! You also might like these gluten-free cinnamon rolls.
How to Make Gluten-Free Pizza Crust
Here’s an overview of how to make gluten-free pizza crust. You can jump to the recipe for the full instructions.
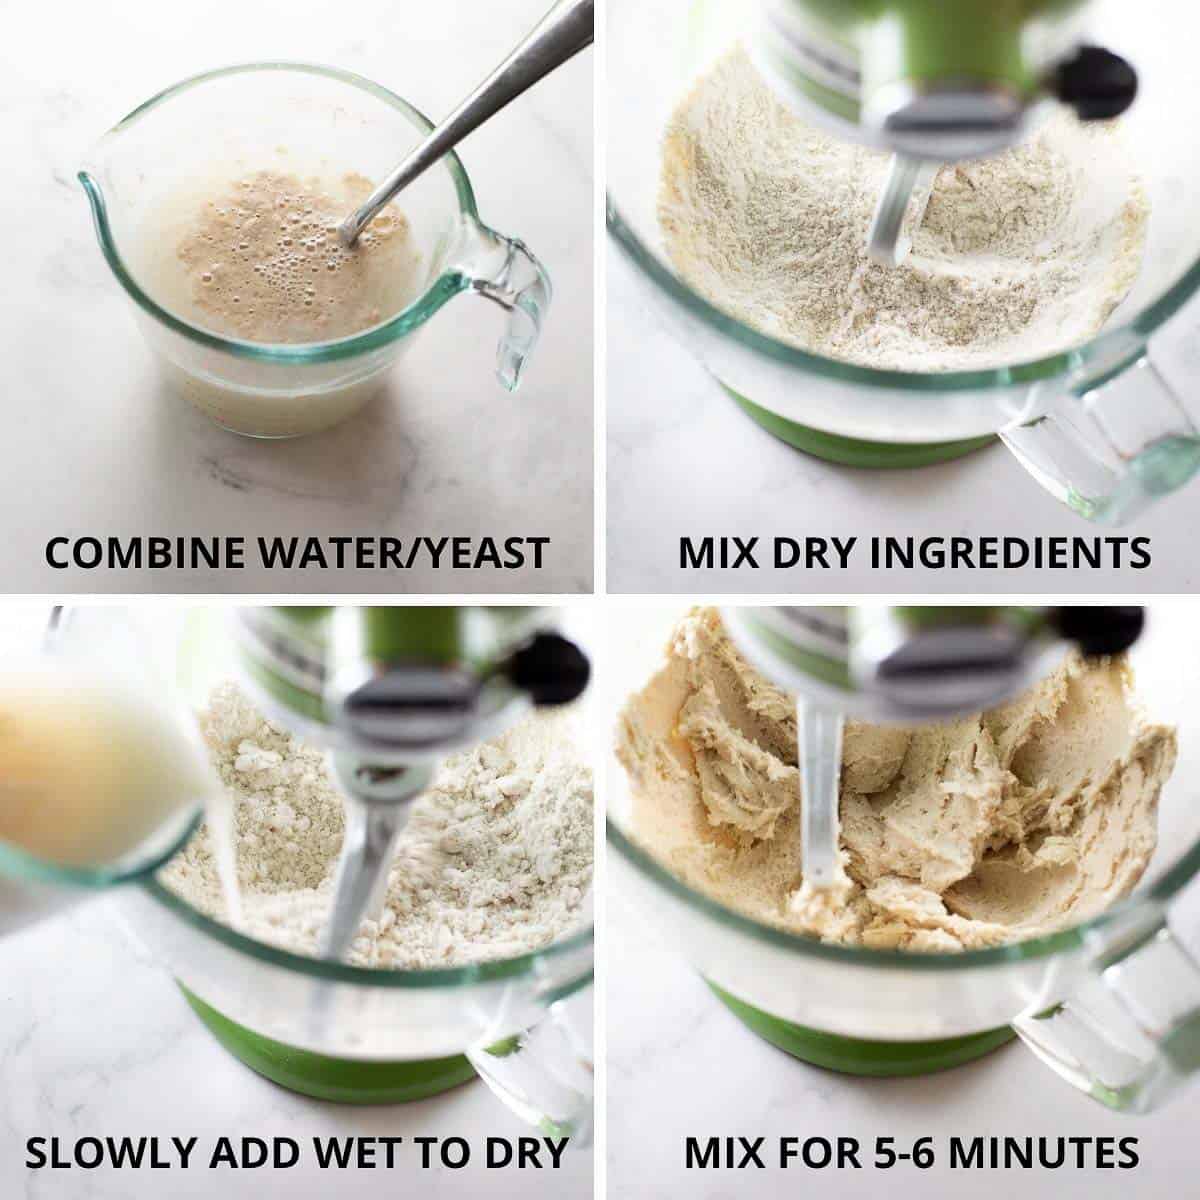
- Yeast: I like to use instant yeast for this gluten-free pizza crust. You’ll mix it together with some sugar and water and let it sit until it’s nice and bubbly.
- Dry Ingredients: I think this dough comes together best in a stand mixer fitted with a paddle attachment. Add all the dry ingredients to the bowl of the mixer and mix to combine.
- Wet Ingredients: With the mixer running on low, slowly pour in the yeast mixture followed by the olive oil. Then mix on medium-high speed for about 5 minutes.
Gluten-Free Pizza Dough Consistency
Your dough might be more runny depending on what gluten-free flour blend you use. All gluten-free flour blends are slightly different and even how you measure the flour can cause differences. See the video in the recipe card below to get a visual on the texture you’re going for.
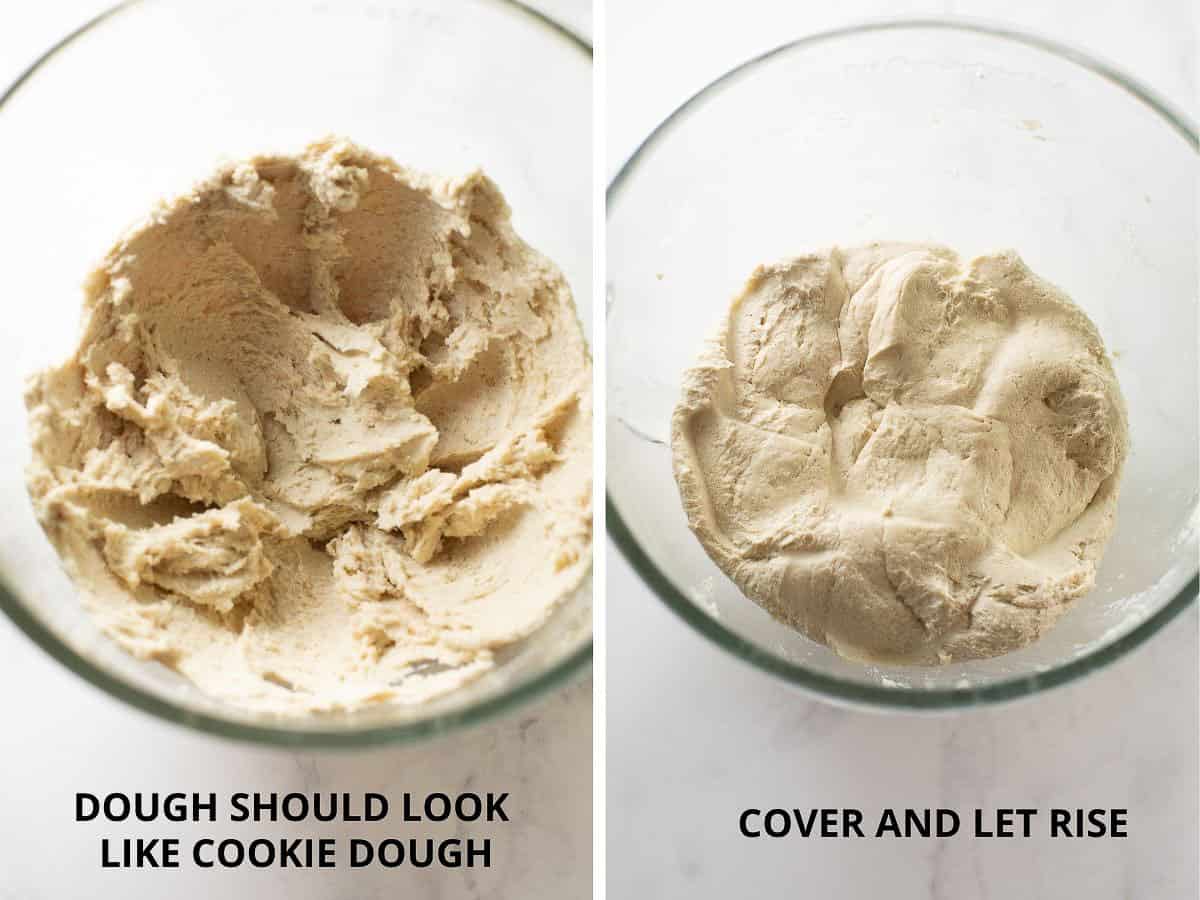
The dough should be more like cookie dough than runny batter. I would suggest mixing the dough for 3-4 minutes first, then adding more flour if needed (just a little at a time!) to thicken it up slightly.

- Press the dough onto the pizza pan and let rise for 10 minutes.
- I like to parbake the crust before adding the toppings for best results. If you have a pizza stone or steel – even better. I usually slide my pizza off the parchment/pan and bake it directly on the pizza steel for the second bake with the toppings.
Tips for the Best Gluten-Free Pizza
- One thing I’ve noticed at a lot of restaurants that serve gluten-free pizza is that the pizza never gets crispy on the bottom. Gluten-free things generally need to be baked longer than regular baked goods.
- I par-bake the pizza on these pans that I line with parchment paper rounds for 15-20 minute before adding the toppings. Then I like to slide the pizza onto a pizza steel and bake it for another 10-15 minute with the toppings on for perfectly crispy, chewy pizza!
- Another great thing about this crust recipe is that it works with basically any gluten-free flour blend. It turns out wonderfully with King Arthur Flour and Bob’s Red Mill gluten-free flours. You can use what you have on hand.

More Gluten-Free Recipes

Gluten-Free Pizza Crust (5-Star Recipe!)
Video
Ingredients
Yeast Mixture:
- 1 cup (240ml) warm water about 110°F
- 1 tablespoon granulated sugar
- 1 1/2 teaspoons instant yeast
Other Ingredients:
- 1 1/2 cups (225g) gluten-free measure-for-measure flour
- 1/4 cup (25g) almond flour
- 1 tablespoon psyllium husk powder
- 1 teaspoon baking powder
- 3/4 teaspoon kosher salt
- 2 tablespoons olive oil
Instructions
- In a measuring cup, combine the warm water, sugar and yeast in a glass measuring cup. Whisk to combine. Let proof for 5-10 minutes.
- In the bowl of a stand mixer fitted with the paddle attachment, add the gluten-free flour, almond flour, psyllium husk powder, baking powder and salt.
- With the mixer running on low, add the yeast mixture along with the olive oil. Increase the speed to medium-high and mix for 5 minutes. The dough will resemble thick cookie dough, this is normal.
- Using an oiled rubber spatula, scrape down the bottom and sides of the bowl and mix again until well-combined.
- Scoop the dough into the prepared pan and smooth the top with wet hands. Cover with oiled plastic wrap and let rise in a warm place for 45-60 minutes.
- Place a pizza steel or pizza stone in the oven. Preheat the oven to 425°F. Line a 12-inch round pizza pan with a circle of parchment paper. Spray the parchment paper with cooking spray.
- Using oiled or wet hands, press the dough into the pan. The dough will shrink slightly as it bakes, so press the dough as thin as you can to cover the pan. Let rise for another 10 minutes.
- Bake the crust without toppings for 15-20 minutes. Remove from the oven and add your desired toppings.
- Slide the pizza off the parchment paper and pan directly onto the pizza steel. Bake for another 10-15 minutes until the toppings are bubbly and cooked to your liking.
- Remove from the oven and let cool for 5 minutes before slicing.
Notes
- One thing I’ve noticed at a lot of restaurants that serve gluten-free pizza is that the pizza never gets crispy on the bottom. Gluten-free things generally need to be baked longer than regular baked goods.
- With this recipe I parbake the crust for 15-20 minute before adding the toppings. Then bake it for another 10-15 minute with the toppings on and you’ll have perfectly crispy, chewy pizza!
- I bake on a pizza pan, then transfer it to a wooden cutting board to slice up. Any cookie sheet will work but I recommend greasing the sheet with shortening (not olive oil) so it doesn’t stick. You can also use parchment paper if you prefer.
- Another great thing about this crust recipe is that it works with basically any gluten-free flour blend. It turns out wonderfully with King Arthur Flour and Bob’s Red Mill gluten-free flours. You can use what you have on hand
Nutrition
I hope you love this recipe as much as we do! If you try it be sure to leave me a comment/rating below. I’d love to hear from you!
Recipe adapted from King Arthur Flour
**This post contains affiliate links to the products I always use.


Erin,
The crust turns out beautifully as written and makes a great pizza. Thanks for posting! I look forward to trying your bread recipe soon.
This crust is excellent! I ended up gradually adding more flour to get the right consistency because I measured rather than weighed my flour. For extra flavor I added a little dried oregano, basil and garlic powder to the crust mixture. My husband, who is not GF, ate 4 slices!
I’m having a hard time finding psyllium husk powder will put psyllium husk seed work as well?
Hi there – can use the husks; just grind them into a powder before adding to the recipe 🙂
I just made this and followed the baking instructions. My Pizza was over baked. The flavor is great, I will just bake it less next time. Thanks for the recipe!
Thank you Erin for this great Recipe! I made it today for lunch, and my kids and thier friends were fighting over every slice of it! Thank you again:)
The dough was a sticky mess. Never looked like cookie dough, even after adding more flour. I didn’t think there would be any way that this would be edible, but I decided to try it anyway. I had to use a greased spatula to spread the dough onto a cookie sheet. After parbaking I thought it might just work, so I added all my toppings and Baked it for 12 mins. longer. It was delicious, and so crunchy like I like it! Thank you so much for this recipe. This will be my go to crust from now on, and I found it at just the right time. I had been buying Trader Joe’s gf pizza crust, but they have not had it in the stores for about 2 months. Now I don’t care. This one is so much better, and probably a lot cheaper. Thanks you again.
I’m glad it worked out for you!
Thank you so much for this recipe! I was just diagnosed and have been missing pizza, nothing tasted right, even deliver was off. Well this is perfect! Even my kids prefer it over my regular pizza dough. Thank you again.
Changes I did was I used my own flour blend, and used 1tsp xanthum gum instead of husks since I did not have any. I also double the recipe and it worked great.
Thanks Rachelle! So glad your kids liked it! 🙂
Hey I’m planning out a gluten free pizza dough and I’ll be using the ingredients suggested but I’m thinking of adding instant mashed potatoes, cheese, 1 teaspoon apple cider vinegar, sauteeing garlic and onion powder in oil (letting it cool) I just want to check if anyone has added this and if it will retard the dough. Thanks for any tips
Okay, reading the comments, I really wish I had read them before. I’m sure I added at least 1/4 more flour and my dough looked nice, but when I took it out of the bowl it was not a ball of dough :-(. My heart was fairly broken, but I have added more flour and will give it a try. Next time will definitely add at least 1/2 cup or more as commented by several folks below. We are at a high altitude so who knows if that has anything to do with it.
Fingers crossed, hope it turns out this time!
Can you refrigerate the dough?
Wow we just made this pizza dough and it was easy and delicious. I have missed eating pizza so thank you so much
This was a tasty gf crust. I will prebake for 20 minutes or until golden brown next time I make it. Thanks for a great recipe.
Can the dough be stored in the fridge – and if so, how long? Can it be frozen? If so, how do you thaw out and use it? Thank you!
I would recommend par-baking the crusts then cooling them before freezing. The dough unbaked cannot be frozen. I haven’t tried refrigerating it!
Very runny dough and very frustrated!
Finally…a GF pizza dough recipe that works! We typically have homemade pizza and watch a movie on Sunday nights. Once my daughter was diagnosed with celiac, this went by the wayside as I couldn’t find a recipe that actually tasted like pizza dough. Seriously, they were all worse than terrible. Tried this one ne last night and everyone loved it. Looked like pizza, tasted like pizza. This will definitely be my Sunday night go-to recipe!
I’m so happy to hear this recipe will help carry on your tradition! Thanks for the comment!
So a few things: for the people who are finding it runny – it still works! Just use a spatula or wet hands to shape it and you’re ready to rock (or at least I was, using cup 4 cup).
Also, I used chia seeds instead of psyllium husk (half the amount, though) since I never have psyllium on hand.
Finally, I used this tonight to make hamburger buns and yum!!! I have runny batter with this, so I just globbed 4 rough buns out of the dough onto a baking sheet, and then used wet hands to shape. Turned the heat down to 350 after 10 minutes and they were perfect after 30 (total). Best hamburger buns I’ve had since going GF!!!