
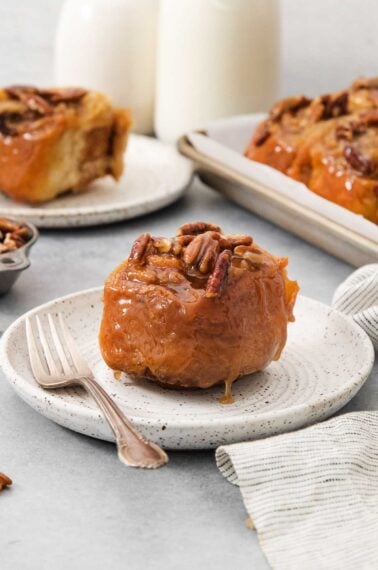
Soft, fluffy and buttery, these Gluten-Free Rolls are EASY to make and perfect for any occasion!
These dinner rolls are made with easy-to-find ingredients and bake up start to finish in less than 2 hours. You’ll be happily surprised with how easy they are to make!
Be sure to watch the video tutorial for more detailed instructions.

If you eat gluten-free there is no need to miss out of soft, yeasted dinner rolls. These gluten-free rolls are the perfect compliment to so many meals. Don’t be surprised if they outshine the main dish!
We love serving these rolls at Thanksgiving dinner every year. You can easily double (or triple!) the recipe to make enough rolls to feed a crowd at your holiday meal.
My family also loves these gluten-free dinner rolls for Sunday dinner with gluten-free beef stew , sirloin tip roast or gluten-free pot roast.
Whatever you serve them with, they will fill your home with the most delicious, bread-baking aroma!
VIDEO: See how to make them!
What Gluten-Free Flour to Use
Making gluten-free dinner rolls might sound tricky, but it’s actually even more simple than making traditional rolls.
These rolls only need a single rise and bake up start-to-finish in less than 2 hours. You’ll just need to start with the right gluten-free ingredients.
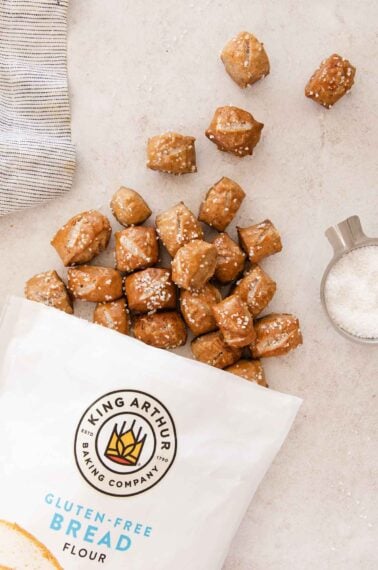
- Use a high quality gluten-free flour blend. I like using a gluten-free measure-for-measure flour blend like King Arthur Flour when making these rolls. It works best to use a blend that contains xanthan gum in this recipe.
- I have many other recipes on my site that use this flour blend like these Gluten-Free Oatmeal Chocolate Chip Cookies so you can put the rest of the flour to good use!
- Add a little almond flour. Adding a little almond flour is one of my favorite tricks in gluten-free baking. The extra protein/fat in the almond flour these gluten-free rolls great flavor and helps them to brown up nice and golden.
You also might like these gluten-free crescent rolls.
How to Make Gluten-Free Rolls

These how-to numbered pictures match up with the instructions below.
- Mix together the dry ingredients.
- Mix together the wet ingredients.
- With the mixer running, slowly add the warm water mixture to the dry ingredients. I like to use the paddle attachment rather than a dough hook for gluten-free bread recipes.
- Mix the dough for 6 minutes to incorporate air.
- The dough will resemble cookie dough once it’s mixed.
- Scoop the dough into balls using a large cookie scoop.
- Smooth the top of the rolls with water.
- Let the dough rise in a warm place then bake.
Be sure to check out the video I’ve included in this post for a visual on the step-by-step instructions.

Egg-Free and Dairy-Free Rolls
You can easily make these gluten-free rolls egg-free or dairy-free with some simple substitutions.
EGG-FREE ROLLS: Add 2 tablespoons golden flaxseed to the dry ingredients and increase the water by 2 tablespoons. The rolls might not rise quite as much as with the egg, but the yeast and baking powder/apple cider vinegar will still the dough a lift.
DAIRY-FREE ROLLS: Simply substitute the melted butter for vegan butter like Earth Balance Buttery Sticks. I prefer using a butter substitute here rather than something like olive oil because it’s nice to have the buttery flavor in the rolls.
Tips for Gluten-Free Rolls
There are a few tips worth noting when it comes to making gluten-free dinner rolls. While you can use some substitutes to make these rolls egg-free or dairy-free, other ingredients can’t be swapped out as easily.
- Psyllium husk is important for the right texture. There is no substitute that works quite the same as psyllium husk powder in this recipe. It’s a great binder in gluten-free breads and adds structure. Psyllium husk helps these rolls turn out soft, but not crumbly. Be sure to buy psyllium husk powder rather than whole psyllium husks for best results.
- Use instant yeast (aka highly active yeast). Unlike traditional bread recipes, gluten-free dough only require one rise, so it works great to use highly active yeast. One rise also makes this gluten-free roll recipe quick and easy!
- Baking Powder + Apple Cider Vinegar. These might seem like strange ingredients to have in a roll recipe! Using a combination of baking powder and apple cider vinegar is a great trick to giving gluten-free bread recipes a light texture and a little extra rise.
- The dough will look like cookie dough. Don’t be alarmed if this gluten-free roll dough looks nothing like regular roll dough. It’s not supposed to, and rather the bread dough should have the consistency of thick cookie dough.
- Use a large cookie or ice cream scoop to form the rolls. Speaking of cookie dough, a large scoop (#14 or a 4 tablespoon amount) works great to shape the balls of dough. You should have enough dough for 8 rolls. After scooping the rolls you can use wet fingers to smooth any imperfections.
You also might like
If you’re looking for more gluten-free bread recipes check out gluten-free sandwich bread. It’s delicious for toast, sandwiches or simply fresh out of the oven with honey.
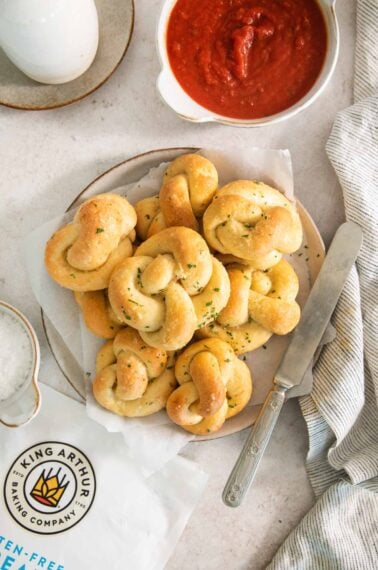
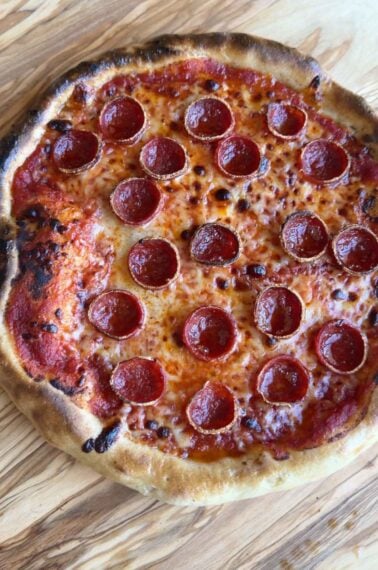
You might also like these long-time reader favorite recipes for gluten-free soft pretzels, gluten-free pizza crust, gluten-free garlic bread, or gluten-free flatbread.
More gluten-free bread recipes


If you have any more questions about gluten-free baking or how to make these gluten-free rolls please leave me a comment below! Again I’ve also included a video in this post with step-by-step instructions to help you out.
If you make this recipe I’d love to hear how it turned out for you! Leave me a comment/rating below. Happy Baking!

Gluten-Free Dinner Rolls (1:1 Baking Flour)
Video
Ingredients
Dry Ingredients:
- 1 3/4 cup (262g) gluten-free measure-for-measure flour
- 2/3 cup (67g) almond flour
- 3 tablespoons granulated sugar
- 3 tablespoons whole psyllium husk or 1 1/2 tablespoons psyllium husk powder
- 1 packet (2 1/4 teaspoons) instant or highly active yeast
- 1 teaspoon baking powder
- 3/4 teaspoon kosher salt
Wet Ingredients:
- 1 1/4 cup (300ml) warm water, about 110°F
- 1 large egg
- 1 1/2 teaspoons apple cider vinegar
- 1/4 cup (56g) butter, melted
Instructions
- In the bowl of a stand mixer fitted with the paddle attachment, add the dry ingredients. Mix on low until combined.
- In a measuring cup, mix together the wet ingredients.
- With the mixer running on low, slowly pour the wet ingredients into the dry ingredients. Increase the mixer speed to medium-high then mix for 6 minutes. This allows air to incorporate into the dough. The dough will have the consistency of cookie dough.
- Lightly spray a 9-inch pie or cake pan with cooking spray. Spray a #14 (4 tablespoon measure) cookie scoop with cooking spray. Scoop 8 balls of dough into the pan. You may need to spray the cookie scoop in-between each scoop.
- Use wet hands to smooth out the tops of the rolls. Let rise for 1 hour. During the last few minutes of rising, preheat the oven to 400F. Bake the rolls for 25-30 minutes. The top should be golden brown. Let cool for 15 minutes before serving. Brush the rolls with melted butter. Serve and enjoy!
- Store leftover rolls in a bag at room temperature for up to 2 days. Reheat for 15-20 seconds in the microwave before serving.
Notes
- Use a high-quality gluten-free measure-for-measure flour for best results.
- A large scoop (#14 or a 4 tablespoon amount) works great to shape these rolls
- There is no substitute that works quite the same as psyllium husk powder in this recipe. It’s a great binder in gluten-free breads and adds structure.
- MAKE IT EGG-FREE: Omit the egg, add 2 tablespoons ground golden flaxseed to the dry ingredients. Increase the water by 2 tablespoons.
- MAKE IT DAIRY-FREE: Use vegan butter instead of regular butter.
- MAKE IT NUT-FREE: Use 1/2 cup more gluten-free measure-for-measure flour in place of the 2/3 cup almond flour.


We filled the scoop half full of dough then sprinkled some dairy free shredded Parmesan and some chopped pepperoni- then filled with more dough to make pepperoni rolls. Delicious! My girls LOVED them! Thank you for a great recipe! I really like that your recipes use a flour blend that I already keep on hand. Your recipes are very easy and always turn out great!
Winner recipe. I mixed mine by hand which worked out. Added some sesame seeds on top. Thank you!
Great to know you were able to mix the dough by hand. I’m happy you enjoyed them! 🙂
Does the melted butter go in the dough? Mine came out very wet
Yes the melted butter goes into the dough. Sorry the batter was too wet! This is usually because of the type of flour blend or not using enough flour. Next time add a little more flour, one tablespoon at a time, until your dough is the consistency of cookie dough. I hope this helps!
Did you brush the tops with melted butter or milk before baking to get that nice shine to the top?
I always brush them with butter after baking! You can definitely brush them with an egg wash or milk before baking if you like though 🙂
Can I use a bread machine to mix the dough? My stand mixer is still in storage.
I don’t have much experience with bread makers but I think that should work!
Thank you for this amazing recipe! These are not just the best GF rolls I’ve made, but the best rolls period! I added some Italian seasonings to the dough and sprinkled a little shredded cheese at the end of baking, just for fun and it turned out beautifully. The only issue I had was that I wasn’t sure when exactly they were done and had to put them back in a couple of times. So you have any suggestions as to how to tell when they’re done? Also, would it be ok to brush them with egg before baking?
I have celiac and usually do not eat bread due to how gross it is GF and how expensive it is.
THIS RECIPE IS AN ABSOLUTE GAME CHANGER!!! IT’S EXACTLT LIKE REAL DINNER ROLLS!
They are very pillowey and springy and incredibly soft. I couldn’t ask for more!!!
Ok, one weird thing though. I used the exact measurements and the exact ingredients. I used King Arthur Flour GF cup for cup flour.
Here’s the weird part: THEY ARE PURPLE I’m serious! They’re golden on top and bottom but have a purple hue!
Has this happened to anyone else?
I’m so glad you enjoyed them! And YES this can happen depending on the psyllium husk powder you use. I have actually started using whole psyllium husk instead now because the powder (depending on the brand) can do that. I hope this helps!
I just made these today. They tasted fine and were fairly easy to make. The inside of my rolls looked more like whole wheat bread, sort of brownish in color. They also spread in my glass pie pan into one big bread pie with indentations to cut out each roll. They didn’t look like your photo. Any idea what went wrong?
Hi Deanna,
Did you use brown rather than golden flax? Brown is supposed to be better for you, but it does give baked goods a darker color than golden. As for the rolls spreading out, I’d guess your dough might have been a little wet, though I doubt that would have affected the flavor.
Best,
Sarah
Would another type of flour work in place of almond flour? Maybe another nut flour like pecan or walnut? Almond allergy here…
Yes! I recommend using more gluten-free 1:1 baking flour in place of the almond flour. I hope this helps!
Thank you so much for this recipe! I have a family member who has several allergies and the substitutions you provide are just what I needed! I also have to use a corn-free baking powder substitute in addition to the dairy, egg, soy, and nut-free substitutions you provide, and these rolls still come out great! It makes me so happy to have bread on the table for her! Thank you, thank you!
Hooray! I’m so happy you and your family member enjoyed the rolls. Thanks for the comment!
Can I use a food processor to mix the dough? I don’t have a standing mixer.
Hi there, excited to try this! Can I freeze the rolls?
Yes you can definitely freeze these. I recommend wrapping the rolls individually in plastic wrap then placing in a large Ziploc bag to freeze. You can defrost the rolls individually in the microwave for 30 seconds or so. I hope you enjoy them!
Can I substitute Xanthum Gum for the Psyllium husk powder?
Unfortunately that won’t work for this recipe!
Just made a second batch and they came out just as wonderful as the first!
I recently had a holiday food memory which turned into a craving for yeast rolls that my mum made throughout my childhood. For years I’ve resigned myself to not ever having such homemade goodness due to a gluten intolerance. Wow, was I wrong! After a bit of an internet search I came across this recipe.
Thank you so much, Erin, for all your time and energy that goes into creating recipes with such thorough and clear instructions for us to recreate and fall in love with!
Seriously, so so incredibly yummy. I’m looking forward to exploring more of your creations.
I’m so glad you enjoyed the rolls! Glad the recipe was easy to follow. Thanks for the comment!
I have tried this recipe twice, and I am wondering if the melted butter is supposed to be added with the wet ingredients or just to be used for topping after baking. Thank you for your help!
Good question! You’re supposed to add it to the roll dough along with the wet ingredients 🙂