

Erin’s Recipe Rundown

I’ve always loved a classic Southern buttermilk pie, and this gluten-free version totally hits the spot! It’s made with tangy buttermilk and a hint of nutmeg and lemon, baked into a silky-smooth filling with a crisp, flaky crust.
This pie tastes even better the day after it’s baked so it’s a great make-ahead option for the holidays.
Why You’ll Love It: This recipe delivers all the same notes of traditional buttermilk pie, with a gluten-free crust that actually flakes! It’s the perfect make-ahead option for holidays and family gatherings.
Top Tips: Use my tried-and-true gluten-free pie crust recipe and give it a quick par-bake on a preheated pizza steel to create a crisp, golden crust. Don’t overbake—the center should still wobble slightly to achieve a custardy texture!
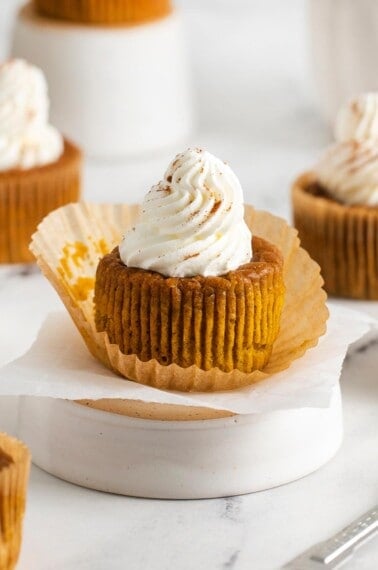
For more gluten-free pie recipes, try this gluten-free apple pie, gluten-free coconut cream pie, gluten-free pumpkin pie, or gluten-free cherry pie.
xoxo erin

Ingredients You’ll Need
Here are a few notes on some of the key ingredients to make this gluten-free buttermilk pie. Jump to the recipe card below for the exact measurements.

- Gluten-free flour: For a crisp, flaky crust, be sure to use a high-quality measure-for-measure gluten-free blend with xantham gum. I recommend using King Arthur Gluten-Free Measure-for-Measure Flour.
- Butter: Melted, cooled butter blends smoothly without scrambling the eggs. This gives you a super silky, sliceable custard filling!
- Buttermilk: Use room temperature buttermilk to ensure the custard sets evenly.
- Lemon and nutmeg: This winning combo helps balance the sweetness and add a depth of flavor that takes this pie to the next level. Be sure to use fresh for better flavor! Then sprinkle nutmeg lightly over the top for a professional bakery look.
How to Make Gluten-Free Buttermilk Pie
Here’s an overview of how to make this recipe. You can jump to the recipe for the full instructions!

Make the gluten-free crust: Start by making your gluten-free crust. See my gluten-free pie crust recipe for full instructions! After chilling the crust, be sure to par-bake it on a preheated pizza steel. This is what gives it the crisp, flaky texture that will hold up to the custard filling.
Make the filling base: Whisk together melted butter and sugar until glossy and thick. Add eggs one at a time, mixing until smooth and frothy.
Finish the filling: Mix in the gluten-free flour, lemon zest, and nutmeg. Combine until you can’t see any dry spots, then add the wet ingredients. The batter should turn a creamy, pale yellow.
Assemble the pie: Set your pie dish on a rimmed baking sheet (just in case it bubbles over a bit.) Pour the filling into the crust. It should come close to the top but not overflow! Give the pan a tap on the counter to pop any air bubbles, then dust with a light sprinkling of nutmeg.
Bake: Bake until the pie edges are puffed and set, but the center still has a slight wobble. Don’t overbake—this is the texture you want for a silky, sliceable custard finish!


Gluten-Free Buttermilk Pie (Easy Old-Fashioned!)
Ingredients
Gluten Free Pie Crust:
- ½ cup (113g) butter frozen until solid
- 2 tablespoons (28g) shortening frozen until solid
- 1½ cups (225g) gluten-free measure-for-measure flour
- 1 teaspoon granulated sugar
- ½ teaspoon kosher salt
- 1 large egg
- 1 tablespoon white vinegar
Buttermilk Filling:
- ½ cup (113g) unsalted butter, melted and slightly cooled
- 1 ½ (350g) cups granulated sugar
- 3 large eggs room temperature
- 3 tablespoons measure for measure gluten-free flour
- 1 teaspoon lemon zest
- ¼ teaspoon ground nutmeg plus more for sprinkling
- 1 cup (240 ml) buttermilk
- 2 teaspoons fresh lemon juice
- 2 teaspoons vanilla extract
Instructions
For the Gluten-Free Pie Crust:
- Be sure to freeze your butter and shortening in advance!
- In a medium bowl, whisk together the gluten-free flour, sugar and salt.
- In a small measuring cup, add the egg and vinegar. Whisk until completely smooth, then add cold water until the mixture measures ½ cup and whisk to fully combine. Refrigerate the egg-vinegar mixture until ready to use.
- Using the large holes of a box grater, grate the butter. Add the grated butter to the dry ingredients and toss to coat in the flour mixture.
- Using the large holes of a box grater, grate the shortening. Add the grated shortening to the dry ingredients and toss to coat in the flour mixture.
- Drizzle 1 tablespoon of the egg-vinegar-water mixture over the flour and butter mixture. Using a rubber spatula, gently stir and toss the mixture, distributing the moisture evenly. Continue adding the liquid, 1 tablespoon at a time, stirring after each addition, until the dough begins to come together in large clumps. Repeat until you’ve added 5-6 tablespoons of the liquid. (Note that you will only use about ½ of the liquid.)
- Pour the dough into a bowl and use your hands to gently bring the dough together, being careful not to overwork it. Add another tablespoon of liquid if needed. Don’t be tempted to add too much liquid! It should be moist enough to hold together when pressed but not sticky.
- Turn the dough out onto a lightly floured surface. Gather it together with your hands, pressing any loose bits into the dough to form a cohesive ball.
- Gently shape it into a disc about 1 inch thick. Wrap the disc tightly in plastic wrap and refrigerate for 1 hour or up to 2 days.
- If the dough has been in the refrigerator longer than 1 hour, let the dough sit at room temperature for 15 minutes before rolling.
- Place the dough on a lightly floured pastry mat or a silicone baking mat. Roll the pie crust into a circle 12 inches in diameter. You may need to press it together if it starts to slit or break on the edges. This is normal; gluten-free pie crust requires a bit of patience to roll out.
- After rolling, use the pastry mat to flip the dough into a 9-inch pie plate. Gently ease the dough into the edges of the pan. Trim any excess edges with scissors and shape the edges as desired.
- Wrap the shaped pie crust loosely in plastic and place in the freezer for 15 minutes or up to 1 hour until chilled and firm. With a fork, prick holes all over the bottom and sides of the crust.
- Place a pizza steel in the oven. (A pizza steel helps to ensure a crispy bottom crust.) Preheat the oven to 375°F.
- Line the frozen crust with parchment paper and pie weights. Bake 10 minutes. Carefully remove weights and parchment. Let the crust cool 10 minutes on a rack. Reduce oven temperature to 350°F and keep the steel in place.
For the Buttermilk Filling:
- In a large bowl, whisk the melted butter and sugar. Add the eggs one at a time, whisking well after each.
- Sprinkle in the flour, lemon zest, and nutmeg and whisk to combine.
- Whisk in the buttermilk, lemon juice, and vanilla until smooth.
- Place the pie dish on a rimmed baking sheet. Pour in the filling. Sprinkle the top lightly with nutmeg.
- Bake at 350°F for 50 to 55 minutes, until the edges are set and puffed and the center has a slight wobble.
- Cool on a rack until room temperature, 2 to 3 hours. Serve at room temperature or place in the fridge.
Notes
To Store: Store leftover pie an airtight container in the fridge for up to three days.
To Freeze: Wrap individual slices in plastic wrap and store in the freezer for up to 1 month. Thaw in the fridge, then bring them to room temperature before serving.


Love this pie
We’re so pleased you enjoyed the recipe, Evelyn! Thank you for the positive review!