


Erin’s Recipe Rundown

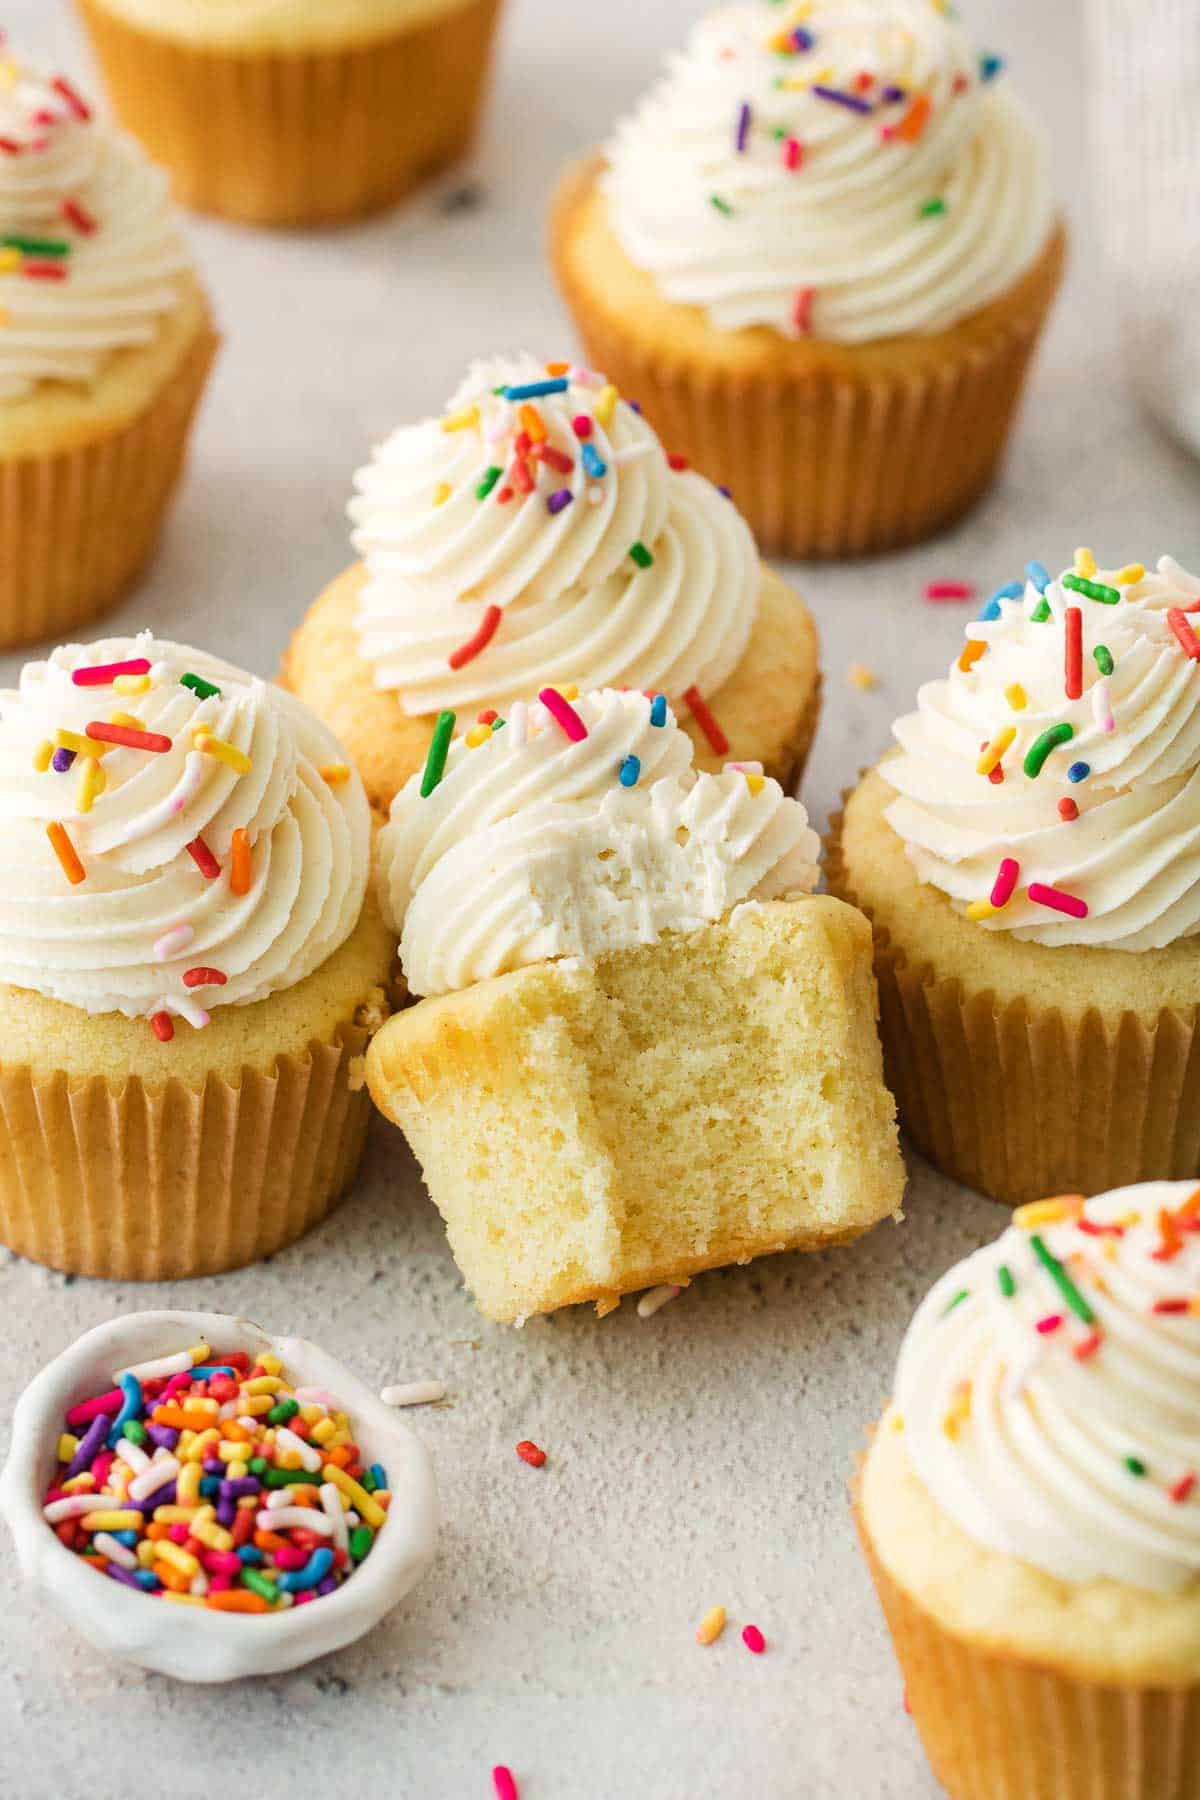
Texture: Light and airy crumb with creamy frosting.
Taste: Buttermilk + vanilla = sweet, flavorful cupcakes.
Ease: Easy to make bakery-quality cupcakes — perfect for birthday parties and events!
Top Tip: Several of the ingredients need to be at room temperature when added to the mixture. Don’t forget to prep these ingredients before you’re ready to bake!
Recommended GF Flour: Use a high-quality flour that contains xanthan gum. Both King Arthur Gluten-Free Measure-for-Measure Flour and Bob’s Red Mill Gluten-Free 1:1 Baking Flour work well!
Would I make these again? Absolutely! These cupcakes are moist, airy, and packed full of flavor. They’re topped with the creamiest buttercream frosting — perfection in every bite!
xoxo erin
This post was originally published in August 2023. It was updated with new photos and instructions in May 2025.
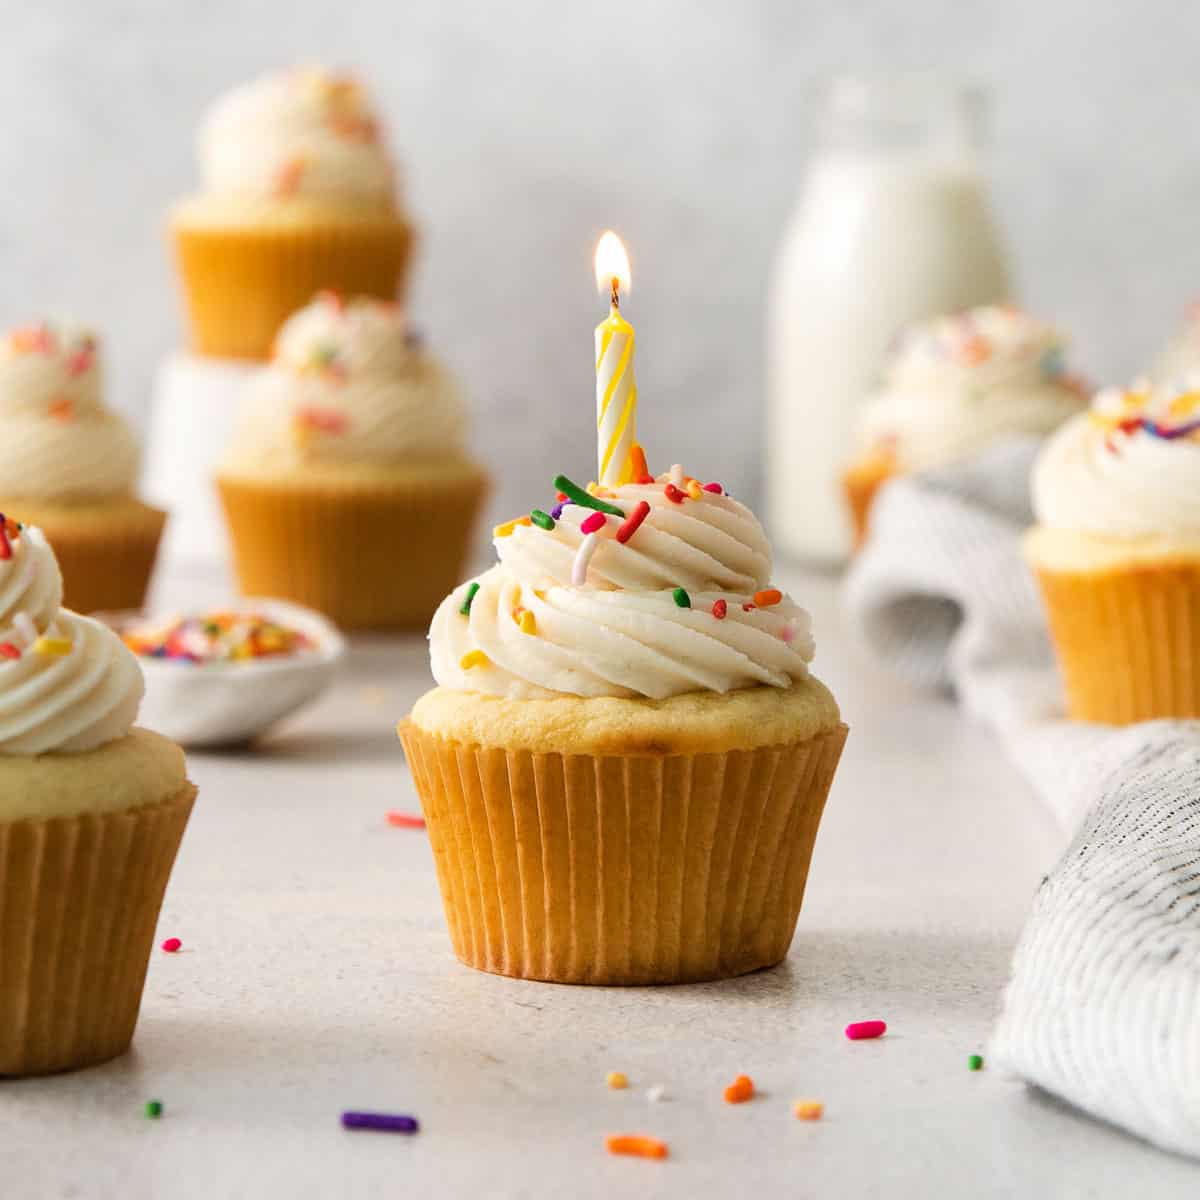
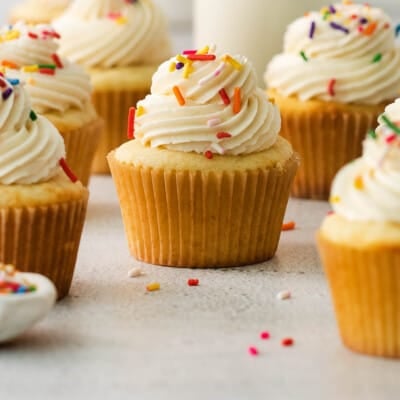
These gluten-free vanilla cupcakes check all the boxes for bakery-style treats that are sure to impress! They’re light and airy, with perfectly domed tops, and topped with the smoothest buttercream frosting.
There’s really so much to love about these cupcakes — that’s why they’re my go-to for birthday parties, special occasions, class parties, and more!
Featured Comment
From Tessa: “Incredible! Easy to follow, so so delicious, and those who can eat gluten didn’t even realize they were gluten free!”
Table of Contents
- Erin’s Recipe Rundown
- Ingredients You’ll Need
- Gluten-Free Cake Flour
- Frosting Tip
- How to Make Gluten-Free Vanilla Cupcakes
- Make-Ahead/Storage/Freezing Instructions
- Can these gluten-free vanilla cupcakes be made dairy-free? What about nut-free?
- What does filling every other cupcake well do?
- What is the best way to frost them?
- Gluten-Free Cupcake Tips
- More Gluten-Free Cupcake Recipes
- Gluten-Free Vanilla Cupcakes (BEST EVER!) Recipe
Ingredients You’ll Need
Here are a few notes on some of the key ingredients to make these gluten-free vanilla cupcakes. Jump to the recipe card below for the exact measurements

- Gluten-free flour: It’s important to use a high-quality gluten-free flour blend that contains xanthan gum for this recipe. For these cupcakes, both Bob’s Red Mill Gluten-Free 1:1 Baking Flour and King Arthur Gluten-Free Measure-for-Measure Flour work well!
- Cornstarch: Adding a little cornstarch to the gluten-free flour is a trick to create easy gluten-free cake flour that lightens the gluten-free flour blend for the best crumb.
- Baking powder: Baking powder helps create a light, fluffy cupcake with the perfect rise.
- Buttermilk: Buttermilk is a key ingredient that helps set these cupcakes apart from the rest. It creates an ultra-moist, fluffy cupcake! For dairy-free, use unsweetened dairy-free milk mixed with 2 teaspoons of lemon juice.
- Butter/Oil: A combination of oil and butter are crucial for achieving the ideal texture. I like to use salted butter for all of my gluten-free baking. It has more depth of flavor than unsalted! For dairy-free, use vegan butter.
- Eggs: This gluten-free vanilla cupcake recipe requires four large, room-temperature eggs. By adding them in one at a time and beating them on high, lots of air gets incorporated into the batter for a light, airy crumb.
- Vanilla: I always recommend using real vanilla extract for cupcakes. Vanilla bean paste is another great option!
For more gluten-free cake recipes, try this gluten-free lemon cake, gluten-free pound cake and gluten-free angel food cake. You might also like this 7-minute frosting recipe.
Gluten-Free Cake Flour
Use a combination of gluten-free flour and cornstarch to create your own gluten-free cake flour. The cornstarch helps to lighten the gluten-free flour.

- Powdered sugar: The fine texture of the powdered sugar helps create a light and smooth buttercream.
- Milk: I like to use regular milk for this frosting, but dairy-free options will work too! The milk thins out the consistency enough so that the frosting is spreadable.
- Butter: I prefer salted butter since it creates more depth of flavor. For dairy-free, you can use vegan butter in its place.
- Salt: I love adding a pinch of salt to my frosting recipes. It adds the perfect bit of complexity and really brings out the flavor.
Frosting Tip
A pinch of kosher salt makes the frosting extra delicious! It helps to cut the sweetness and bring out the flavor.
How to Make Gluten-Free Vanilla Cupcakes
Here’s an overview of how to make these cupcakes. You can jump to the recipe for the full instructions!

- In a medium bowl: Whisk together all of the dry ingredients (gluten-free flour, cornstarch, baking powder, and salt).
- In the bowl of a stand mixer: Use a whisk attachment to beat the softened butter and oil until they’re completely blended (about 3 minutes). You can also use a hand mixer with a large bowl!

- With the mixer on medium-low: Slowly add the sugar into the butter/oil mixture, then beat on high until it becomes light and fluffy (about 3 minutes). You’re looking for it to turn a very pale yellow.
- Incorporate in air: Add the eggs one at a time. It helps to scrape down the bowl in between each egg. Add in the vanilla and beat on high (2 minutes). This adds a lot of air to the batter for light and fluffy cupcakes!

- With the mixer on low: Add half of the dry mixture, then half of the buttermilk. Mix until they’re fully combined, then repeat the process by adding the rest of the dry mixture followed by the rest of the buttermilk.
- In a prepared cupcake tin: Place liners in every other cup and pour batter into the liners, filling them 3/4 of the way full. Bake (18-30 minutes) until a toothpick inserted into the center comes out mostly clean (a few moist crumbs are okay). You can refrigerate any extra batter, if needing to bake in batches! Let the cupcakes cool for 5 minutes, then transfer them to a wire rack to cool the rest of the way.

- In the bowl of a stand mixer: On medium-high, beat the butter (2 minutes). Add 4 cups of powdered sugar plus the milk, vanilla, and salt. Mix them together on low (30 seconds), then up the mixer to medium-high (2 minutes). You can also use a hand mixer and a large bowl!
- Frost: If the frosting seems too thick, you can add a little more milk. If too thin, add a little more powdered sugar. You want it to be a spreadable consistency. Frost and enjoy!
You also might like these family-favorite recipes for gluten-free banana cake, gluten-free mug cake, gluten-free carrot cake and gluten-free german chocolate cake!
Make-Ahead/Storage/Freezing Instructions
To Make-Ahead: Unfrosted cupcakes can be made up to 2 days in advance and stored in an airtight container at room temperature. The frosting can be made up to 3 days in advance and stored in an airtight container in the refrigerator. Briefly re-whip it before frosting the cupcakes.
To Store: Store frosted cupcakes in an airtight container in the fridge for up to 5 days.
To Freeze: Unfrosted cupcakes can be frozen for up to 2 months if individually wrapped in plastic wrap and then stored in a freezer bag or airtight container. Thaw at room temperature for 1-2 hours before frosting. The frosting can also be frozen for 2 months if stored in an airtight container. Thaw in the fridge overnight and then re-whip before use.
Can these gluten-free vanilla cupcakes be made dairy-free? What about nut-free?
Yes! For the cupcakes, you can use 1⅓ cups unsweetened dairy-free milk mixed with 2 teaspoons of lemon juice to replace the buttermilk. Dairy-free butter will work in place of the regular butter too. For the frosting, use dairy-free butter and unsweetened dairy-free milk.
These vanilla cupcakes are naturally nut-free!
What does filling every other cupcake well do?
Spacing out the cupcakes by only filling every other cup allows for better air circulation which helps them to bake more evenly. This helps to create the perfect rise for bakery-style domed cupcakes!
What is the best way to frost them?
Once you get the frosting to a spreadable consistency, scoop the frosting into a piping bag or even just a Ziploc bag. The piping bag can be fitted with different tips, like a classic star tip. For the Ziploc bag, cut one corner off to create a circle opening. Gently pipe the frosting in a circular motion onto the cupcakes. There’s always the option to decorate with sprinkles and other toppings too!
Gluten-Free Cupcake Tips
- I use these cupcake liners. They never stick!
- Be sure the butter is completely at room temperature! It won’t whip up with the oil correctly if it is too cold.
- Use a combination of gluten-free flour and cornstarch to create your own gluten-free cake flour. King Arthur Gluten-Free Measure-for-Measure Flour or Bob’s Red Mill Gluten-Free 1-to-1 Baking Flour both work equally well.
- A combination of oil and butter makes for the perfect texture. I highly recommend using both!
- This batter requires a secret ingredient – AIR! Whipping the cupcakes helps add lots of air to the cupcakes and creates a light, fluffy texture.
- Adding a pinch of kosher salt to the frosting helps to cut the sweetness and bring out the flavor.
More Gluten-Free Cupcake Recipes
Gluten-Free Vanilla Cupcakes (BEST EVER!)
Video
Ingredients
Dry Ingredients
- 2 ¼ cups (337g) gluten-free measure-for-measure flour
- ½ cup (64g) cornstarch
- 2 1/2 teaspoons baking powder
- 1 teaspoon kosher salt
Other Ingredients
- 1/2 cup (113g) butter at room temperature
- 1/2 cup (120ml) neutral oil
- 1 1/2 cups (300g) granulated sugar
- 4 large eggs at room temperature
- 2 tablespoons vanilla extract
- 1 1/3 cups (320ml) buttermilk at room temperature
Frosting Ingredients
- 1 cup (226g) butter at room temperature
- 4-5 cups (480-600g) powdered sugar
- 1/4 cup (60ml) milk of choice
- 2 teaspoons vanilla extract
- pinch of kosher salt
Instructions
Make the Cupcakes
- Preheat the oven to 350°F. Place paper liners in every other cup of two cupcake tins. Set aside.
- In a medium bowl, whisk together the gluten-free flour, cornstarch, baking powder and salt.
- In the bowl of a stand mixer fitted with a whisk attachment (or use a large bowl with a hand mixer), beat the softened butter and oil together until blended well, about 3 minutes.
- With the mixer running on medium-low, slowly add the granulated sugar to the oil and butter. Beat on high until the mixture is light and fluffy and turns a very pale yellow, about 3 minutes.
- Add the eggs in one at a time, scraping down the bowl in between each addition. Mix in the vanilla extract, then beat on high for another 2 minutes. You want to incorporate lots of air!
- With the mixer running on low, add ½ of the dry ingredients followed by ½ of the buttermilk, mixing until fully combined. Repeat with the remaining dry ingredients and buttermilk.
- Using a kitchen scoop or large spoon, fill each baking cup ¾ of the way up. Bake for 18-20 minutes, until a toothpick inserted in the center comes out mostly clean with a few moist crumbs. Repeat with the remaining batter if needed.
- Let the cupcakes cool in their pan for 5 minutes, then transfer to awire rack to cool completely.
Make the Frosting
- In the bowl of a stand mixer, or using a hand mixer, beat the butter on medium-high speed until creamy, about 2 minutes.
- Add 4 cups powdered sugar along with the milk, vanilla and salt. Mix on low speed for 30 seconds, then increase to medium-high speed and whip for a full 2 minutes.
- If the frosting is too thick, add a little more cream/milk. If the frosting is too thin, add more powdered sugar to make a spreadable consistency. Frost the cupcakes as desired.


I’m not gluten free but my daughter in law is and her birthday is coming up. I made these today just to see if they were good enough. Oh my goodness they are definitely good enough. Your tips to incorporate more air, I think is key, but the flavor is unbelievable too. Absolutely delicious. I know you have a cake recipe as well, but it’s slightly different. I’d like to make a birthday cake, but I might just stick with the cupcakes. Thank you so much.
Hi Karen, that’s great to hear! So glad they lived up to your expectations and hope your daughter-in-law enjoys them just as much!
I love all your recipes they are truly just like wheat recipes. Do you have a recipe for GF Blondies?
It is much appreciated
Can I add chocolate chips?
Hi Ala, yes, you definitely can! Let us know how they turn out!
Very light and fluffy! Can’t tell these are GF!!
Thank you for the positive feedback, Cass! We’re so glad you enjoyed the cupcakes so much. Happy baking!
Hi! I was wondering if this could be converted to make strawberry cupcakes? Could I add a strawberry puree to the mix?
Thank you!
Hi Jennifer, we haven’t tested out converting this one to strawberry cupcakes before. You could try replacing 1/3 cup of buttermilk with 1/3 cup of strawberry puree to keep the liquids balanced. It may be a little trial and error to find the right combination. If you decide to give it a try, we’d love to hear how it goes!
Can I add sprinkles in the mix?
Hi Agatha, instead of adding sprinkles to these cupcakes, we’d recommend using our gluten-free funfetti cupcake recipe that’s already designed with the sprinkles in the batter. We hope you enjoy the cupcakes!
Super tasty and very fluffy – a bit too domed for my liking for decorating but next time I’ll just drop the temp down a smidge to address that. But I’m still trying to figure out why the buttermilk and corn starch in this recipe vs your best vanilla cake recipe that uses sour cream. They seem really similar. This one is a bit fluffier maybe but why wouldn’t I want my layer cakes fluffier too?
Hi Amelia, we’re so glad you loved the cupcakes! Thank you for your kind feedback! This recipe uses buttermilk, butter, and oil combo to create light and fluffy cupcakes whereas the cake recipe relies on sour cream and oil to produce a moist, tender wedding-cake like texture that doesn’t dry out. Both recipes create deliciously rich, soft cakes. They’ve just been adjusted for different goals!
My cupcakes did not rise and they were sunken down when I took them out out of the oven. Do you know what could have gone wrong?
Hi Tammy, we’re sorry you had this experience! Factors like underbaking, overfilling the cupcake liners, inaccurate oven temp., or opening the oven too early can all lead to sunken cupcakes. We hope these ideas help and your next batch goes much better. Happy baking!
Is it 2.25 cups or 337g of flour? There’s quite a discrepancy here when using the King Arthur’s GF flour (2.25 c = 279 g).
Hello! Both measurements are correct despite King Arthur’s label. We find that 1 cup of KAF weighs much closer to 150 grams. At the end of the day a cup measurement is subjective – and we think the manufacturer doesn’t realize gluten-free flour is denser than traditional wheat flour (traditional wheat flour is 120 grams/cup) so they provide that generalized measurement that really isn’t accurate for gluten-free flour. Erin likes to make her recipes so they will turn out for both people using cup measurements and grams measurements. Her measurement for the KAF flour is consistent across all of her recipes, even though it’s not the same as KAF.
Question – Can I replace the cornstarch with arrowroot flour?
Hi Linda, we haven’t tried arrowroot flour in this one, but you can use potato starch (not potato flour) or tapioca starch, in place of the cornstarch. If you decide to test out the arrowroot, we’d love to hear how it goes!