Erin’s Recipe Rundown

These grit cakes are a staple in my kitchen!
I love their versatility. Beyond the basic recipe, there’s no limit to the flavor combinations you can create, from traditional cheesy grits to spicy Tex-Mex, even fancier flavors. They’re always a hit!
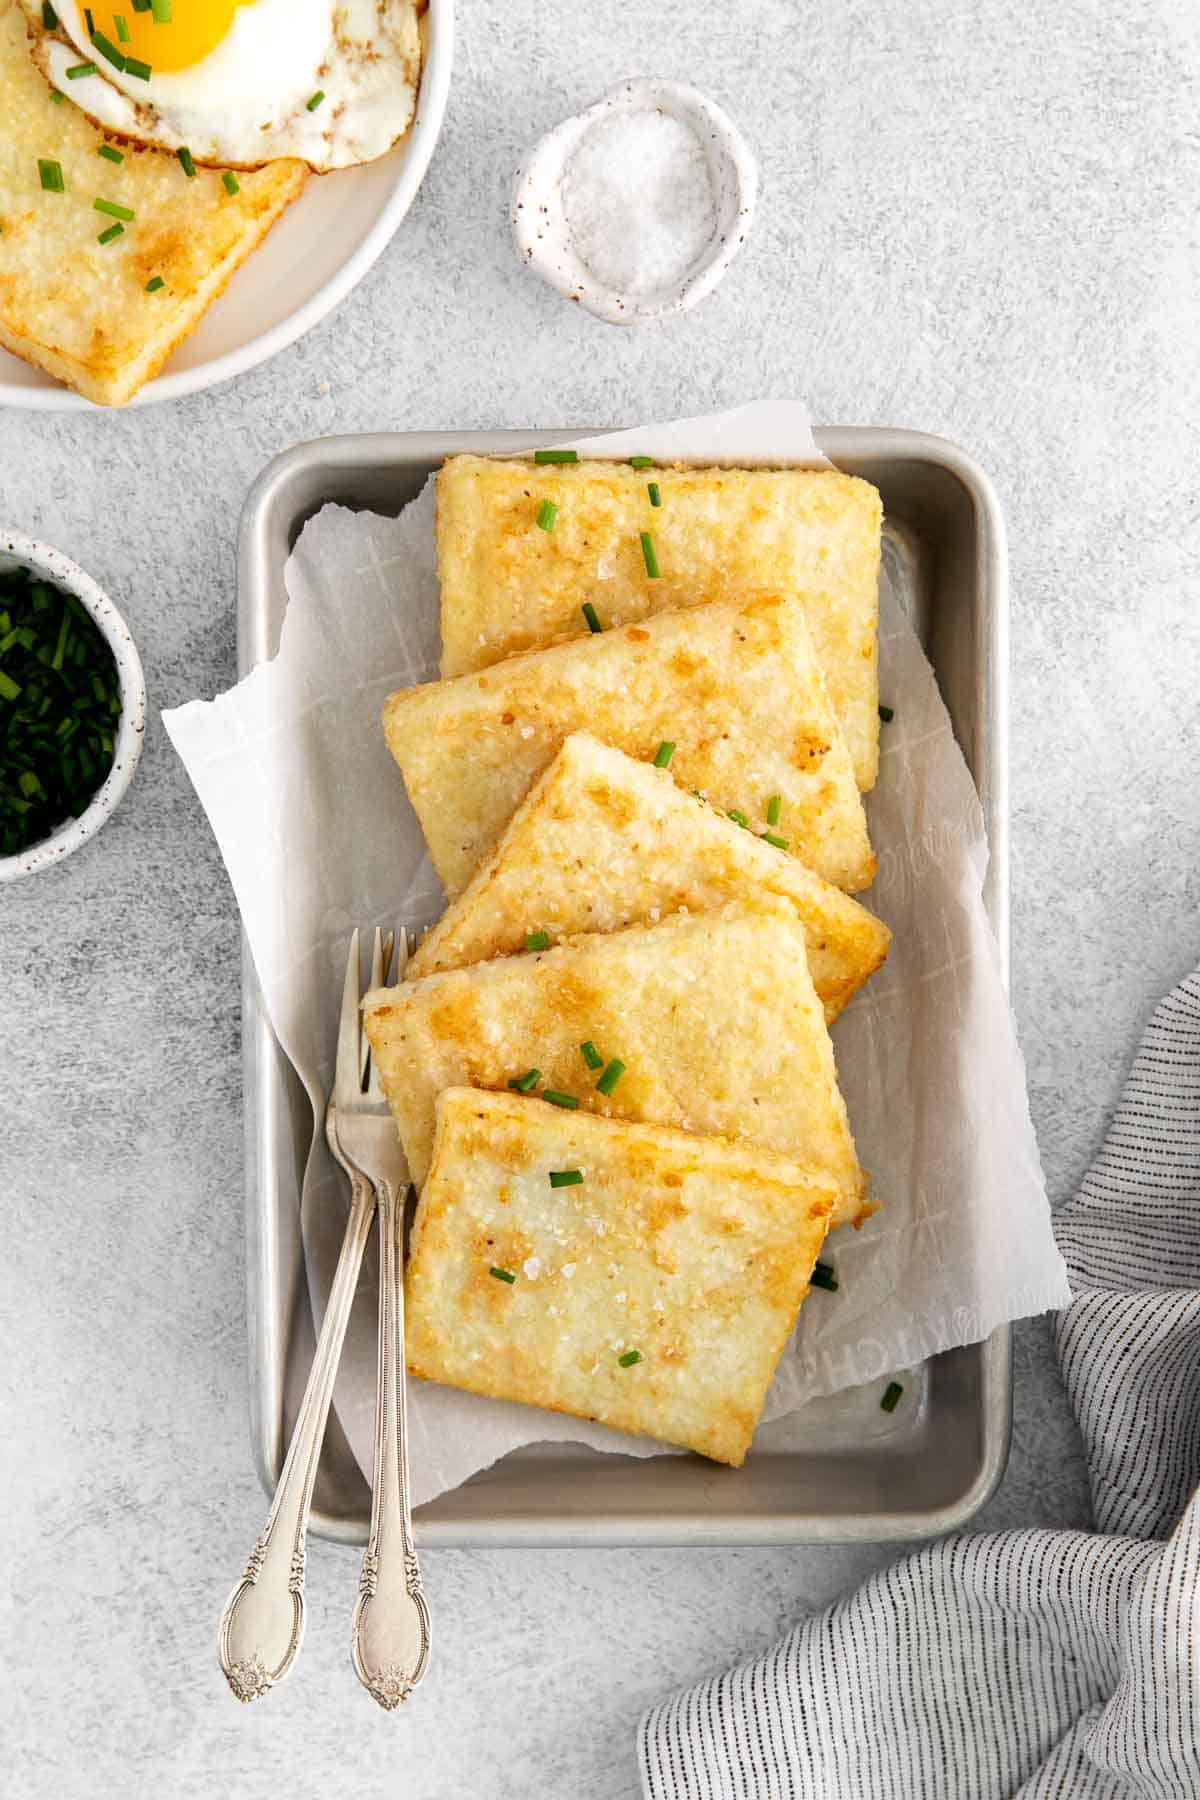
Why You’ll Love Them: These grit cakes are crisp on the outside, creamy on the inside, and a great recipe for beginners. Savory and rich, this recipe takes basic grits and elevates them to a new level!
Top Tip: For the crispiest grit cakes, chill them thoroughly before slicing and make sure the oil is hot before frying.
For more savory breakfast recipes, try these grits and eggs, cream cheese grits, gluten-free breakfast burritos, or these breakfast tacos.
xoxo erin
Ingredients You’ll Need
Here are a few notes on some of the key ingredients to make these grit cakes. See the recipe card below for exact measurements.

- Flour: Flour dries out the surface of the grits and creates a crisp crust. You can use all-purpose flour or make them gluten-free by using a high quality gluten-free measure-for-measure flour.
- Grits: As you can guess, quality grits are the key to delicious grit cakes. I highly recommend Palmetto Farms brand.
- Salt: Don’t skip the salt! Since this is a simple recipe, salt plays a major role in creating the perfect savory flavor.
Check out this article to find out are grits gluten-free?
How to Make Grit Cakes
Here’s an overview of how to make this recipe. You can jump to the recipe for the full instructions!
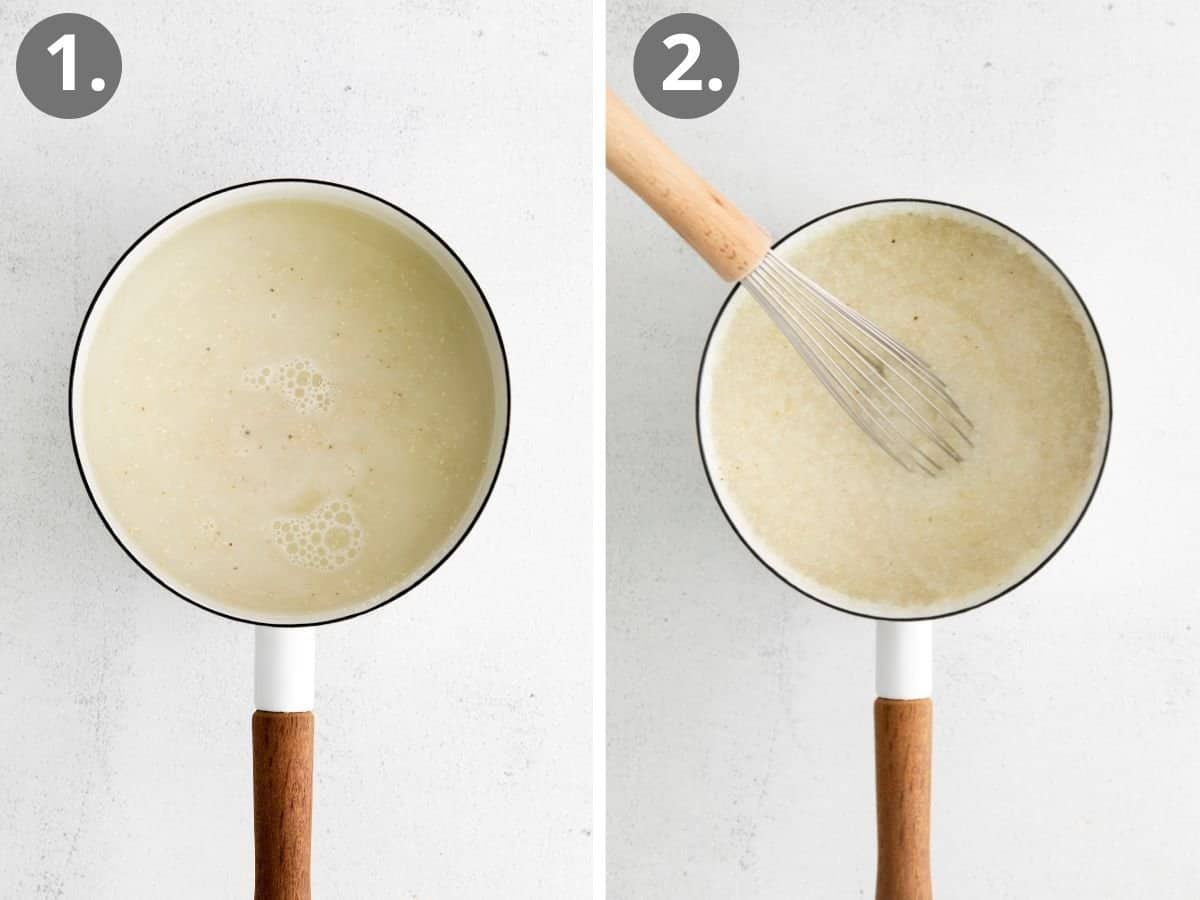
If using stone ground grits: Bring all of the ingredients to a boil. Lower the heat, cover, and cook until the water is completely absorbed. Don’t forget to stir!
If using quick cooking grits: Bring the water to a boil first, slowly whisk in the grits and salt, then lower the heat and cook until the water is absorbed.
If using leftover grits: Reheat them on the stove before moving on to the next steps.
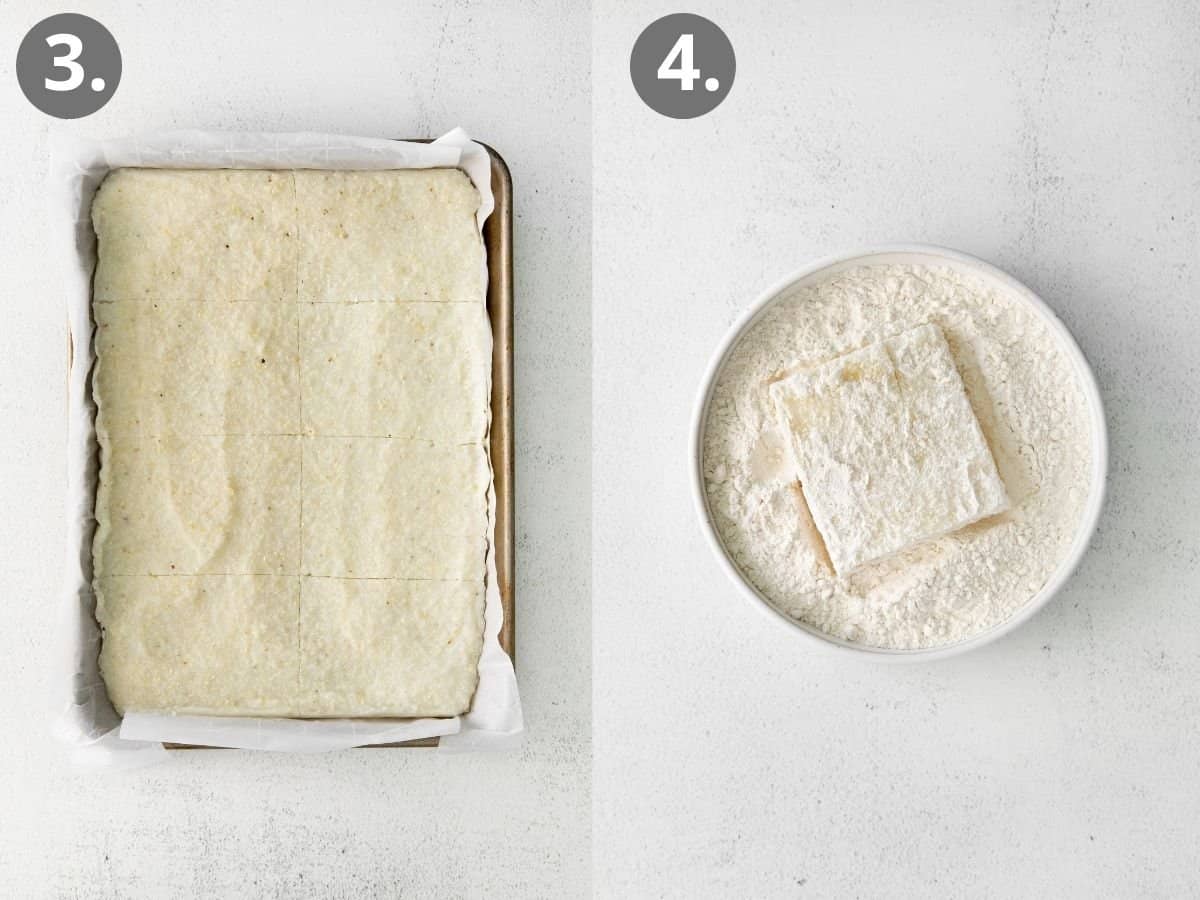
Chill time: Spread the grits in an even layer on the prepared pan and refrigerate until they’re fully set. Use the parchment or foil to lift them out of the pan, then slice.
Dredge in flour: Place the flour in a shallow bowl so it’s easier to coat the grit cakes. Dip each cake into the flour, covering them with flour evenly on all sides.
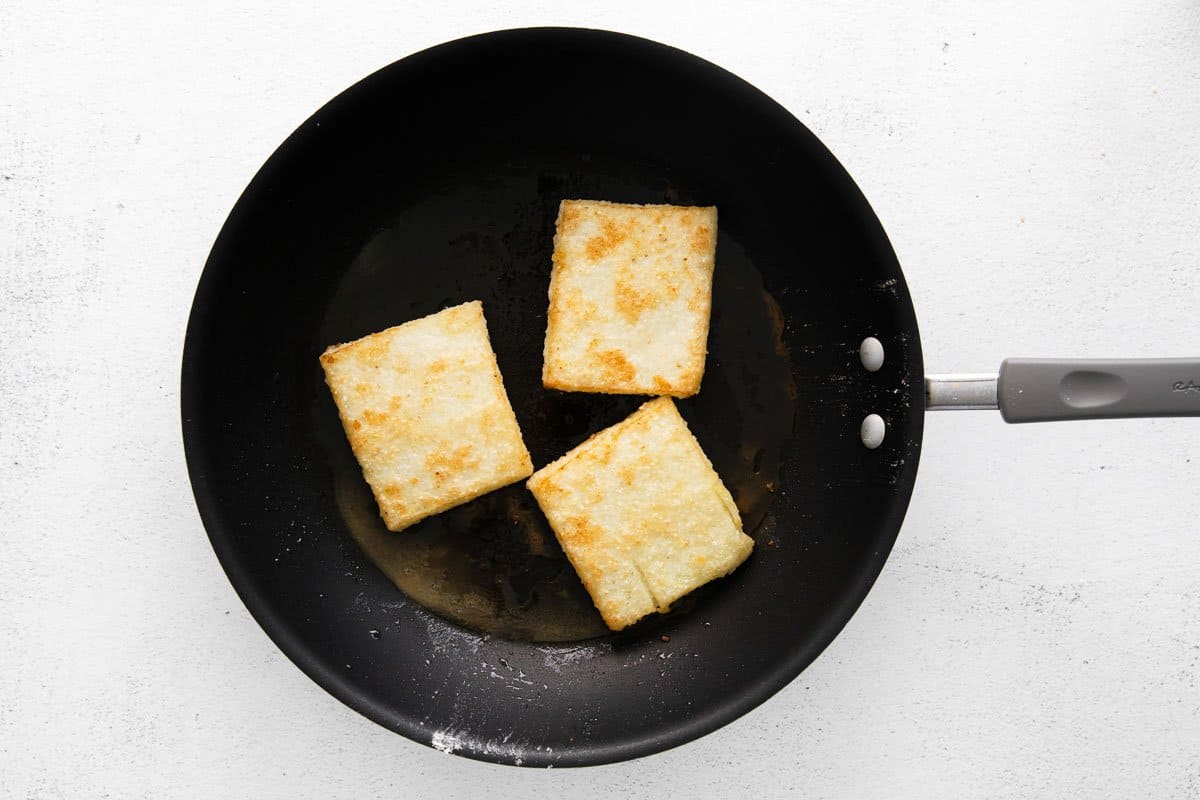
Frying time: Heat the oil first. Add a few grit cakes to the skillet without overcrowding them. Cook each side until crisp and golden brown. If the pan dries out between batches, add a little more oil before adding more cakes to the skillet. Season to taste and enjoy!


Easy Grit Cakes
Ingredients
- 4 cups water
- 1 cup stone ground grits
- 1 teaspoon kosher salt
- 1 cup all purpose flour or a 1:1 gluten free flour substitute
- ¼ cup olive oil divided
Instructions
- Line quarter sheet pan with parchment paper or foil, making sure it covers all of the sides with enough room to lift the grits out of the pan later.
- Add the water, grits, and salt to a medium saucepan set over medium-high heat. Bring the grits to a boil and then reduce the heat to medium-low. Cover and cook for 20-22 minutes, or until all of the water has been absorbed. Make sure to stir the grits occasionally so they don’t scorch.
- Remove the grits from the heat and spread them into an even layer in the prepared pan. Place the grits in the fridge to chill for 1 hour, or until fully set.
- Remove the grits from the pan (using the parchment or foil to lift them) and slice them into your desired size.
- Place the flour in a shallow bowl and dip a few of the grit cakes into the flour, making sure to coat them evenly on all sides.
- Heat 2 tablespoons of olive oil in a large skillet over medium heat. When the oil is hot, add as many grit cakes as will fit – you don’t want to overcrowd the pan.
- Cook for 2-3 minutes per side, or until the grit cakes are golden brown and crisp. If the pan is dry, add the additional 2 tablespoons of oil before frying the remaining grit cakes (repeat steps 5 – 7 with the remaining grits).
- Season the grit cakes with additional salt and pepper, to taste. Enjoy immediately or store any leftovers in an airtight container in the fridge for up to three days.
Notes
Nutrition
This post was originally published in April 2022. It was updated with new photos and instructions in October 2025.