


Featured Comment
From Kelly: “I’m obsessed with these cookies and also love the pumpkin version! Definitely a crowd pleaser even for my non-gluten free family.”
From L: “WHY ARE YOU DOING THIS TO US?? How am I supposed to not eat the whole batch of cookies if you keep creating these wonderful delicious recipes? Oh my goodness. I don’t even like snickerdoodle cookies but these were so good. I only made them since this is my daughter’s favorite cookie. She isn’t even gluten free and she loved them too. These are just incredible and so easy to make. Thank you!”
Recipe Overview
⏱️ Time to Taste: About 1 hour 30 minutes (including chilling and cooling)
✨ Texture: Soft, chewy centers with crisp, cinnamon-sugar coated edges
🥣 Ease: Easy to make, with browning the butter adding extra flavor
🌾 Flour Used: Gluten-free measure-for-measure flour and almond flour
❄️ Freezer Friendly: Freeze the baked cookies or unbaked dough balls for a homemade treat anytime

Gluten-free cookies are my most popular recipes, and these homemade chewy snickerdoodles are the perfect addition to the collection. Like my gluten-free chocolate chip cookies, brown butter gives this gluten-free cookie recipe an extra-rich, nuttiness that goes so well with the classic cookie flavors.
For the chewiest cookies, shortening is a must! I love how it helps create the soft, tender texture that makes these snickerdoodles so irresistible.
Ingredients You’ll Need
Here are a few notes on some of the key ingredients to make these gluten-free snickerdoodles. Jump to the recipe card below for the exact measurements.
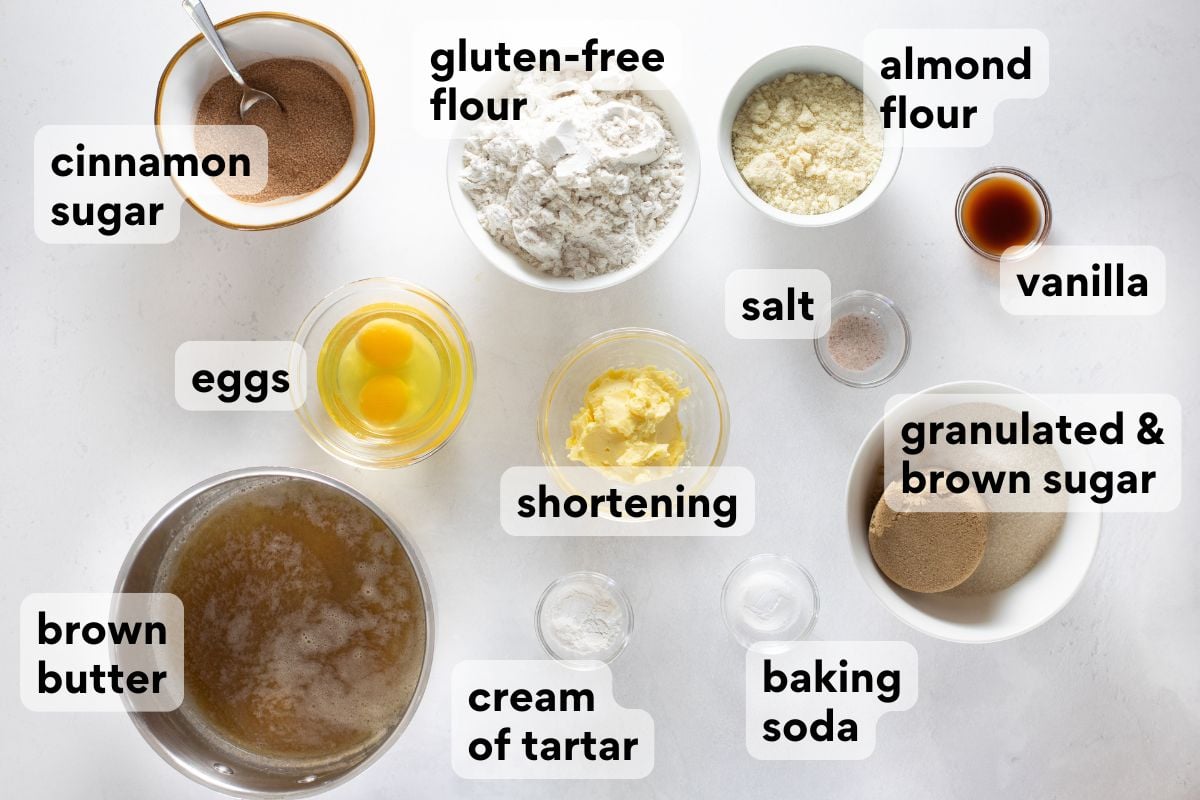
- Gluten-free flour: I love the combination of gluten-free measure-for-measure flour (containing xanthan gum) and a little almond flour for the best texture and golden brown finish.
- Butter: In my opinion, browning the butter is a quick, extra step that’s so worth it! It adds a caramelized, nutty flavor that complements the cinnamon sugar for rich, one-of-a-kind snickerdoodles!
- Shortening: I like to use organic palm shortening but any kind will work. It’s needed for moisture and stability so that the cookies have a chewy, tender texture.
- Cream of Tartar: Don’t skip this! Cream of tartar is a classic snickerdoodle ingredient that adds a slightly tangy flavor and ensures the cookies end up light and chewy.
How to Make Gluten-Free Snickerdoodles
Here’s an overview of how to make these cookies. You can jump to the recipe for the full instructions!
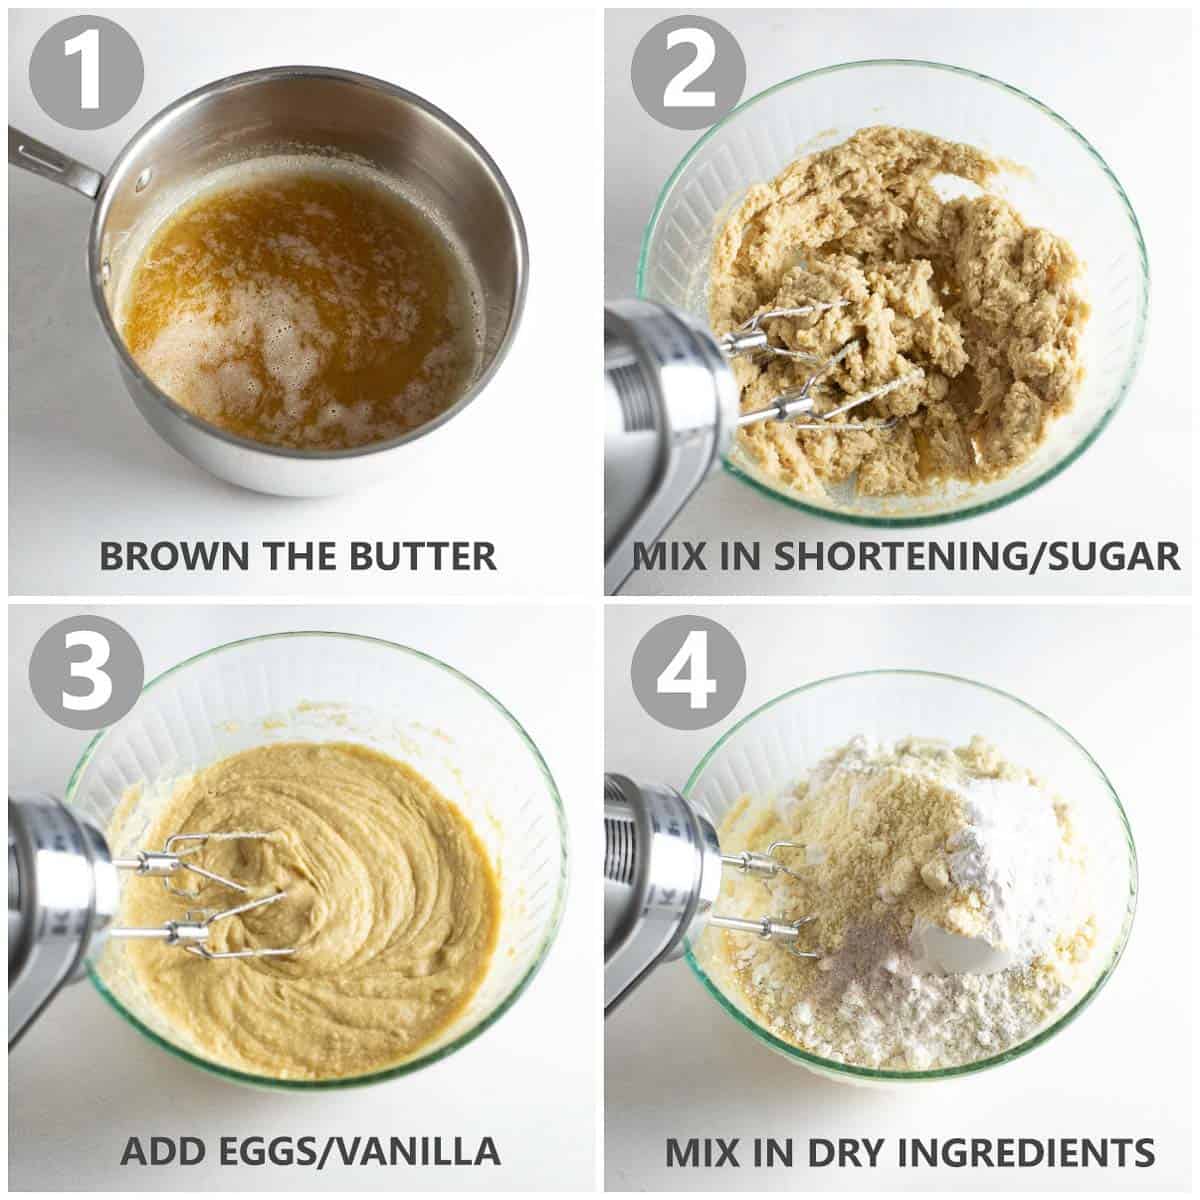
Brown the Butter: I love the rich, nuttiness that brown butter adds to cookies. Once the butter has browned, make sure you pour the butter into a glass mixing bowl so that it doesn’t burn!
Build the Dough: I firmly believe these cookies aren’t the same without shortening either. Cream it with the sugar, then add in the other wet ingredients, followed by the dry. This dough is so simple!
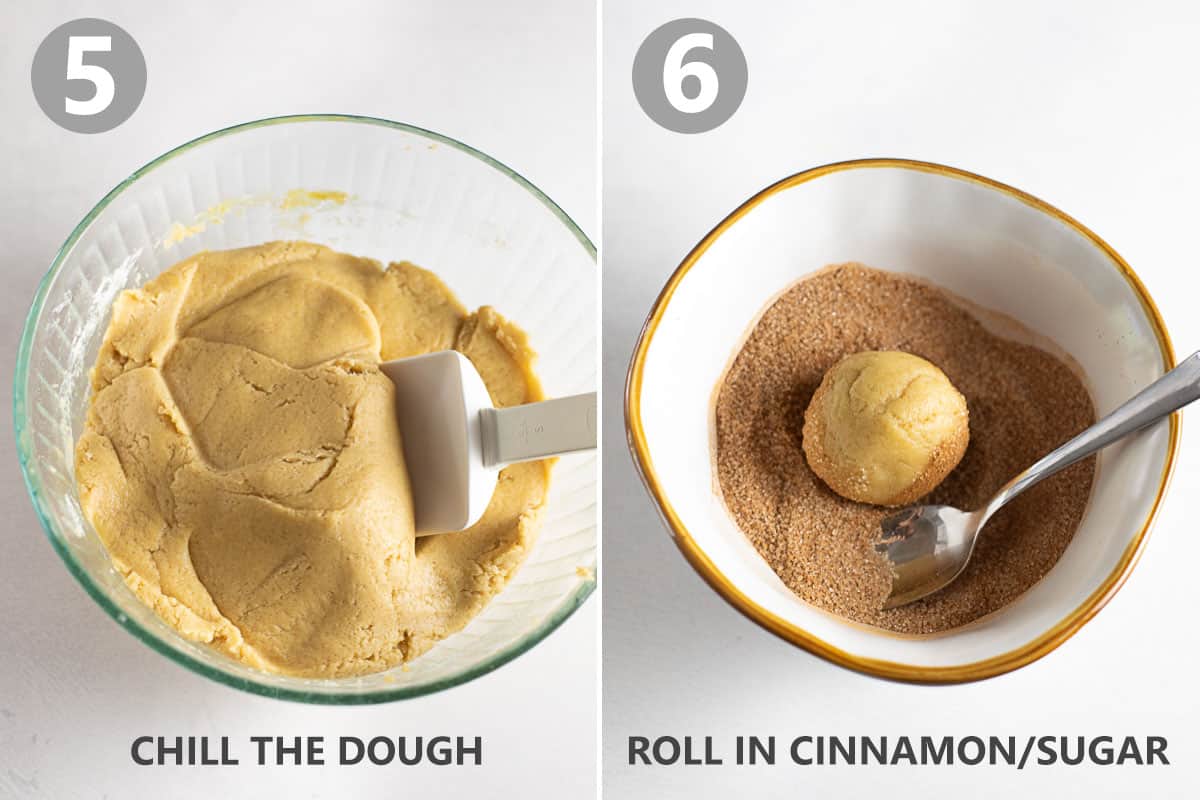
Chill the Dough: Make sure you plan ahead! This dough needs at least 1 hour to chill so that the flour has time to hydrate. Since it can chill for up to 2 days, I tend to make the dough when I have time, then pop it in the fridge until I’m ready to bake!
Roll and Bake: Coat the dough balls in cinnamon sugar, then bake. Like most cookies, they’ll set a little more as they cool.
What Do Gluten-Free Brown Butter Snickerdoodles Taste Like?
These gluten-free brown butter snickerdoodles have the classic cinnamon-sugar flavor you love, with a nutty, caramelized flavor from the browned butter. They’re sweet with a hint of tang from the cream of tartar for the perfect balance of flavors.
When I want a fall twist on this recipe, I make these gluten-free pumpkin snickerdoodles. They use the same brown butter technique plus cozy warm spices for a fun seasonal treat.
Can I Skip Browning the Butter?
You can use melted butter instead, but the flavor won’t be quite the same. If you’re using dairy-free butter, most brands won’t brown so I recommend skipping this step when making these cookies dairy-free.
Make-Ahead, Storage, & Freezing Instructions
To Make-Ahead: The chilled dough keeps in the fridge for up to 2 days. I also like to freeze the dough balls for longer storage. Freeze them on a lined baking sheet until firm, then transfer to an airtight container and freeze for up to 3 months. I bake them straight from frozen and just add a couple extra minutes to the baking time.
To Store: Once cooled, the cookies should be stored in an airtight container at room temperature for up to 4 days.
To Freeze: The baked cookies freeze well too! Freeze them in an airtight container or freezer bag for up to 3 months. I separate the layers with parchment paper to avoid sticking. They’ll thaw at room temperature in about 30 minutes.

More Gluten-Free Cookie Recipes

Chewy Gluten-Free Snickerdoodles (Brown Butter)
Ingredients
- 1/2 cup (113g) butter
- 1/2 cup (98g) shortening
- 1 cup (200g) granulated sugar
- 1/2 cup (107g) brown sugar
- 2 large eggs
- 2 teaspoons vanilla extract
Dry Ingredients:
- 2 cups + 2 tablespoons (319g) gluten-free measure-for-measure flour
- 1/2 cup (50g) almond flour
- 2 teaspoons cream of tartar
- 1 teaspoon baking soda
- 1/4 teaspoon kosher salt
For Rolling:
- 1/4 cup (50g) granulated sugar
- 1 tablespoon ground cinnamon
Instructions
- Brown the butter: Melt butter in a saucepan over medium heat. Once the butter is melted start to whisk constantly. First the butter will begin to foam, then after a couple of minutes it will begin to brown on the bottom of the saucepan. Turn off the heat as soon as the solids turn brown and the butter gives off a nutty aroma. Pour into a glass mixing bowl to prevent burning.
- Add the shortening, granulated sugar, and brown sugar to the bowl with the butter and mix until combined. Add the eggs and vanilla and mix until smooth.
- Add the dry ingredients and mix until well-combined. Cover the dough and refrigerate for at least 1 hour and up to 2 days.
- Preheat the oven to 400°F. Line a large baking sheet with a silicone baking mat.
- Mix together the sugar and cinnamon in a small bowl for rolling. Shape the dough into rounded 1-inch balls. Roll the dough in the cinnamon/sugar mixture and place 2 inches apart on the baking sheet.
- Bake for 9-11 minutes until set. Let cool for 2 minutes then transfer to a wire rack to cool completely. Enjoy!
Notes
Nutrition
This post was originally published in June 2020. It was updated with new instructions in August 2026.









I made these cookies just for fun. I sent some home with a neighbor (without telling her they were GF). She texted me later saying “Those cookies were SO good!” And they truly are! Yum! Thank you.
Thank you for sharing with us, Maria! We’re thrilled to hear you and your neighbor loved the snickerdoodles so much. We hope your next bake is just as enjoyable!
Best cookie ever. I used a small cookie scoop. It made 4 1/2 dozen cookies. Browned butter is worth the effort.❤️❤️
Aww, thank you, Cindy! We’re so happy to hear the snickerdoodles were such a success. We love the brown butter too! Happy baking!
I would love your recipes with sugar-free options.
Hi Deb! Thank you for your feedback! Unfortunately, we don’t typically bake with sugar substitutes. Sugar is a key part of many of our recipes. Still, our readers are wonderful about sharing their successes with sugar subs in the comment sections. Happy baking!
Can these be made as a giant sheet pan cookie?
Hi Kate! That’s a fun idea! We haven’t tested it, but it might be possible. If using a 9×13, we’d try baking the pan cookie at 350°F for roughly 18-22 minutes. You’ll want the center to look set, but still be soft. The texture and crackle top may not end up exactly the same as individual cookies. We’d love to hear how it goes!
That sounds interesting! I wonder if you scored them like the swim Biscuits if they would cut into squares while still hot or warm.
I’m never going to use shortening. Can I just double the butter?
Hi Terry! Skipping the shortening will typically cause the snickerdoodles to spread more. If you decide to give the double butter a try, we’d love to hear how it goes! Happy baking!
Can I swap coconut oil or avocado shortening instead of palm?
Hi Christine! We haven’t tested a solid avocado-oil shortening, but it may work as a substitute for the palm shortening since it has a similar solid texture. We wouldn’t recommend substituting coconut oil 1:1, as it can behave differently in the dough and may affect the texture and spread of the cookies. If you try the avocado shortening, we’d love to hear how they turn out!