


Erin’s Recipe Rundown

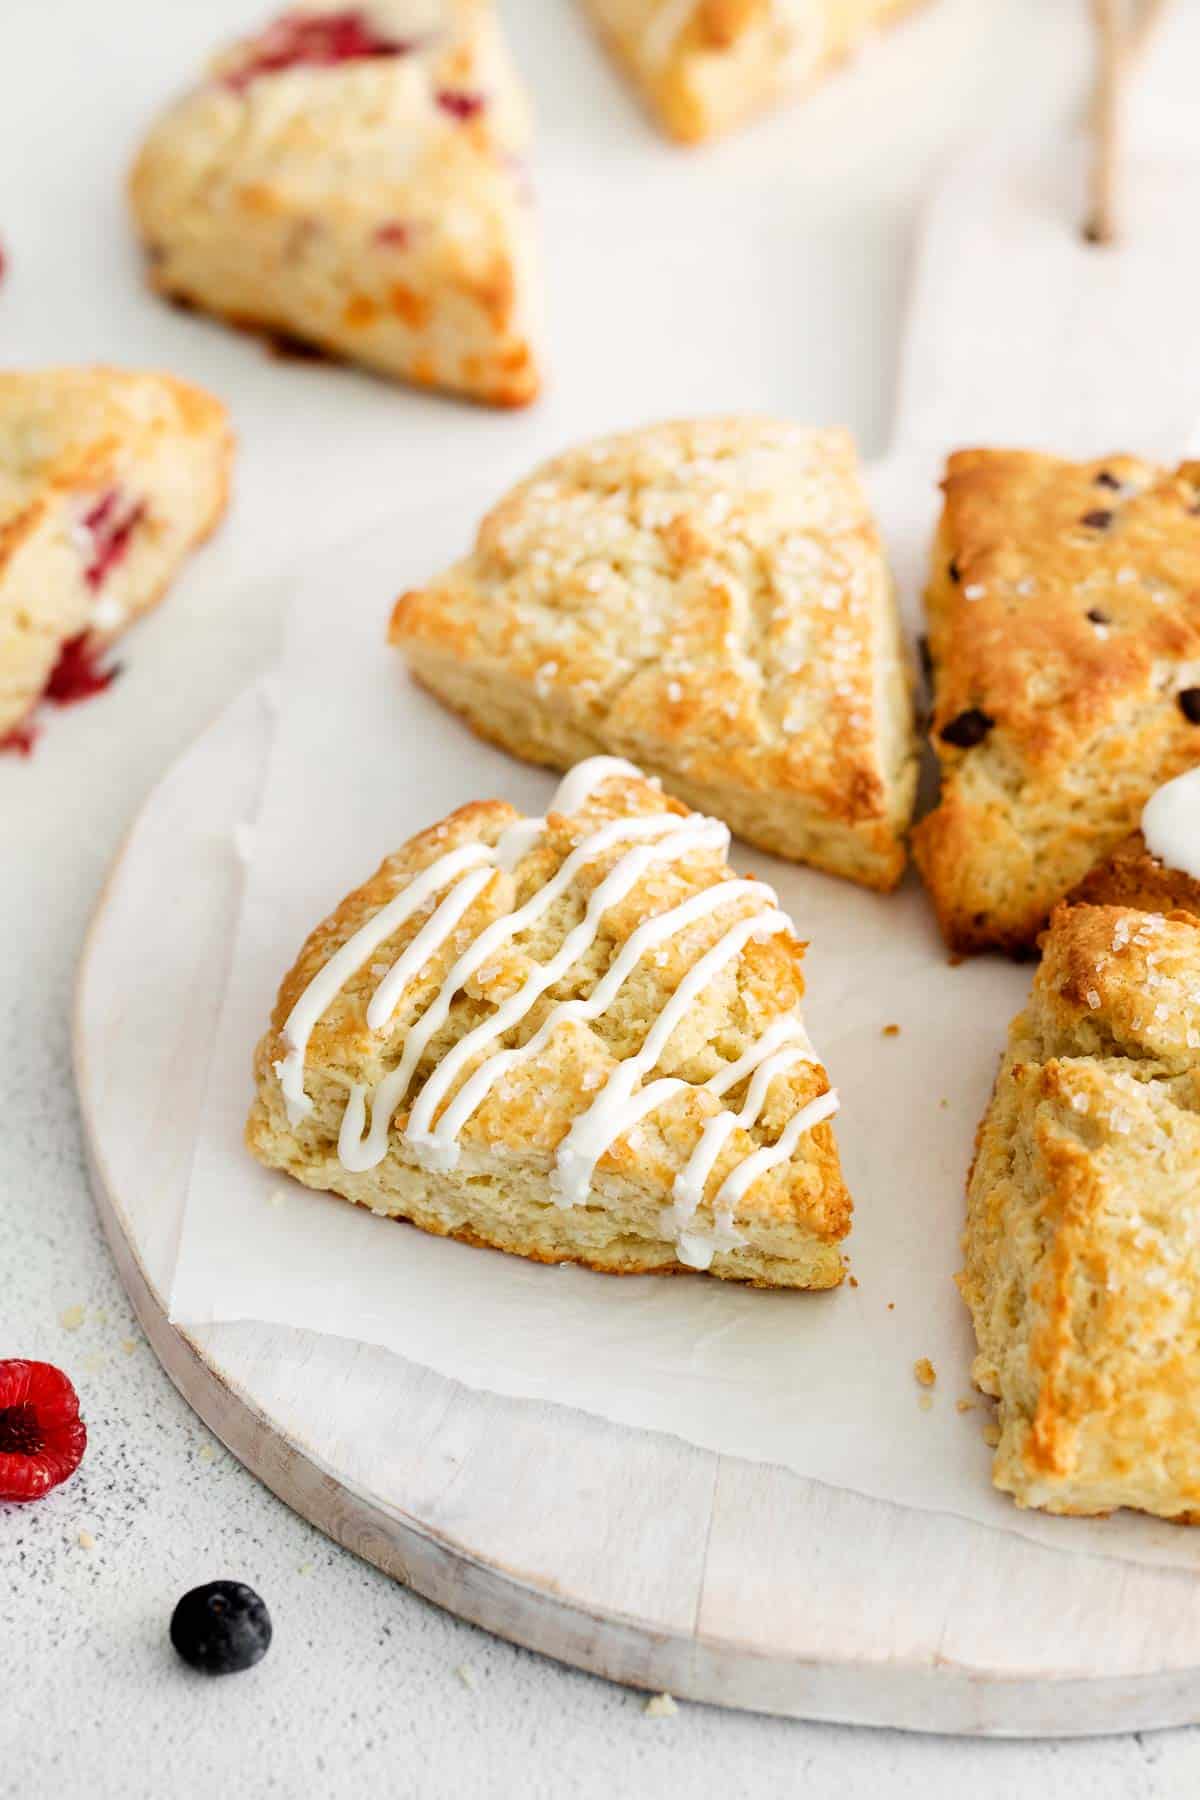
Texture: Light and flaky with moist interiors and crisp golden-brown edges. Top with sanding sugar for a little more crunch!
Taste: Buttery and extra rich from the sour cream. Add any flavors/mix-ins you like.
Ease: So easy to make! Great beginner recipe.
Top Tips: Use frozen grated butter! Also freeze the dough for 15 minutes before slicing/baking for extra flaky scones.
Recommended GF Flour: Works great with many gluten-free flour blends. Use a high-quality flour that contains xanthan gum. I like King Arthur Flour and Bob’s Red Mill.
Would I make these again? Definitely! This is my go-to scone base recipe and we love to make different varieties!
xoxo erin
Featured Comment
From Christina: “I made these yesterday for a Mother’s Day High Tea, and they were fabulous! I was leery as so often gluten-free baked goods turn out so so, but these were scrumptious! Flaky on the outside and moist on the inside. Followed the recipe exactly minus any add-ins as I was serving them with whipped honey butter and blueberry compote. I will definitely be making these again and again!”
Table of Contents
- Erin’s Recipe Rundown
- Ingredients You’ll Need
- How to Make Gluten-Free Scones
- Gluten-Free Scone Variations
- Storage, Make-Ahead and Freezing Instructions
- Can I make these scones dairy-free?
- Do I have to refrigerate the dough, then freeze it? Can I just skip straight to the freezer?
- Why do scones need eggs?
- More Gluten-Free Recipes
- Gluten-Free Scones (Endless Mix-Ins!) Recipe
Ready to make incredible scones that also happen to be gluten-free?
This gluten-free scone recipe is what I consider a master scone recipe. You can easily tailor it with your favorite mix-ins or glazes to create gluten-free blueberry scones, gluten-free chocolate chip scones, and even savory baked scones.
No matter which variation you choose, you’ll get amazing scones every time.
Ingredients You’ll Need

Here are a few notes on the key ingredients you’ll need to make these gluten-free scones. Jump to the recipe for the exact measurements.
- Gluten-Free Flour: For best results, use a high quality gluten-free flour blend that contains xanthan gum. I recommend King Arthur Flour Gluten-Free Measure-For-Measure Flour or Bob’s Red Mill Gluten-Free 1:1 Baking Flour.
- Baking powder: A full tablespoon of baking powder helps gluten-free scones rise properly and turn out light and fluffy.
- Sour cream: Sour cream gives these scones richness, but also helps them hold their shape during baking.
- Frozen grated butter: Frozen grated butter is KEY to creating light, flaky, buttery scones. The cold butter and flour crumbs melt as the scones bake, releasing steam and creating air pockets. These pockets are what create flaky scones with crisp edges!
- Vanilla/Sugar: Sweet scones call for 1/4 cup of sugar and vanilla, while savory scones call for 1 tablespoon of sugar and no vanilla.
- Mix-ins: Add any mix-ins like chocolate chips, nuts or blueberries that you like! The possibilities are endless. You can use up to 1/2 cup of any mix-in.
You also might like these recipes for gluten-free blueberry scones, gluten-free chocolate chip scones and gluten-free cheese scones.
How to Make Gluten-Free Scones
Here’s a basic run-through of how to make this gluten-free scone recipe. You can find the full instructions in the recipe card below.
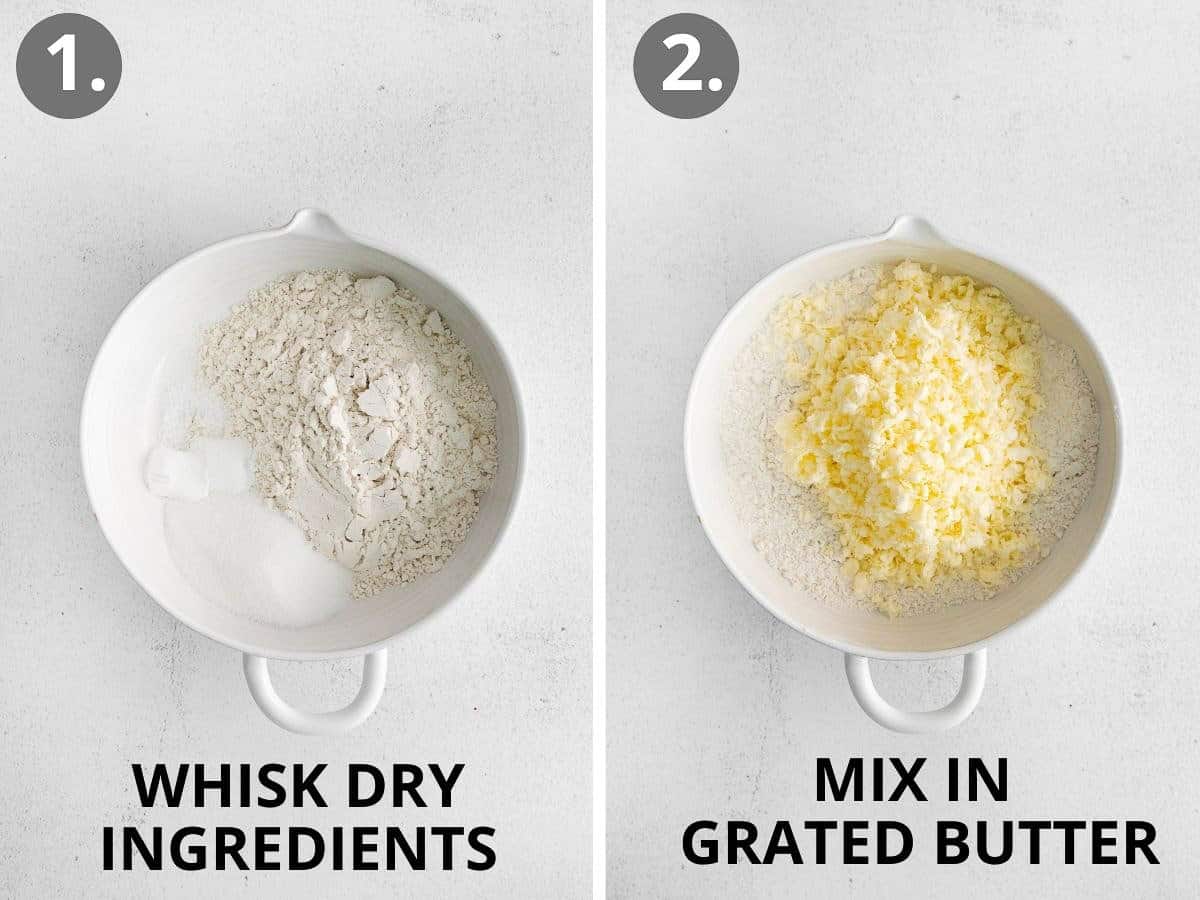
- Dry ingredients: Whisk them all together.
- Butter: Grate the frozen butter then mix it into the dry ingredients using a fork
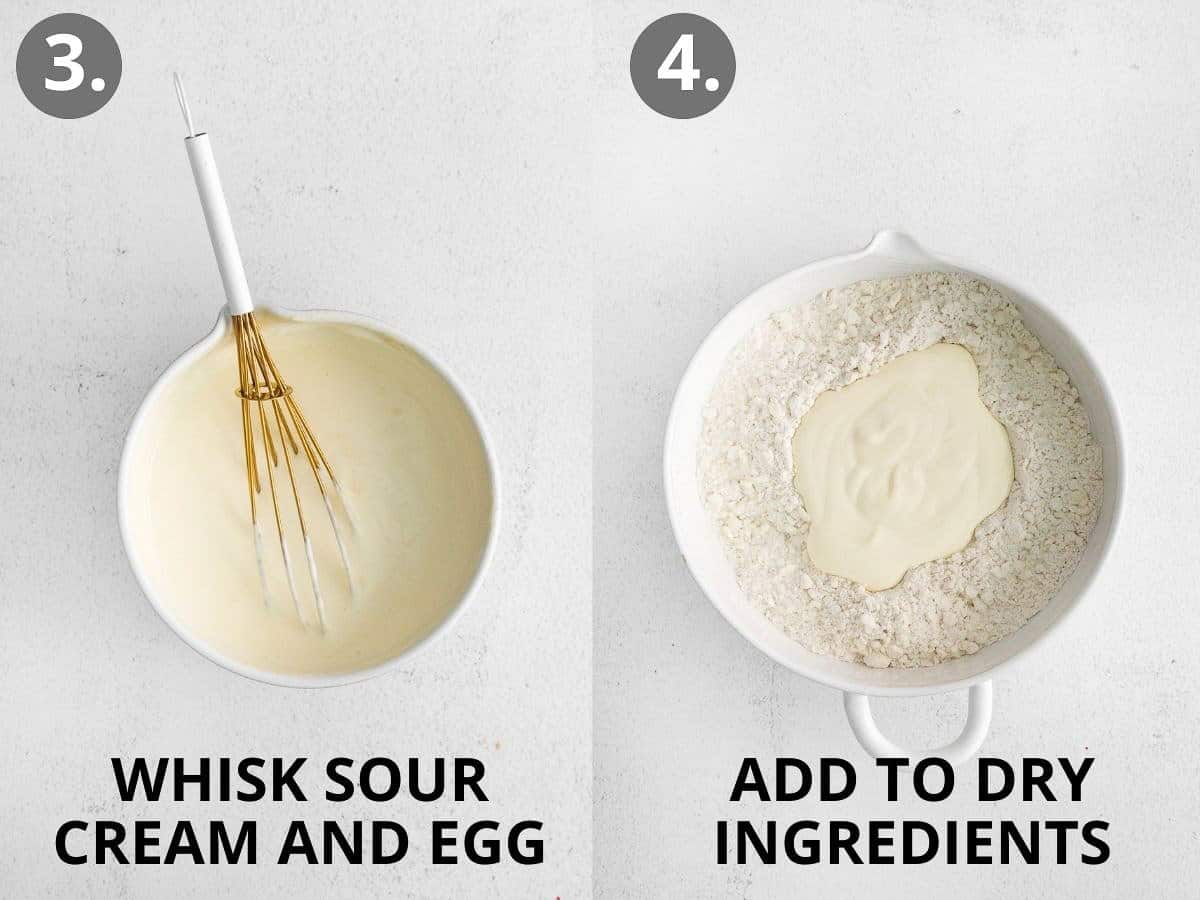
- Sour cream/egg: Whisk the egg and add the sour cream and egg to the dry ingredients. Mix to combine. Note that the dough might look dry- this is normal and the dough will continue to hydrate in the fridge.
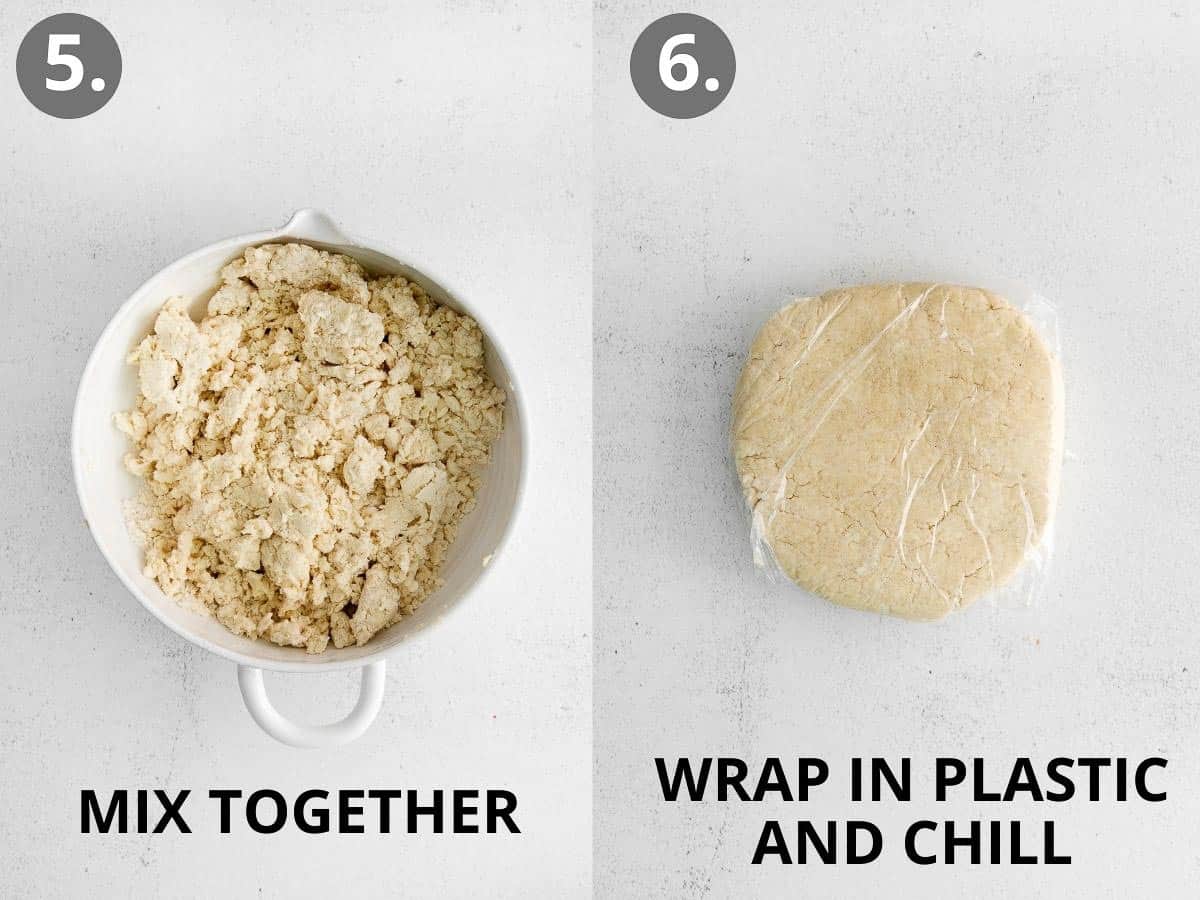
- Refrigerate: Wrap the dough in plastic wrap and refrigerate for 20-30 minutes, then place in the freezer for 15 minutes (or longer!) before baking.
- Preheat the oven: You’ll preheat the oven to 500°F, then immediately turn the temperature down to 425°F when you put the scones in the oven. The hot oven helps the scones to rise quickly.
- Bake until golden brown! Cool before topping with any glaze.
Gluten-Free Scone Variations

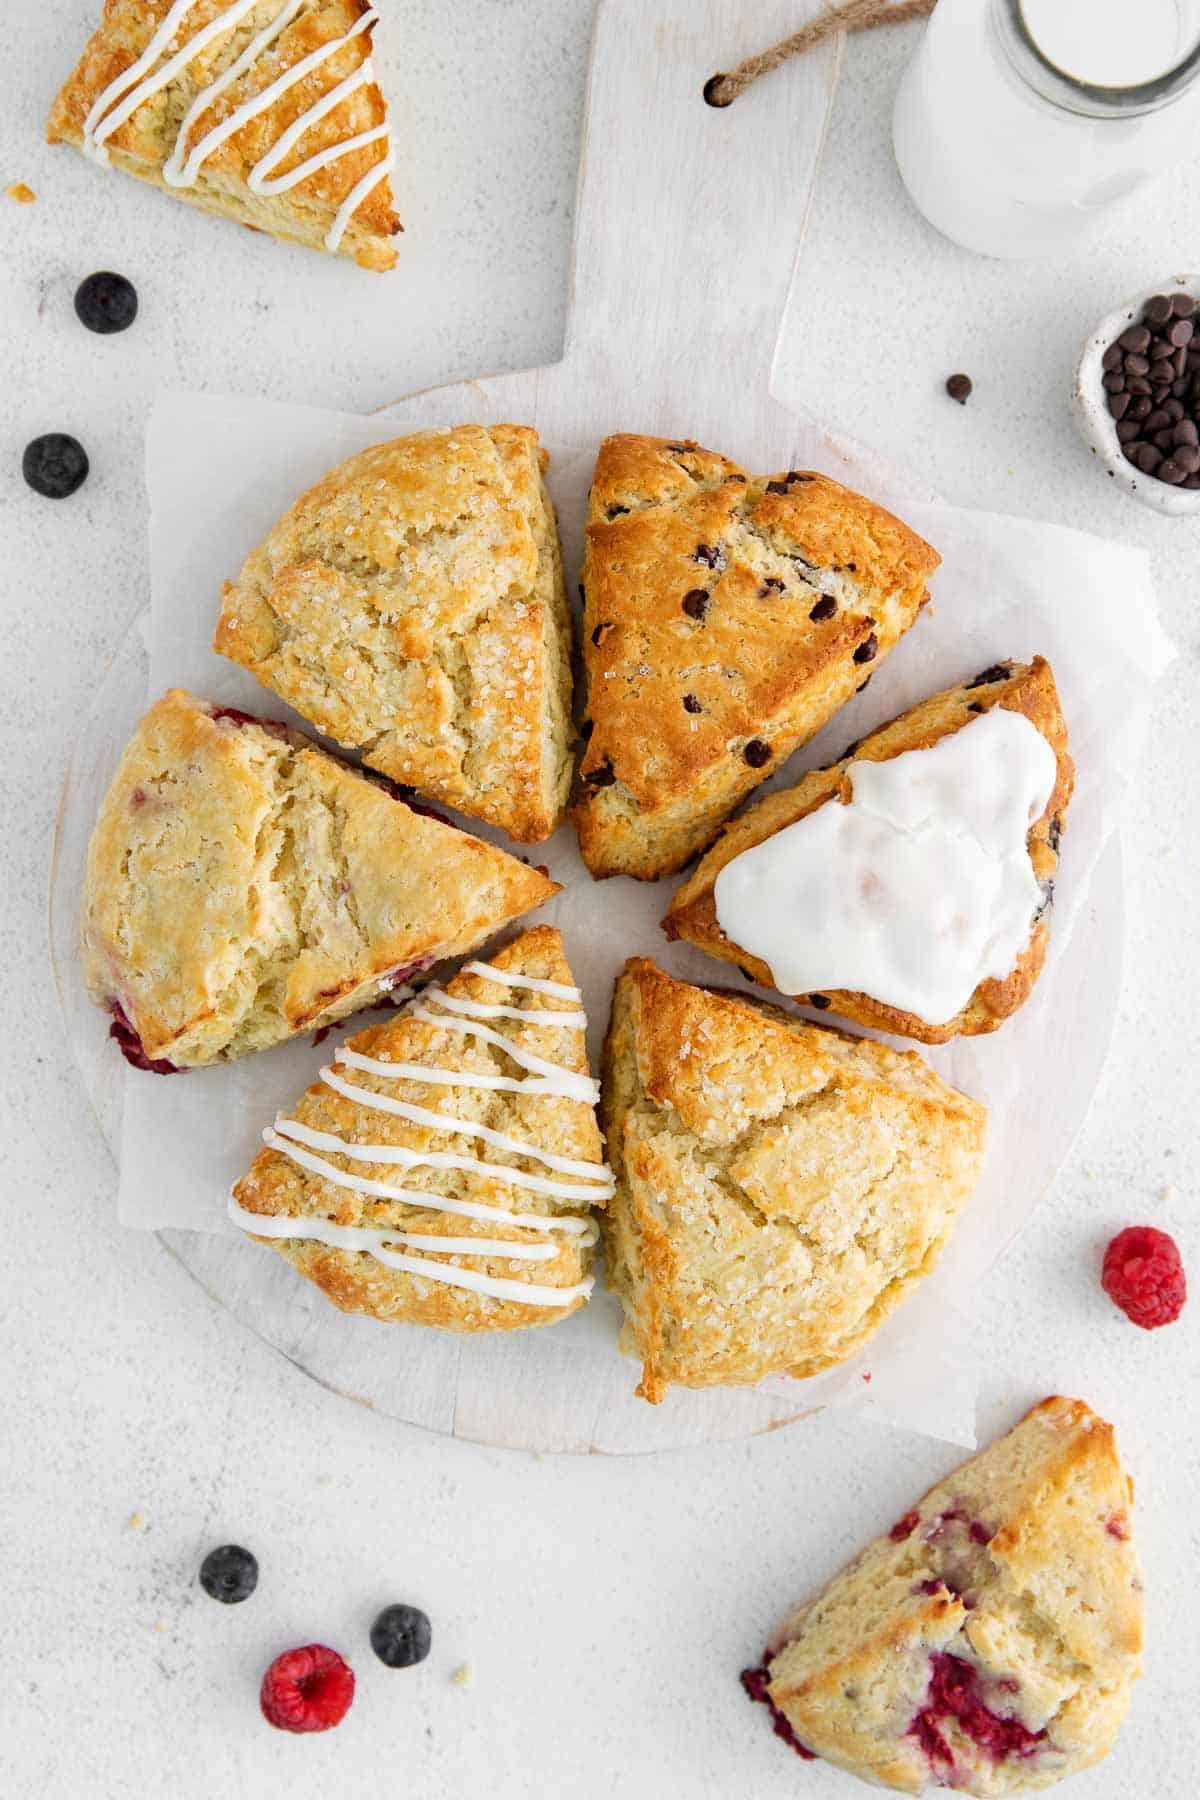
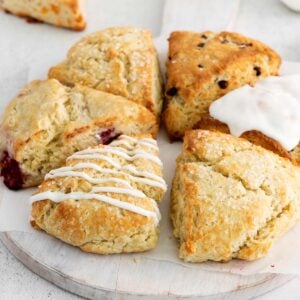
There are so many ways to customize this gluten-free scones recipe! You can add a glaze to the tops of the scones, add mix-ins, make them sweet, or savory.
Here are some of my favorite ways to switch up these delicious gluten free scones.
- Chocolate Chip: Add ⅓ cup mini chocolate chips. Top with sparkling sugar.
- Blueberry Lemon: Add the zest and juice of 1 lemon and 1/2 cup blueberries. Top with a glaze made of 1 cup powdered sugar whisked together with 1 tablespoon lemon juice.
- Raspberry White Chocolate: Add 1/4 cup white chocolate chips and 1/3 cup raspberries (break them up slightly).
- Cheese: Omit the vanilla and reduce sugar to 1 tablespoon. Mix in 1 cup sharp cheddar cheese. Top with garlic chive butter after baking
Storage, Make-Ahead and Freezing Instructions
Storage: Gluten-free scones are best eaten the day they are baked, but they can be stored in an airtight container for up to two days.
Make-Ahead: After the dough has rested in the refrigerator for 20-30 minutes, you can freeze it for up to 5 days. Then slice and bake the scones directly from the freezer.
Freezing Instructions: Let the gluten-free scones cool completely, then wrap each one in plastic wrap. Put the wrapped scones in a freezer bag, squeeze out the air, and freeze them. To reheat, place the frozen scones in a preheated oven at 350°F for about 10 minutes.
Can I make these scones dairy-free?
Yes! I have successfully made these scones dairy-free using dairy-free sour cream.
Do I have to refrigerate the dough, then freeze it? Can I just skip straight to the freezer?

Once the dough is mixed together, you’ll form it into a ball and wrap it tightly with plastic wrap, then refrigerate for 20-30 minutes and freeze for 15 minutes. The time in the refrigerator serves a different purpose than the time in the freezer.
20-30 minutes in the refrigerator gives the gluten-free flour time to hydrate and absorb the moisture from the sour cream/egg. The 15 minutes in the freezer allows the butter to solidify so it creates those light pockets of air once the scones hit the hot oven. Both are needed for the ideal gluten-free scone texture!
Why do scones need eggs?
Eggs help the scones dough bind together, creating lift and structure while baking. It also adds a richer, deeper flavor to the scones.
More Gluten-Free Recipes
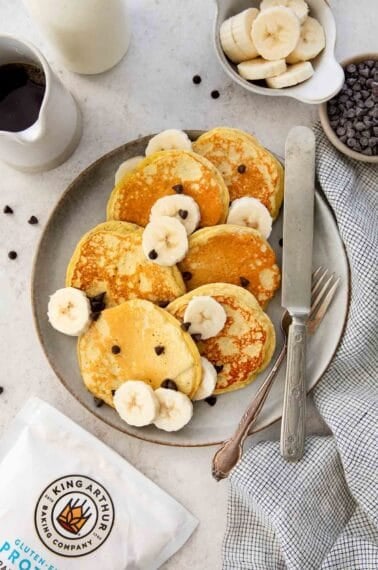
- Gluten-Free Muffins
- Gluten-Free Banana Bread
- Gluten-Free Chocolate Chip Cookies
- Gluten-Free Brownies
- Gluten-Free Vanilla Cake
Gluten-Free Scones (Endless Mix-Ins!)
Video
Ingredients
- 1 ½ cups (240g) gluten-free 1:1 baking flour
- ¼ cup (50g) granulated sugar reduce to 1 tablespoon for savory scones
- 1 tablespoon baking powder
- ½ teaspoon kosher salt
- 8 tablespoons (113g) butter frozen
- ⅓-½ cup mix-ins of choice chocolate chips, berries, nuts, dried fruit
- ⅔ cup sour cream
- 1 large egg
- 1 teaspoon vanilla extract omit for savory scones
- sparkling sugar for topping
Instructions
- In a large mixing bowl, whisk together the gluten-free flour, sugar, baking powder and salt.
- Grate the frozen butter using a box grater. Add the butter to the flour mixture and combine with a pastry cutter, two forks, or your fingers until the mixture resembles pea-sized crumbs.
- Stir the mix-ins into the flour mixture until evenly distributed.
- In a separate bowl, whisk together the sour cream, egg and *vanilla until well-combined.
- Using a rubber spatula, stir the sour cream mixture into the flour mixture until no dry bits of flour remain.
- Spread out a large piece of plastic wrap. Using wet hands, transfer the dough to the plastic wrap. Clean and wet your hands again then pat the dough to form a 6-inch round that is 1-inch thick.
- Wrap the dough tightly in plastic wrap and refrigerate for 20-30 minutes. Then freeze for 15 minutes (or up to 5 days).
- Preheat the oven to 500°F. Line a large baking sheet with parchment paper or a silicone baking mat.
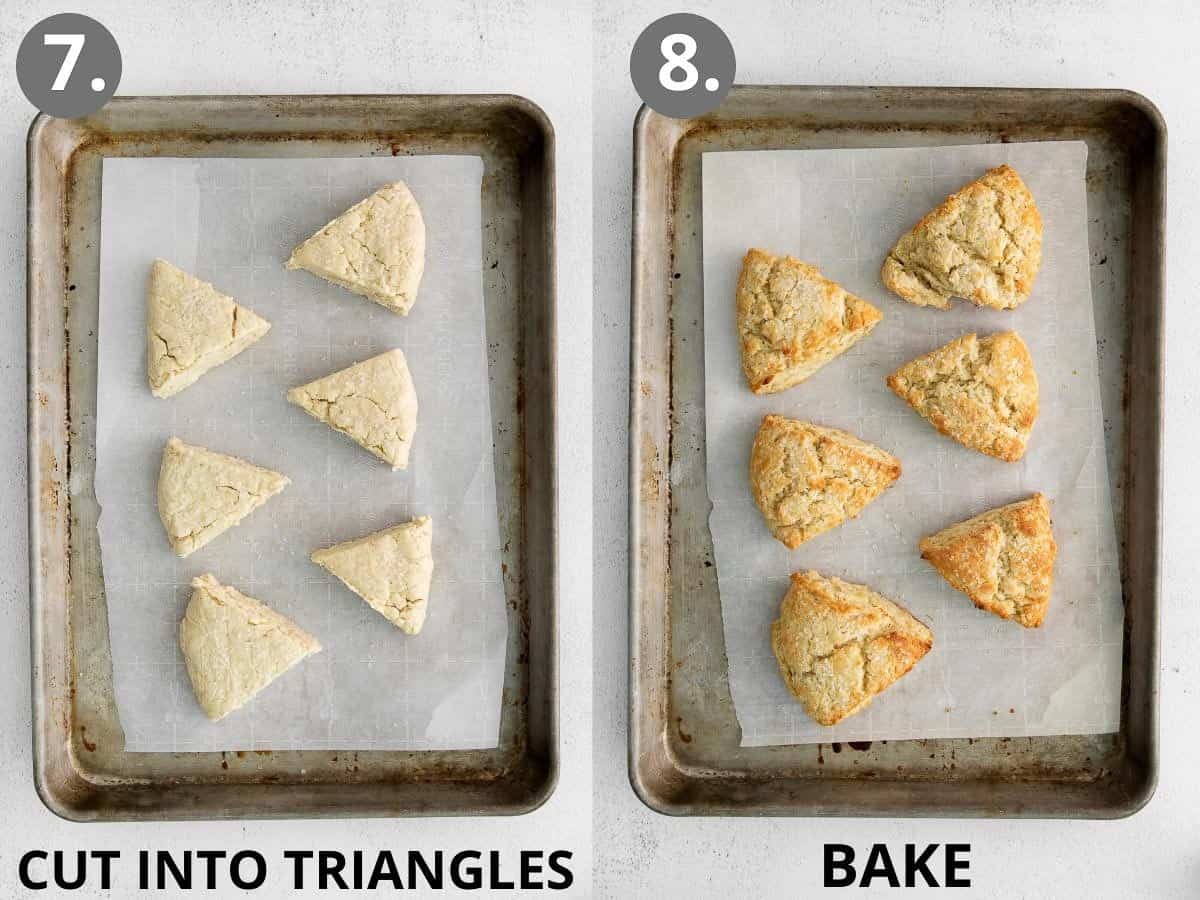
- After 15 minutes (or up to 5 days), take the dough out of the freezer. Spray a sharp knife with cooking spray and cut the dough into 6 equal wedges. Arrange the scones on the prepared baking sheet. Sprinkle with coarse sugar, if desired.
- Place the scones in the oven, then immediately lower the oven temperature to 425°F. (You want the oven temperature to start hot so the scones turn golden brown as they cook through.) Bake for 12-14 minutes until golden brown.
- Remove from the oven. Transfer the scones to a wire rack and let cool for 20 minutes before serving.
Notes
- Gluten-Free 1:1 Baking Flour: I like to use a high quality gluten-free flour blend like gluten-free measure-for-measure flour blend like King Arthur Flour in my baked goods. It works best to use a blend that contains xanthan gum in this recipe.
- Sour cream: Sour cream gives these scones richness, but also helps them hold their shape during baking.
- Frozen grated butter: Frozen grated butter is KEY to creating light, flaky, buttery scones. The cold butter and flour crumbs melt as the scones bake, releasing steam and creating air pockets. These pockets are what create flaky scones with crisp edges!
- Recipe variation: You can add any mix-ins you like to this recipe. Add ⅓-1/2 cup of your favorite ingredients such as chocolate chips, berries, nuts, dried fruit and more!
- Rest the dough: Resting the dough for 30 minutes before baking allows the gluten-free flour to hydrate, since gluten-free flour takes longer than regular flour to absorb moisture.


AMAZING! Everyone raved about them! I added chocolate chips and can’t wait to try other combos. I baked them the full 14 (maybe more) minutes because they looked a little doughy at 12. Maybe they would’ve firmed up, but I’m not sure.
Hi Melanie, so glad you enjoyed these! Sounds like you made the right call baking a few minutes longer, it can vary a lot from one oven to another. Thanks for your review!
Hi Erin, wonder if you have recipes in all organic ingredients/ diary free versions? vegan?
Hi Stephanie, you’re always welcome to use all organic ingredients for any of our recipes! We also have many dairy-free and vegan recipes on the site. (But not a dairy-free version of these scones, unfortunately. The real butter is key here.) Hope that answers your question!
Tried these this morning and they didn’t turn out as expected. I followed instructions with the exception of using low fat sour cream as it is what was on hand. I also was unable to get my oven up to 500, 480 was as high as my oven thermometer would read. The major problem I had was the flour measurement. I’ve always baked by weight, not volume, but the measurement for this appears to be off. I measured out my flour by volume (spooned and leveled) and weighed it and 1.5 C of KA M4M weighed 197g. The recipe says 240g by weight. I’ve been taught that the average of gluten-free 1:1 flours is 130g, so 197g for 1.5 C would be close and went with that measurement. Rested and froze dough as instructed; it was a softer dough than expected for scones but I was reluctant to add anything more than bench flour for handling. Baked them off, but they lost a lot of butter during the bake and appeared soft with very little rise. It took quite a bit longer to bake them to doneness and consequently, they got really brown and overly crunchy on the edges. The flavor was fine in the center but my husband would only eat one. I’ve read your explanation of the flour weights before and am well aware of the vast spectrum of GF flour weights, but I’ve struggled with this before with some of your recipes and believe that your baseline 160 g per C of GF 1:1 flour is not accurate to what the volume of those flours tends to be. I will try this recipe again, but will definitely use the weight measurement. I’ll report back on the result.
Hi Gigi, it can really vary from bag to bag, but we do our best to give the most accurate measurements based on our experience and research! The oven temperature also makes a big difference, so hopefully you can get it up to 500 and have these work out better for you next time!
I made these today and made them just plain in case something went wrong or I didn’t like them! WELL, they are delicious. I followed the instructions to the T. I will make again adding a little something! Thank you!!!!!
Hi Diane, that’s great to hear! Glad they turned out well for you!
I was excited to think that I had ready to go scones in the freezer. I baked some from frozen and they lost a lot of fat and the texture was a bit gummy. Should I thaw them first?
Hi Vivianne, sorry they didn’t bake up as expected! We haven’t tried baking from frozen, but a partial thaw of 30-60 minutes might work best, baked at 425°F the whole time.
Hi, I would like to make the scones but don’t have that brand of flour here in Ireland. What we’ve got is plain gluten free flour. How much xantham gum should I use please,
Best regards,
Helen
Hi Helen, good question! The general recommendation is ¼ teaspoon xanthan gum per 1 cup gluten-free flour.
I think 1 tbls. Of baking powder is too much. I did add cranberries and orange zest. They were a good product but all I tasted was the baking powder.
Hi Ann, sorry these didn’t turn out as expected for you! 1 Tablespoon of baking powder has proven to work well for us consistently, but you’re welcome to cut back. Perhaps the dough needed a bit more mixing to evenly distribute?
Hi, I want to make the dough the day before and bake in the morning for Christmas. Can I leave it in the fridge overnight?
Hi Marissa, good question! It’s best to freeze the dough until you’re ready to bake, as listed in step 7: “Wrap the dough tightly in plastic wrap and refrigerate for 20-30 minutes. Then freeze for 15 minutes (or up to 5 days).” Hope that helps!
I was just coming here to ask the same question.
So how long after you take it out of the freezer can you bake it?
Hi Donna, you can bake immediately after taking out of the freezer!