
Soft, buttery homemade caramels! A tried-and-true recipe you’ll want to make every Christmas. Hundreds of reviewers agree these are the most delicious homemade soft caramels around!
This post was originally published in 2012. It has been updated with new step-by-step photos but the recipe is still the same treasured recipe from an old church cookbook.
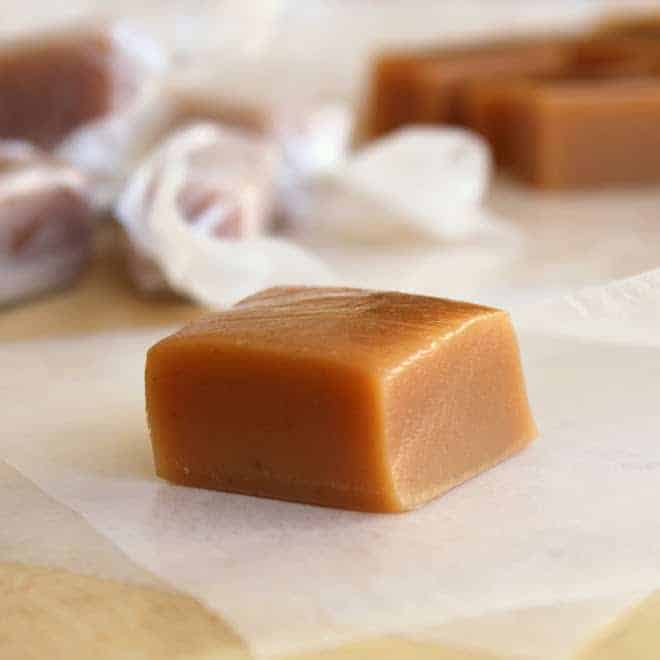
I’ve tried other caramel recipes over the years, but always come back to this one. These are perfectly soft, but not such a soft caramel that they fall apart.
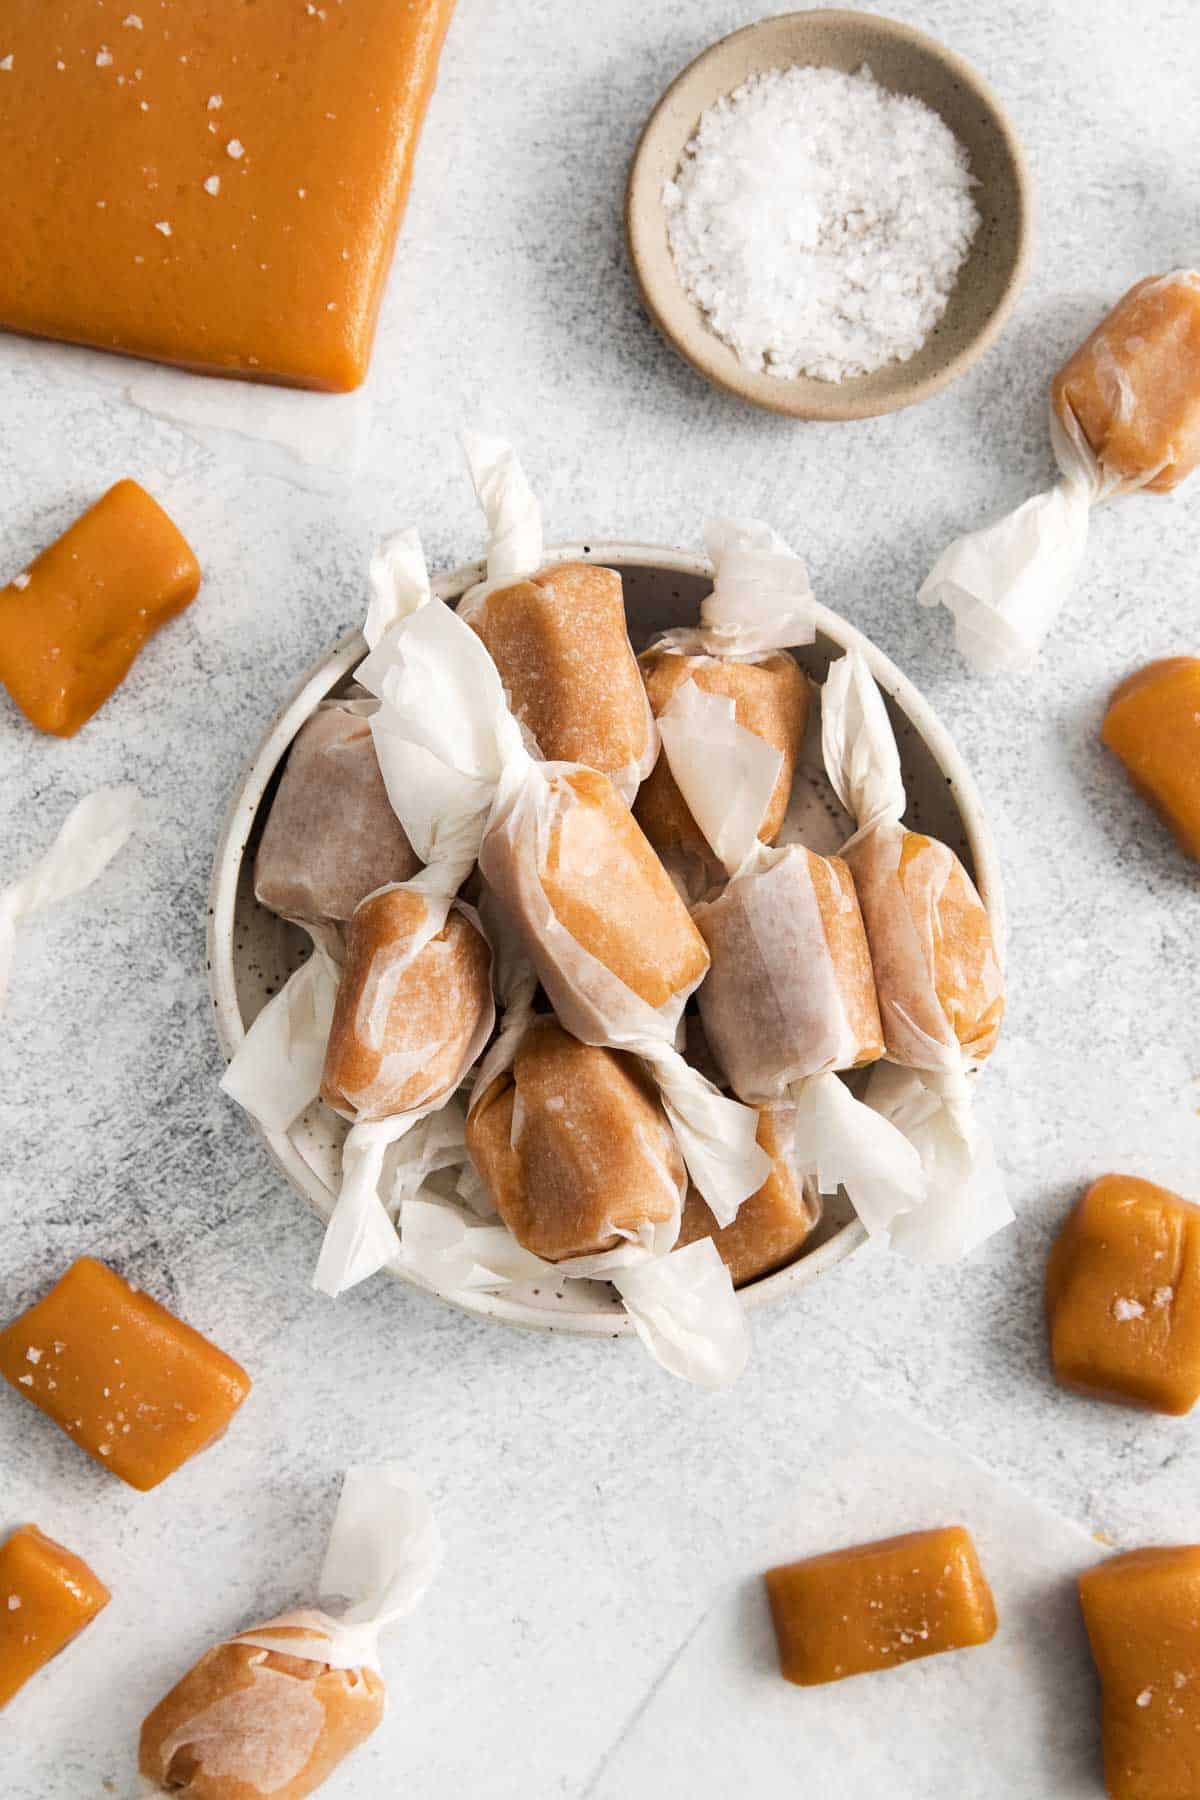
This recipe makes a ton of caramels! I usually make them for my yearly Christmas neighbor gifts. It’s a family tradition to make a batch or two the weeks leading up to Christmas.

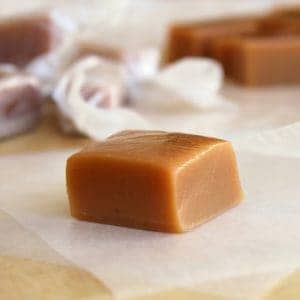
(Original photo from 2012 post)
I actually look forward to spending the evening wrapping caramels in wax paper (and sneaking some bites!) and hanging out with family.
VIDEO: How to Make Caramels
Homemade Soft Caramels
This recipe makes a ton of caramels, so you’ll want to recruit the whole family to help wrap them and package them in gift boxes for friends and neighbors. They’re a creamy indulgence and quick treat everyone will love!
Long ago my Grandma would cut individual pieces of wax paper to wrap up these caramels. Now I just buy a pack of pre-cut wrappers on Amazon. I like these wax paper squares or these clear wrappers.
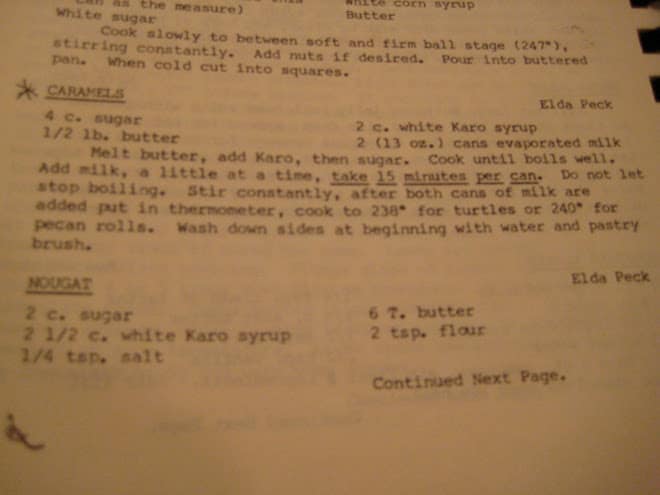
The original recipe my Grandma used came from an old church cookbook. It was submitted by a woman named Elda Peck.
So wherever you are Elda Peck, thank you! Your soft homemade caramels are a classic candy favorite at our house!
Why You’ll Love this Recipe
- Soft, melt-in-your-mouth texture
- Great for the holidays
- Deep caramel flavor
- Makes a large batch for gifting
Ingredients You’ll Need
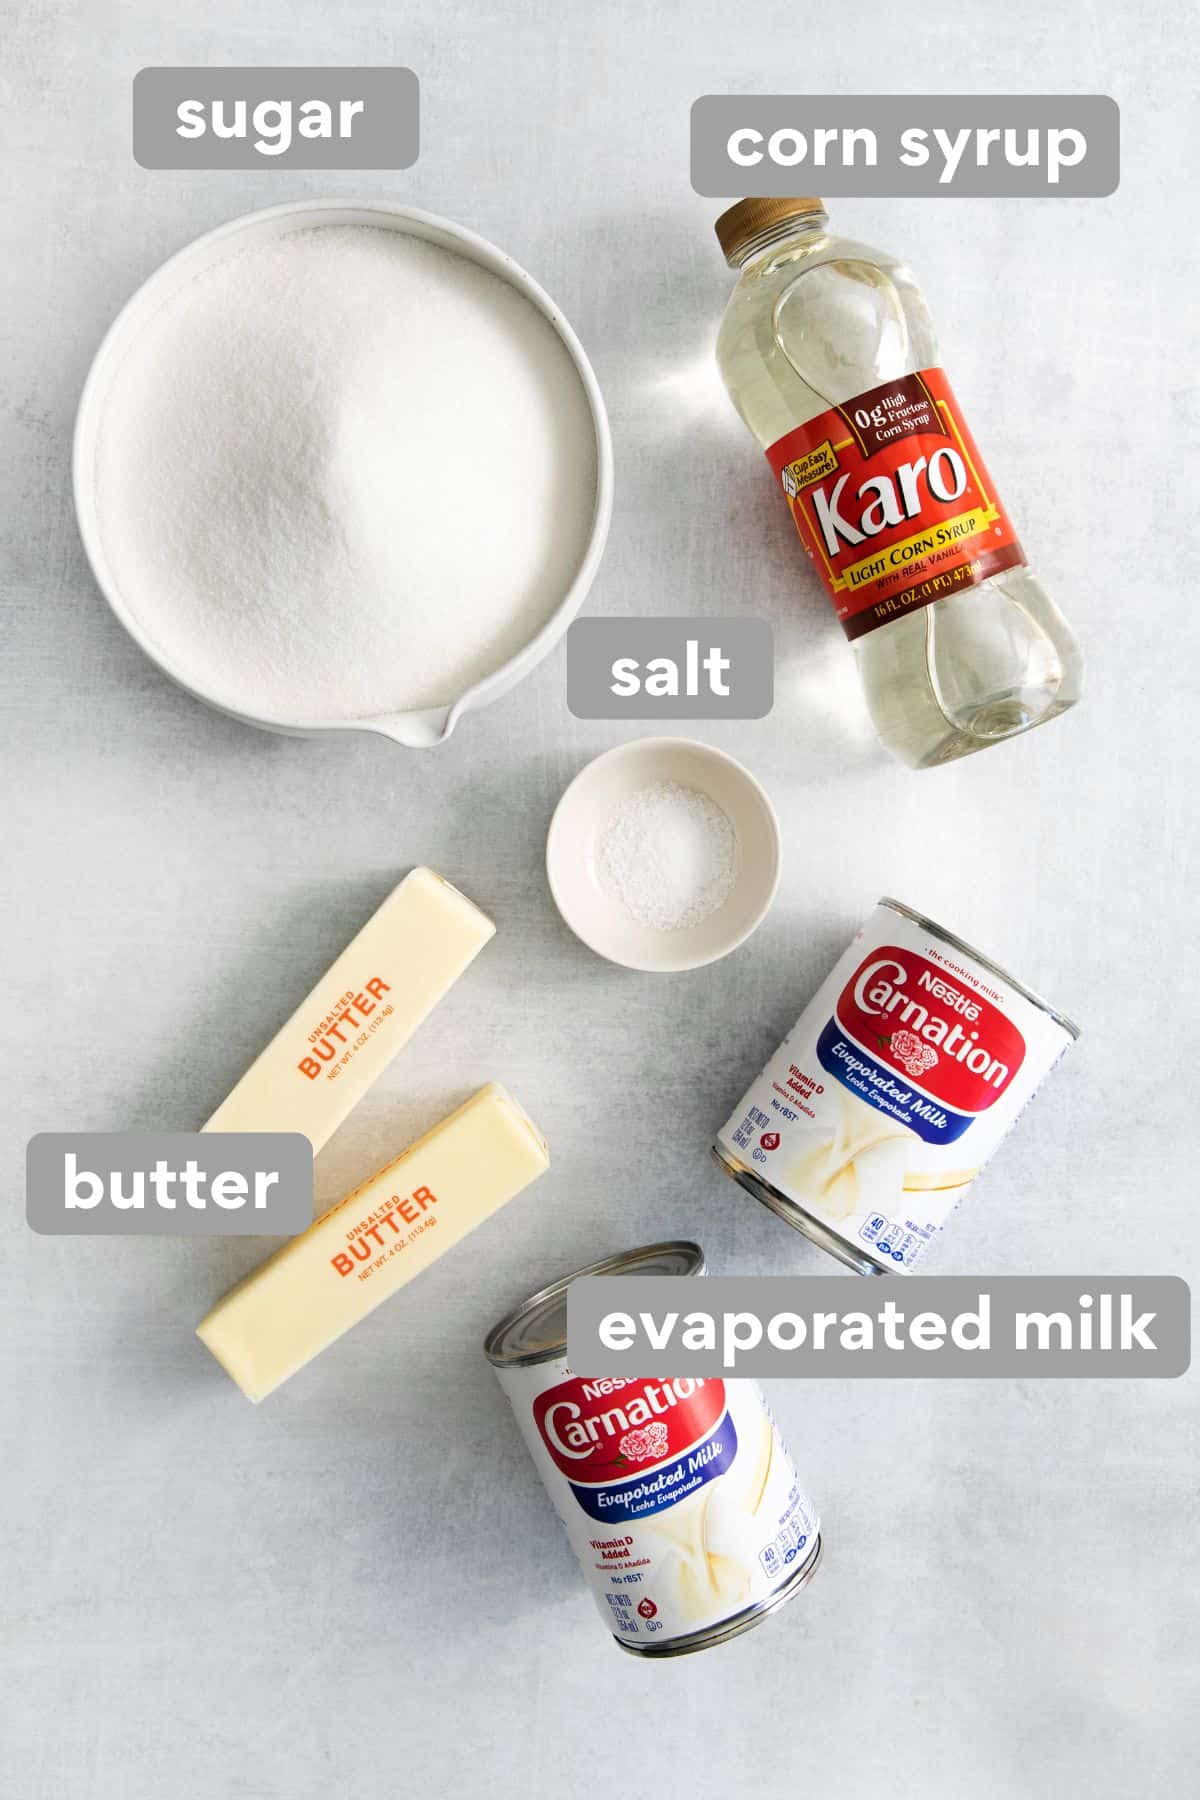
These homemade caramels are made with simple, easy-to-find ingredients. The magic is in the method of making them!
- Sugar: It’s important to use white granulated sugar to create the best rich caramel flavor. No other type of sugar will work! I like Domino brand best.
- Butter: I like to use salted butter for these caramels!
- Corn syrup: For the best caramels, use light corn syrup (not dark corn syrup).
- Salt: Kosher sea salt is best for this recipe — it gives the best texture and flavor!
- Evaporated milk: Evaporated milk helps give these soft chewy caramels a creamy, smooth texture.
Optional but delicious: I also love adding the seeds of a vanilla bean to these caramels. Just add scrape the seeds out of the vanilla bean pod and add them in with the sugar. They’re also delicious topped with some flaky sea salt.
How to Make Homemade Caramels
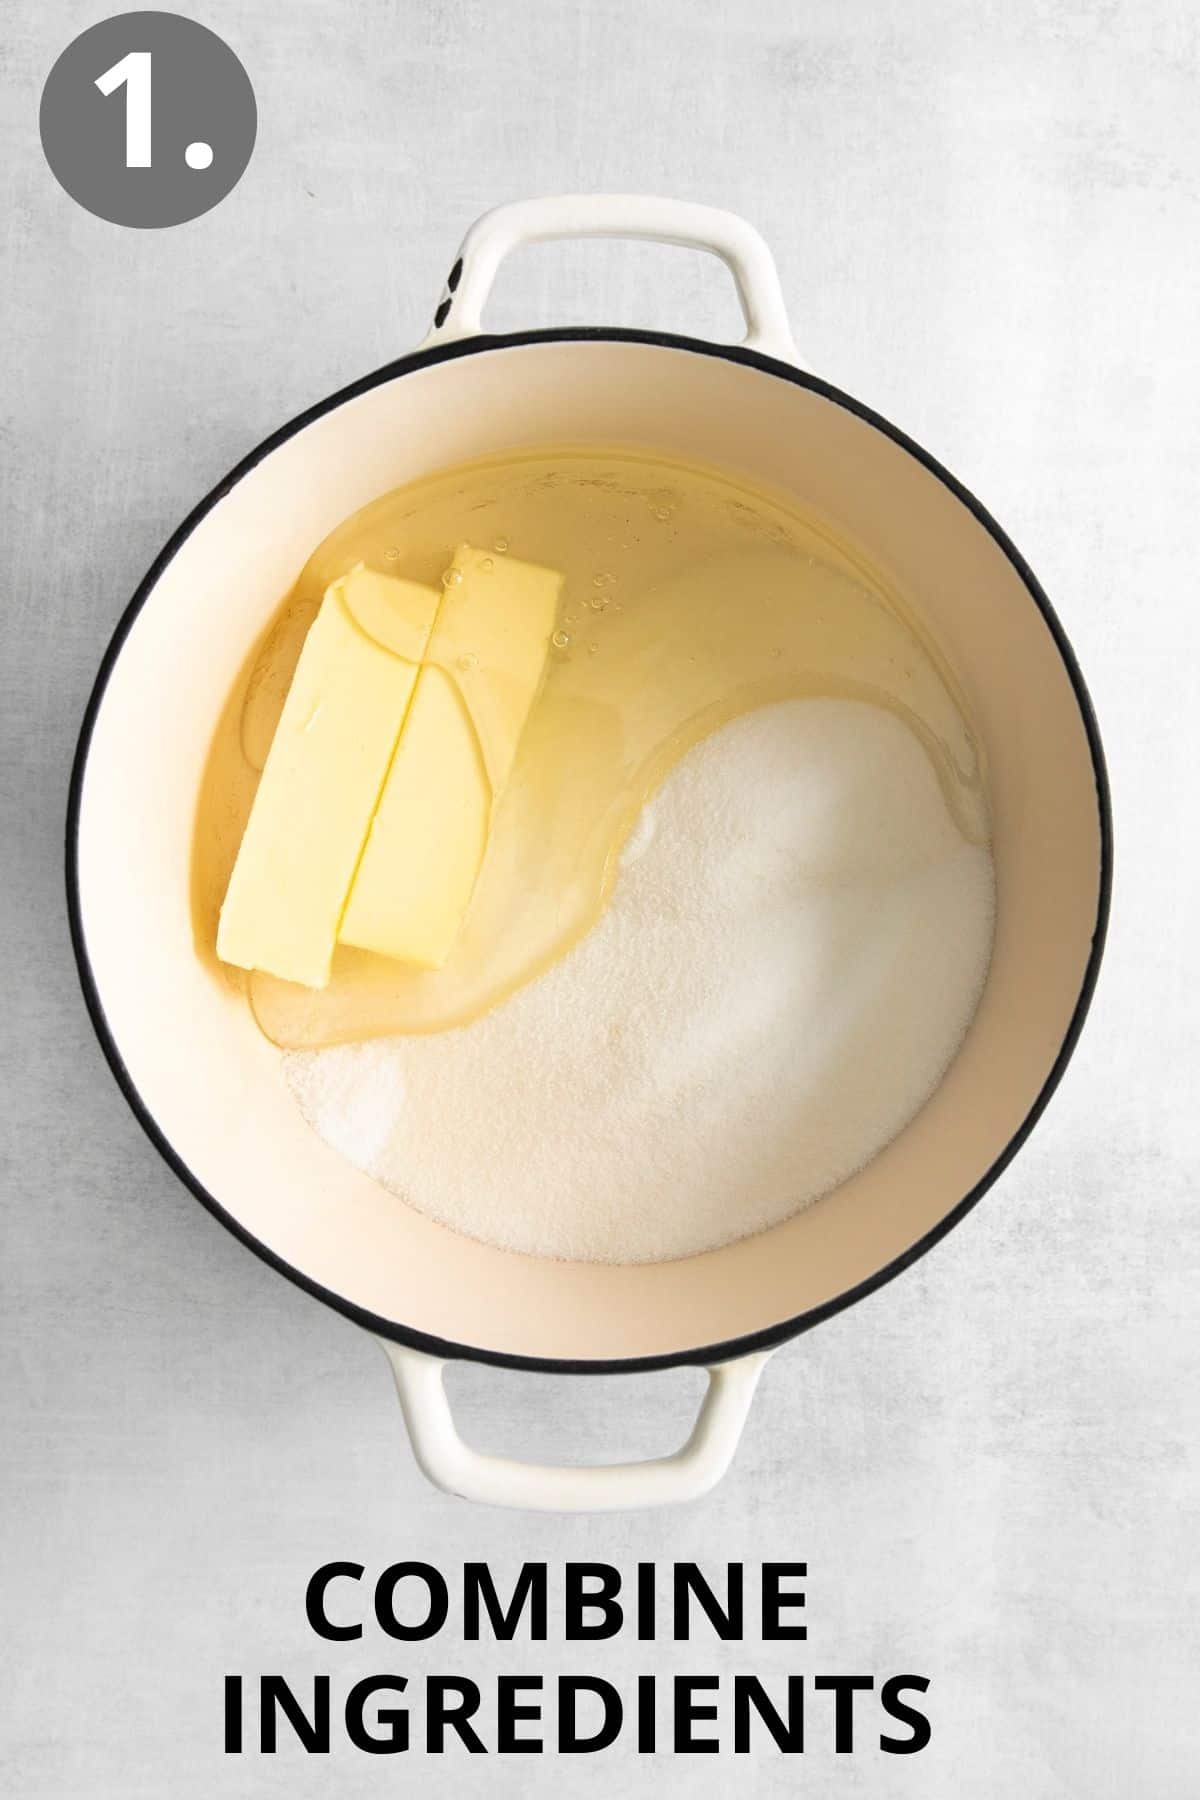
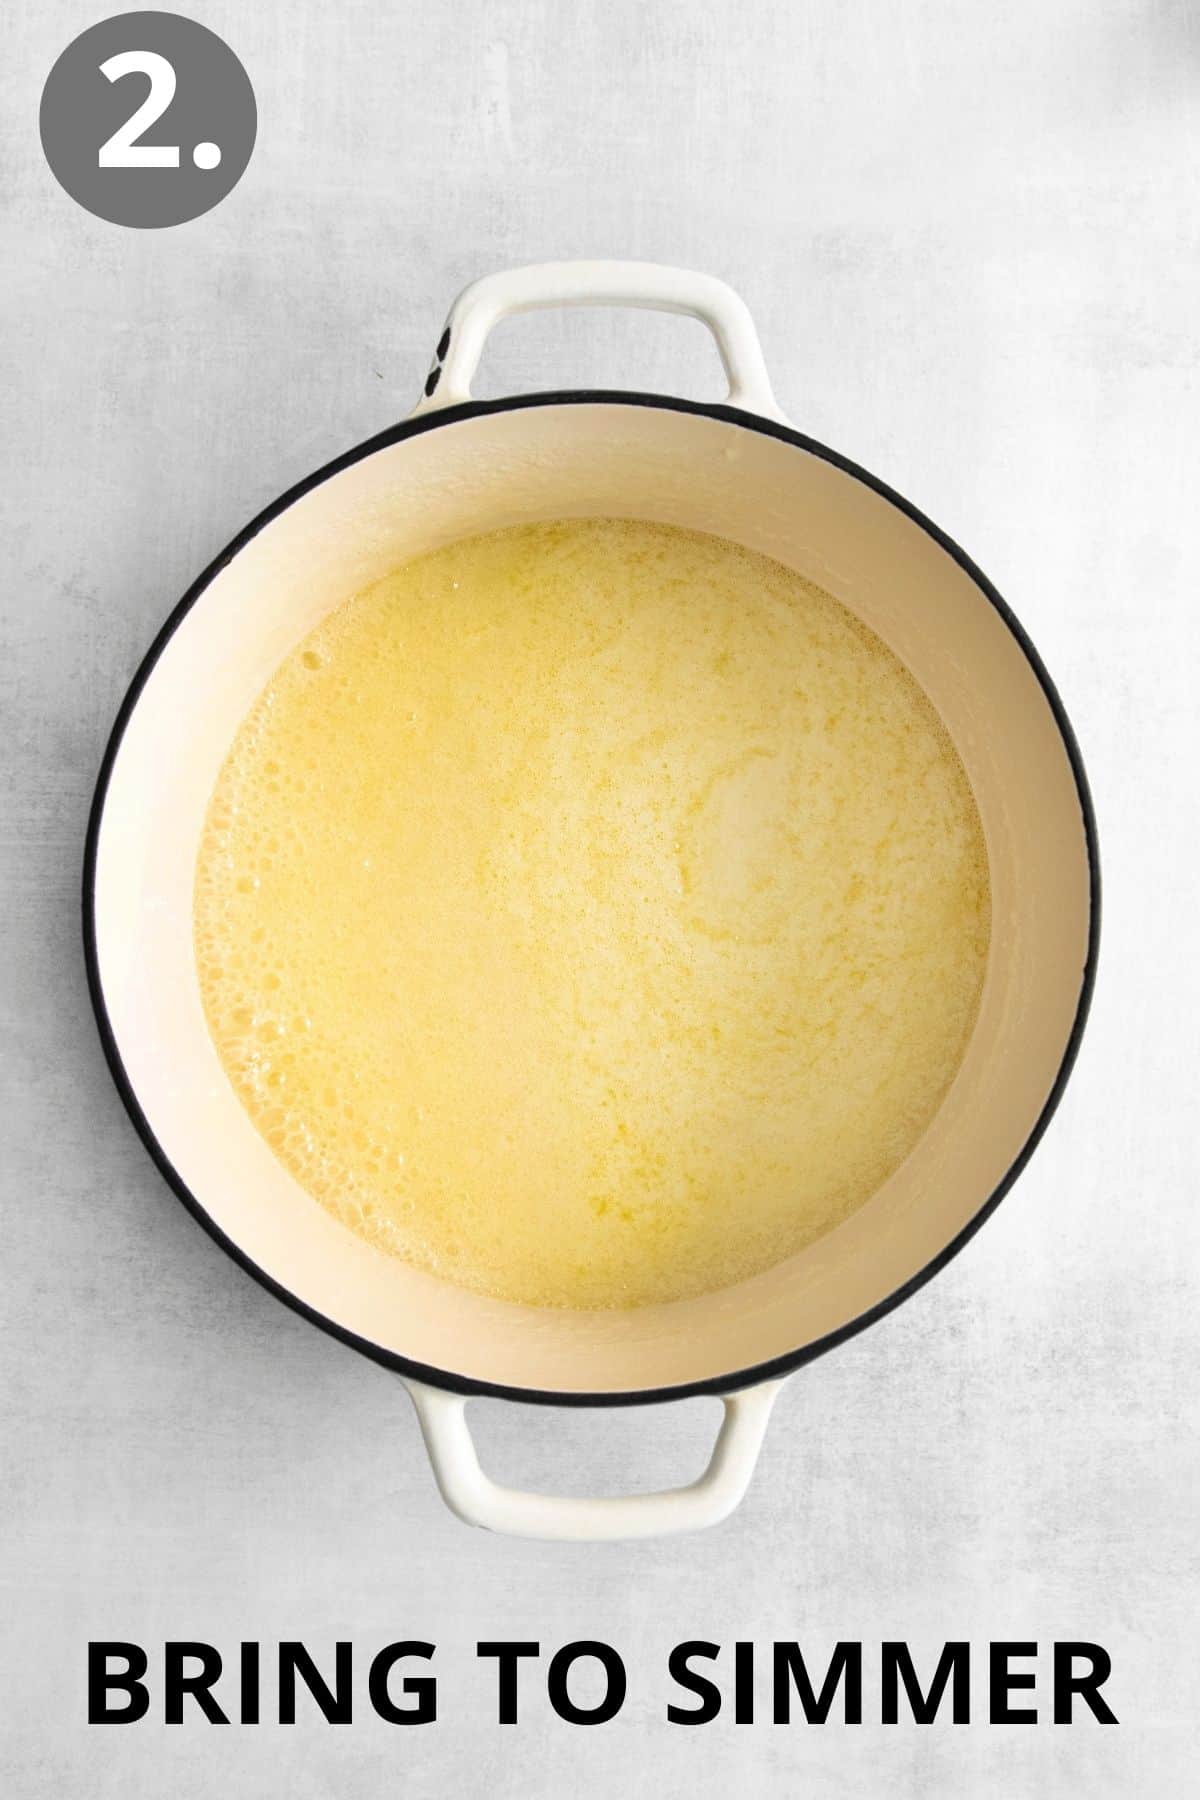
- Melt the sugar, butter, corn syrup, and salt together in a large, heavy-bottomed sauce pan over medium heat or medium-high heat.
- Once the mixture comes to a boil, add the evaporated milk a little at a time, taking 5-10 minutes per can and stirring constantly. A labor of love indeed.
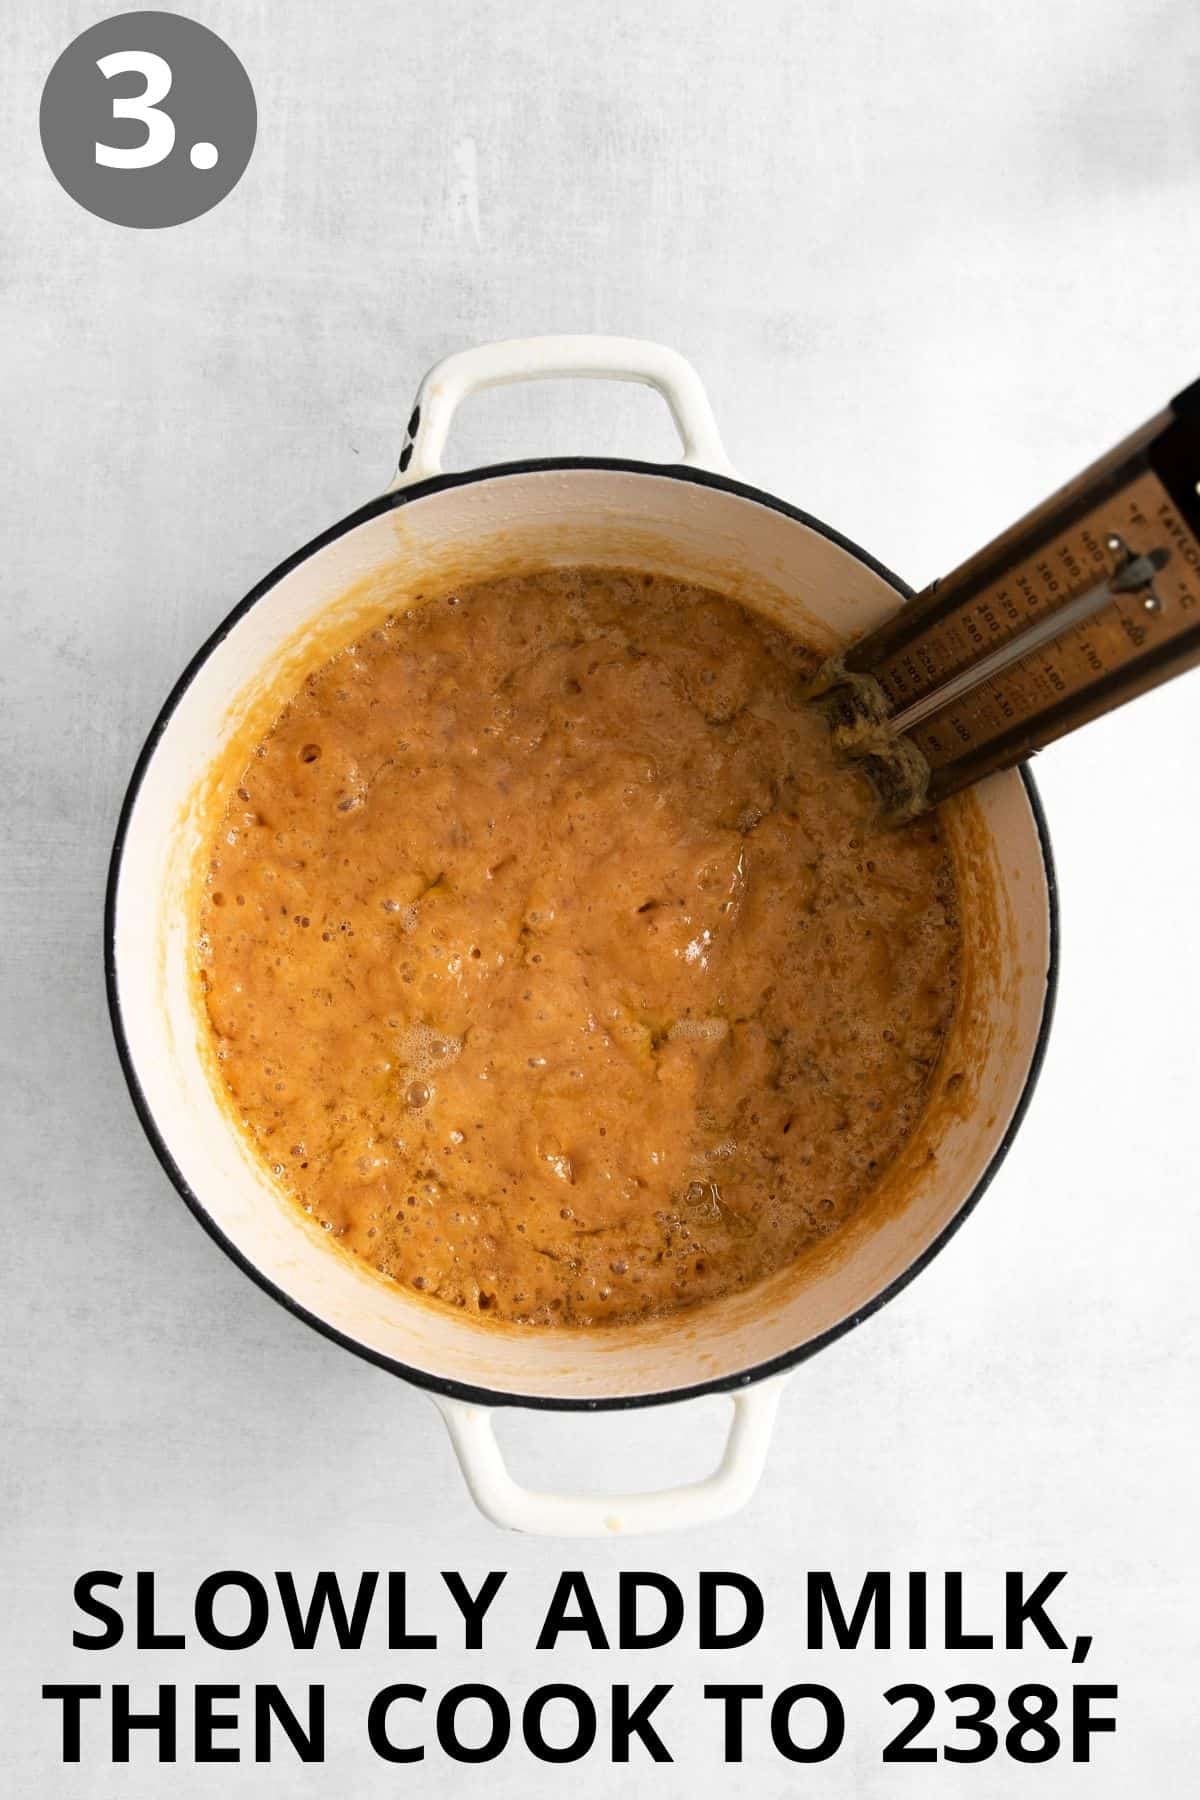
- Once all the milk is added use a candy thermometer and bring the mixture to 238F-240F and not any hotter! Even a few degrees hotter will make them chewy instead of soft.
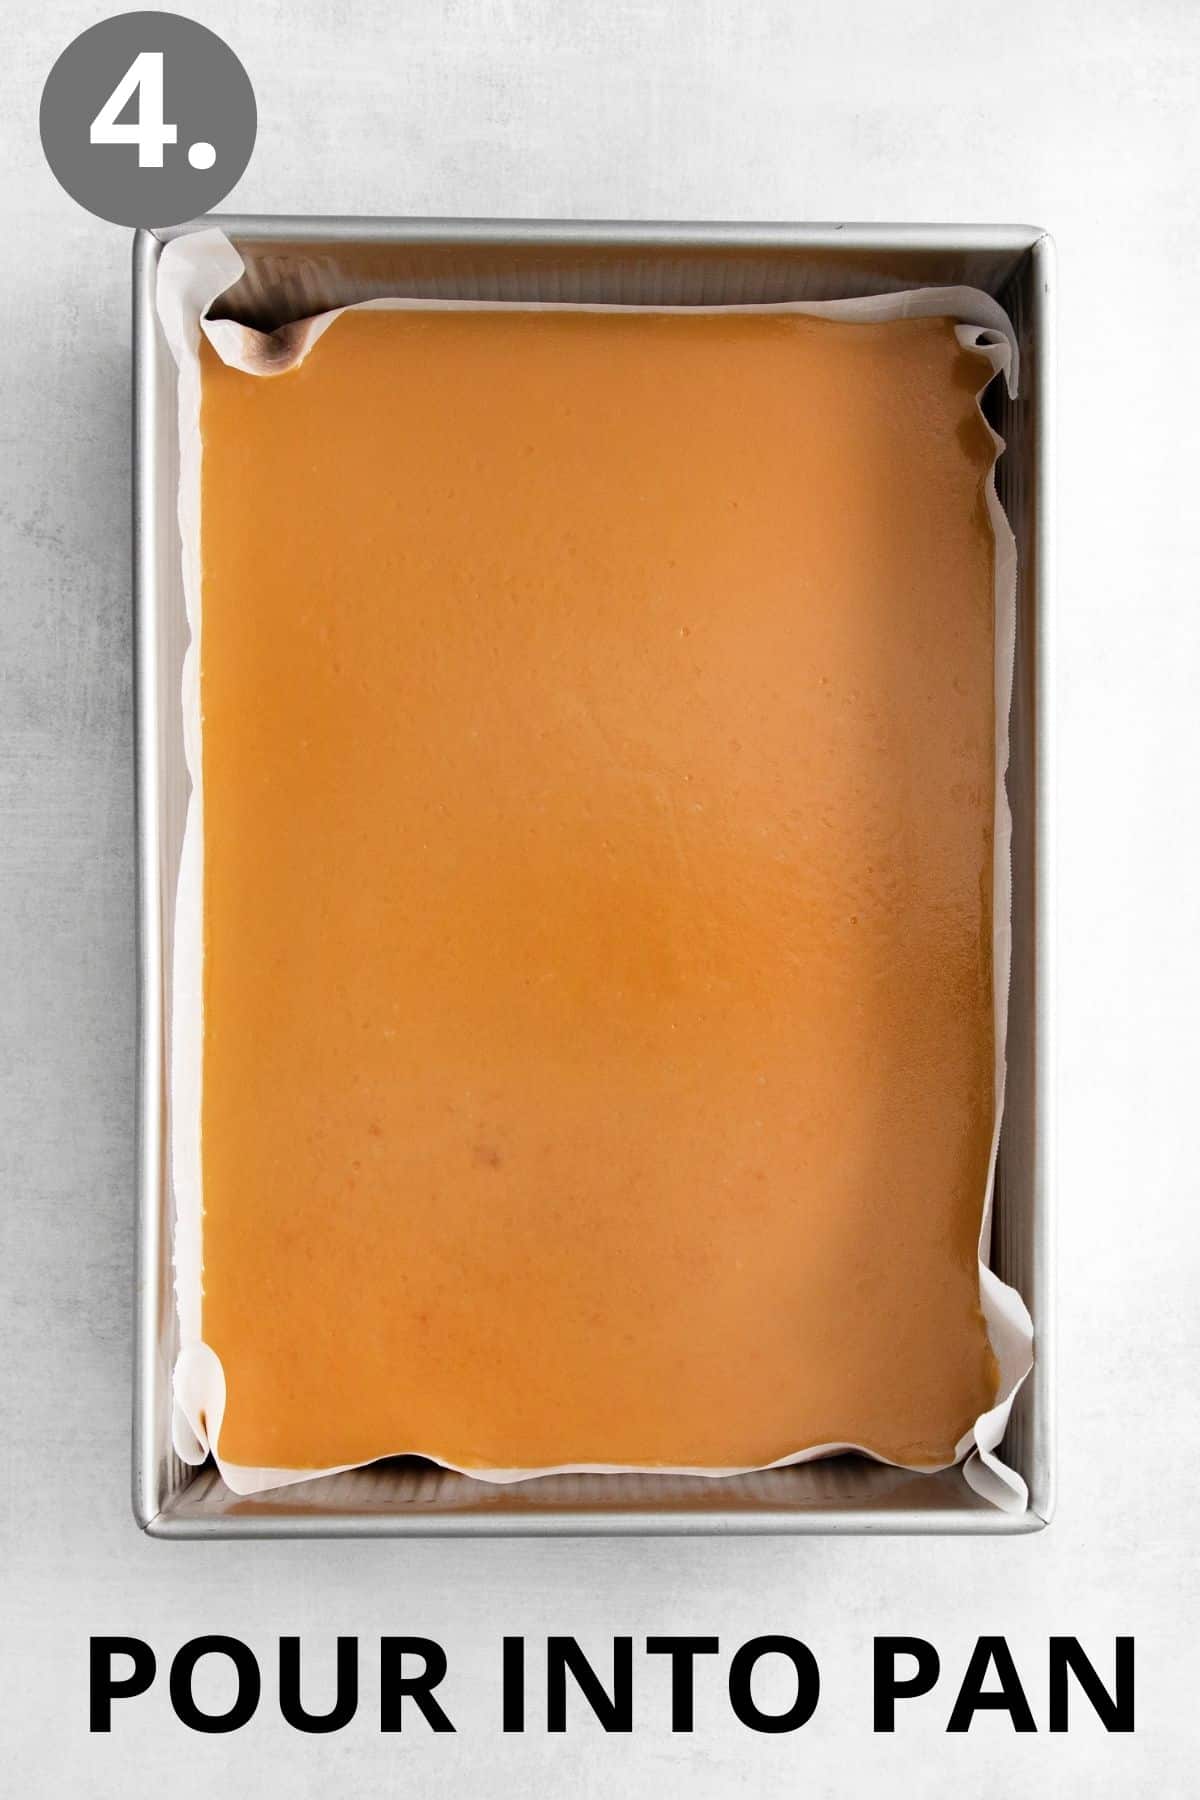
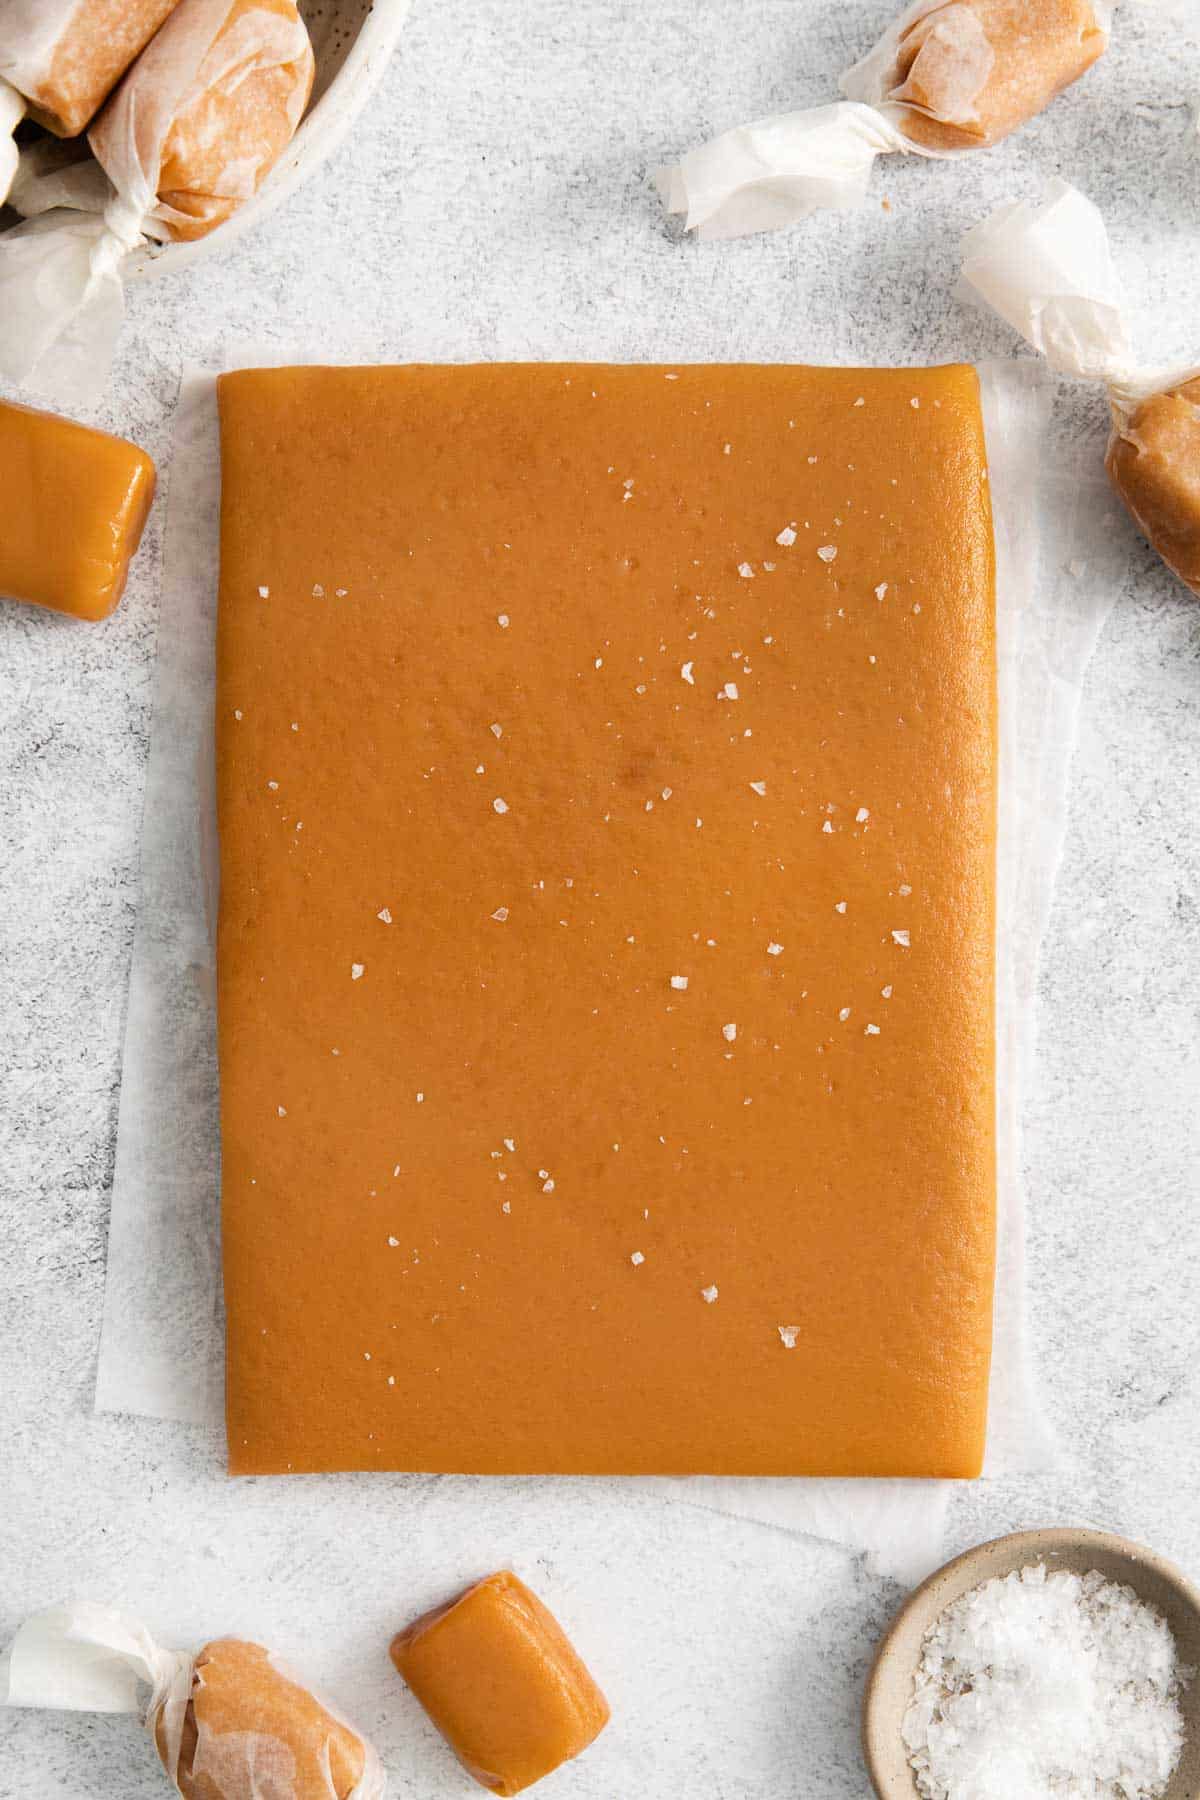
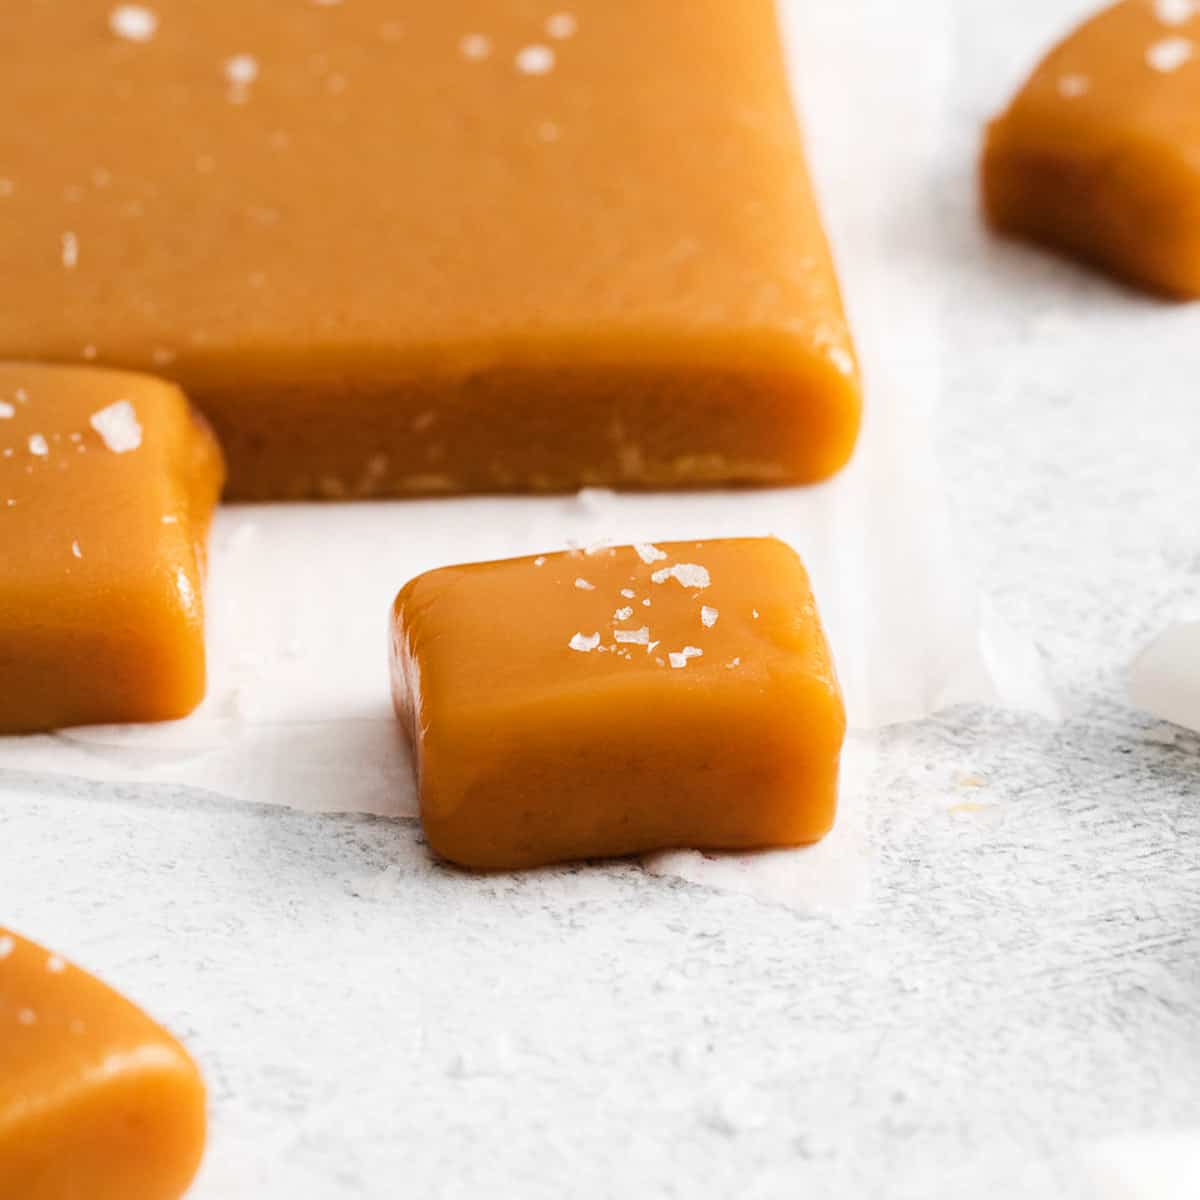
- Pour into a parchment lined 13×9 pan and cool completely. Cut and serve. Enjoy!
Storage Instructions
For a perfect bite size candy, individually wrap these creamy caramels in pre-cut wrappers from Amazon. From there, you can store them in an airtight container or in a candy jar. You can store them at room temperature or in the fridge. They’ll last up to a week at room temperature and even long in the refrigerator.
Expert Tips & Tricks
- Testing the temperature: The most important part of making homemade caramels is to be sure they come up to the right temperature. For soft caramels 238F is the perfect temperature. I like to use a candy thermometer while I’m stirring/cooking the caramels then MOST IMPORTANTLY double check the temperature with an instant thermometer. Be sure to check the temperature in the middle of the caramel mixture! If the thermometer is touching the bottom of the pan the temperature won’t be correct.
- Testing the consistency: I highly recommend using a thermometer AND the cold water test to be sure you get perfectly chewy candies. To do the cold water test, simply fill a small cup with cold water then drizzle a little of the caramel into the cup. You should be able to use your fingers to form it into a stable ball, but it will still be soft and easy to squish.
- Use a stainless steel pot if possible! These caramels turn out much butter when made in a stainless steel pot (as opposed to an enameled Dutch Oven).
We also might this tried-and-true marshmallow fudge every year!
More Recipes from My Grandma’s Cookbook
I hope you love this recipe as much as we do! If you try these homemade caramels, be sure to leave me a comment/rating below. I’d love to hear from you!
Soft, Buttery Homemade Caramels
Video
Ingredients
- 4 cups (800g) granulated sugar
- 2 sticks (226g) butter
- 2 cups (480ml) white corn syrup
- 1 teaspoon kosher salt
- 2 12 oz. cans (708ml) evaporated milk
Instructions
- Line a 9×13 pan with parchment paper and set aside.
- Melt the sugar, butter, corn syrup, and salt together in a large, heavy-bottomed pot over medium heat. (A stainless steel pot works best for these caramels.)
- Once the mixture comes to a boil, add the evaporated milk a little at a time, taking 10-15 minutes per can and stirring constantly. A labor of love indeed.
- Once all the milk is added use a candy thermometer and bring the mixture to 238F-240F and not any hotter! Even a few degrees hotter will make them chewy instead of soft. (This will take another 15 minutes or so!) I highly recommend double checking the temperature with an instant read thermometer as it comes to temperature.
- Immediately pour into the prepared pan and cool completely. (Once the caramels are cool – I recommend freezing them for 20-30 minutes before slicing. Or you can refrigerate them for a few hours. You don't want them to be frozen solid, but if they're cold this helps the caramels hold their shape when cutting/wrapping.) Cut and serve. Enjoy!
Notes
- Testing the temperature: The most important part of making homemade caramels is to be sure they come up to the right temperature. For soft caramels 238F is the perfect temperature. I like to use a candy thermometer while I’m stirring/cooking the caramels then MOST IMPORTANTLY double check the temperature with an instant thermometer. Be sure to check the temperature in the middle of the caramel mixture! If the thermometer is touching the bottom of the pan the temperature won’t be correct.
- Use a stainless steel pot if possible! These caramels turn out much butter when made in a stainless steel pot (as opposed to an enameled Dutch Oven).


Happy Holidays and Merry Christmas. Son is taking a turn stirring. Thanks for this recipe. Hope it turns out.
My son loves to take turns stirring! I hope it turned out well for you!
Is flaked salt the same as Kosher? I am about to make this recipe (a bit different than mine) and considering sprinkling a bit of kosher salt on top after being poured??? Would that be too much salt? Also, I have never made caramels without adding vanilla extract..I don’t have a vanilla bean…but YET delicious without adding vanilla? Thanks!
I always sprinkle them with a little salt after they’re poured out! I don’t think it’s too much. And I’ve added the seeds of a vanilla bean to these many times with great results. I find this works better than vanilla extract which boils off.
Excellent recipe. After making this recipe and sharing caramels with friends, someone asked if I’d be willing to share my secret recipe. I had to search google for it since I didn’t save it but thats no longer an issue. I’ve only made it once (and my first attempt at any candy making) but won’t be my last time. It was a huge success with everyone who tried it. Thanks (and Ms. Peck) for sharing it.
I’m so glad the recipe worked for you! We’re all grateful Elda Peck shared it years ago 🙂
We made these last year and they were great. Today we made them using a friends hand written recipe and they came out sticky. We didn’t do the water check or use an instant read thermometer like in your recipe. Can we salvage this batch by reheating them to 238 degrees?
Unfortunately that won’t work once the caramel has cooled! Using an instant read thermometer is the best way to ensure the caramels are the correct temperature!
Can these caramels be used for making turtles?
As per how I made caramel at the fair, for this scaled down recipe I put in one oz of milk every 3 minutes, pouring it down the side of the pan. This makes the cooking time an hour and 12 minutes after it starts simmering, bit it is worth it. Using an induction plate is great because you can set it to 220 and never come close to ruining it. I also mix the vanilla into the last 2 oz of milk for the last two additions. The above recipe is grand since it exactly fits a 9 x 9 pan.
Are these suitable for dipping in chocolate or would I have to take the temp up a bit?
These will work for dipping but I would freeze the caramels before you dip them. I hope this helps! 🙂
How long should I leave them in the freezer before dipping in chocolate? When they defrost will they still be chewy? Thank you
Yes they will definitely still be chewy! I usually freeze them before I slice them. I would do this:
1. Freeze for 20-30 minutes to firm the caramels up before you slice them.
2. Slice them into the desired shapes.
3. Freeze for another 20-30 minutes before dipping in chocolate.
I hope this helps! 🙂
I just made these. They’re cooling off now as a matter of fact. I did make a slight change. I skipped the salt but used salted butter bc that was what I have on hand. Tastes AMAZING. Will def. make again. Thank you so much!
I’m so glad they turned out for you! Hooray!
I made these yesterday, first time making caramels. Buttery, creamy, chewy, soft caramels. I used salted butter and just omitted the addition of salt while cooking. I stirred the entire time because I didn’t want them to burn. I will make these again, but I’ll order wraps, I ran out of wax paper wrapping them. I wish I could add a photo.
I’m so glad they turned out for you! 🙂
Very tasty! Once I took the pot off the stove, I added two teaspoons of vanilla extract and two teaspoons of imitation raspberry extract. Now they taste like Brach Royals!
Great idea. I just made these then looked at the comments. LOL I’ll try your idea next time.
Love this recipe! What brand of raspberry extract do you use? The brand I picked didn’t leave any flavor. Thanks
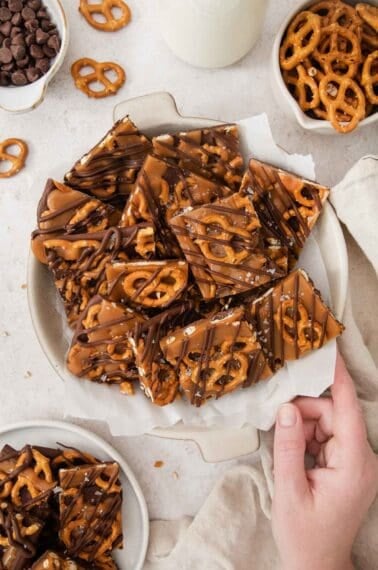
Can this recipe be used to dip pretzel rods?
Can you use non stick stainless?
I have a heavy 4-quart stainless saucepan. Is that large enough? If not, my only heavy pot is the enameled Dutch oven. I noticed that your photos show an enameled pot, I’m guessing that the reason you don’t recommend it is that it stays lava-hot and possibly jeopardizes overcooking the caramel as you’re trying to stop the cooking process at the desired temperature. Plus, it would be heavy and very hot to pour out the candy. Thank you for the delicious-looking recipe and outstanding instructions.
Yes! The process shots need to be updated to show a stainless steel pot. A 4-quart should do the trick. You’re totally right about the enameled pot holding too much heat! I hope you enjoy the caramels 🙂
Delicious! Can I use vanilla extract in leu of the bean?
This is my 2nd writting. I LOVE these caramels and I love making them. Everyone just sings their praises! I haven’t had a person yet that doesn’t come back for more! I love salted caramels so I do add the flake salt immediately after pouring.
I started making these when the recipe said to take 15 minutes per can when adding the milk. And I minded that! I think it is fine that it changed a bit. I do however stir my pot the entire time the caramels are cooking, not just when adding the milk. Does everyone else?
Another question I have is this – I have never finished these in the 45 minute cook time that is noted in the recipe? Not even an hour. I do like my caramels chewy so “yes” this takes a bit longer, but my caramels always take a good 1hour and 45 minutes to bring the temperature up to 140°? And I always have it going at a slow rolling boil and stirring constantly. I’m just curious how they could get done in the 45 minutes or even just an hour?
Finally I purchase the 2.9″ x 3.1″ clear cellophane self sealing treat bags from Amazon to place each of my 1″ caramels in. I get 1,000 of them for about $14. They work so nicely and look so nice for gift giving. I’ll start making them soon for all the Holiday gifting coming up.
Thank You for one of my favorite recipes!
I’m so glad you enjoyed the caramels! I’ve found it works ok to add the canned milk taking closer to 10 minutes instead of 15 so I wanted to give that option to speed things up just a bit. How long this recipe takes to make can depend on so much! If you live at altitude it will take longer as well as how much you stir, how hot your stove is, etc. Great to know about the treat bags! I’ll have to go check those out. Thanks for the comment and so glad you love the recipe!
I just made them and it took an hour and a half. I stirred the entire time they were cooking. LOL muscle failure in my right arm. The taste was worth it.
I’m so glad the effort was worth it ha! Way to go!
I found this posted several years ago and have been making every year since. I give them for gifts for Christmas. Tonight will be making them with my grandchildren who gave them for gifts last year to rave reviews. What a great recipe. Passing down the love to the next generation. Ty.
Aww this makes me so happy! My Grandma use to make this recipe with me too. So special! Glad you all like them!
Help!!! This is my second time to make these. The first was perfect but the second was very soft and grainy. Not sure what went wrong? Can I melt them down after they have set and try adding a little water and cook more??
Also are you supposed to stir constantly??
Yes you definitely need to stir constantly. Unfortunately you can’t salvage the caramels once they’ve cooled. I would try again stirring constantly!
I was wondering, would this recipe work for making caramel apples?
Forgot to pin my rating!
I’m planning on trying this recipe for the holidays. Do you think you could substitute maple syrup for corn syrup? One cup maple syrup/one cup corn syrup, perhaps? Thanks, they look delicious!
Unfortunately maple syrup will not work. Sorry about that!