
Soft, buttery homemade caramels! A tried-and-true recipe you’ll want to make every Christmas. Hundreds of reviewers agree these are the most delicious homemade soft caramels around!
This post was originally published in 2012. It has been updated with new step-by-step photos but the recipe is still the same treasured recipe from an old church cookbook.
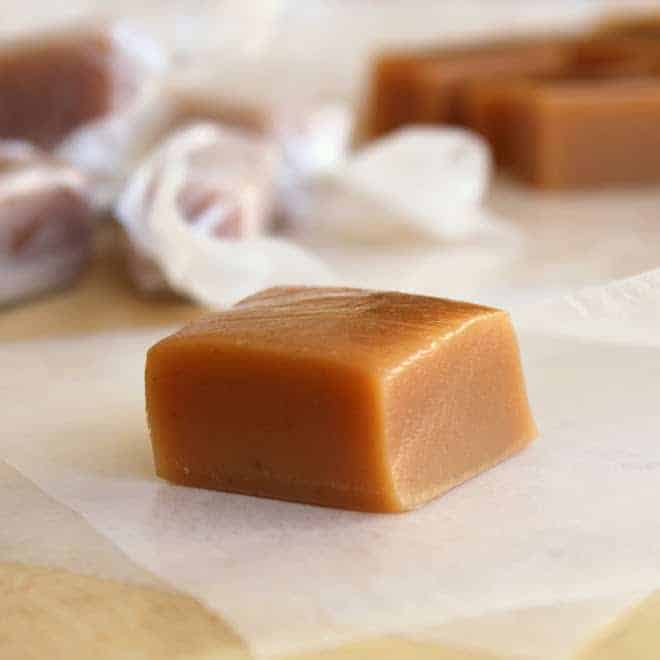
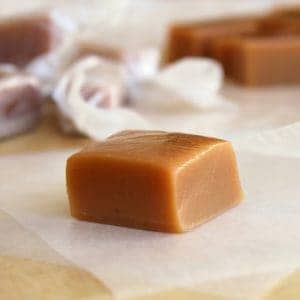
I’ve tried other caramel recipes over the years, but always come back to this one. These are perfectly soft, but not such a soft caramel that they fall apart.
This recipe makes a ton of caramels! I usually make them for my yearly Christmas neighbor gifts. It’s a family tradition to make a batch or two the weeks leading up to Christmas.

(Original photo from 2012 post)
I actually look forward to spending the evening wrapping caramels in wax paper (and sneaking some bites!) and hanging out with family.
VIDEO: How to Make Caramels
Homemade Soft Caramels
This recipe makes a ton of caramels, so you’ll want to recruit the whole family to help wrap them and package them in gift boxes for friends and neighbors. They’re a creamy indulgence and quick treat everyone will love!
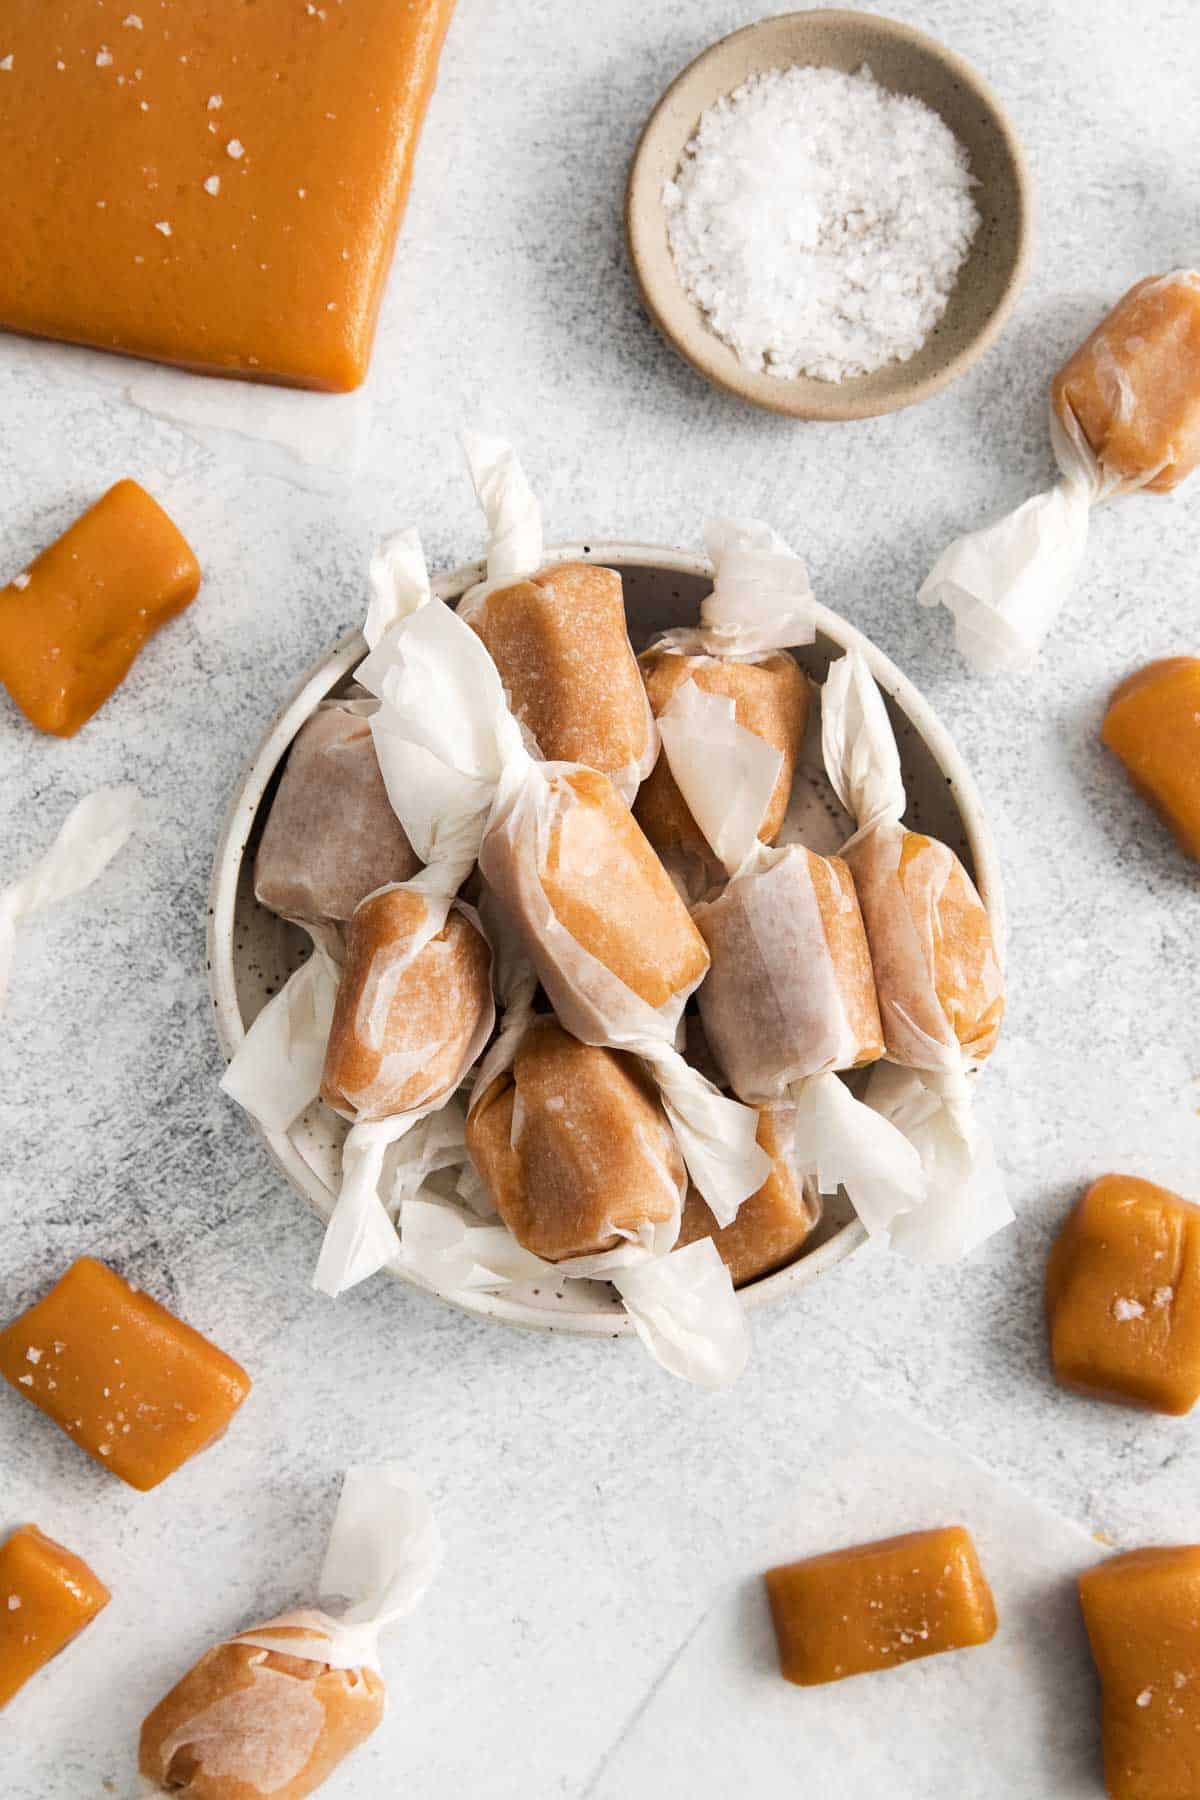
Long ago my Grandma would cut individual pieces of wax paper to wrap up these caramels. Now I just buy a pack of pre-cut wrappers on Amazon. I like these wax paper squares or these clear wrappers.
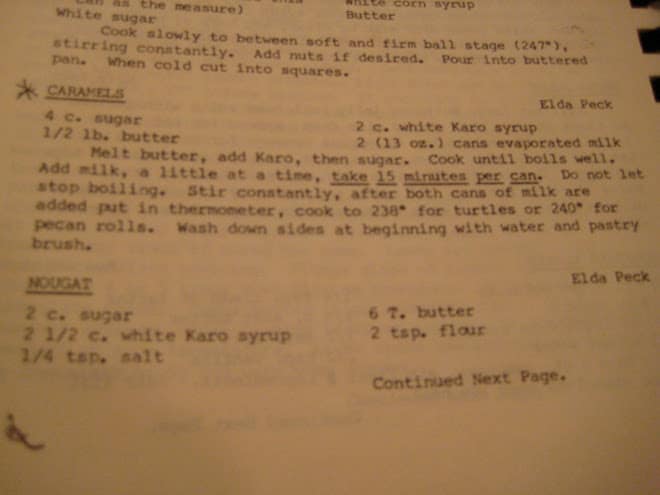
The original recipe my Grandma used came from an old church cookbook. It was submitted by a woman named Elda Peck.
So wherever you are Elda Peck, thank you! Your soft homemade caramels are a classic candy favorite at our house!
Why You’ll Love this Recipe
- Soft, melt-in-your-mouth texture
- Great for the holidays
- Deep caramel flavor
- Makes a large batch for gifting
Ingredients You’ll Need
These homemade caramels are made with simple, easy-to-find ingredients. The magic is in the method of making them!
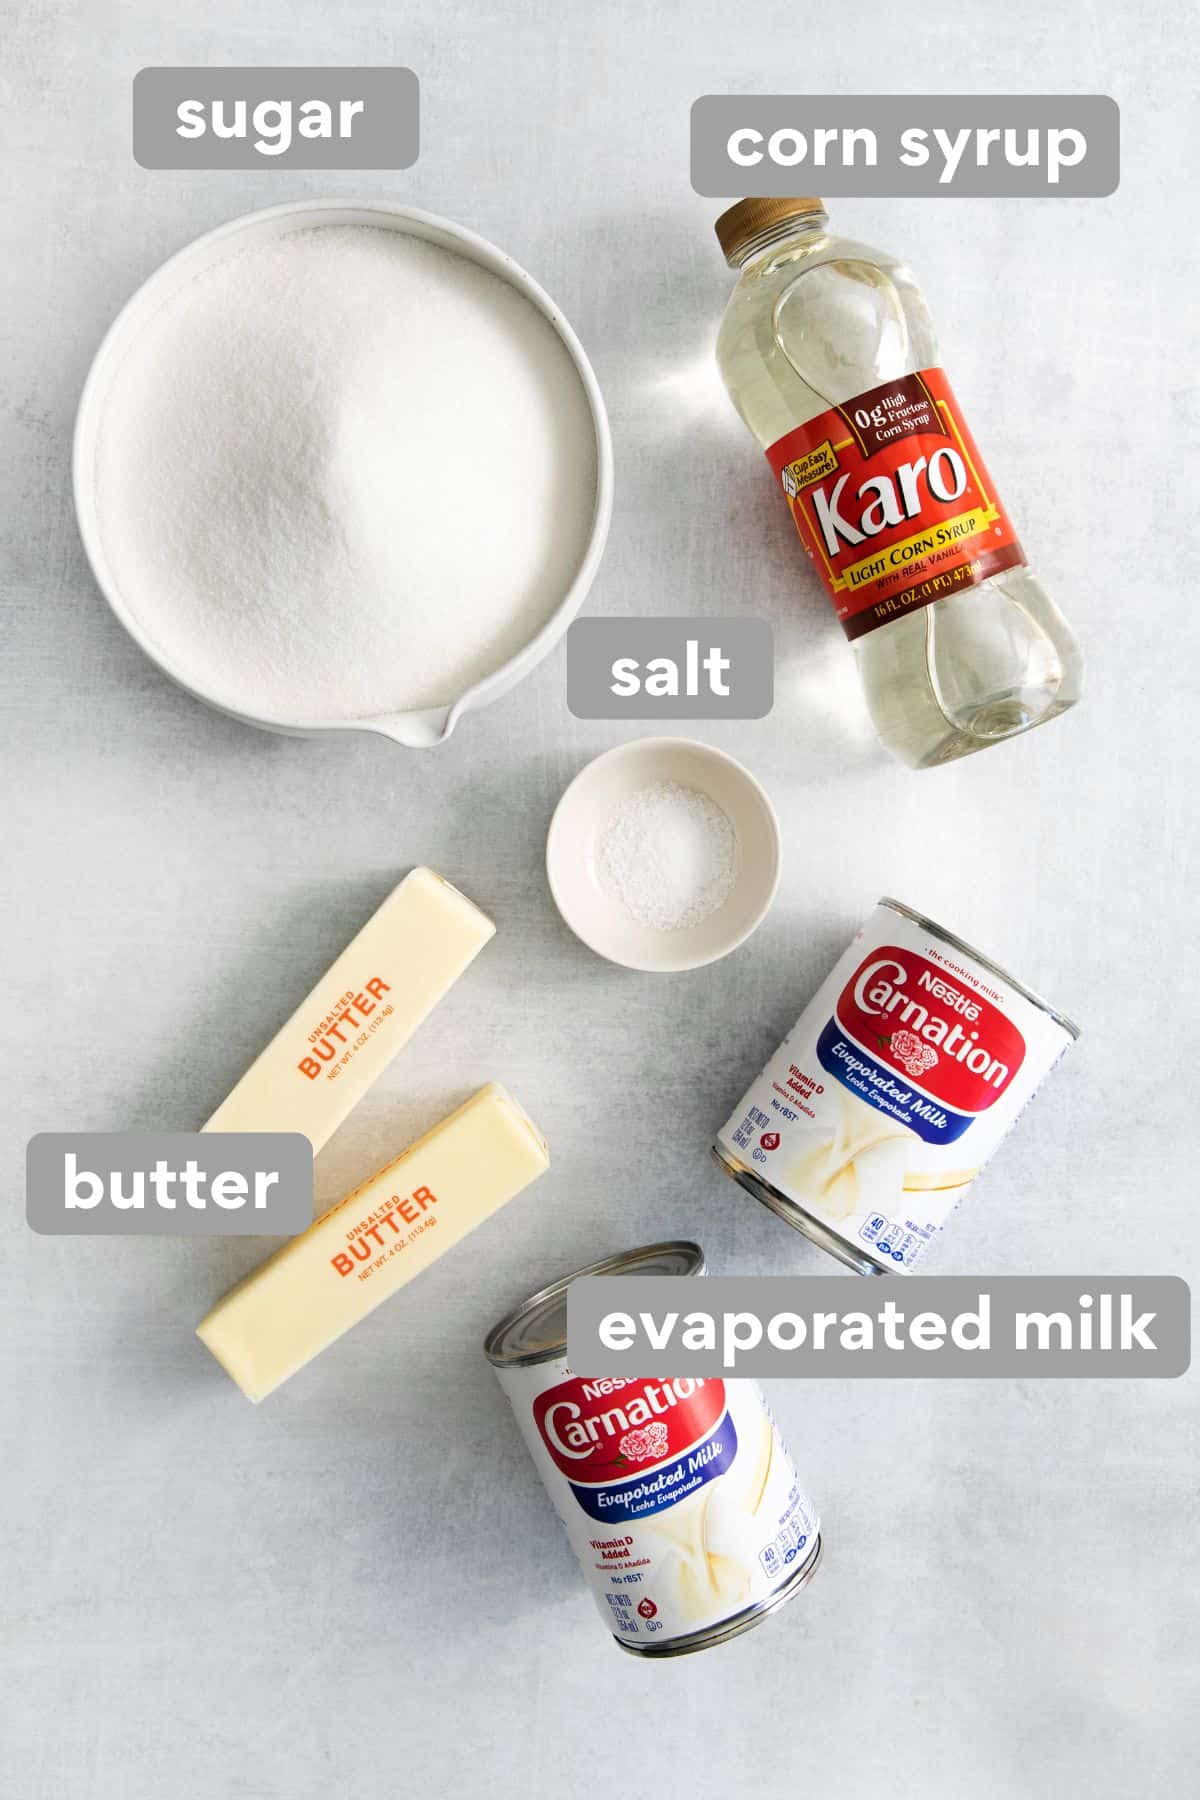
- Sugar: It’s important to use white granulated sugar to create the best rich caramel flavor. No other type of sugar will work! I like Domino brand best.
- Butter: I like to use salted butter for these caramels!
- Corn syrup: For the best caramels, use light corn syrup (not dark corn syrup).
- Salt: Kosher sea salt is best for this recipe — it gives the best texture and flavor!
- Evaporated milk: Evaporated milk helps give these soft chewy caramels a creamy, smooth texture.
Optional but delicious: I also love adding the seeds of a vanilla bean to these caramels. Just add scrape the seeds out of the vanilla bean pod and add them in with the sugar. They’re also delicious topped with some flaky sea salt.
How to Make Homemade Caramels
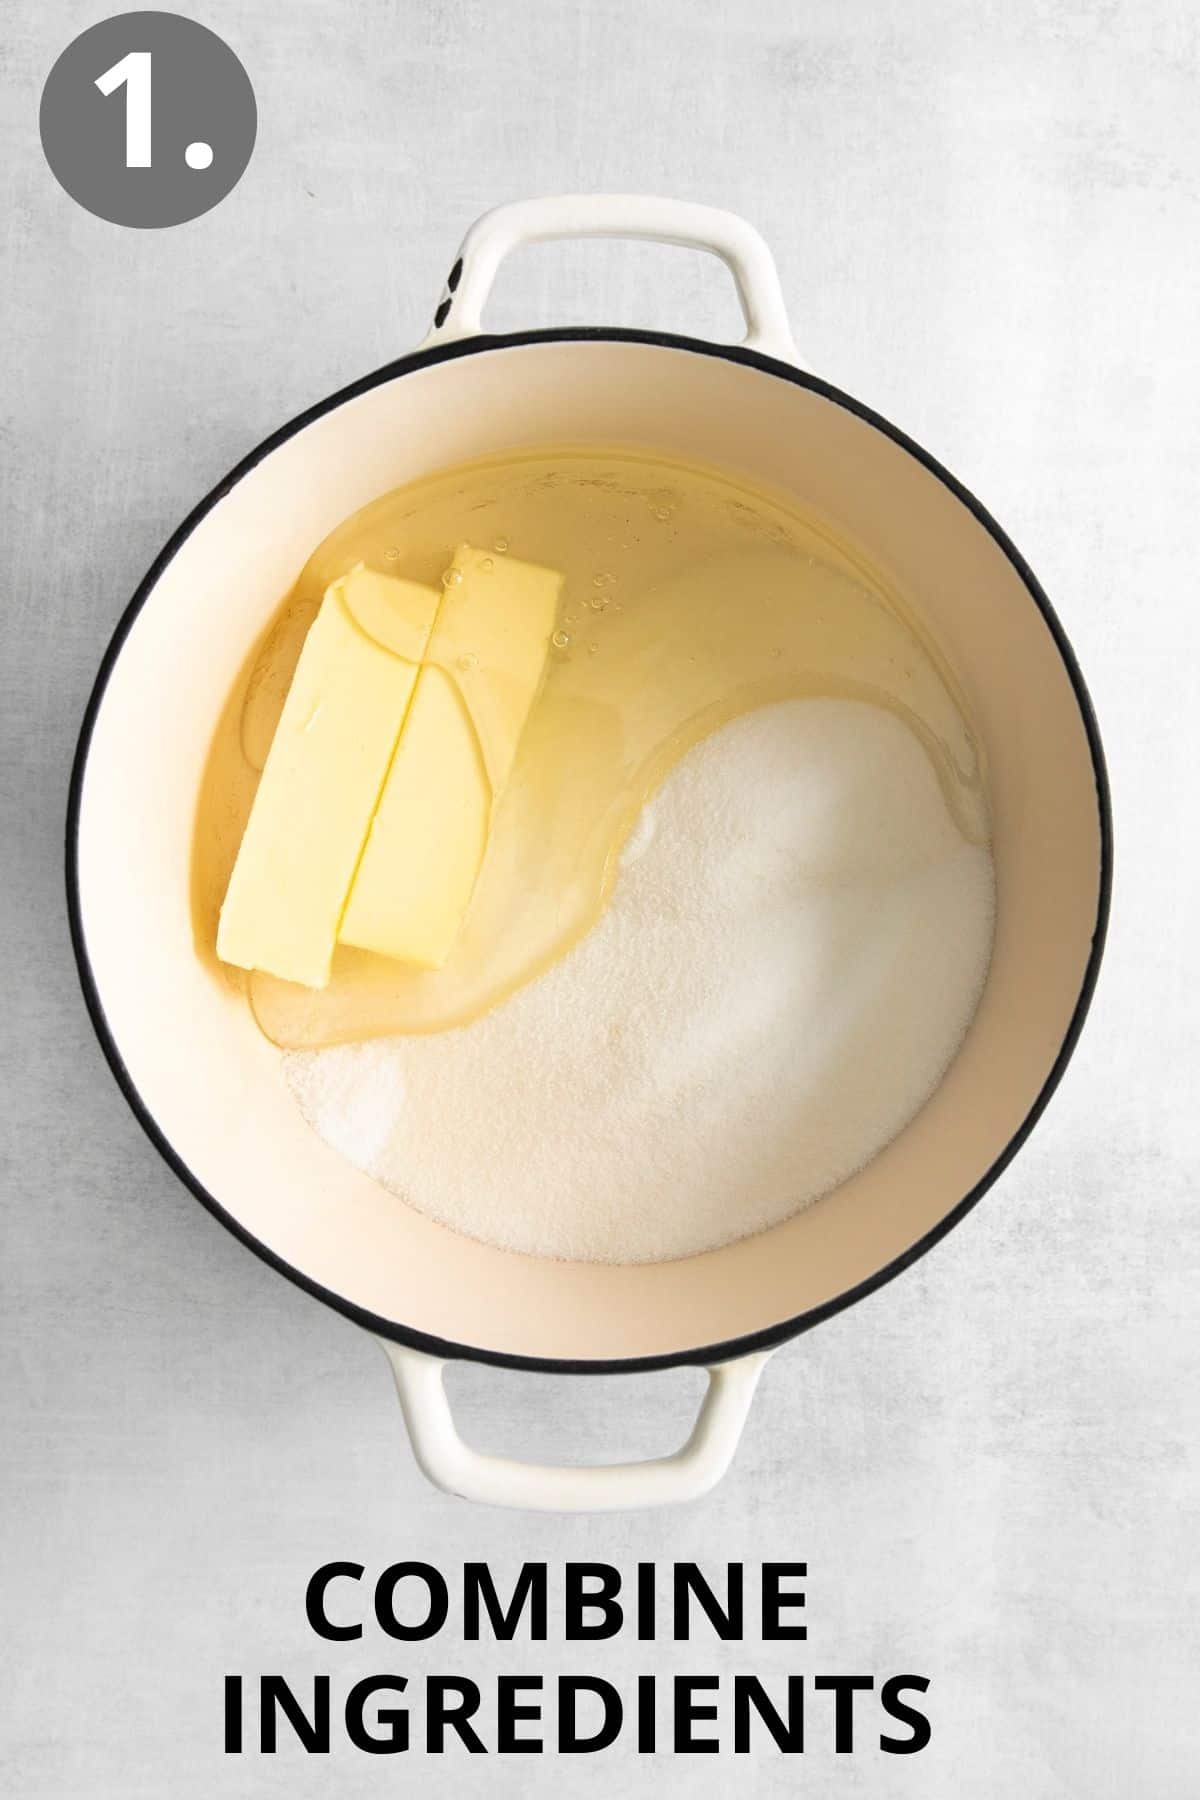
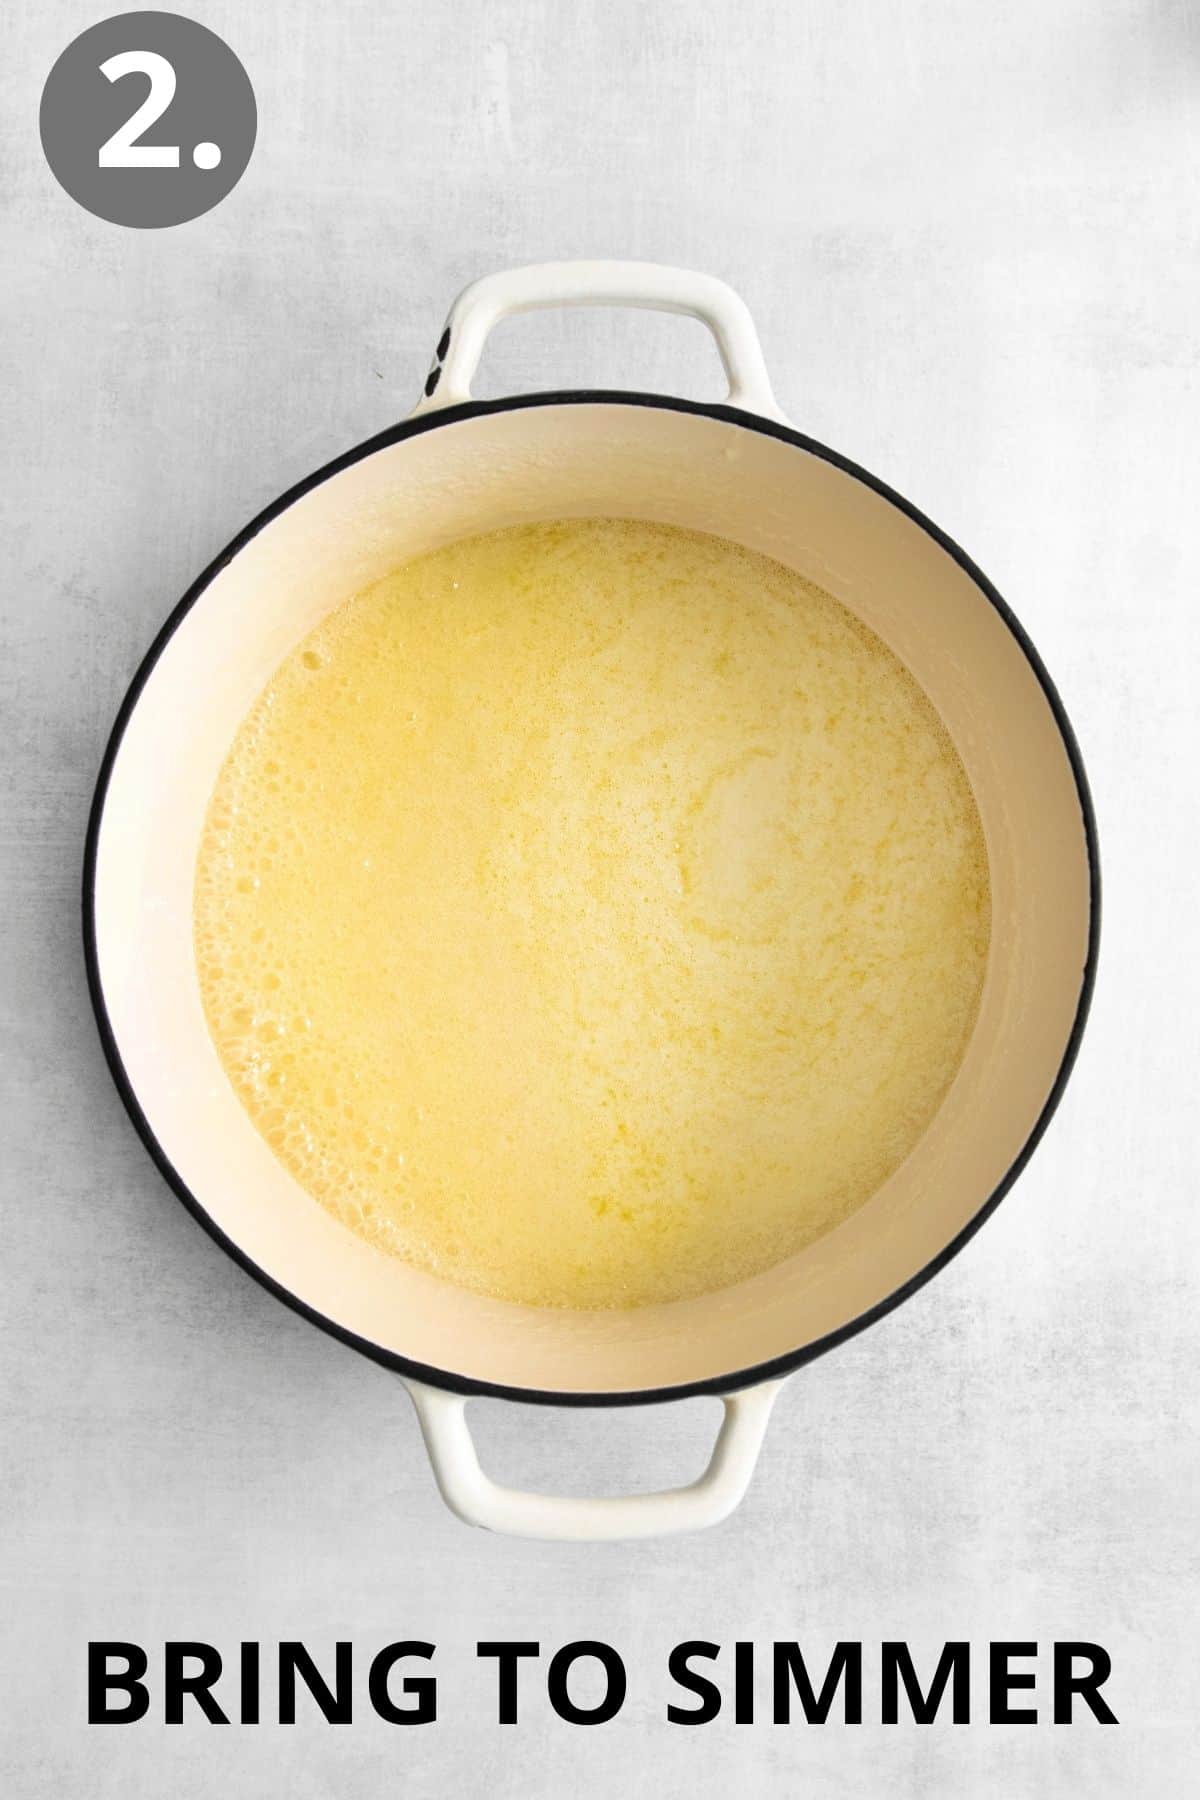
- Melt the sugar, butter, corn syrup, and salt together in a large, heavy-bottomed sauce pan over medium heat or medium-high heat.
- Once the mixture comes to a boil, add the evaporated milk a little at a time, taking 5-10 minutes per can and stirring constantly. A labor of love indeed.
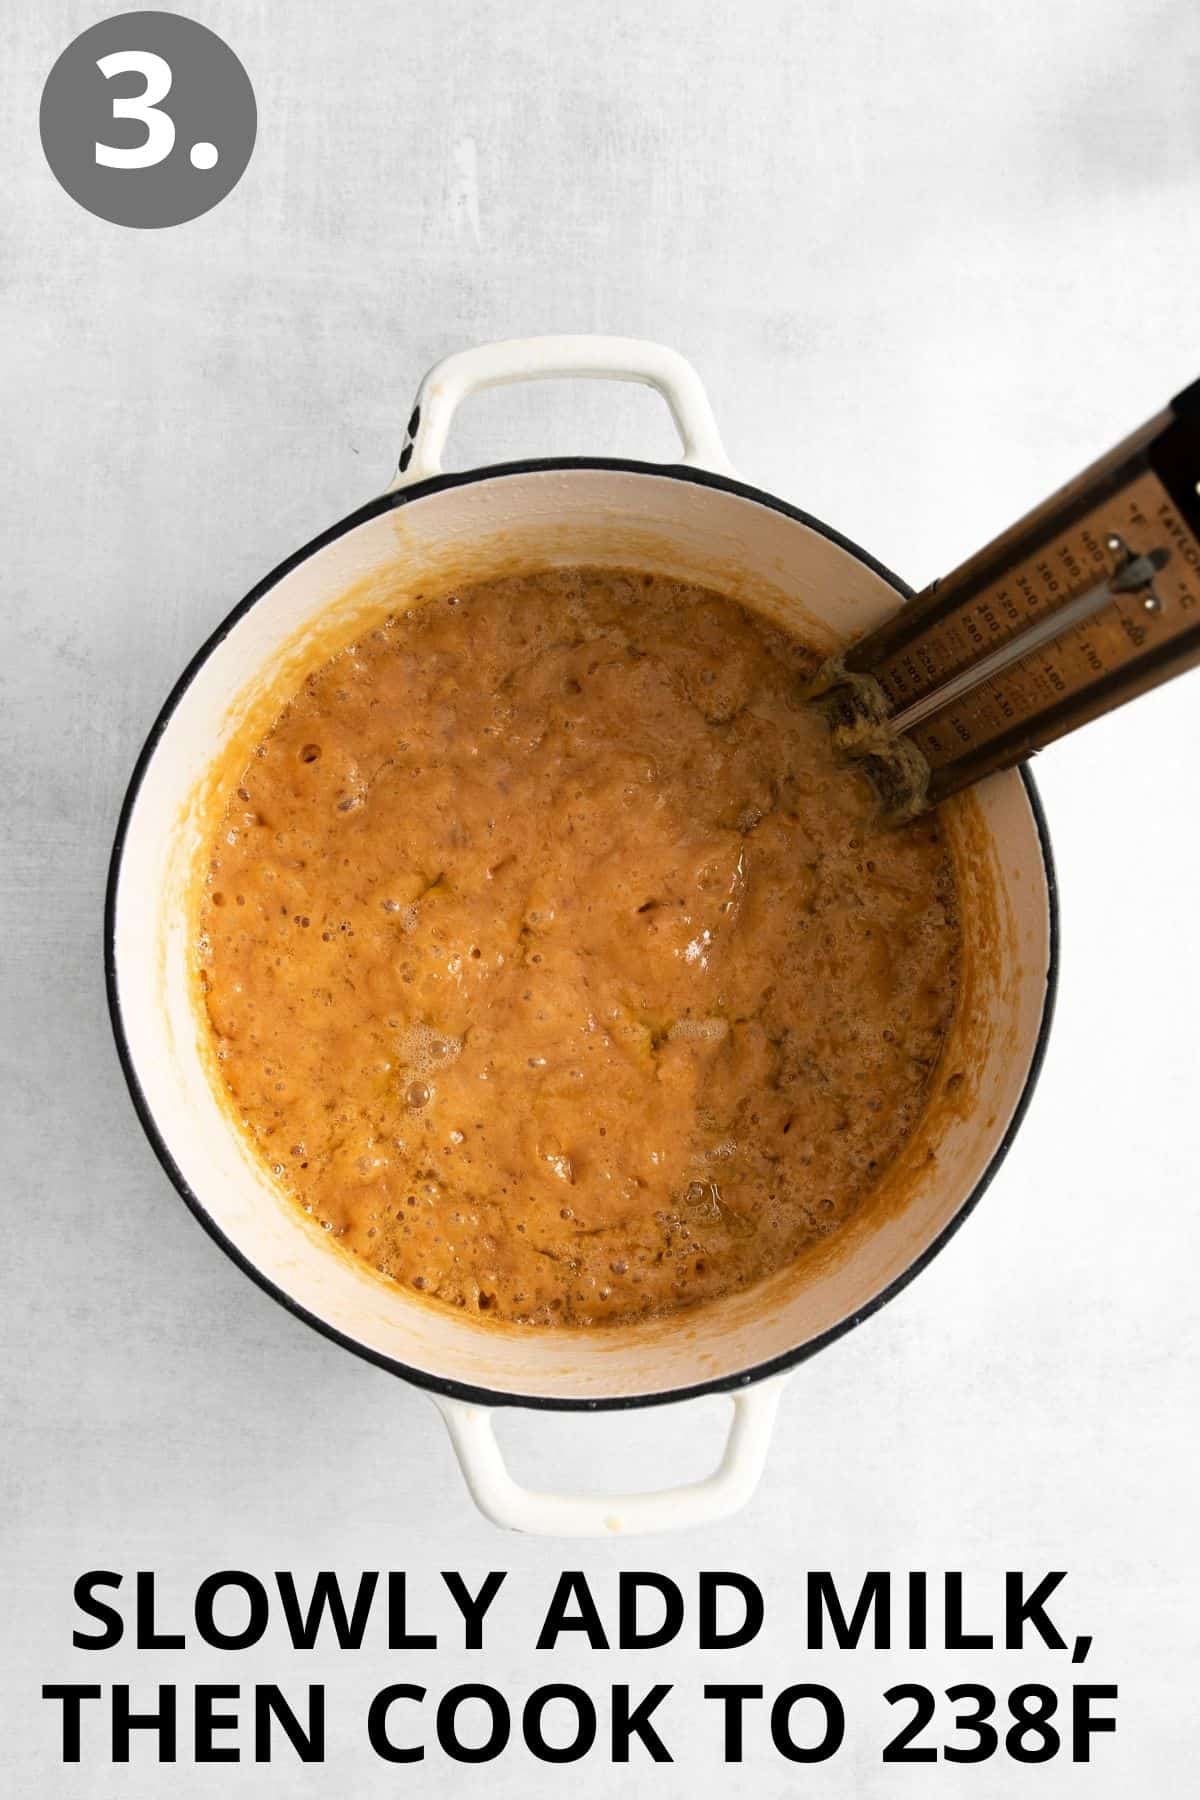
- Once all the milk is added use a candy thermometer and bring the mixture to 238F-240F and not any hotter! Even a few degrees hotter will make them chewy instead of soft.
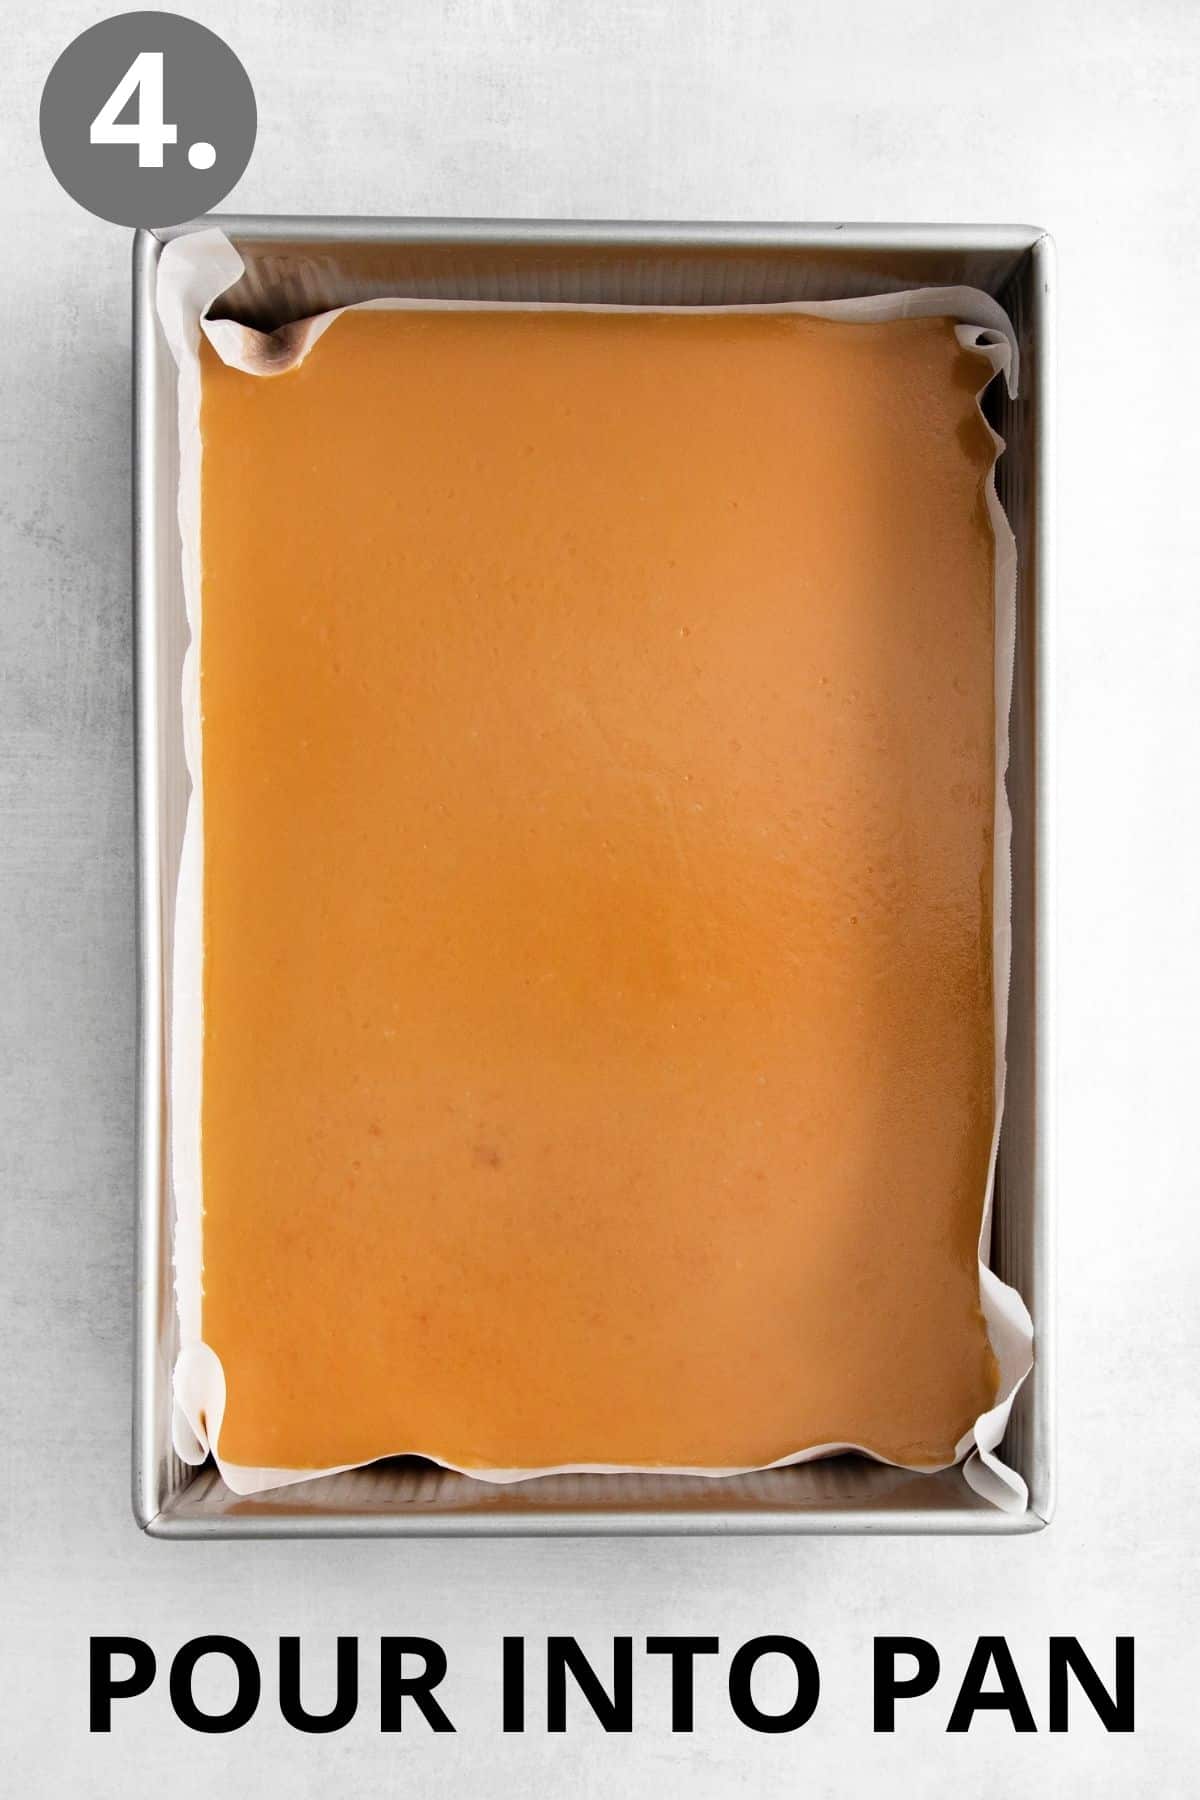
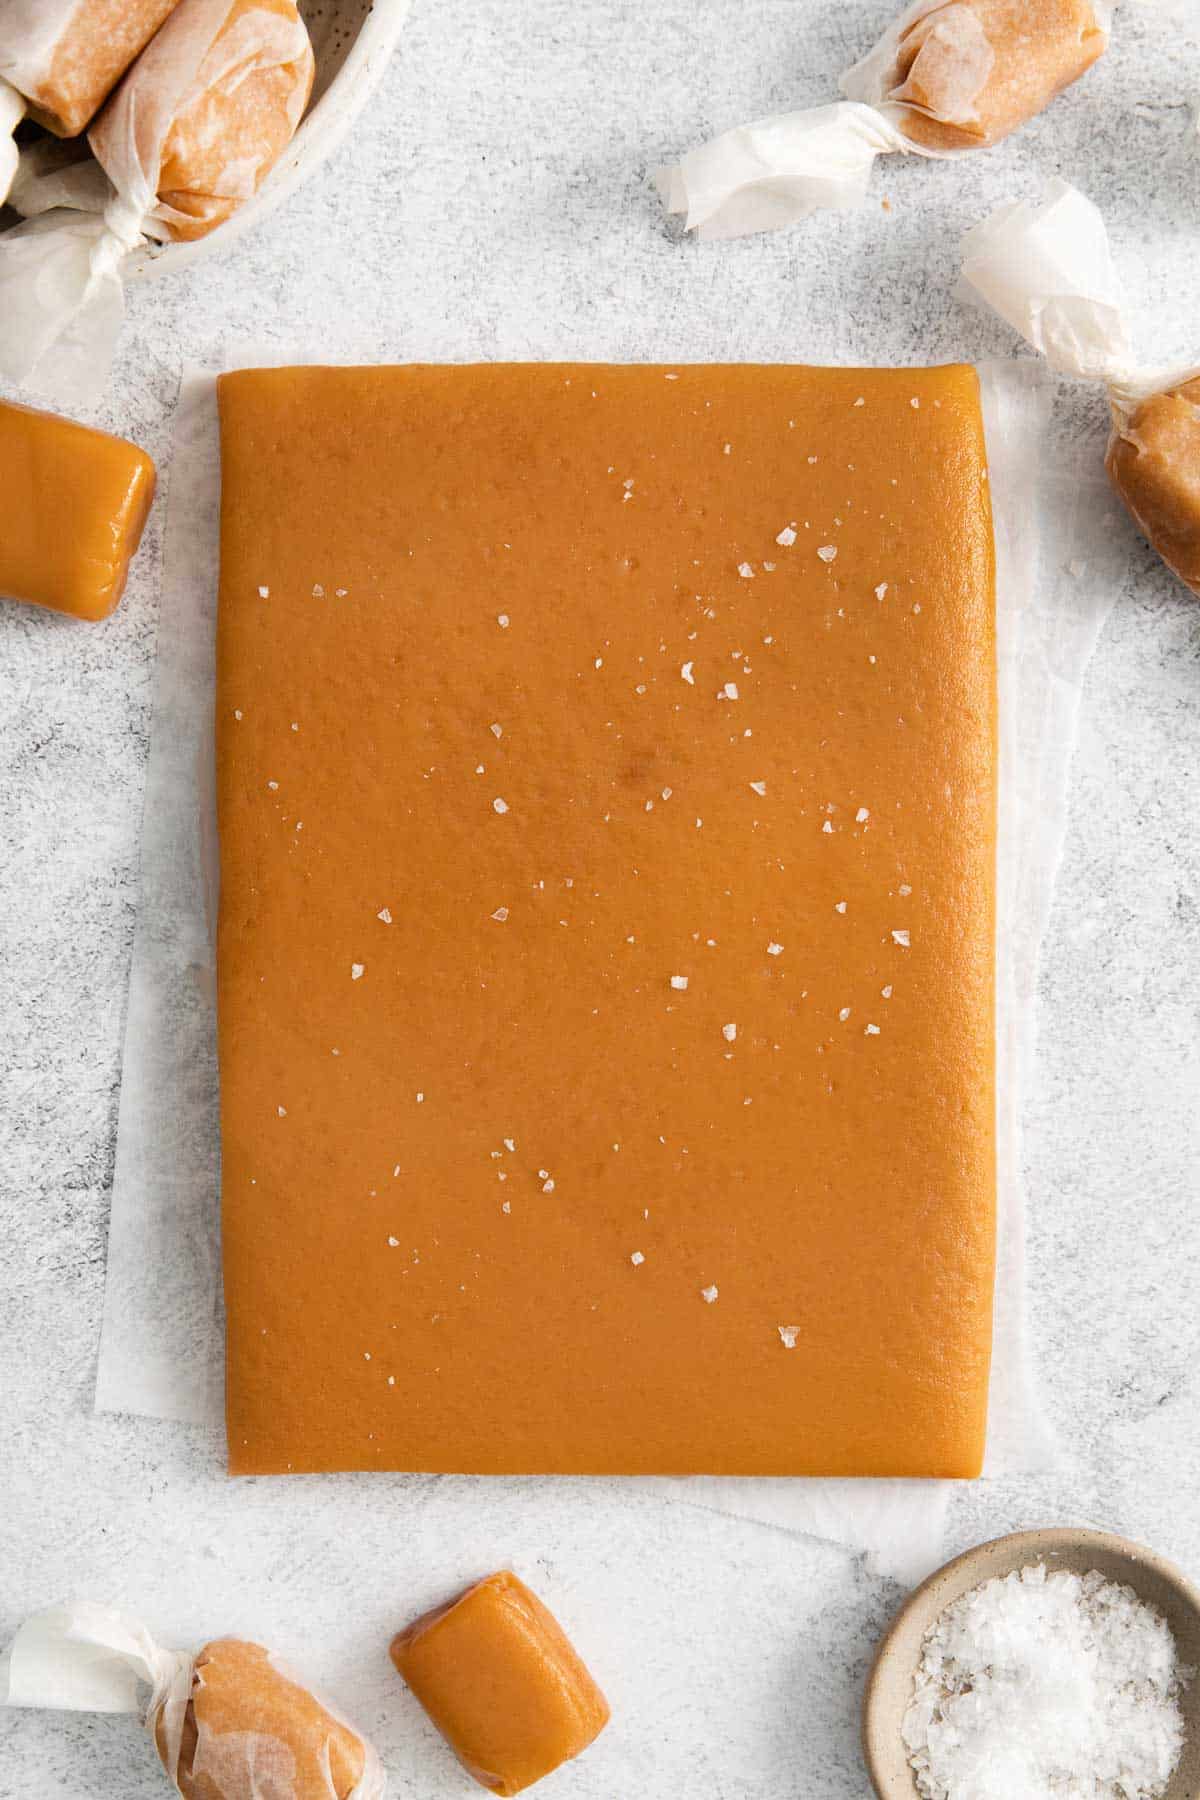
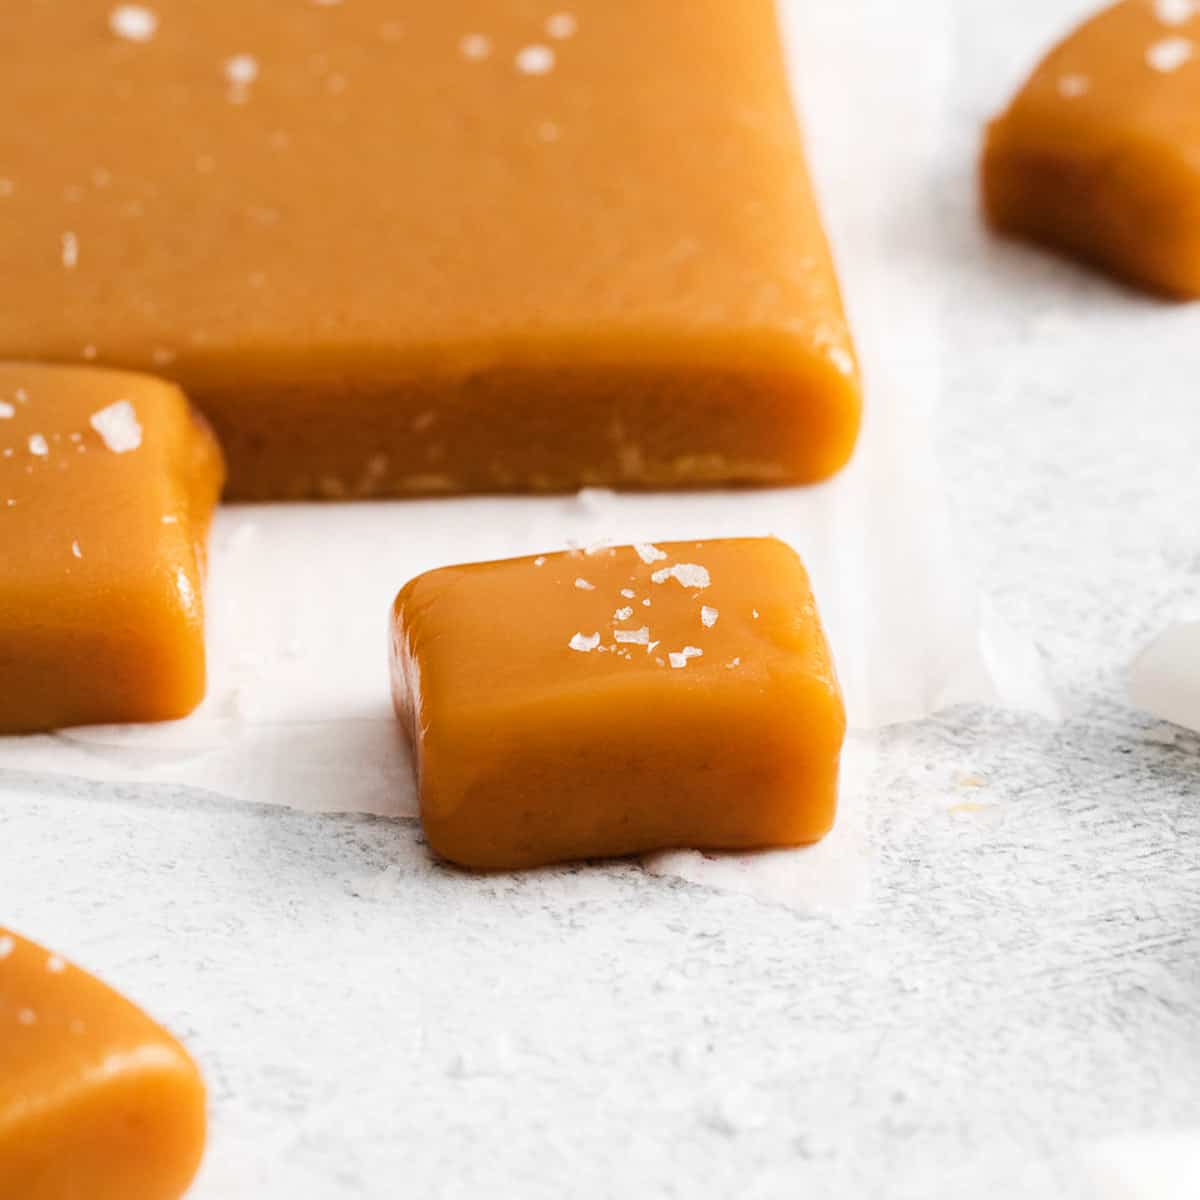
- Pour into a parchment lined 13×9 pan and cool completely. Cut and serve. Enjoy!
Storage Instructions
For a perfect bite size candy, individually wrap these creamy caramels in pre-cut wrappers from Amazon. From there, you can store them in an airtight container or in a candy jar. You can store them at room temperature or in the fridge. They’ll last up to a week at room temperature and even long in the refrigerator.
Expert Tips & Tricks
- Testing the temperature: The most important part of making homemade caramels is to be sure they come up to the right temperature. For soft caramels 238F is the perfect temperature. I like to use a candy thermometer while I’m stirring/cooking the caramels then MOST IMPORTANTLY double check the temperature with an instant thermometer. Be sure to check the temperature in the middle of the caramel mixture! If the thermometer is touching the bottom of the pan the temperature won’t be correct.
- Testing the consistency: I highly recommend using a thermometer AND the cold water test to be sure you get perfectly chewy candies. To do the cold water test, simply fill a small cup with cold water then drizzle a little of the caramel into the cup. You should be able to use your fingers to form it into a stable ball, but it will still be soft and easy to squish.
- Use a stainless steel pot if possible! These caramels turn out much butter when made in a stainless steel pot (as opposed to an enameled Dutch Oven).
We also might this tried-and-true marshmallow fudge every year!
More Recipes from My Grandma’s Cookbook
I hope you love this recipe as much as we do! If you try these homemade caramels, be sure to leave me a comment/rating below. I’d love to hear from you!
Soft, Buttery Homemade Caramels
Video
Ingredients
- 4 cups (800g) granulated sugar
- 2 sticks (226g) butter
- 2 cups (480ml) white corn syrup
- 1 teaspoon kosher salt
- 2 12 oz. cans (708ml) evaporated milk
Instructions
- Line a 9×13 pan with parchment paper and set aside.
- Melt the sugar, butter, corn syrup, and salt together in a large, heavy-bottomed pot over medium heat. (A stainless steel pot works best for these caramels.)
- Once the mixture comes to a boil, add the evaporated milk a little at a time, taking 10-15 minutes per can and stirring constantly. A labor of love indeed.
- Once all the milk is added use a candy thermometer and bring the mixture to 238F-240F and not any hotter! Even a few degrees hotter will make them chewy instead of soft. (This will take another 15 minutes or so!) I highly recommend double checking the temperature with an instant read thermometer as it comes to temperature.
- Immediately pour into the prepared pan and cool completely. (Once the caramels are cool – I recommend freezing them for 20-30 minutes before slicing. Or you can refrigerate them for a few hours. You don't want them to be frozen solid, but if they're cold this helps the caramels hold their shape when cutting/wrapping.) Cut and serve. Enjoy!
Notes
- Testing the temperature: The most important part of making homemade caramels is to be sure they come up to the right temperature. For soft caramels 238F is the perfect temperature. I like to use a candy thermometer while I’m stirring/cooking the caramels then MOST IMPORTANTLY double check the temperature with an instant thermometer. Be sure to check the temperature in the middle of the caramel mixture! If the thermometer is touching the bottom of the pan the temperature won’t be correct.
- Use a stainless steel pot if possible! These caramels turn out much butter when made in a stainless steel pot (as opposed to an enameled Dutch Oven).


What about adding vanilla extract? I don’t have beans. When would I add the extract?
Fabulous flavor and consistency. We love it.
I made another caramel recipe last week before I found yours. They were really good and use real cream but seeing yours makes me want to try it. I’m going to halve the ingredients and put in an 8×8 inch pan. My question is once these caramels are set can I use them in other dessert recipes calling for ‘Kraft caramels? I’d rather use my own homemade ones for desserts like carmelitas and other recipes calling for caramels. Thanks
I have never purchased sea salt. Will this recipe turn out okay if regular salt is used?
Yes that will work fine!
You are right a labor of love but so worth it. They are yummy!!!!!
Thank you for the recipe!
A labor of love indeed! I’m so glad you enjoyed them! 🙂
Hi, just saying thank you for your recipe. I use caramel in, my snicker brownies. Makes me feel very special I wrap them what’s left over. I make mexican wedding cookies. That is my Christmas Treats to all the special people in my life. Lost my recipe. I never realized how many different caramel recipes there are. So thank you ever so much. BLESS YOU.
Can you use heavy cream instead of evaporated milk?
Unfortunately no! This recipe was designed to work with evaporated milk.
I’ve never made caramel before but this recipe was easy to follow and turned out great! I think I went slightly over temp because I was using a candy thermometer that sat on the edge of my pot. Based on the tips from other commenters, I’ll plan to use an instant read thermometer next time and measure from the center of the pot. Regardless, I’m very happy with the results.
I’m glad the caramels turn out for you and you found them easy to make!
I made these using agave 1:1 in place of the corn syrup, and they turned out amazing!!! Will be making again.
That’s great to know the agave worked in place of the corn syrup! Thanks for the comment as it helps others.
Hi Erin! These sound delicious! But what if you dont have a candy thermometer? I live out in the sticks and nothing is close by to just run and get one. Nearest store is almost 10 miles away!! Any input would help. Thanks and have a super day!!
Hello Lisa,
No problems! You can skip the thermometer totally. Keep the stuff boiling slowly. Allow it to be gently bubbling most of the time and avoid overheating, meaning the whole mixture starts to rise. This willautomatically keep the temperature at the proper level. And allow it to simmer another 10 minutes after the Ball in Water-test says Ok, otherwise it will be too soft.
With vanilla and flaky salt this is A dream come through!! Best ever…
Regards
//mats
Any chance you can post that nougat recipe of Edna??
I am tracking down a copy of the cookbook from my Grandpa! I definitely will when I have the book!
Believe it or not, I have this exact recipe book from when I lived in WV, I’ve made a lot of the recipes in it and my favorite icing for decorating cakes is in this book,
That is such a fun coincidence! What is your favorite icing called? I’ll have to look it up!
What is the name of the book?? I may be able to find it somewhere. That nougat recipe looks like a great one but missing the rest of it. Thinking of making these but using heavy whipping cream at room temp. I usually always use the land of lakes caramel recipe.
I will be sharing the nougat recipe later this month! The cookbook isn’t available anywhere as I checked and there are only 2 copies cataloged in the whole country ha!
I was going to ask the same thing about the nougat recipe. Thanks for checking.
I have that photographed and ready to share this holiday season! Be sure to look for it in the next month or so 🙂
Hi! Were you able to get the cookbook for the other recipe?
These are delicious! I definitely recommend an instant read thermometer vs a candy thermometer though. I found that it gives a falsely low reading as the caramel at the outside edge of the pot isn’t as hot as the mixture in the middle. I went over temp on my first batch but learning from that mistake, the second batch turned out fabulous (still using the first batch, it’s just a little more firm than i would’ve liked). I’m experimenting with stirring less after the milk is added (still stirring, but not ‘constantly’ and it seems to work well. I’m about 5 minutes from completion. Delicious recipe that i will continue to use! Thanks!
These are great tips! Thanks for sharing your experience. I’m glad you like the recipe!
I have made this recipe twice now and it’s delicious! I put mine into an 11×7 so I have thicker caramels. Unfortunately, it makes it difficult to cut.
How do you keep your hand from feeling the heat from the pot? I have been keeping my hands cool by keeping a bowl of ice water near the stove, along with a towel so I don’t drip any water into the mixture. Given the need to constantly stir this, I found that my hands were just getting too hot! I’m sure this a “me” problem and I just need to get a wider pot and a longer wooden spoon.
That’s a great question! I’ve definitely felt my hands get hot from making these too. I put my hand inside of a hot pad or oven mit to stir. And sometimes I take turns with my son!
I’ve had this recipe for years, and use it for my Caramel Candy treats that I sell. Amazing, but I usually don’t go above 235⁰
Making them now… I accidently doubled the recipr thinking this was only going to make 12 pieces… I should have paid closer attention… Oh… They are good, just a ton!
Can i know exactly what does it mean with 2 12 oz evaporated milk? Are u using 2 can evaporated milk which is 12 oz( 340 g) for one can?
Yes that’s correct!
I’ve been using this recipe for a year now, and my family and friends can’t get enough of them! I’ve found that 238°F is perfect. My mother is so glad that they’re soft and don’t pull on her teeth. Now I’m moving on to experimenting with mix-ins like pumpkin pie spice and dried fruit, and so far they’ve all been great. I look forward to trying more flavors in the future, and it’s all thanks to you and Mrs. Peck! Thank you!!
I”m so happy you enjoyed them! Pumpkin pie spice and dried fruit sound like delicious mix-ins. I need to try that myself!
I cooled to 230 and added 2tsp vanilla & 2tsp English toffee flavor. My gramma would be proud! They are very tasty. Thank you!
What kind of english toffee flavor do you use?
Followed the recipe exactly and it turned out perfect and delicious!! I only made 1/2 batch and used part of it to make polar bear paws. This is delicious soft caramel!
Polar bear paws sound delicious! I want to try and make those 🙂 Glad the recipe worked for you!
I just made these today and they were delicious! It was my first-time making candy of any kind and it was easy to do with the directions provided.
Thanks!
Great! So glad they turned out for you!
What type of sugar should I use for the best results?
I use white granulated sugar!
Big thank you! Make 3 batches for Christmas to give around to my favourite people, very excited
A labour of love indeed!
The first time around I didn’t cook long enough or to high enough temperature so it didn’t set right. I melted everything back down and cooked longer, to higher temp and used the cold water test.
It came out perfect! I got 112 caramels out of it (plus whatever I ate in the process!)
Old church recipes are the best!
Thanks so much for this 🙂
Outstanding flavor! Relatively easy to make, except for the stirring and stirring and stirring.
Rather than “add the evaporated milk a little at a time, taking 5-10 minutes per can,” I used boiling as my guide. That is, I added the milk a little a time, making sure to add only as much milk as the mixture would take while still maintaining a boil. That visual cue seemed easier to follow than doing “5 – 10 minutes per can.”
It’s not a bad idea to check thermometers in boiling water, noting that the boiling point will be just under 1 degree Fahrenheit lower for each 500 feet of elevation above sea level. For me, cooking the candy to precisely 238 degrees yielded perfect caramels! Thank you!