


Erin’s Recipe Rundown

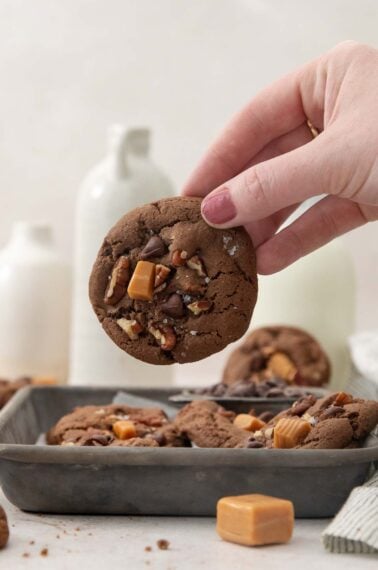
Texture: Soft, chewy centers and slightly crisp edges.
Taste: Rich peanut butter with the perfect amount of sweetness and warmth.
Ease: Easy one-bowl recipe with a quick baking time!
Top Tip: Press the cookies down as soon as they come out of the oven to get that dreamy chewy center and crackly top!
Recommended GF Flour: Use a high-quality gluten-free measure-for-measure flour that contains xanthan gum. For the best texture, this is my favorite gluten-free flour!
Would I make these again? Yes! These gluten-free peanut butter cookies are so simple and the perfect anytime dessert. Thanks to their rich flavor and irresistible texture, no one ever guesses that these cookies are gluten-free!
xoxo erin

Featured Comment
From Kristyn: “There is nothing better than a peanut butter cookie right from the oven!! These are soft & so yummy!! Love this gluten-free version!!“
Ingredients You’ll Need
Here are a few notes on some of the key ingredients to make these gluten-free peanut butter cookies. Jump to the recipe card below for the exact measurements.

- Gluten-Free flour: These cookies need a high-quality gluten-free flour that contains xanthan gum. King Arthur Gluten-Free Measure-for-Measure Flour is my top pick!
- Peanut Butter: Creamy peanut butter creates that classic melt-in-your-mouth texture. No-stir brands, like Skippy or Jiff, work best! You may also like this post on is peanut butter gluten-free?
- Sugar: I like to use a combination of brown and granulated sugar. The brown sugar adds moisture and chewiness that you won’t get with granulated sugar alone.
How to Make Gluten-Free Peanut Butter Cookies
Here’s an overview of how to make this recipe. You can jump to the recipe for the full instructions!

All you need is one bowl and a stand or a hand mixer! Start by creaming the butter, peanut butter, and sugar until light and fluffy (2-3 minutes). Mix in the egg and vanilla until smooth (1 minute).
It helps to scrape down the sides and bottom of the bowl before slowly mixing in the dry ingredients. Stop mixing once everything is just combined (no flour streaks are visible).
Plan time to cover the dough and let it rest for at least 30 minutes before baking so that the flour has time to hydrate. This is key for non-gritty gluten-free cookies!

I like to use a silicone baking mat on the baking sheet, but parchment paper will work too! Scoop the dough balls and place them about 2 inches apart on the prepared baking sheet so they have room to spread. I like to use a cookie scoop for uniform sizing!
Bake until the edges are set, but the centers are still soft (about 8-10 minutes). As soon as you pull them from the oven, press the cookies down using the bottom of a measuring cup. Option to sprinkle them with flaky salt too!
The cookies need a little time to set. Let them cool almost completely on the baking sheet before moving them to a wire rack. This will prevent breaking for picture-perfect cookies!


Gluten-Free Peanut Butter Cookies
Ingredients
Dry Ingredients
- 1¼ cups (187g) gluten-free measure-for-measure flour
- ½ teaspoon baking soda
- ½ teaspoon baking powder
- ¼ teaspoon kosher salt
Other
- ½ cup (113g) butter at room temperature
- ¾ cup (188g) peanut butter
- ¼ cup (50g) granulated sugar
- ¾ cup (160g) brown sugar
- 1 large egg
- 1 teaspoon vanilla extract
- flaky salt for sprinkling, optional
Instructions
- In a medium bowl, whisk together the gluten-free flour, baking soda, baking powder, and salt.
- In the bowl of a stand mixer fitted with the paddle attachment, or using a hand mixer, cream together the butter, peanut butter, granulated sugar, and brown sugar until light and fluffy, about 2–3 minutes.
- Add the egg and vanilla and beat until smooth and well combined, about 1 more minute. Scrape down the sides and bottom of the bowl.
- With the mixer running on low, slowly add the dry ingredients to the wet ingredients. Mix until just combined and no streaks of flour remain.
- Cover the bowl and let sit at room temperature for 30 minutes while the oven preheats.
- Preheat the oven to 350°F. Line large baking sheets with parchment paper or silicone baking mats.
- Scoop the cookie dough into round balls, about 2 tablespoons each. Place on the prepared baking sheets, about 2 inches apart.
- Bake for 8-10 minutes, until the edges are set but the centers are still soft.
- When the cookies come out of the oven, immediately use the bottom of the measuring cup to press each cookie down. Sprinkle with flaky salt.
- Let the cookies cool almost completely on the baking sheet before transferring to a wire rack.
Notes
Nutrition
This post was originally published in September 2015. It was updated with new photos and instructions in July 2025.


My cookies were crumbly and dry and I followed the recipe exactly. I did use truvia instead of regular sugar.
PERFECTION❣️
Thank you, Diane! We’re so pleased you loved the cookies!
OH-MY-GOSH!!!! What can I say about these cookies! Absolutely my FAVORITE cookie by far. I LOVE peanut butter. These cookies have a soft chewy center and a crispy edge, the best of both worlds. So delicious!
Yay! Thank you for such an amazing review, Maria! We’re so glad you loved the cookies so much!
Best gluten free peanut butter cookies ever!!!!! Thank you!
Thank you for such kind feedback, Marian! We’re so happy to hear you loved the cookies so much!
To be really healthy I’ve been using Monk Fruit and Grade A maple syrup. The monk fruit is pure not mixed with anything. I found you can use less monk fruit than the recipe calls for and when using maple syrup you need to add a tad bit more flour. The results have been outstanding. I also mix in some almond flour with all your recipes I’ve tried about 3/4 to 1/4 ratio.
Hi Eric, thank you for sharing your sugar substitute tips with us! It’s good to know these adjustments work well and we’re happy to hear your enjoying the recipes!
I love your oatmeal cranberry cookies. They are my absolute favorite. Any suggestions for adapting this peanut butter cookie recipe to include oatmeal? I’d love to see an oatmeal peanut butter cookie recipe, but I’m looking forward to trying out this one too!
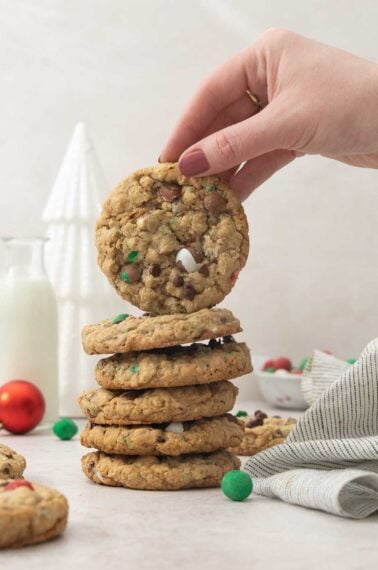
Hi Kel, we’re so happy to hear you loved the oatmeal cranberry cookies! Rather than adapting this recipe, you might like these gluten-free monster cookies that contain oats and peanut butter. Happy baking!
That looks perfect! I know what my weekend plans are! I’m also loving all the holiday recipes on Instagram this time of year!
I am working my way randomly through the Meaningful Eats cookbook…as with every recipe I’ve tried, this one is WONDERFUL! I followed the recipe – made sure to spend enough time to cream the butter and sugars. I used Members Mark No Stir Natural Creamy PB (it’s a softer PB and worked great). I used a 2 TBS scoop for one pan and a 1 TBS scoop for the rest of the batch, adjusting the time to 8 minutes for the smaller cookie size. I baked on insulated sheets because they work better in my gas oven, and rotated the pan halfway through baking time. Both sizes came out lovely! Peanut butter cookies do need to cool completely before picking up, but my family couldn’t wait…these still held together nicely while warm. Once cooled, they are perfect on texture – soft and chewy. Thank you, Erin, for developing these recipes! I love to bake and use your recipes all the time as I have a daughter with wheat sensitivity. No one would ever guess this treats are gluten free!!!
Thank you for sharing such a kind comment, Holly. We’re so glad you are enjoying the cookbook! We love all of the tips you shared too. Happy baking!
I tried and it came out crumbly! And it just seems dry
Hi Sara, things like not enough liquid, not resting the dough, overmixing, and overbaking can all lead to dry, crumbly cookies. We highly recommend refrigerating the dough for at least 30 minutes to allow the flour to soak up the moisture and hydrate the dough. If you included this step and it still seemed dry before baking, the dough could benefit from more liquid. If it only seemed dry after baking, then you may want to reduce the baking time next time to avoid overbaking. We hope they turn out better for you next time!
Can the dough stay in the fridge for a day or two before baking it up? Thanks 🙂