

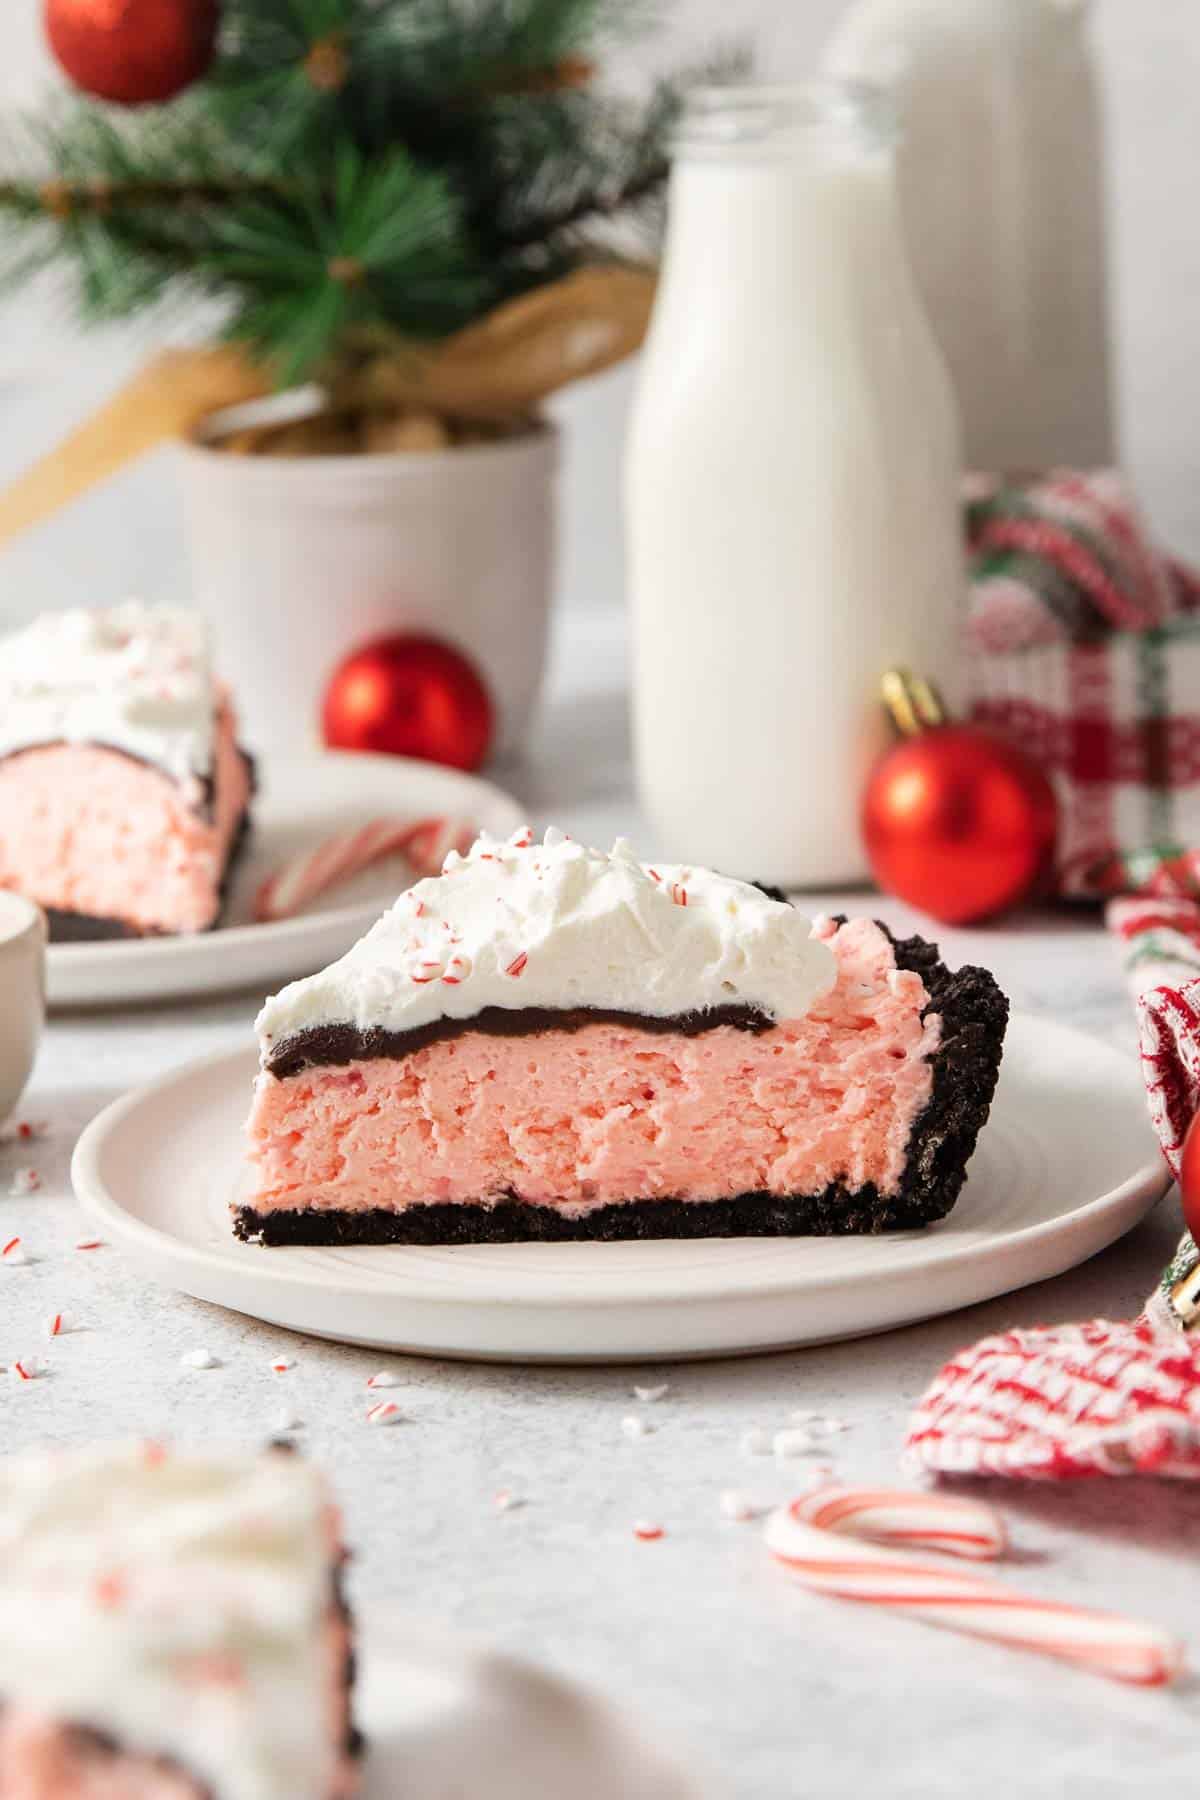
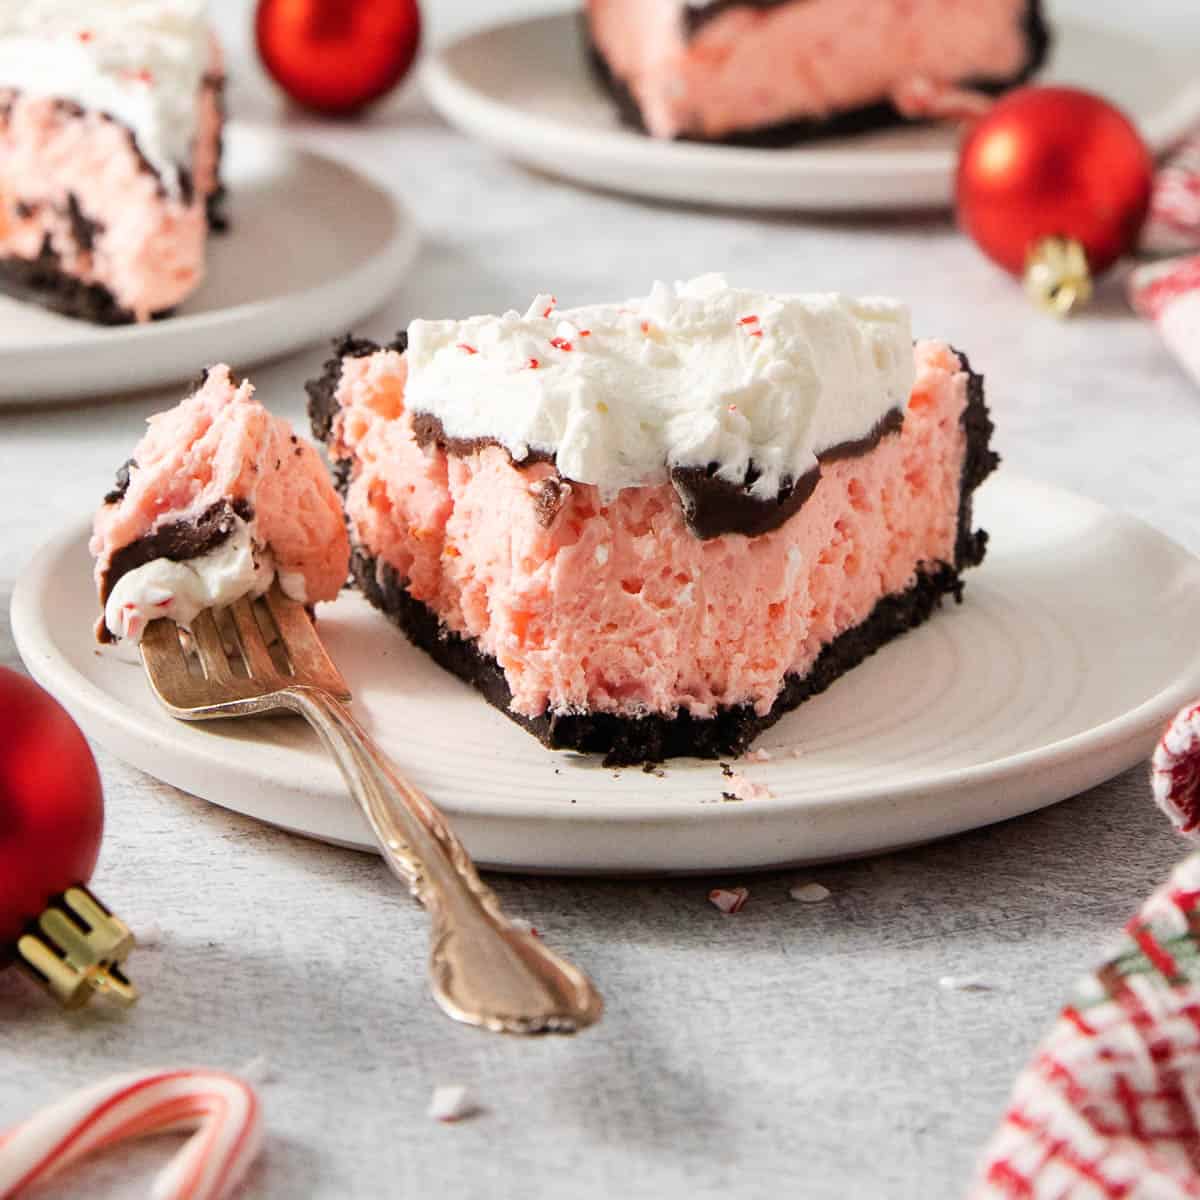
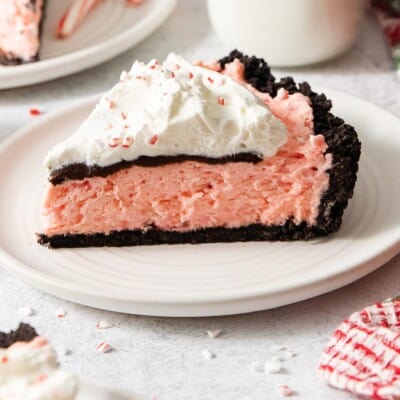
This gluten-free peppermint oreo pie is a festive and EASY gluten-free Christmas dessert! With a crisp oreo crust, fluffy peppermint mousse and real whipped cream, nobody will be able to tell it’s gluten-free!
You also might like this gluten-free gingerbread or gluten-free cheesecake.
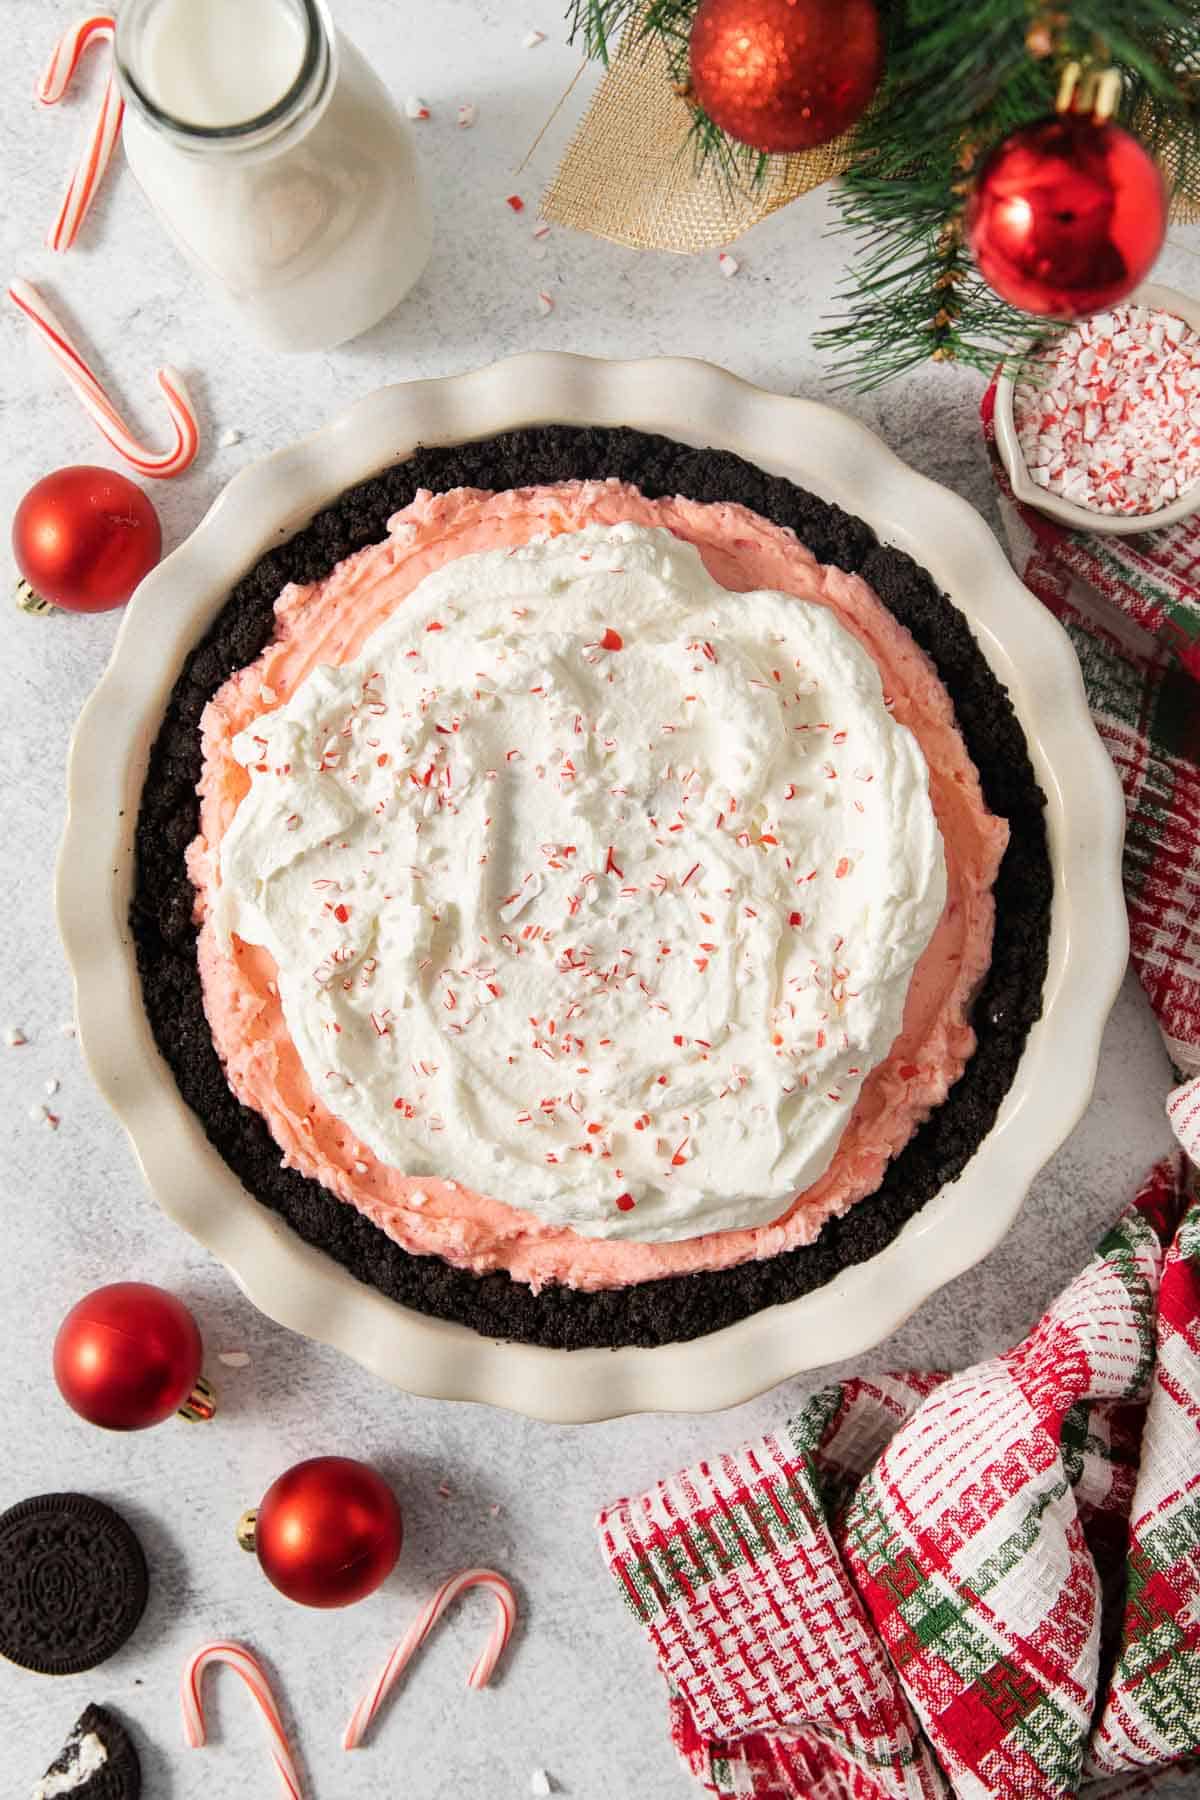
This gluten-free peppermint oreo pie is my new favorite holiday dessert! The creamy filling, touch of peppermint extract, and crunchy cookie crust is such a perfect combination. It’s great for a special occasion and it’s SO easy to make!
For this gluten-free peppermint pie, I simply replaced the regular Oreo crust with a gluten free Oreos pie crust. Everything else is very similar to traditional peppermint pie, and every bit as delicious!
Trust me — this is the perfect dessert for the holiday table. And no one will know it’s gluten-free!
Why I Love This Recipe
- Festive holiday treat: This gluten-free peppermint pie is full of classic holiday flavors, making it perfect for parties, dinners, and family gatherings.
- EASY holiday dessert: This gluten-free peppermint pie uses simple ingredients and comes together quickly. If you buy a store-bought gluten-free crust, then it’s also a no-bake dessert!
- Can be made ahead: Save time by making this gluten-free peppermint pie the night before, then top with whipped cream when ready to serve.
Ingredients You’ll Need
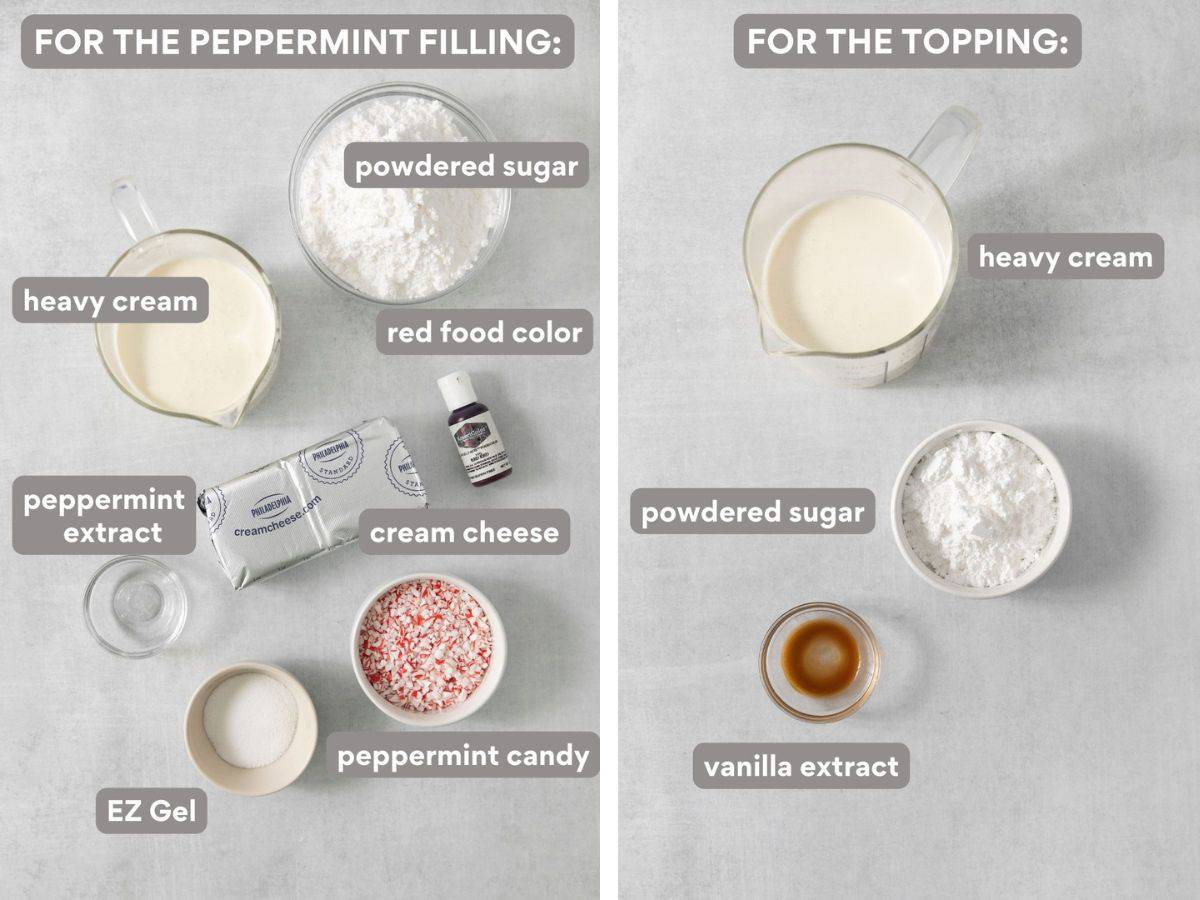
- Peppermint candy: I highly recommend buying crushed candy canes in a bag at the grocery store. You can find them on the baking aisle! (If you can’t find them, you can crush candy canes in a bag with a rolling pin.)
- Cream Cheese: The peppermint mousse has a cream cheese base which makes it extra delicious! I use the same trick for my gluten-free chocolate mousse cake.
- EZ Gel: This naturally gluten-free thickener helps create a thick, fluffy gluten-free peppermint pie filling. It’s an essential ingredient! You can buy it online here.
- Peppermint extract: Be sure to buy pure peppermint extract, not mint extract.
For another festive gluten-free oreo treat, try these gluten-free oreo balls.
How to This Gluten-Free Christmas Dessert
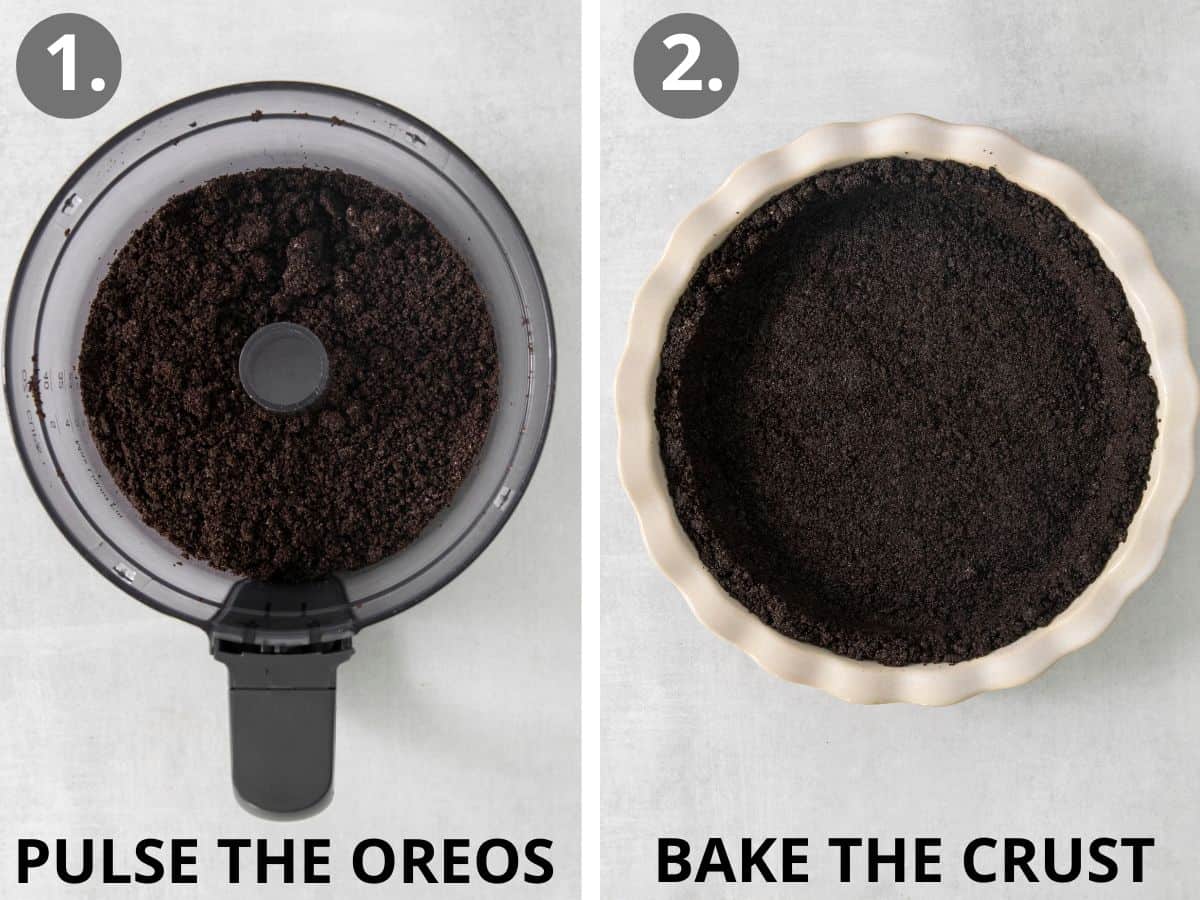
Make the Gluten-Free Oreo Crust: In a food processor or blender, pulse the whole chocolate sandwich cookies (no need to remove the cream filling) into fine crumbs. Remove any large pieces of gluten-free Oreos. Pour the Oreo crumbs into a large mixing bowl. Add the melted butter and stir until evenly combined. Using your hands or a measuring cup, press the cookie mixture evenly into the bottom and up the sides of a 9-inch pie pan. Bake peppermint pie crust for 10 minutes. Cool completely.
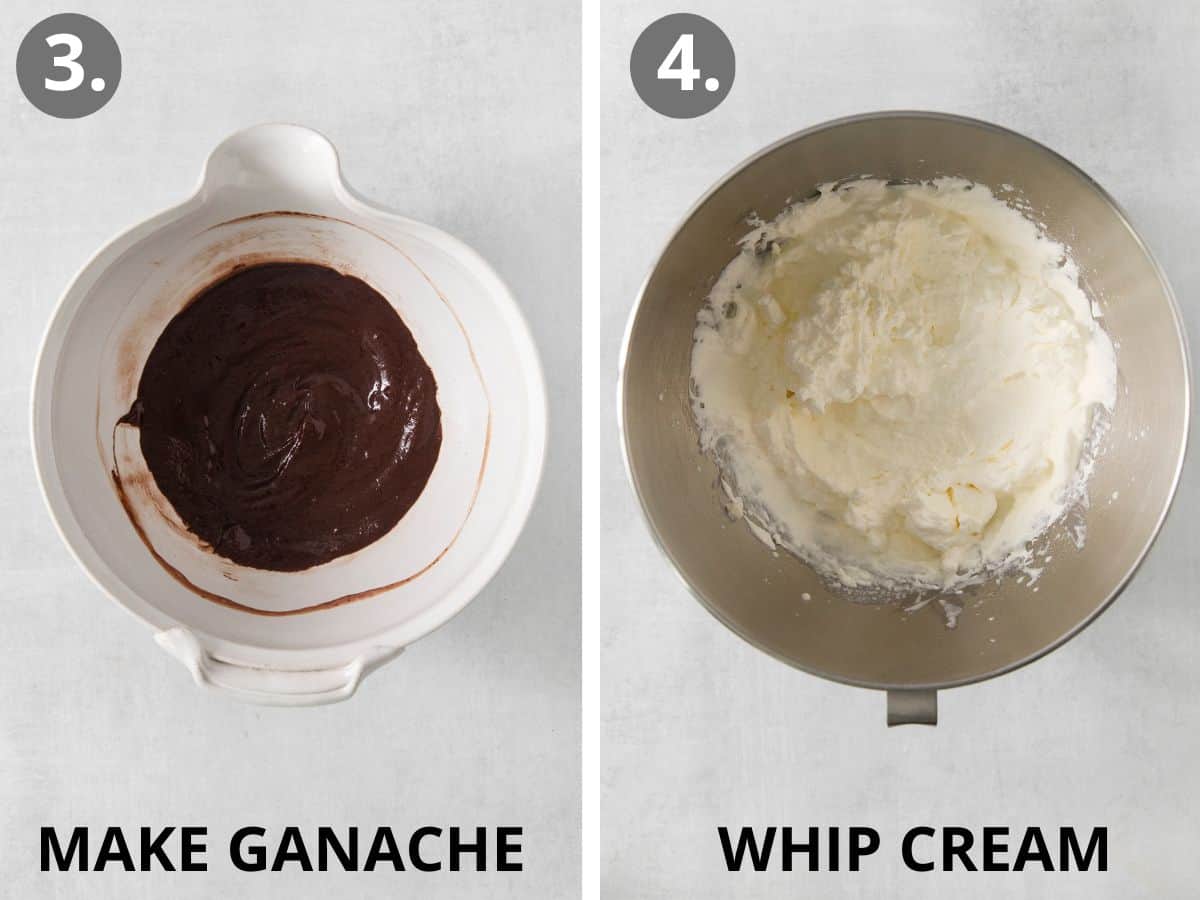
Make the Chocolate Ganache: Place the chocolate chips in a medium bowl. Microwave the heavy cream in a glass measuring cup for 30-60 seconds, until just starting to simmer. Immediately pour the hot cream over the chocolate. Stir gently until the ganache is smooth. Set aside melted chocolate and allow to cool to room temperature. During this time, it will slowly thicken as well.
Make the Peppermint Filling: Using a hand mixer or a stand mixer fitted with a whisk attachment, whip the heavy whipping cream on medium speed. Slowly sprinkle in the EZ Gel. Continue mixing on medium-high speed until semi-stiff peaks form, about 3-5 minutes. Spoon the whipped cream into a bowl and set aside.
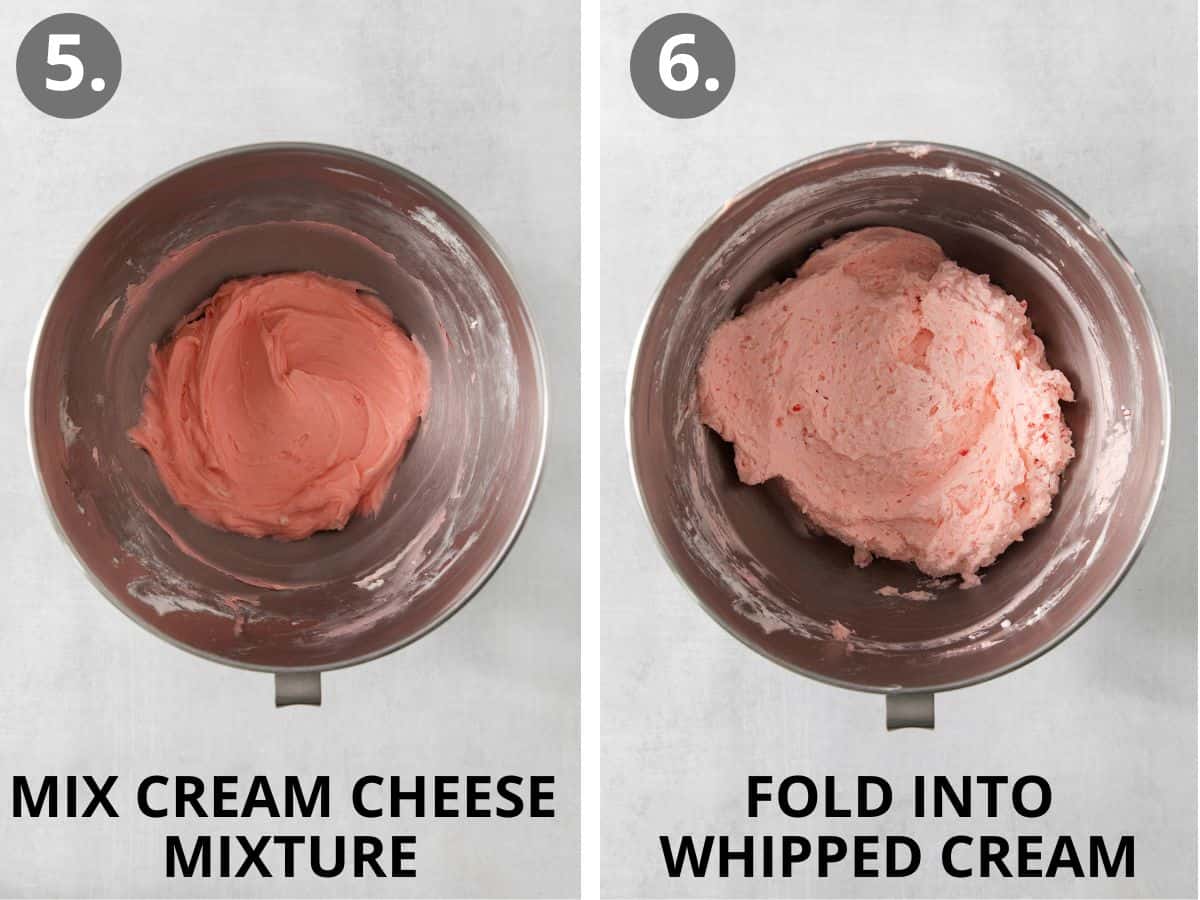
Using the same mixing bowl (no need to rinse clean!), beat the cream cheese, powdered sugar, peppermint extract and red food coloring together on medium-high speed until combined. Fold the whipped cream into the cream cheese mixture until smooth. Be gentle, you don’t want to deflate that cream. Fold the crushed peppermint candies into the gluten-free peppermint pie filling ingredients.
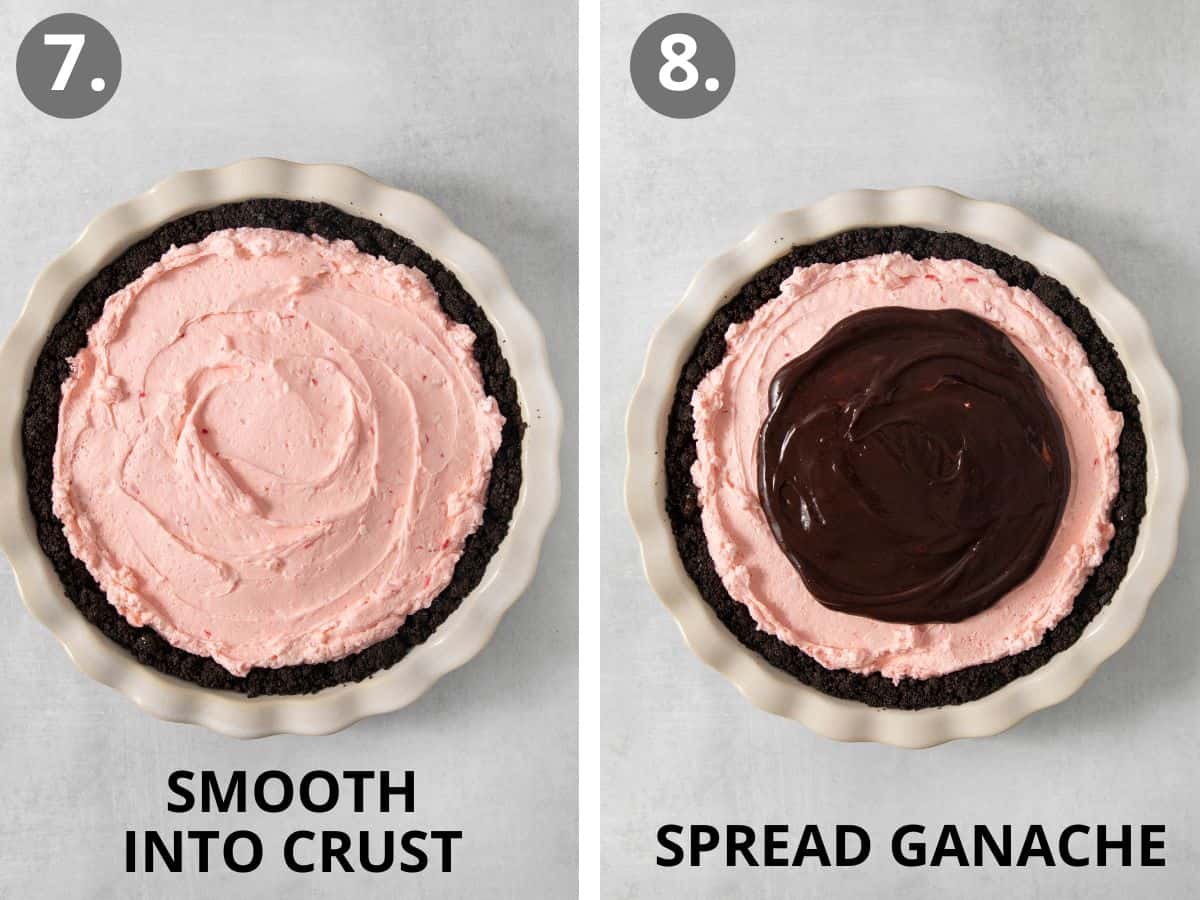
Assemble the Pie: Spread the peppermint filling evenly into the cooled gluten-free chocolate cookie crust. Once the chocolate ganache is cooled to room temperature, spread over the top of the filling. I like to leave about ½ inch border around the gluten-free peppermint pie so you can still see the pink peppermint filling. Chill the gluten-free peppermint pie in the refrigerator for 3-4 hours or even overnight.
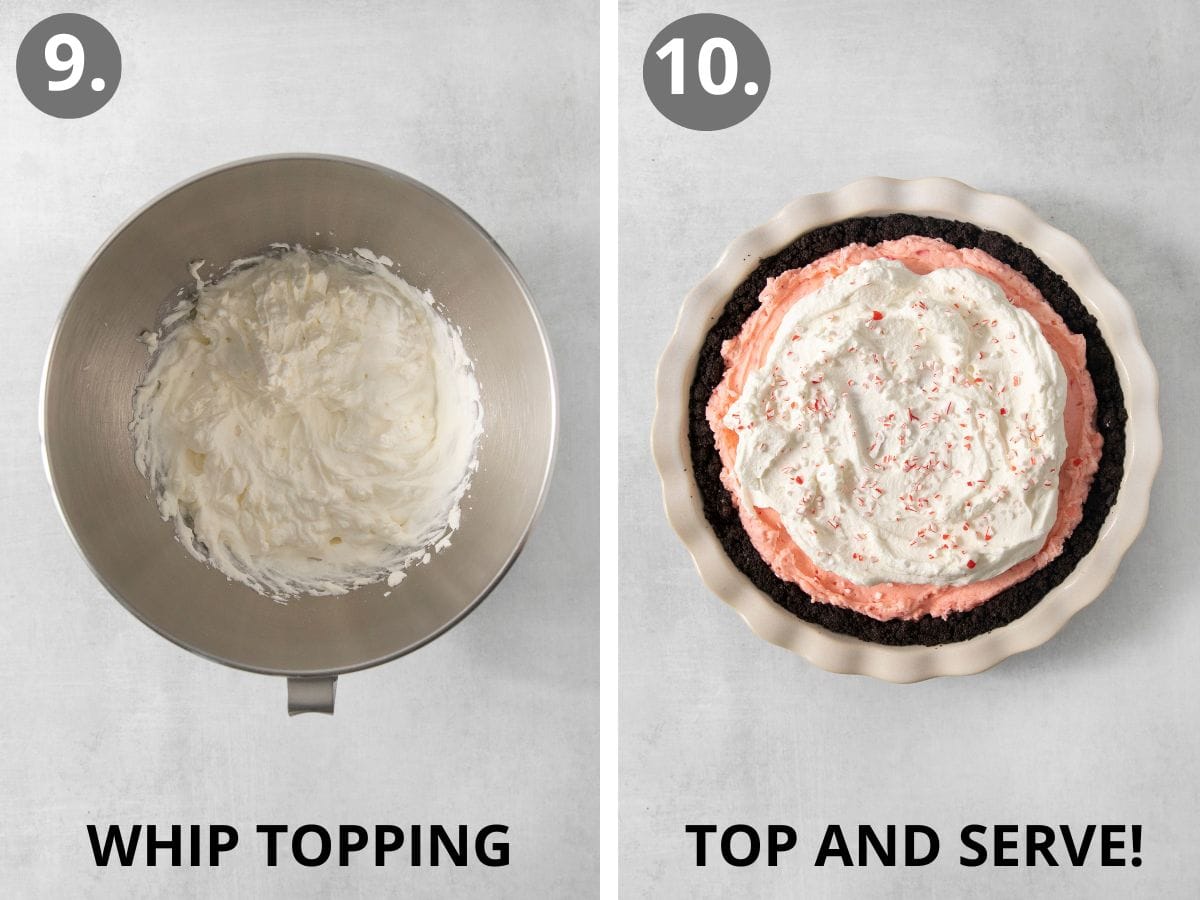
Make the Topping: Using a hand mixer or a stand mixer fitted with a whisk attachment, whip the heavy whipping cream, powdered sugar, and vanilla extract on medium-high speed until semi-stiff peaks form, about 3-5 minutes.
Top with the whipped cream topping. Top gluten-free peppermint pie with crushed peppermint candy just before serving. Slice and serve cold – enjoy!
Storage Instructions
Cover gluten-free peppermint pie with plastic wrap or store in an airtight container in the refrigerator for up to three days.
Recipe Tips
- For best results, be sure everything is very cold when whipping up the peppermint filling. Sometimes I even put the stand mixer bowl into the freezer before making the filling!
- EZ gel is a naturally gluten-free thickener that helps create a fluffy, stabilized filling. I highly recommend using it but if you don’t have it you can simply omit it. The filling might be a little softer.
- If you want to save time, make this gluten-free peppermint pie the night before. Then add the whipped topping just before serving!
More Gluten-Free Holiday Recipes
I hope you love this recipe as much as we do! If you try this gluten-free peppermint pie, be sure to leave me a comment/rating below. I’d love to hear from you!
Gluten-Free Peppermint Oreo Pie
Ingredients
For the Gluten-Free Oreo Crust:
- 24 gluten-free regular Oreo cookies
- 4 tablespoons butter melted
For the Chocolate Ganache:
- 1/3 cup chocolate chips
- 3 tablespoons heavy whipping cream
For the Peppermint Filling:
- 1 1/2 cups (360ml) heavy whipping cream
- 1 tablespoon EZ Gel see note
- 8 ounces cream cheese
- 1 1/2 cups (180g) powdered sugar
- 1 teaspoon peppermint extract
- 1 drop red food coloring
- 1/3 cup crushed peppermint candy or candy canes plus extra for garnish
For the Topping:
- 1 cup (160ml) heavy whipping cream
- 1/4 cup (30g) powdered sugar
- 1/2 teaspoon vanilla extract
Instructions
Make the Gluten-Free Oreo Crust:
- Preheat the oven to 350F.
- In a food processor or blender, pulse the whole gluten-free Oreos (no need to remove the cream filling) into fine crumbs. Remove any large pieces of Oreos.
- Pour the oreo crumbs into a large mixing bowl. Add the melted butter and stir until evenly combined.
- Using your hands or a measuring cup, press the cookie mixture evenly into the bottom and up the sides of a 9-inch pie pan.
- Bake the crust for 10 minutes. Cool completely.
Make the Chocolate Ganache
- Place the chocolate chips in a medium bowl. Microwave the heavy cream in a glass measuring cup for 30-60 seconds, until just starting to simmer.
- Immediately pour the hot cream over the chocolate. Stir gently until the ganache is smooth. Set aside and allow to cool to room temperature. During this time, it will slowly thicken as well.
Make the Peppermint Filling
- Using a hand mixer or a stand mixer fitted with a whisk attachment, whip the heavy whipping cream on medium speed. Slowly sprinkle in the EZ Gel. Continue mixing on medium-high speed until semi-stiff peaks form, about 3-5 minutes. Spoon the whipped cream into a bowl and set aside.
- Using the same mixing bowl (no need to rinse clean!), beat the cream cheese, powdered sugar, peppermint extract and red food coloring together on medium-high speed until combined.
- Fold the whipped cream into the cream cheese mixture until smooth. Be gentle, you don’t want to deflate that cream. Fold in the crushed peppermint candies.
Assemble the Pie
- Spread the peppermint filling evenly into the cooled pie crust. Once the chocolate ganache is cooled to room temperature, spread over the top of the filling. I like to leave about ½ inch border around the pie so you can still see the pink peppermint filling.
- Chill the pie in the refrigerator for 3-4 hours or even overnight.
Make the Topping
- Using a hand mixer or a stand mixer fitted with a whisk attachment, whip the heavy whipping cream, powdered sugar, and vanilla extract on medium-high speed until semi-stiff peaks form, about 3-5 minutes.
- Top the pie with the whipped cream topping. Top with more crushed peppermint candy just before serving. Slice and serve cold – enjoy!
Notes
- For best results, be sure everything is very cold when whipping up the peppermint filling. Sometimes I even put the stand mixer bowl into the freezer before making the filling!
- EZ gel is a naturally gluten-free thickener that helps create a fluffy, stabilized filling. I highly recommend using it but if you don’t have it you can simply omit it. The filling might be a little softer.
- If you want to save time, make this gluten-free peppermint pie the night before. Then add the whipped topping just before serving!


Would Knox gelatin work in place of the EZ gel? We use clear gel A that we purchase at a local bakery shop as thickener for gravy, soup etc. It is a corn starch base. Would that work also?
could corn starch or tapioca flour be used in place of ez gel?
Hi Ann, we haven’t tried those substitutes. They’d most likely thicken the filling, but produce a different texture than the EZ gel. You can also omit the EZ gel, if you prefer to not use it, and the filling will just be softer. We hope you enjoy the recipe!
I made this for Christmas Eve dessert, and was a huge hit! I skipped the EZ gel, and it still held up nicely. Wonderful recipe!!
This is vibrant and adorable! Can’t get enough of it! We enjoyed it!
Amazing!! The crust, the filling…everything was to die for. I am making it again to bring to a party on Saturday!
Love this do you have a recommendation to make filling with something other than cream cheese?
I have tried making this pie dairy-free and unfortunately it doesn’t turn out at all. So sorry!