


Erin’s Recipe Rundown

Texture: Silky smooth and creamy.
Taste: Rich, sweet vanilla.
Ease: Simple ingredients + a great make-ahead recipe.
Top Tips: Serve it hot or chilled, with raisins, topped with a dusting of cinnamon, etc. — it’s all delicious!
Would I make these again? Definitely! Dairy-free or not, this is honestly some of the best rice pudding I’ve ever had! It has that “real deal” rice pudding consistency and flavor — perfect for the holidays!
xoxo erin
This post was originally published in December 2023. It was updated with new photos and instructions in November 2024.
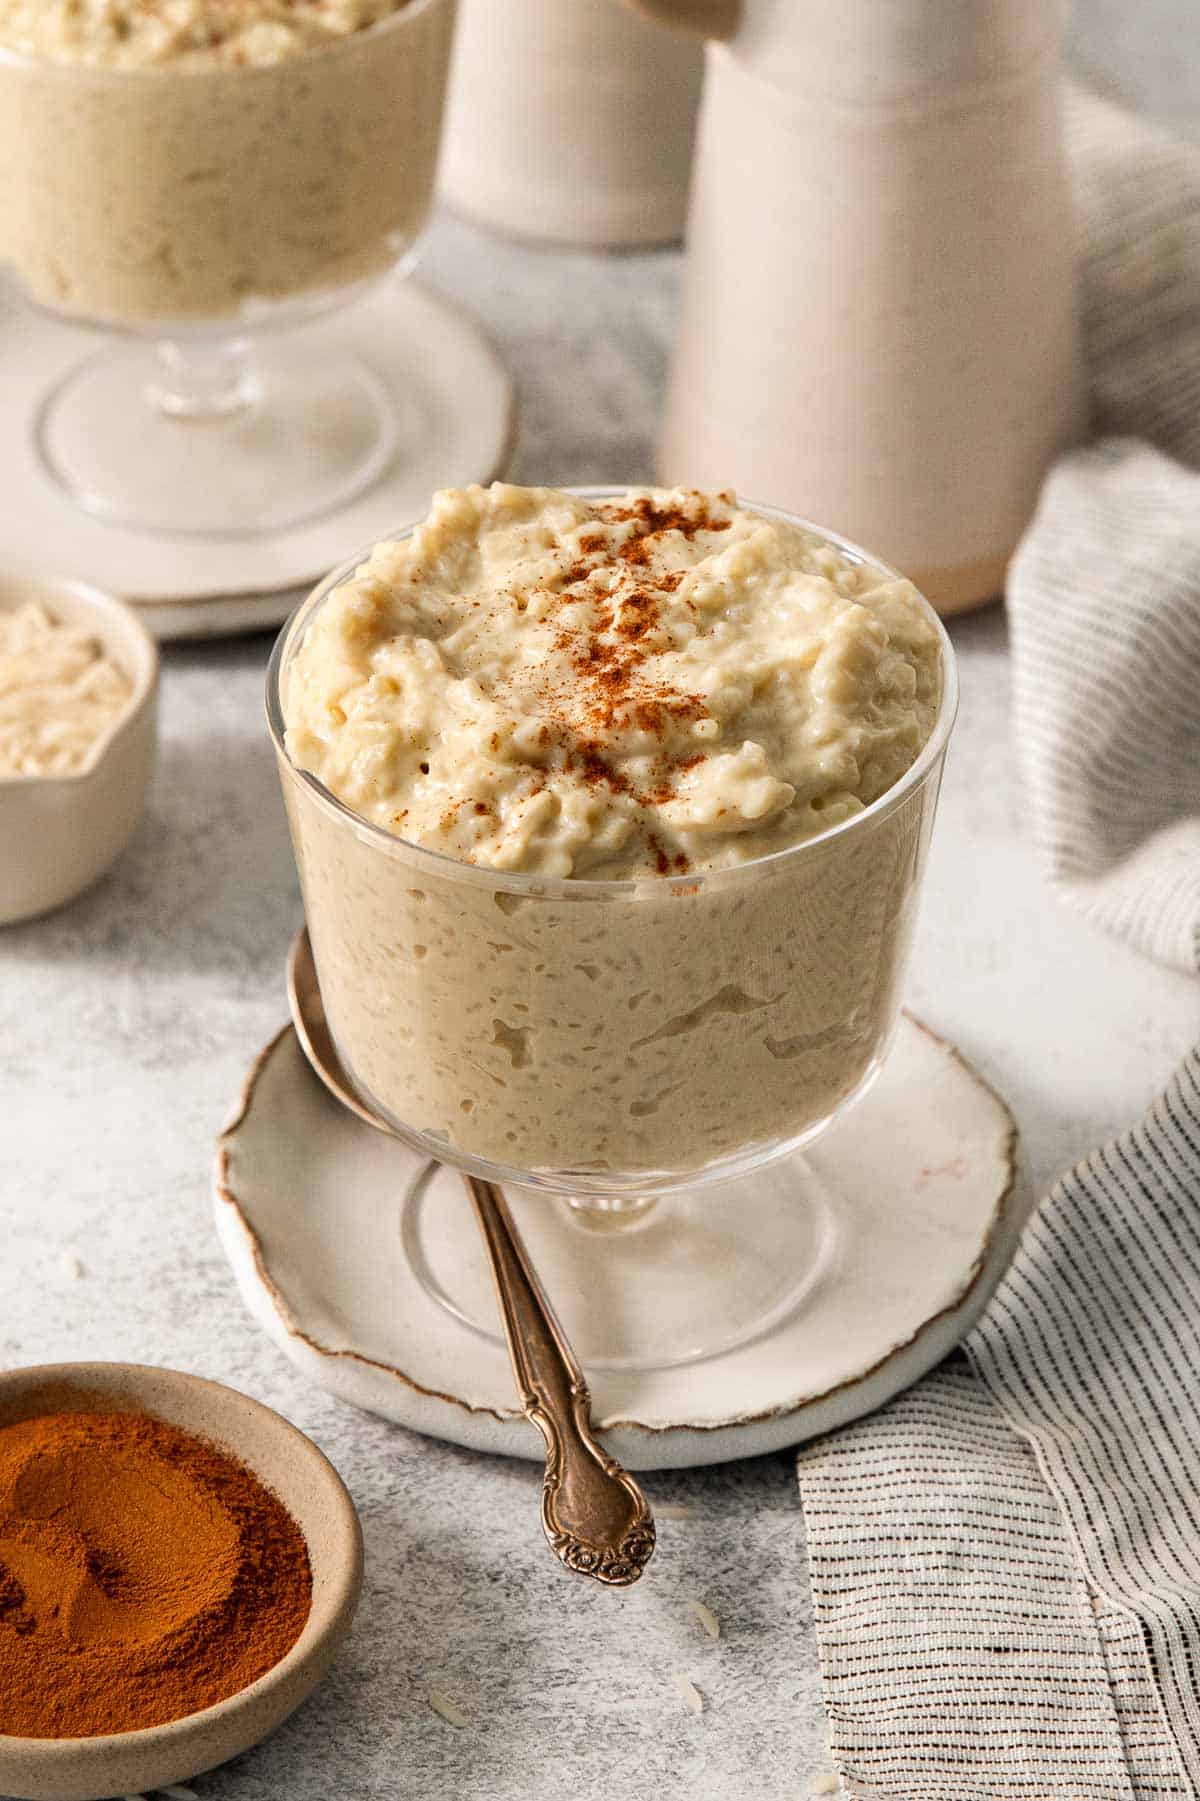
Homemade rice pudding is a comforting treat any time of year! This dairy-free rice pudding with egg yolks has an amazing creamy texture and perfectly sweet flavor.
It can also be prepared in advance, then served chilled or warm. I’m always looking for more make-ahead recipes for the holidays!
For more dairy-free recipes, try this dairy-free creme brulee and dairy-free eggnog.
Featured Comment
From Kate: “I followed the step-by-step guide and it came out perfectly. The cashew milk and cream combination made it so creamy and delicious.”
Table of Contents
- Erin’s Recipe Rundown
- Ingredients You’ll Need
- How to Make Dairy-Free Rice Pudding
- The right consistency
- Make-Ahead/Storage/Freezing Instructions
- What mix-ins or toppings can I add to the dairy-free rice pudding?
- Can I add spices directly into the rice pudding instead of on top?
- How do I know if it has too much or too little liquid?
- How do I prevent lumpy or curdled pudding?
- Recipe Tips
- More Dairy-Free Holiday Recipes
- Dairy-Free Rice Pudding (with Egg Yolks!) Recipe
Ingredients You’ll Need
Here are a few notes on some of the key ingredients to make this dairy-free rice pudding. Jump to the recipe card below for the exact measurements.

- Cashew milk: I recommend using Elmhurst Unsweetened Cashew Milk. It only contains two ingredients, cashews and water, which works well in this recipe. Other cashew milks will work, but the added gums and stabilizers may affect the pudding consistency.
- Basmati rice: This is my preferred rice for this recipe! Different types of rice have varying levels of starch, so be sure to use the right kind. Basmati rice is a long-grain, starchy white rice that has the best consistency and flavor for the dairy-free rice pudding.
- Dairy-free heavy cream: I like to use the brands Country Crock or Silk Dairy-Free Heavy Whipping Cream to finish the dairy-free rice pudding. You can also use full-fat coconut milk.
How to Make Dairy-Free Rice Pudding
Here’s an overview of how to make this rice pudding. You can jump to the recipe for the full instructions!
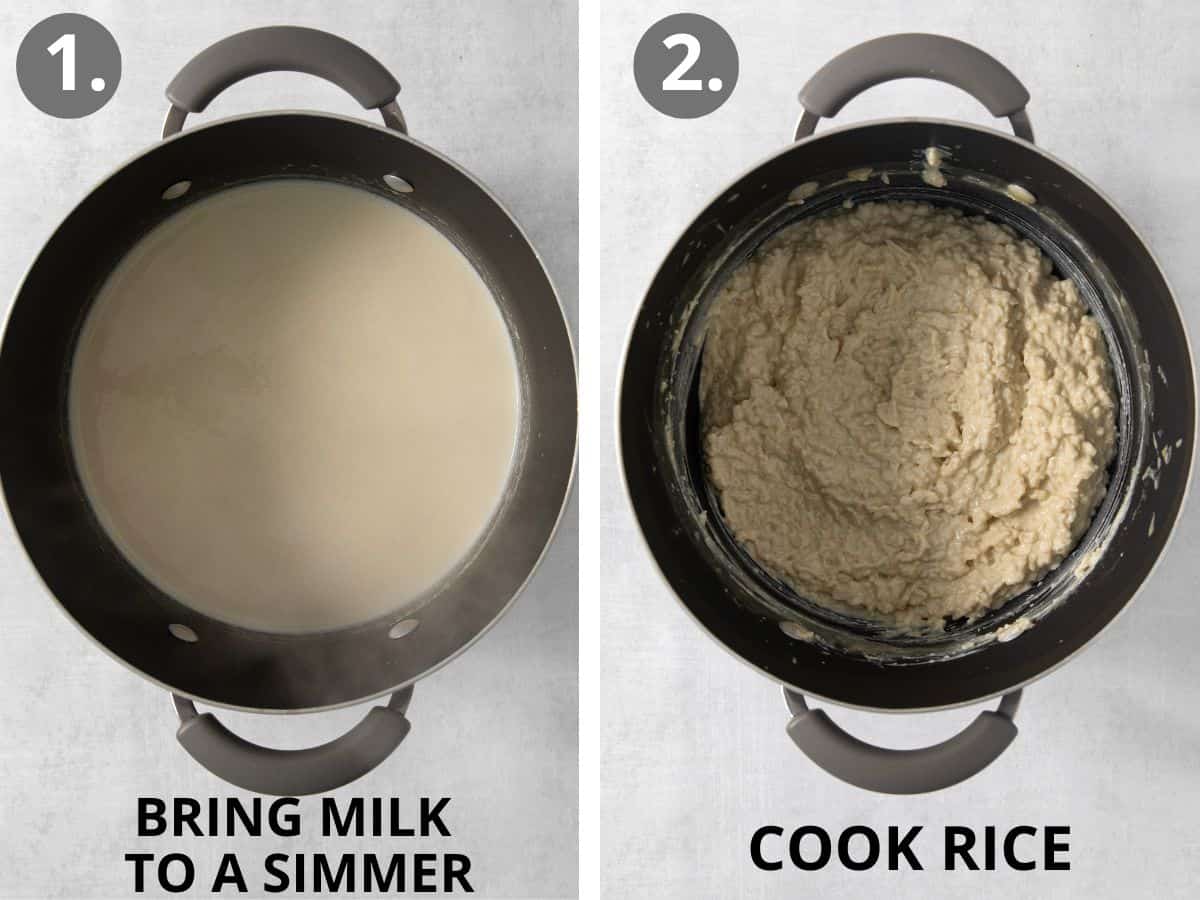
- In a large saucepan: Bring cashew milk and water to a boil over medium heat. Keep a close eye on it so it doesn’t boil over!
- Cook rice: Once it’s boiling, add in the rice and stir constantly until it returns to a simmer. Lower the heat to medium-low and cook until rice is tender (about 30 minutes). You want it to simmer the whole time (don’t let it boil). Make sure you stir every 5 minutes or so to keep the rice from sticking to the bottom! If it gets too thick and doesn’t loosen back up with each stir, add a little water. Remove from heat when tender.
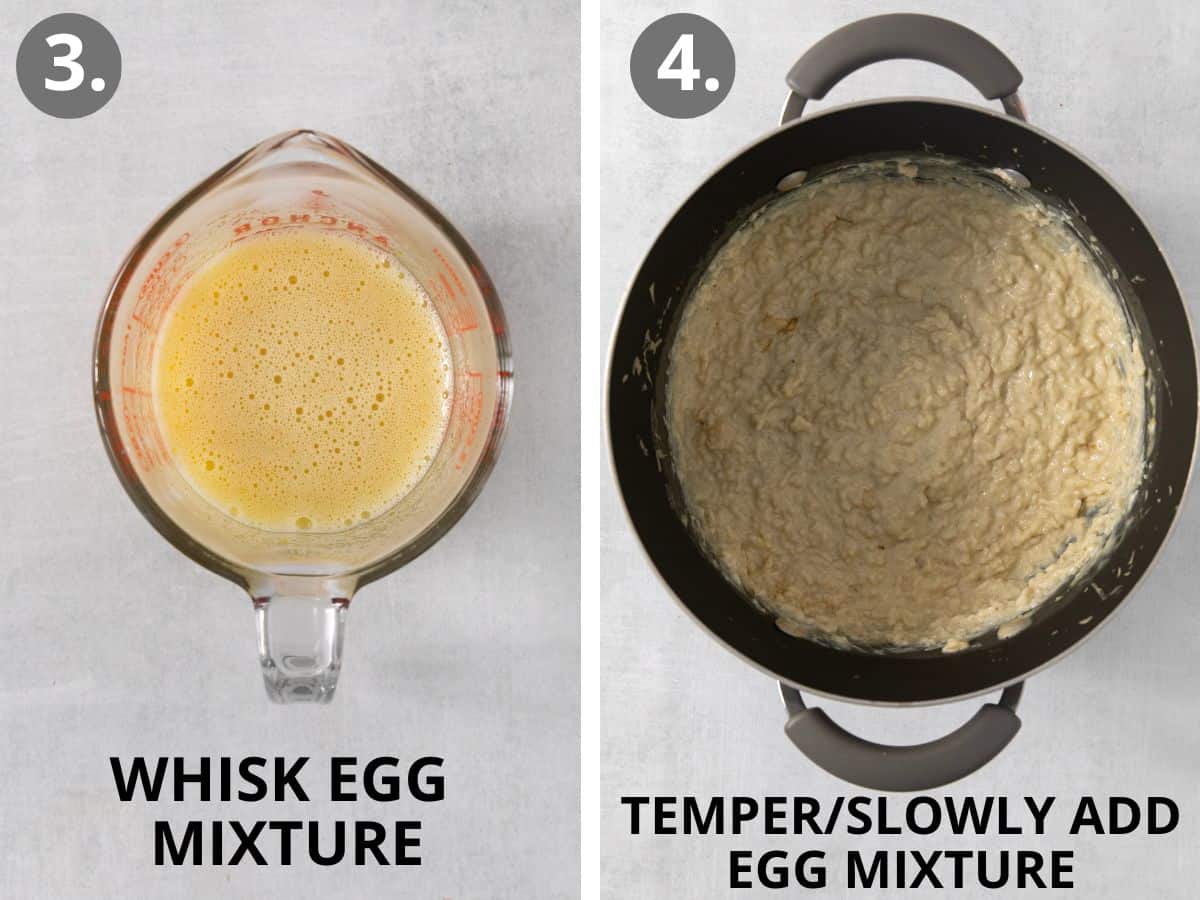
- In a large measuring cup: Whisk together 1/3 cup of dairy-free heavy whipping cream plus the sugar, egg yolks, and salt. Heat the other 1/3 cup of dairy-free heavy whipping cream in a separate container in the microwave for 30 seconds at a time until just barely hot. Whisk constantly as you slowly pour the heated cream into the egg mixture.
- Combine and cook: Whisk constantly as you slowly ladle a spoonful of rice into the egg mixture. No scrambled eggs! Take it slow and let the temperature of the eggs gently heat up as you ladle in another dollop of rice, trying to use the liquid if possible. Turn the heat back on low under the saucepan of rice and slowly pour the warmed egg mixture into the pot of rice, still whisking constantly. Bring to a gentle simmer and cook for 2-3 minutes.
The right consistency
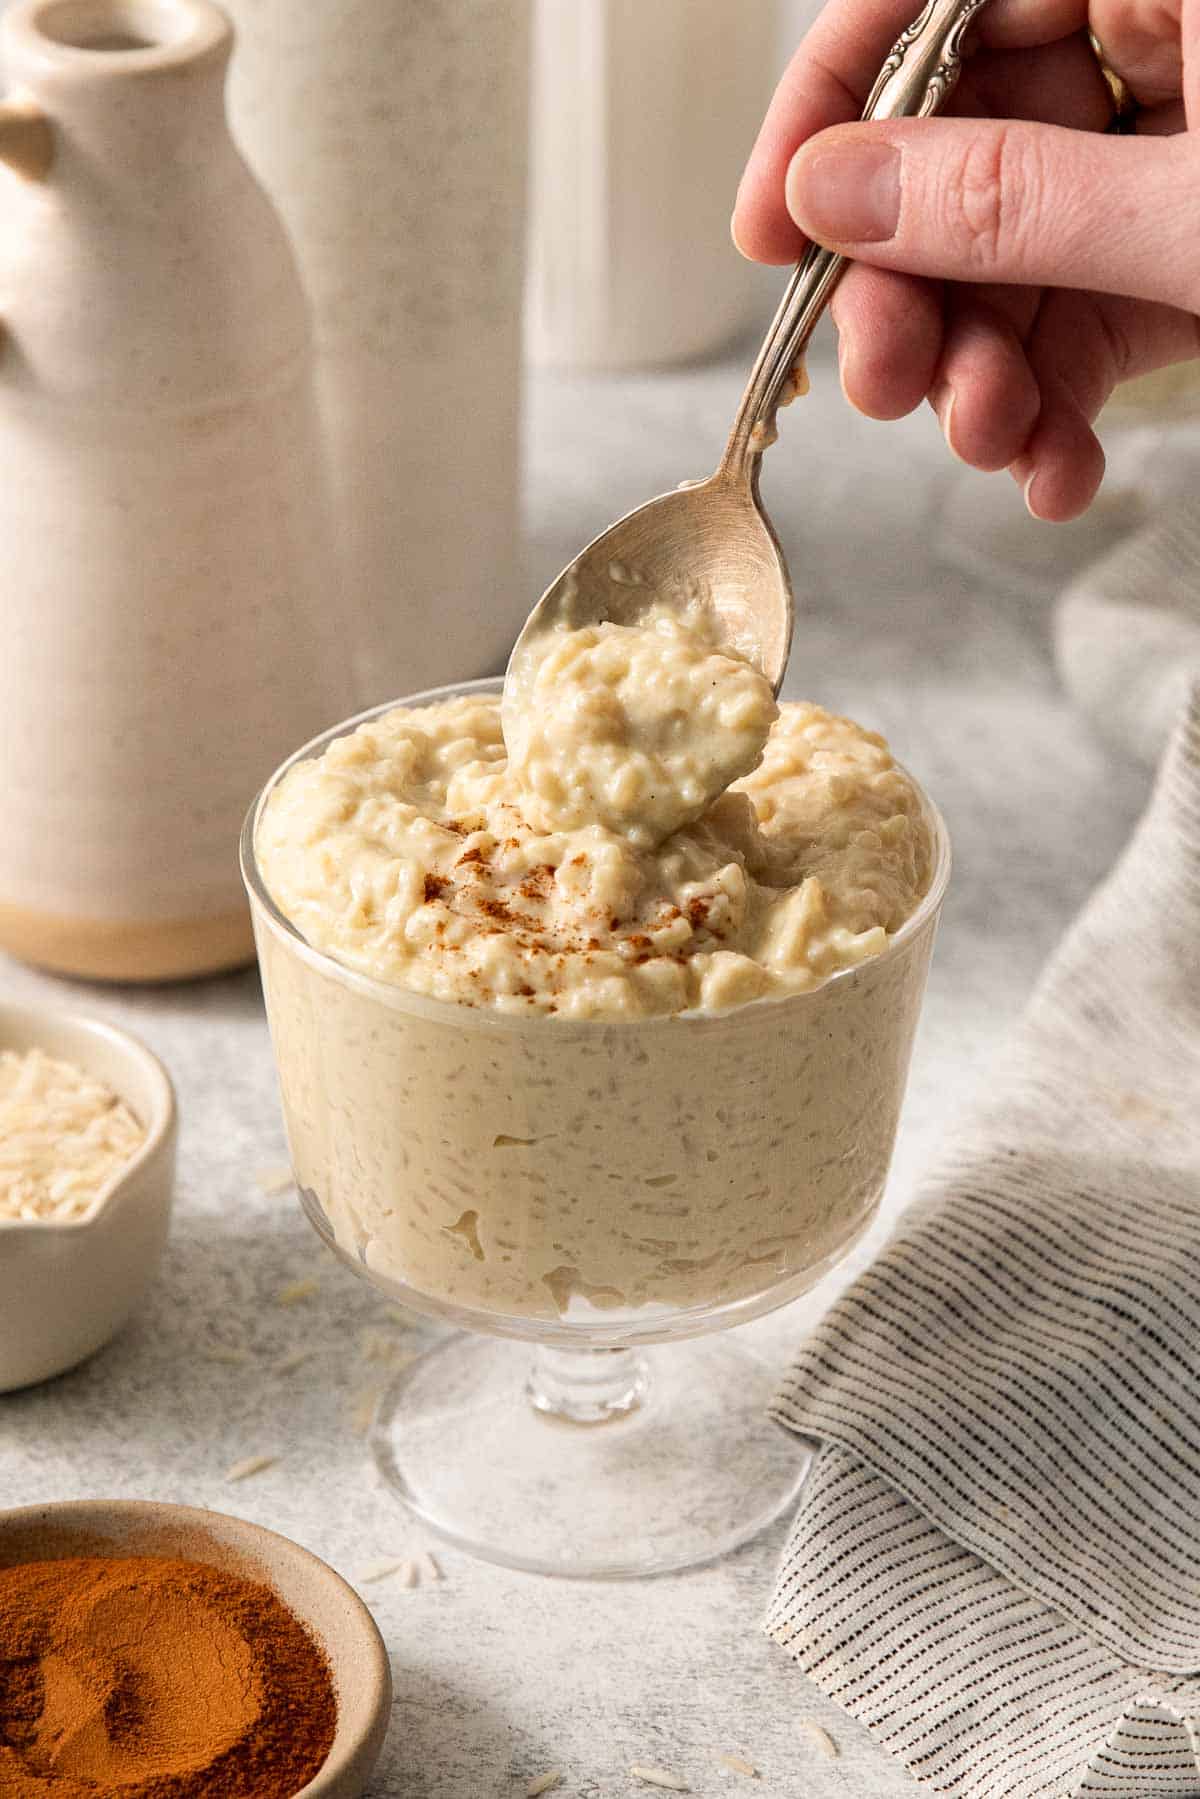
Note: After cooking, the rice pudding should be noticeably thickened and saucy, but still more sauce than rice. It will set in the fridge as it cools. If the pudding is too thick, add a little more dairy-free cream. If it’s too thin, cook for a little longer.
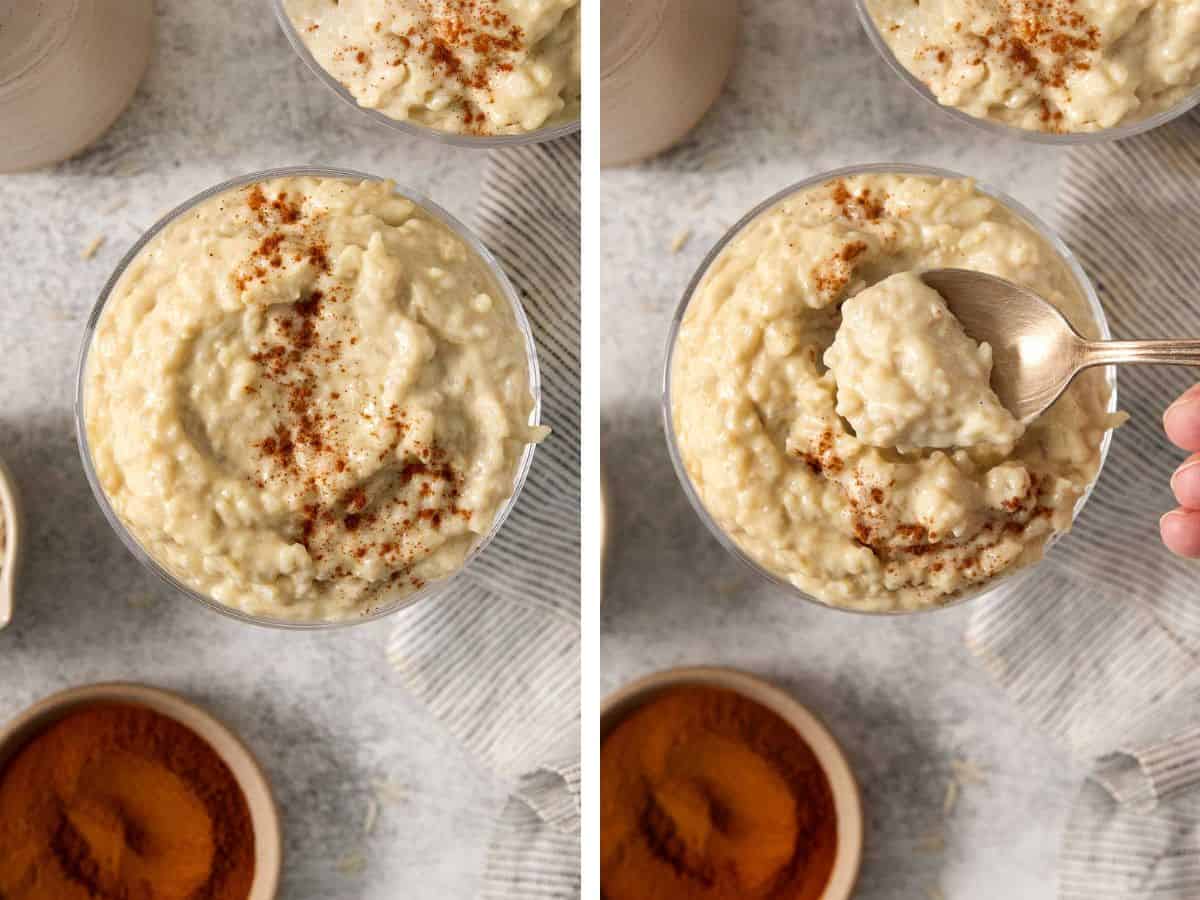
- Get ready to serve: If you want to add in raisins, mix them into the hot rice pudding after it’s done cooking. If serving warm, let the pudding cool for a few minutes, then serve. To serve cold, transfer to a glass bowl, cover, and refrigerate for at least 6 hours (preferably overnight). Option to top servings with a dusting of cinnamon. Enjoy!
You also might like this pumpkin rice pudding.
Make-Ahead/Storage/Freezing Instructions
To Make-Ahead: This recipe can be made up to 4 days in advance. Serve chilled or reheat to serve warm.
To Store: Let cool, then store in an airtight container in the refrigerator for up to 4 days.
To Freeze: Let cool, then store in an airtight container, leaving some space for expansion. Freeze for up to 2 months. Thaw in refrigerator overnight. Stir well as freezing may slightly change the texture.
To Reheat: To serve warm, place on stove on low heat and stir frequently until warm. Or microwave in short increments, stirring occasionally to heat evenly. To restore creaminess, add a little cashew milk or dairy-free heavy whipping cream, if needed.
What mix-ins or toppings can I add to the dairy-free rice pudding?
While this recipe is delicious on its own, it also goes well with so many flavors! Mix in raisins, other dried fruit, nuts, or even fresh fruit like bananas and berries. Sprinkle cinnamon, nutmeg, cocoa powder, or your favorite spice on top for a little extra warmth and flavor.
Can I add spices directly into the rice pudding instead of on top?
Yes, you can add spices like cinnamon, cardamom, ginger, cloves, and nutmeg into the pudding to make it spiced. Start with 1/4 teaspoon of your favorite spice and then adjust to taste.
How do I know if it has too much or too little liquid?
To get the right consistency, you want it to be more liquid than rice right after cooking. As it cools, especially in the refrigerator, it will thicken up to the perfect rice pudding consistency. If it seems really thick during the cooking process, add a little cashew milk or water to make sure it cools creamy and smooth.
How do I prevent lumpy or curdled pudding?
Tempering the egg yolks gently is key! Constantly whisking the egg mixture as the hot rice liquid is gently ladled in is important so that the yolks gradually heat up. Exposing the yolks to too much heat, too fast will cause them to scramble. Once the egg and rice mixtures are combined, it’s also really important to keep the pudding simmering, without boiling, or the eggs can curdle then too.
Recipe Tips
- Use high-quality cashew milk. I recommend using Elmhurst Unsweetened Cashew Milk. It only contains two ingredients, cashews and water, which works well for this recipe. Other cashew milks will work but the added gums and stabilizers may affect the pudding consistency as it cooks.
- Use a good-tasting dairy-free cream. I like to use the brands Country Crock or Silk Dairy-Free Heavy Whipping Cream to finish the pudding. You can also use full-fat coconut milk.
- Use the right type of rice. I recommend white Basmati rice for this recipe!
- Cook to the right consistency. After cooking, the pudding should still be more liquid than rice. It will thicken more in the refrigerator.
- Make it ahead! This pudding is delicious served warm or chilled. It can be made up to 4 days in advance.
More Dairy-Free Holiday Recipes

Dairy-Free Rice Pudding (with Egg Yolks!)
Ingredients
- 4 cups (950ml) cashew milk (see note)
- 2 cups (480ml) water
- 1/2 cup (105g) white basmati rice
- 2/3 cup (160ml) dairy-free heavy whipping cream (see note)
- 1/3 cup (67g) granulated sugar
- 2 large egg yolks
- 1 ½ teaspoons vanilla extract or vanilla bean paste
- ½ teaspoon kosher salt
- 1/2 cup (100g) raisins optional
Instructions
- In a large saucepan, add the cashew milk and water. Bring to a boil over medium heat, watching closely so the mixture doesn’t boil over.
- When milk boils, stir in the rice and keep stirring until mixture returns to a simmer. Reduce the heat to medium-low and cook, stirring every 5 minutes to scrape the rice off the bottom of the pan. Try not to let the mixture boil vigorously, you want a gentle simmer. Scraping the bottom of the pan often is important so the rice doesn’t stick.
- Cook for 30 minutes or until the rice is tender. If the pudding starts to look too thick, add a little more water. It should thicken slightly, but still loosen with each stir. Remove from the heat for a bit.
- Meanwhile, in a large measuring cup whisk together ⅓ cup of the dairy-free heavy whipping cream along with the sugar, egg yolks and salt.
- Heat the remaining ⅓ cup dairy-free heavy whipping cream in the microwave for 30 seconds until just barely hot. While whisking constantly, slowly pour the hot cream into the egg mixture. Start with a few drops at a time and then slowly add the rest while whisking constantly.
- While whisking constantly, ladle a spoonful of the rice mixture, a few dollops at a time, into the egg mixture. You want to bring the temperature of the eggs up slowly so they don’t scramble. Repeat with another ladle-full of the pudding, trying to use the liquid from the pudding if possible.
- Turn the heat back onto low for the rice pudding. Slowly pour the egg mixture into the pot of rice pudding, while whisking constantly.
- Bring the pudding to a gentle simmer and cook for 2-3 more minutes. Don’t let the pudding boil once the eggs have been added.
- Note: The rice pudding should be noticeably thickened and saucy, but still more sauce than rice. It will set in the fridge as it cools. If the pudding is too thick, add a little more dairy-free cream. If it’s too thin, cook for a little longer.
- If using raisins, add them to the hot pudding after it’s finished cooking. Let cool for a few minutes if serving warm. If serving cold, transfer to a glass bowl and cover. Refrigerate until ready to serve and up to 4 days.
- Scoop into bowls and top with cinnamon before serving. Enjoy!
Notes
-
- Use high-quality cashew milk. I recommend using Elmhurst Unsweetened Cashew Milk. It only contains two ingredients, cashews and water, which works well for this recipe. Other cashew milks will work, but the added gums and stabilizers may affect the pudding consistency as it cooks.
-
- Use a good-tasting dairy-free cream. I like to use the brands Country Crock or Silk Dairy-Free Heavy Whipping Cream to finish the pudding. You can also use full-fat coconut milk.
-
- Use the right type of rice. I recommend white Basmati rice for this recipe!
-
- Cook to the right consistency. After cooking, the pudding should still be more liquid than rice. It will thicken more in the refrigerator.


This is so comfy and delicious! We’ll be having this again for New Year!
I followed the step-by-step guide and it came out perfectly. The cashew milk and cream combination made it so creamy and delicious.